
In this post, we will learn the steps to create a Distribution Group in Exchange Server 2019.
What is the dynamic distribution group in Exchange 2019?
Distribution groups are mail-enabled Active Directory group objects that are created to send messages to groups of recipients and assign permissions in an Exchange Server organization, and mail contacts and mail users.
We can use the Exchange Admin Center (EAC) and Exchange Management Shell (EMS) to create a distribution group in Exchange Server 2019.
Create a dynamic distribution group in exchange 2019:
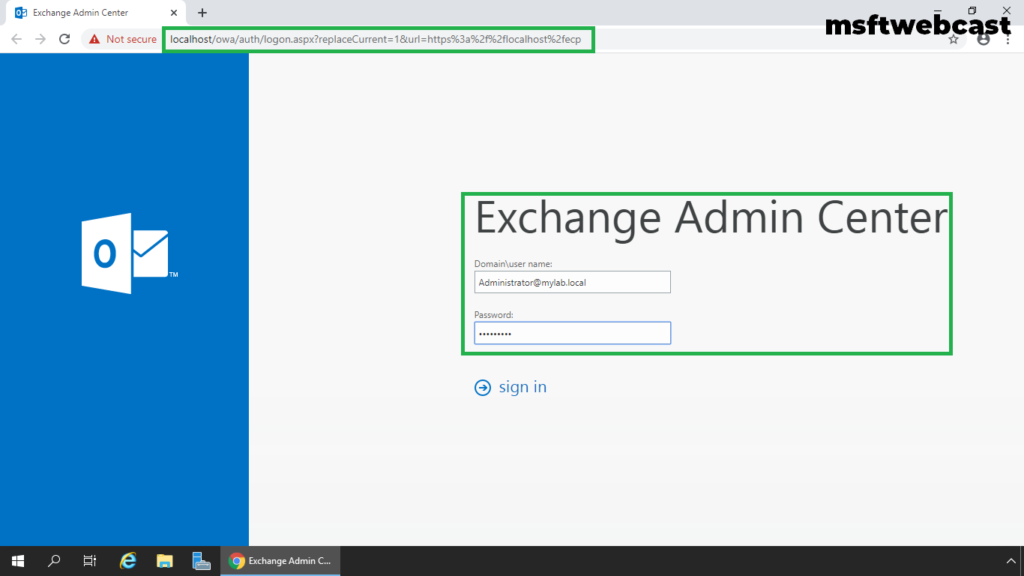
1. On Exchange 2019 Mailbox Server. Open Internet Explorer and type https://localhost/ecp, and then press Enter.
2. Sign in as an Administrator with the password.
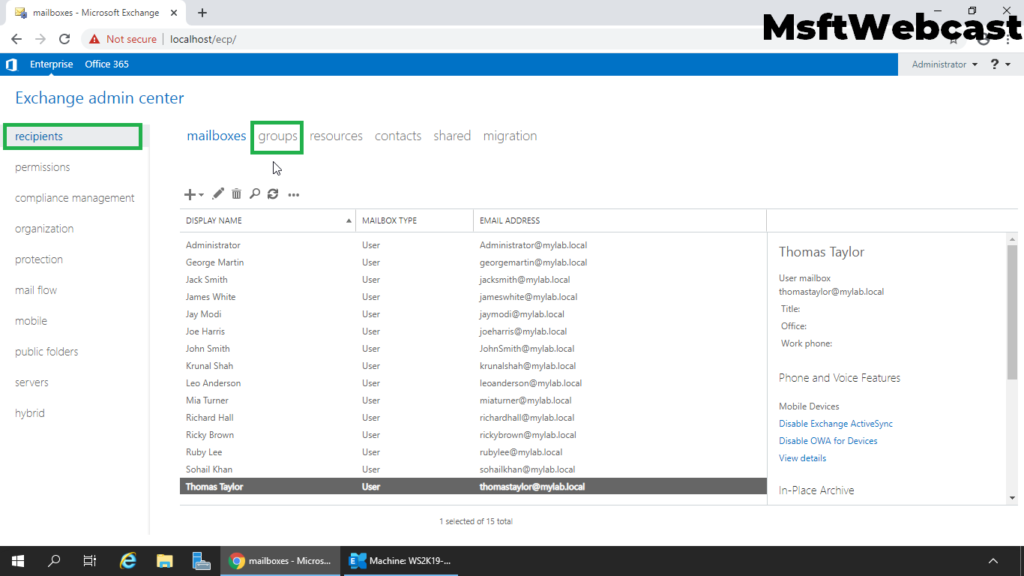
3. In the Exchange Admin Center web interface, navigate to Recipients. Click on the Groups tab.
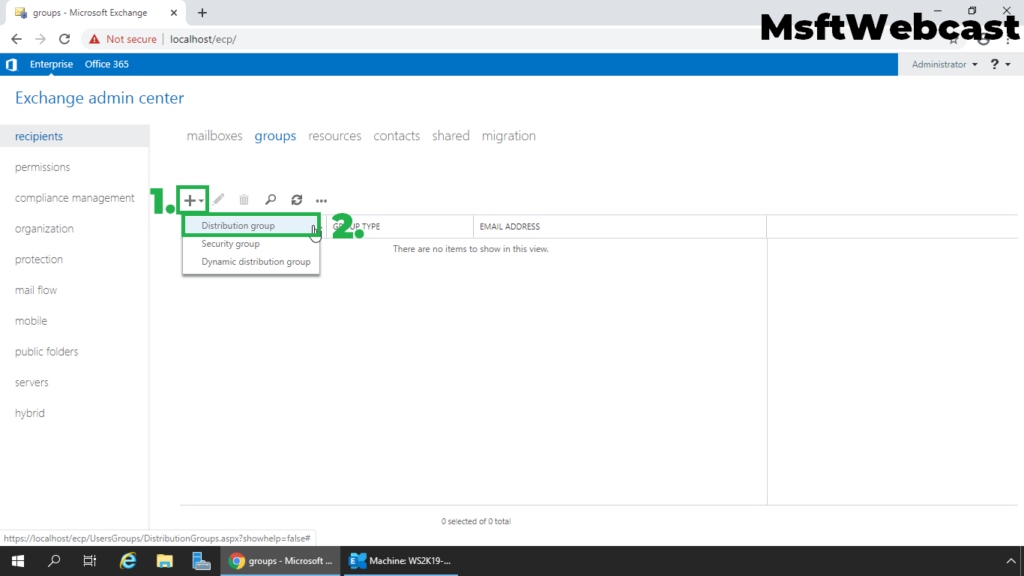
4. To create a distribution group, click on + (plus) sign and select the Distribution group.
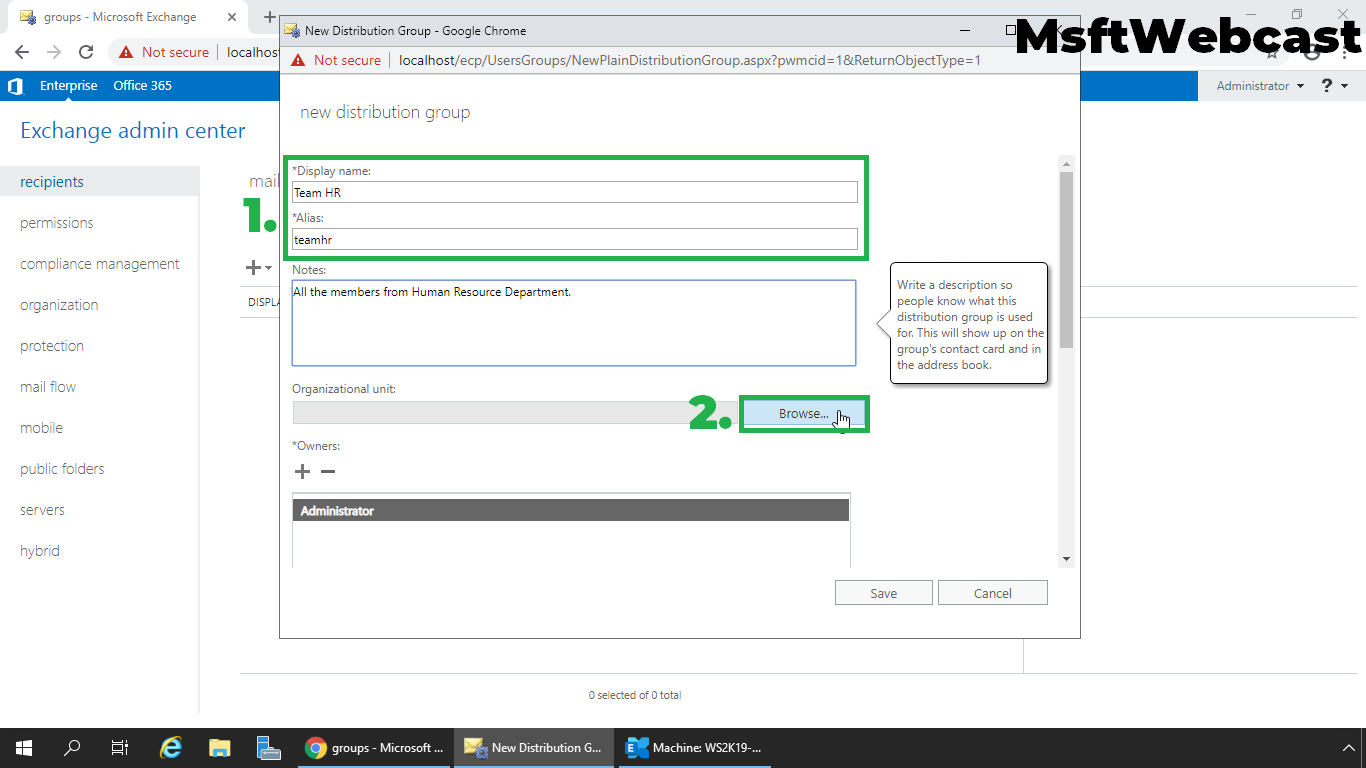
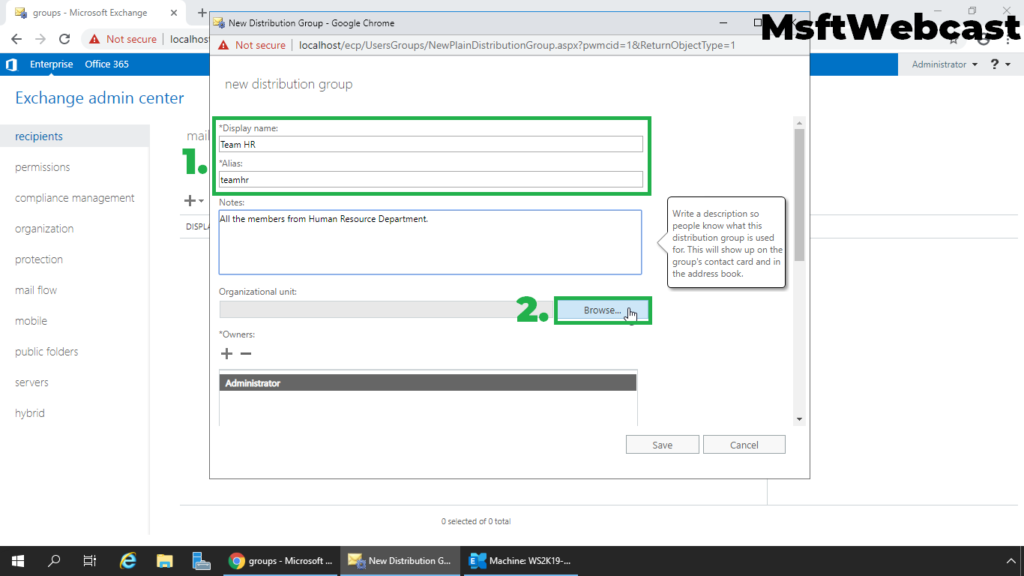
5. Specify a display name and alias for the distribution group. Click on browse to select the OU to store the group.
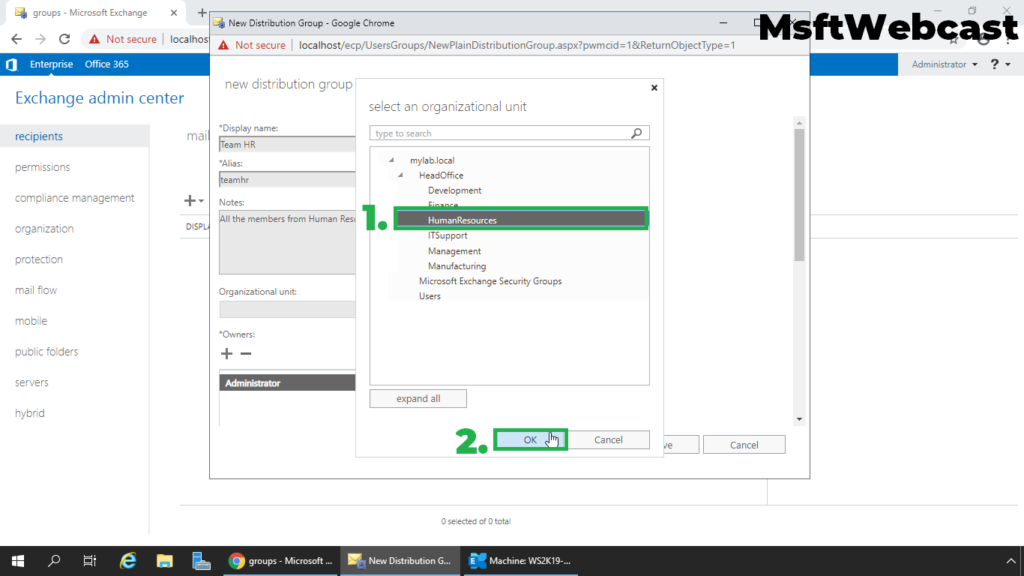
6. In this example, I have selected the HR OU. If you don’t specify the OU to store group, the dynamic distribution group will be created in Users container by default.
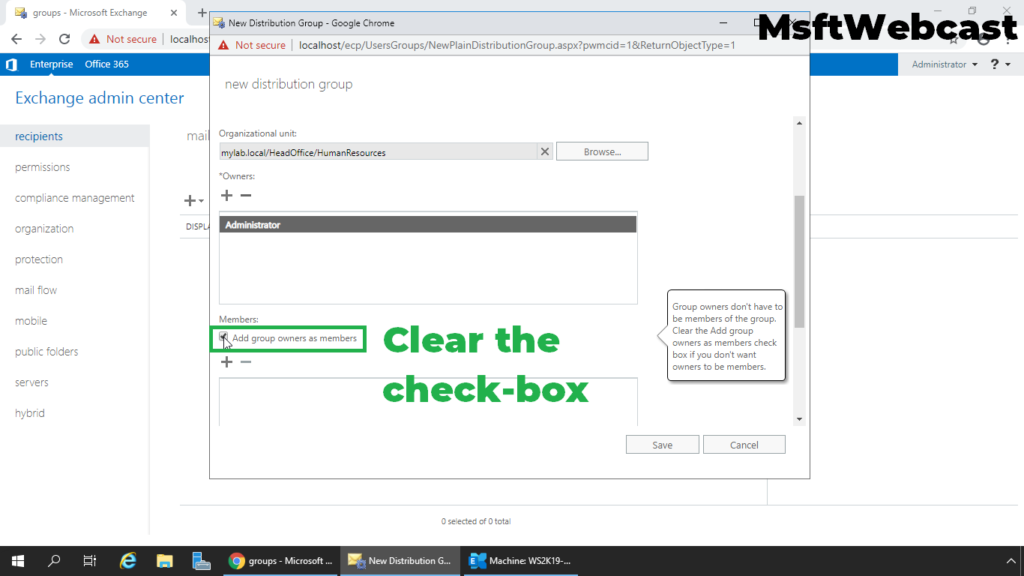
7. An owner for a distribution group is optional. We will leave the administrator as the default owner of this distribution group. Clear the checkbox “Add group owners as members”.
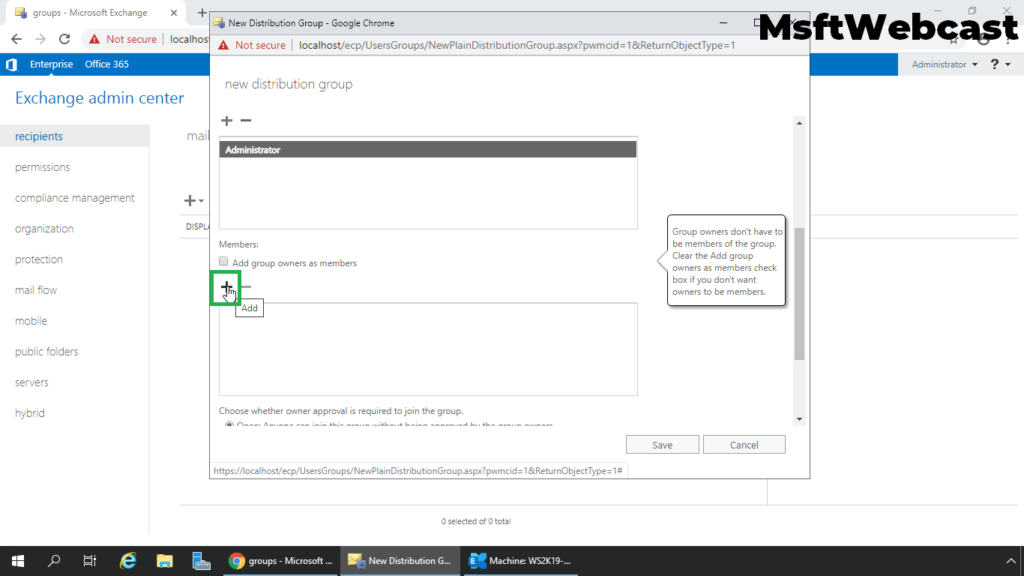
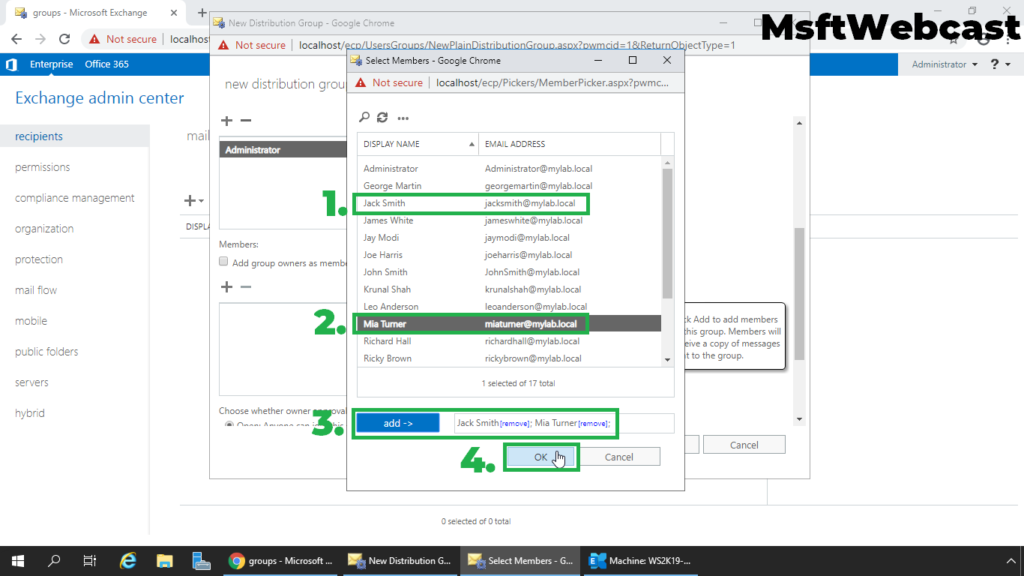
8. Under the Members section, click on + (plus) sign to add members to this distribution group.
9. Select the Mailboxes, which you want to add as members to this distribution group. Click OK.
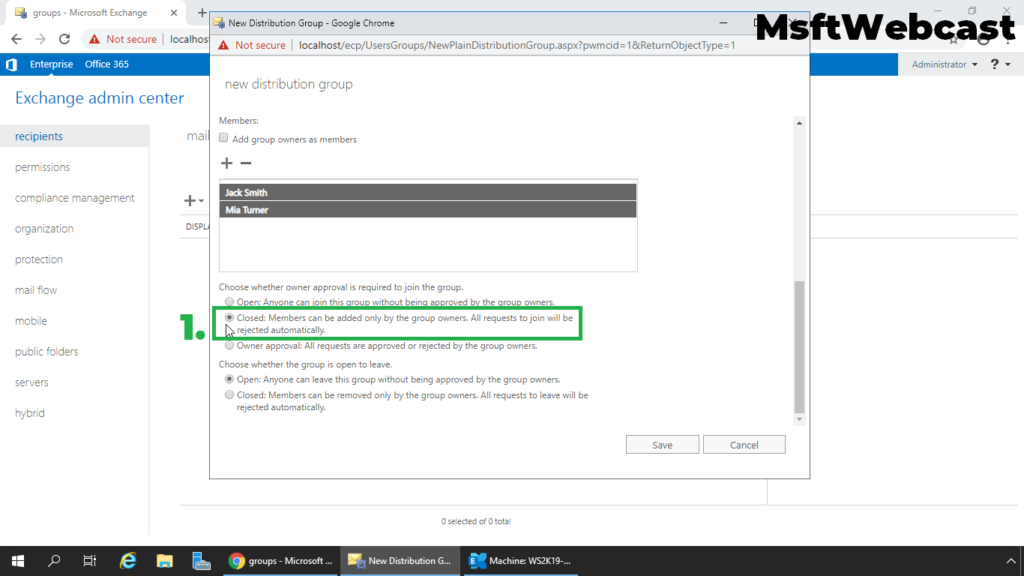
Choose the owner’s approval settings to join this distribution group.
- Open: Anyone can join this distribution group. Approval is not required.
- Closed: Only the group owner can add members to this group.
- Owner Approval: All requests are approved or rejected by the group owners.
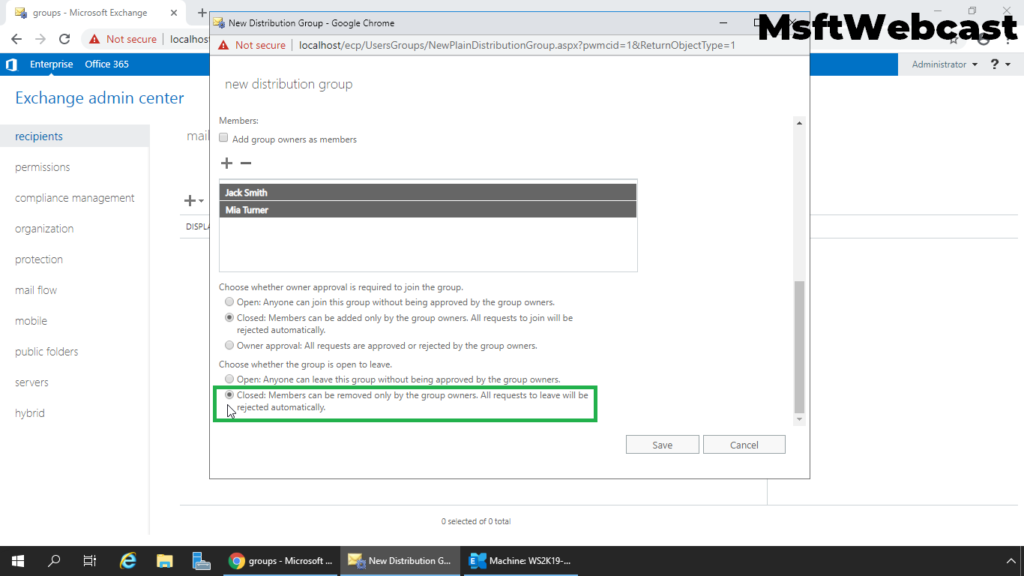
Choose whether the group is open to leave, specify whether approval is required for people to leave the group.
- Open: Anyone can leave this group.
- Closed: Members can be removed only by the group owners.
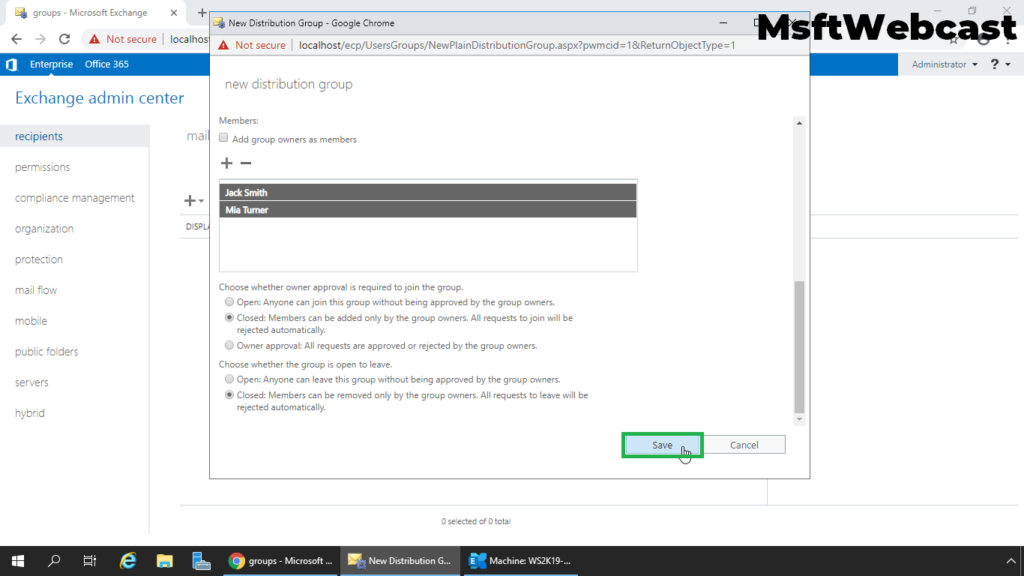
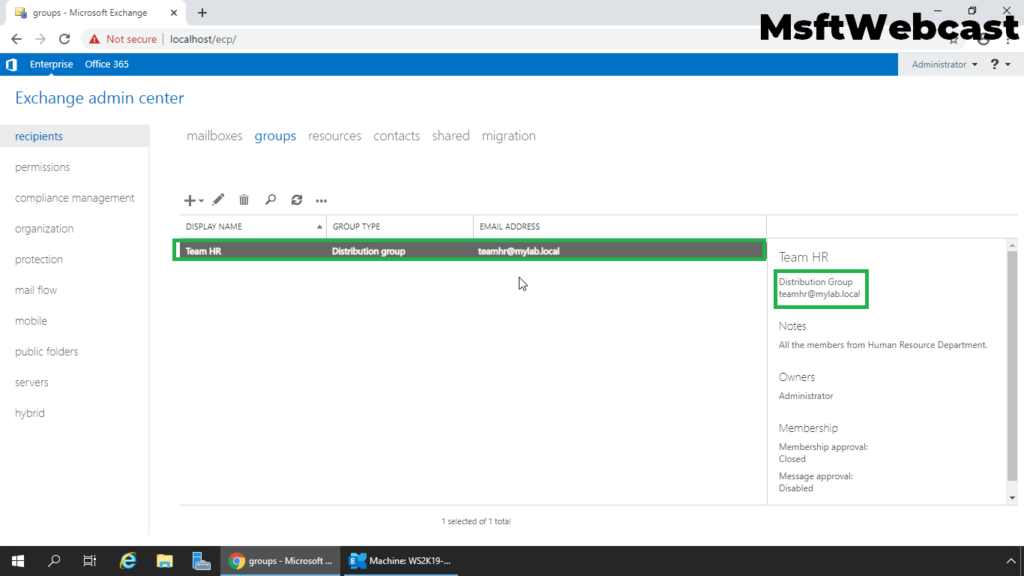
10. Click Save to create the distribution group.
11. As we can see the distribution group is created successfully in Exchange 2019.
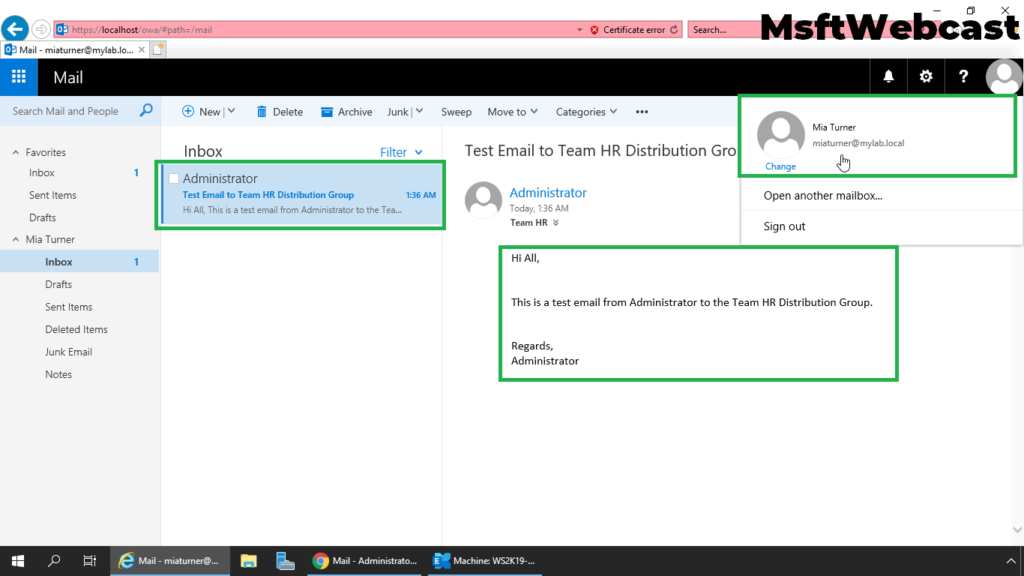
Send a Test Email to the Distribution Group:
12. Login to outlook on the web using a administrator (any user) account.
13. Compose and send a test email to the distribution group.

14. Verify the group members are getting a copy of the test Email.
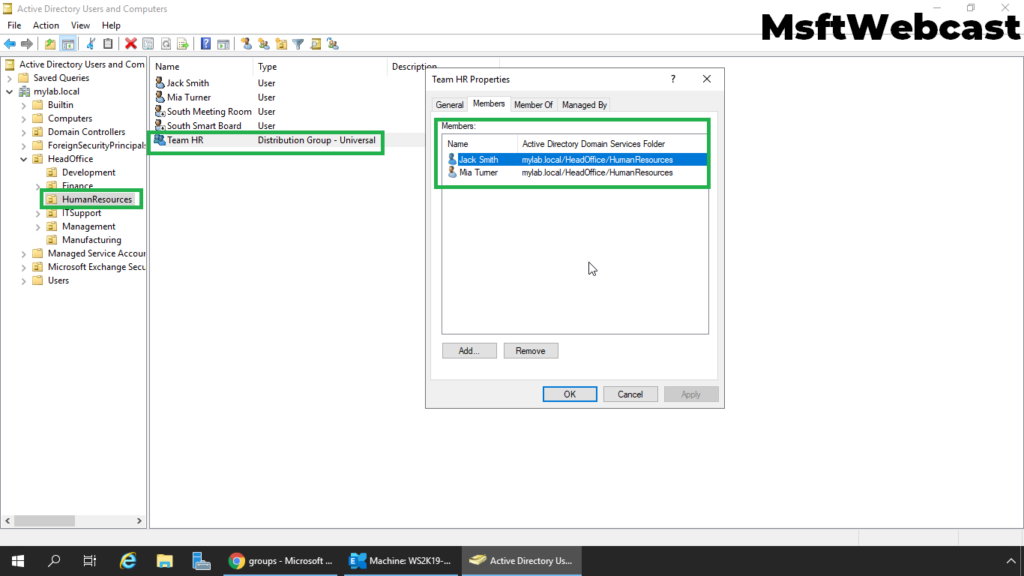
15. Verify Distribution Group Account in Active Directory Users and Computers snap-in.
That’s all for this guide. In this article, we have learned the steps to create a distribution group in Exchange Server 2019.
Related Articles:
2 Comments
Leave a Reply
You must be logged in to post a comment.
[…] 5 days ago 3 min read […]
[…] Create Distribution Group in Exchange 2019 […]