Hyper-V is Microsoft’s native hypervisor that allows you to create and manage virtual machines on Windows systems. It enables multiple operating systems to run concurrently on a single physical machine by abstracting hardware resources. Available in Windows 10/11 Pro, Enterprise, and Windows Server editions, Hyper-V is widely used for development, testing, and server virtualization.
Installing Windows 11 in a Hyper-V virtual machine is a great way to explore the Windows 11 operating system without changing or modifying your main system. Whether you’re testing features, developing software, or setting up a secure environment, Hyper-V offers a powerful and flexible virtualization solution.
This guide walks you through the steps to install a Windows 11 VM using Hyper-V on a Windows Server 2025 host. The process involves creating a new virtual machine, configuring its hardware settings, and using an ISO file to install the Windows 11 operating system.
Table of Contents
Prerequisites:
Before installing Windows 11 on a Hyper-V VM, make sure you have the following prerequisites:
- Windows Host: Windows Server 2025 with the Hyper-V feature enabled.
- Windows 11 ISO image: You can download it from Microsoft’s official website or the TechNet Evaluation Center.
- Sufficient disk space: Required to store the Windows 11 virtual hard disk file.
Windows 11 Hardware Requirements
If you create a standard VM on Hyper-V and try to install Windows 11, you’ll likely encounter the following screen during the setup process:
- Create a Generation 2 virtual machine with UEFI firmware.
- Windows 11 requires TPM and Secure Boot.
- You need at least 4GB of RAM to operate, ideally on a physical PC equipped with 8GB of RAM or more.
You can create a new virtual machine for Windows 11 using Hyper-V Manager and adjust the necessary settings from the VM properties page.
Create a Windows 11 VM on Hyper-V via PowerShell
In this guide, I will create a Windows 11 VM using Windows PowerShell, modify its settings with Windows PowerShell, attach the Windows 11 ISO image to the newly created VM, and change the boot order to make the ISO image the primary boot option. This will allow the VM to boot from the attached Windows 11 ISO image, enabling us to start the Windows 11 installation in the Hyper-V VM.
This command will create a new Generation 2 virtual machine named “WIN11-VM01” with 4 GB of RAM, a newly created 127GB VHDX file stored in the D:\VM\WIN11-VM01\VHDX folder, and will attach the existing external virtual switch “External-vSwitch01” to the VM.
New-VM -Name “WIN11-VM01” -Generation 2 -MemoryStartupBytes 4096MB -SwitchName “External-vSwitch01” -Path “D:\VM\WIN11-VM01” -NewVHDPath “D:\VM\WIN11-VM01\VHDX\WINN-VM01.vhdx” -NewVHDSizeBytes 127000MB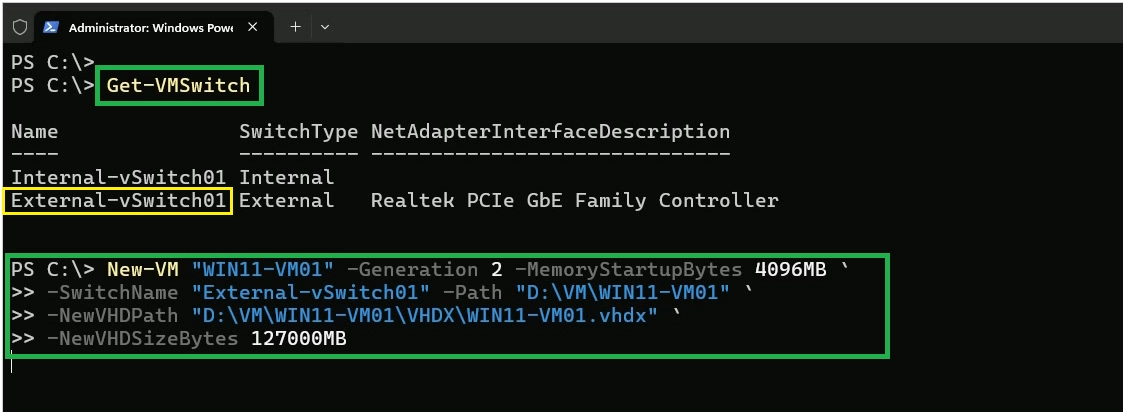
Allocate four virtual processors to the Windows 11 VM.
Set-VM -Name “WIN11-VM01” -ProcessorCount 4Add a DVD drive to the VM and attach the Windows 11 ISO image file named 26100.1742.240906-0331.ge_release_svc_refresh_CLIENT_LTSC_EVAL_x64FRE_en-us.iso, stored at F:\ISOImages.
Add-VMDvdDrive -VMName WIN11-VM01 -Path F:\ISOImages\26100.1742.240906-0331.ge_release_svc_refresh_CLIENT_LTSC_EVAL_x64FRE_en-us.isoConfigure the boot order to set the DVD as the primary boot device.
$DVDDrive = Get-VMDvdDrive -VMName WIN11-VM01Set-VMFirmware -BootOrder $DVDDrive -VMName WIN11-VM01Configure the virtual machine named WIN11-VM01 to use a new local key protector.
Set-VMKeyProtector -VMName WIN11-VM01 –NewLocalKeyProtectorLastly, enable Virtual TPM on the VM named WIN11-VM01.
Enable-VMTPM -VMName WIN11-VM01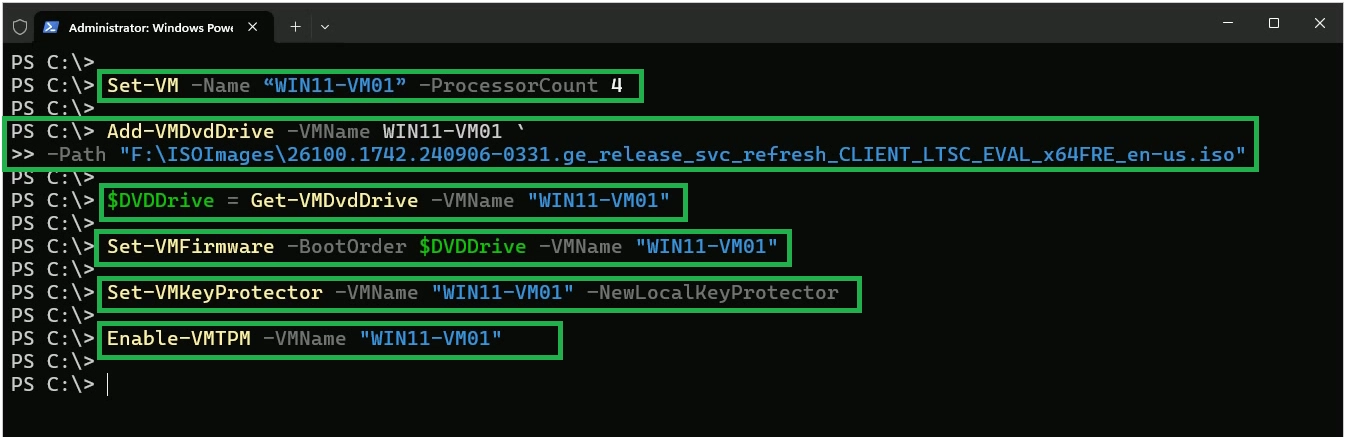
Now, power on the VM and press any key when it starts to begin the Windows 11 installation process.
How to Install Windows 11 on Hyper-V VM
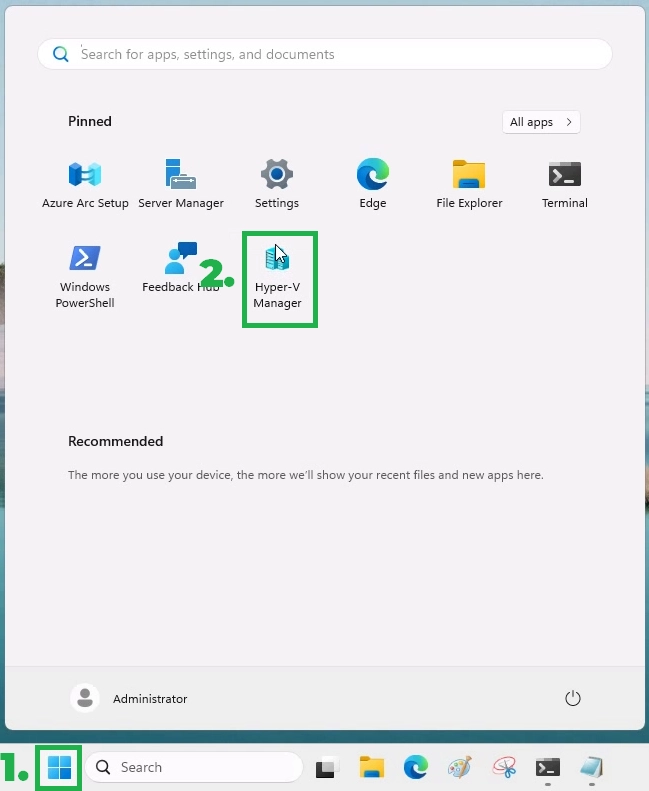
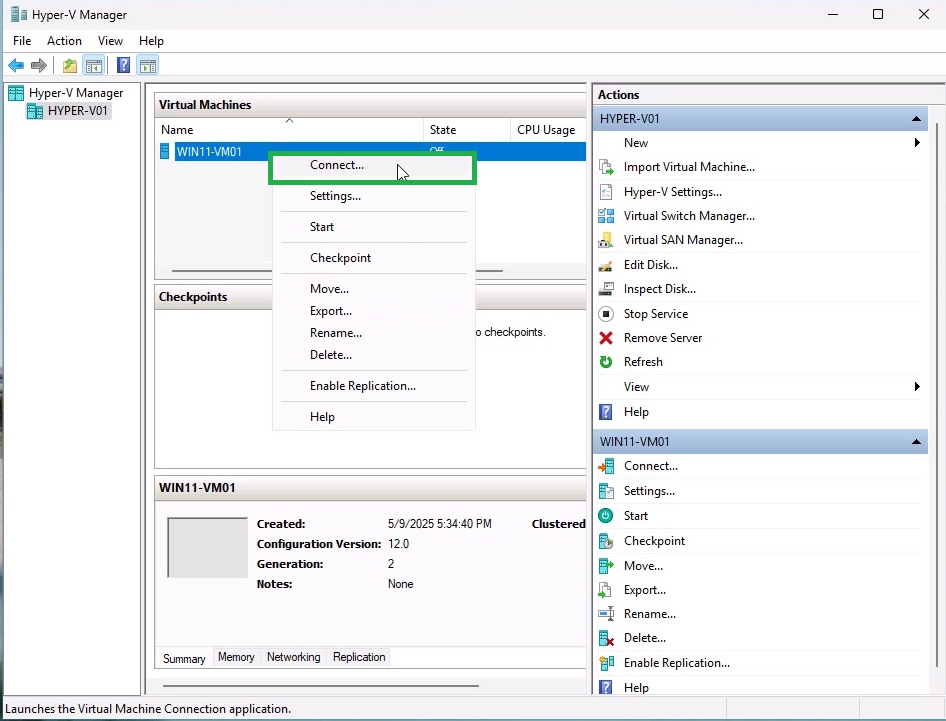
Open Hyper-V Manager.
In Hyper-V Manager, right-click the newly created VM and select ‘Connect.’
Then, click the ‘Start’ button to Power on the VM.
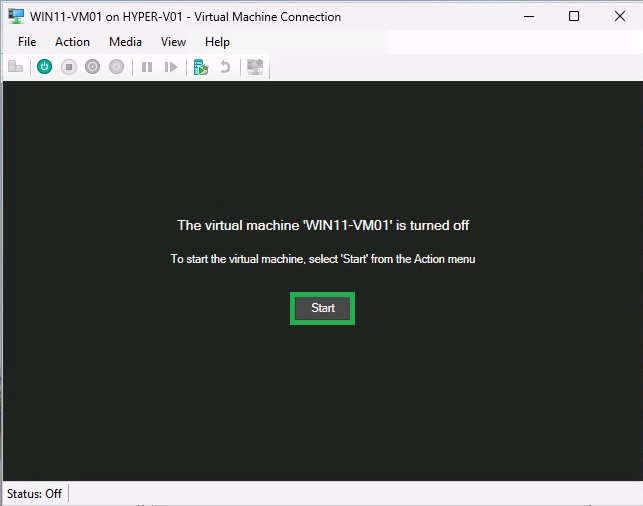
The VM will boot from the Windows 11 ISO, and you can follow the on-screen instructions to begin the installation.
Select your language, time and currency format, and click Next.

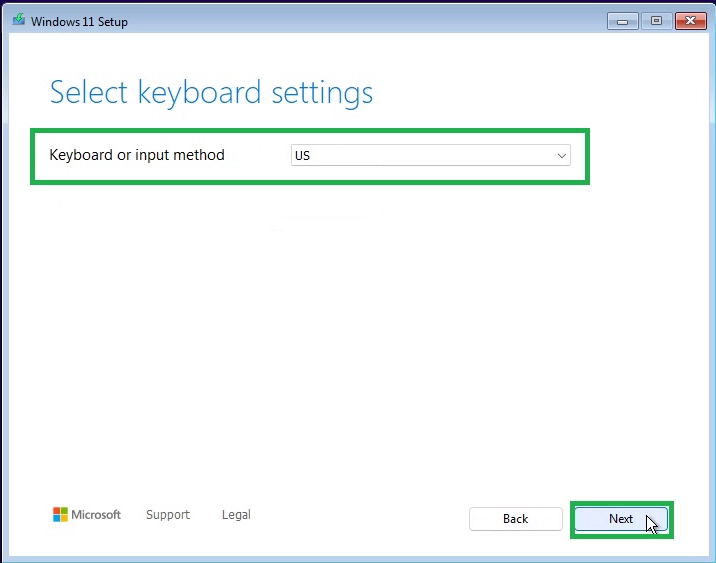
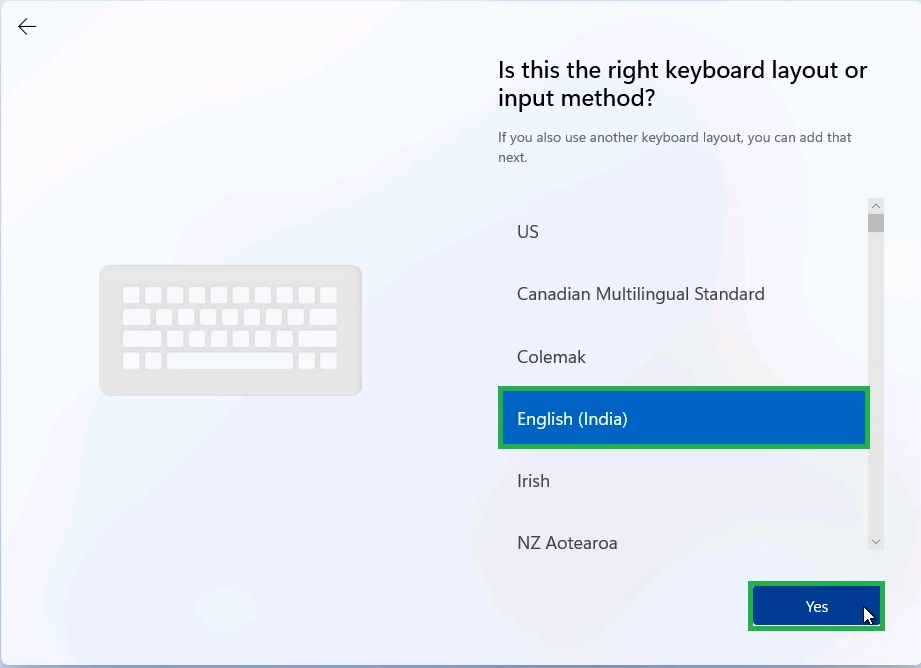
Select the keyboard input method and click Next.
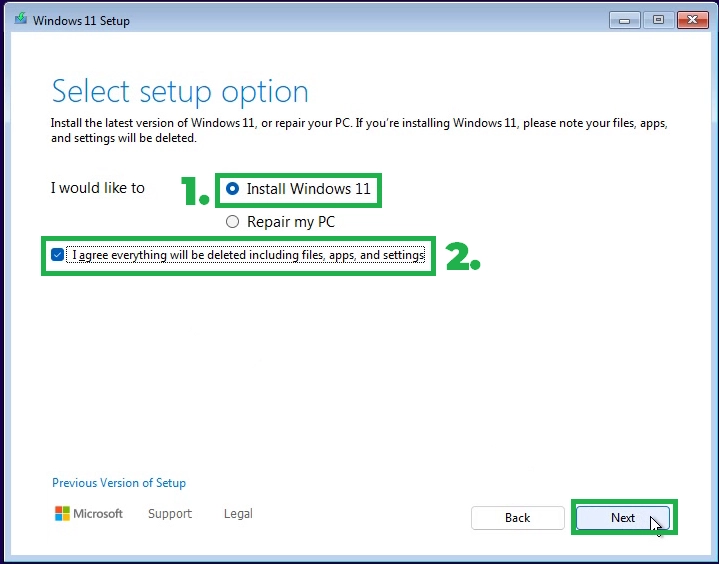
On the Select setup option page, select Install Windows 11 option to perform clean installation. Also select the checkbox “I agree everything will be deleted, including files, apps, and settings.”
Click Next to start the installation process.
If prompted, enter your Windows 11 product key to activate the system. This prompt will be not displayed if you are using Windows 11 Evaluation ISO image.
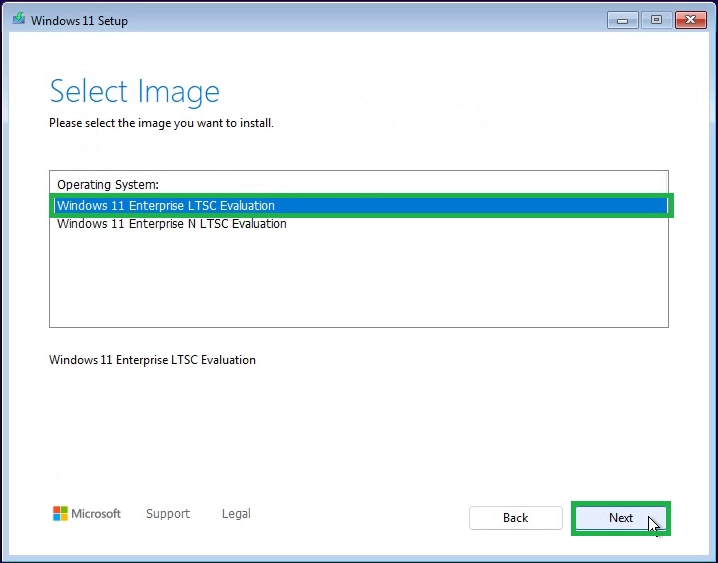
Next, you’ll be prompted to select the edition of Windows 11 you wish to install. Choose the appropriate edition from the available options. Click Next to continue to the next screen.
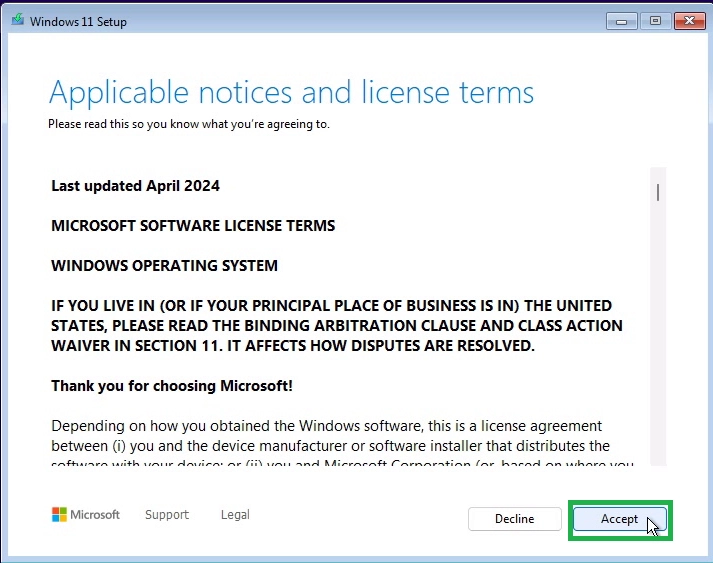
Read the license agreement and click the Accept button to agree to the terms.
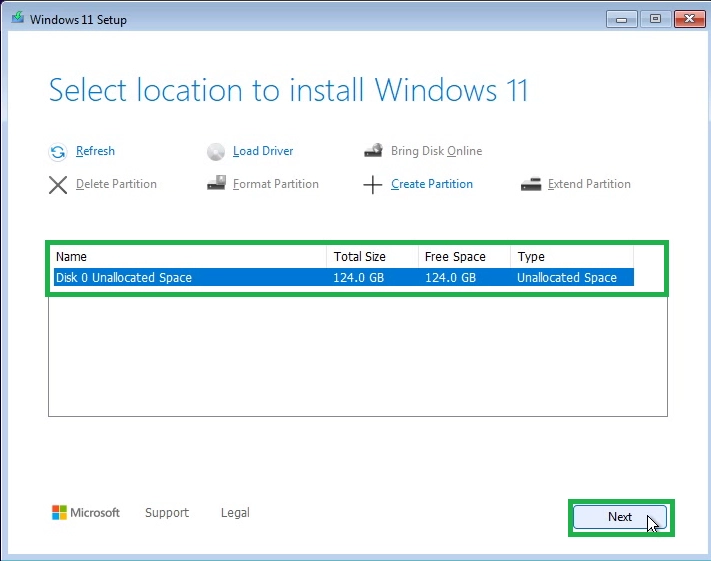
You will now be prompted to select a disk or partition to install Windows Server. If the disk is unallocated, you may need to format it.
You can optionally create new one partition or use total available size. Click Next to proceed. You’re now ready to begin the Windows 11 installation in Hyper-V VM.
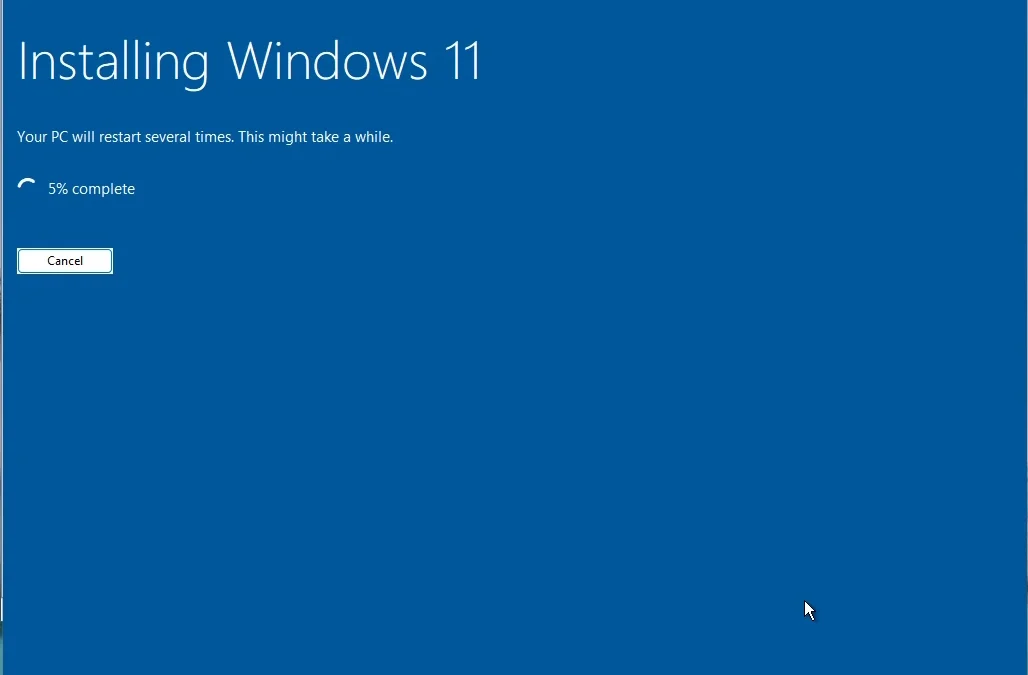
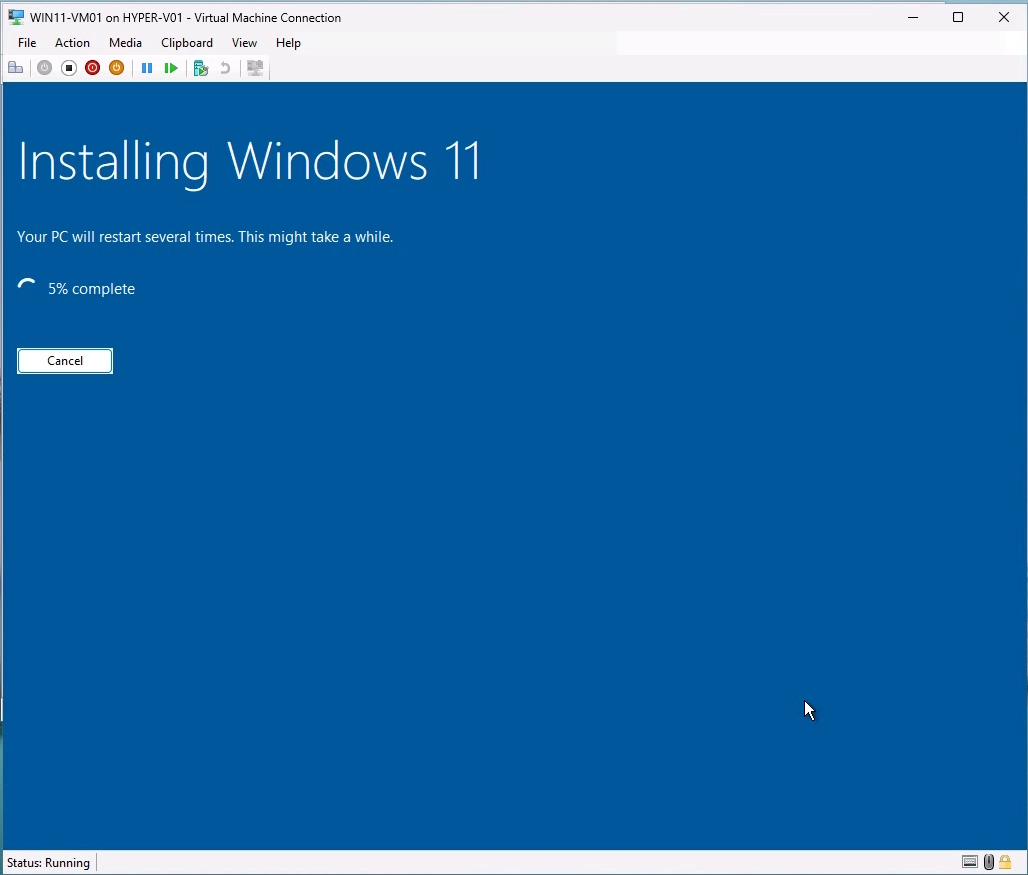
Click ‘Install’ to start copying files from the ISO image to the virtual hard disk and expanding them.
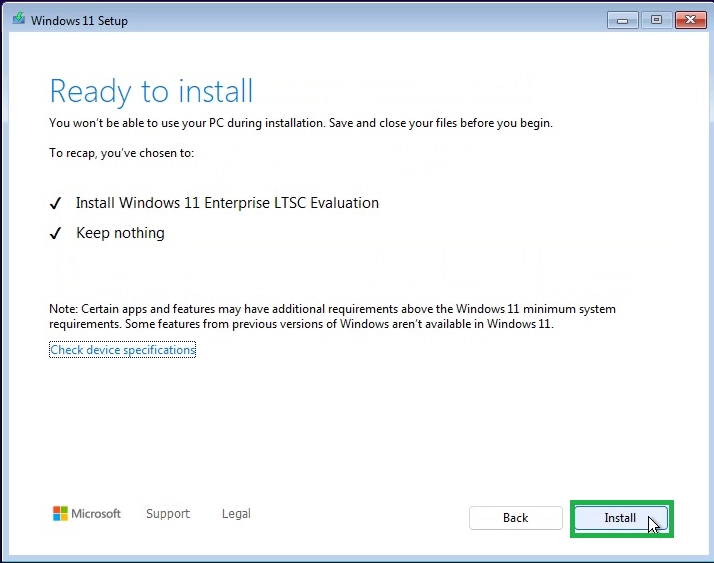
The system will restart several times throughout the process, which may take approximately 10 to 15 minutes to complete.
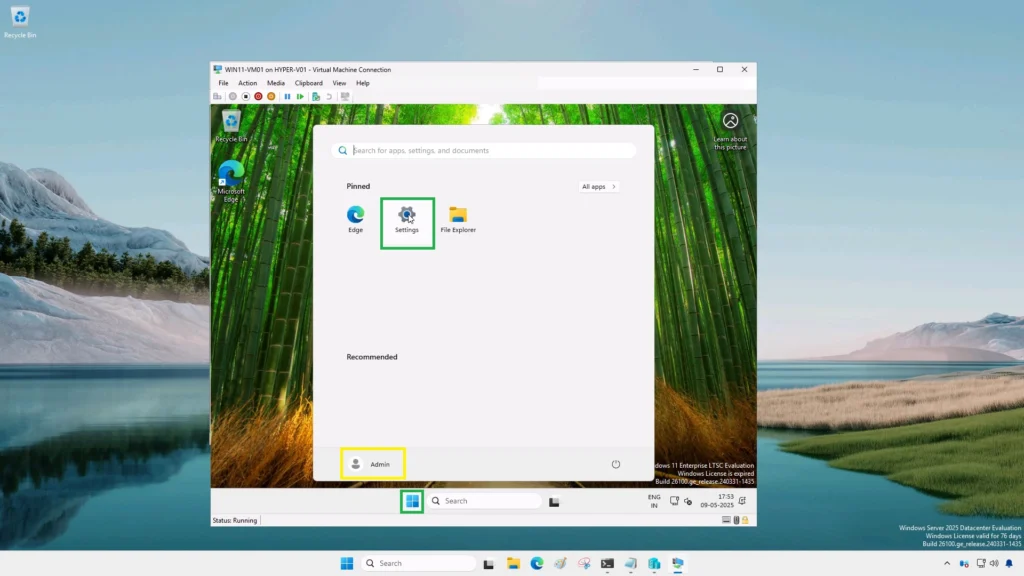
Complete the Windows 11 Out-of-Box Experience (OOBE) setup wizard, and you’ll have a fully functional Windows 11 VM running on Hyper-V.


I hope you found this step-by-step guide helpful. If you have any questions or comments, please feel free to leave them below.
Conclusion:
Installing Windows 11 in a Hyper-V VM is straightforward once you meet the system requirements and configure the correct VM settings. Whether you’re testing new features or building a development environment, this method gives you the flexibility and safety of virtualization.