
In this post, we will learn the steps to add or remove Alias Email Address for a Mailbox in Exchange Server 2019.
Why Alias Email Address?
In case, if we need multiple Email Addresses for the existing mailbox in Exchange 2019.
We can configure more than one email address for the same mailbox. The additional addresses are called proxy addresses that allow a user to receive an email that’s sent to a different email address.
We can use the Exchange Admin Center web interface or the Exchange Management Shell (EMS) to add or remove an email address for a user mailbox.
Add SMTP alias Email Address for a Mailbox:
On Exchange 2019 Mailbox Server.
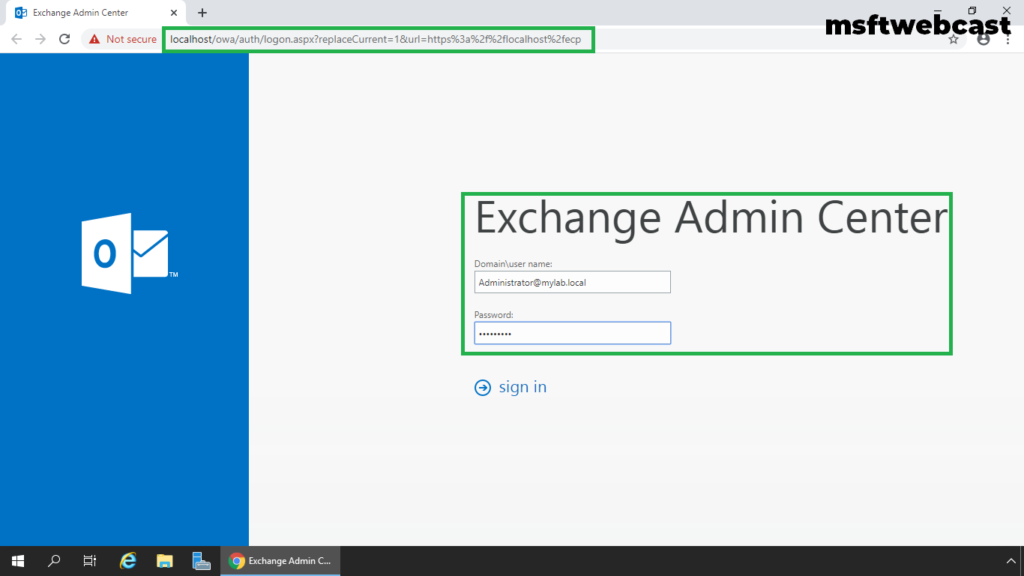
1. Open Internet Explorer and type https://localhost/ecp, and then press Enter. Sign in as an Administrator with the password.
2. In the Exchange Admin Center web interface, navigate to Recipients and click on groups.
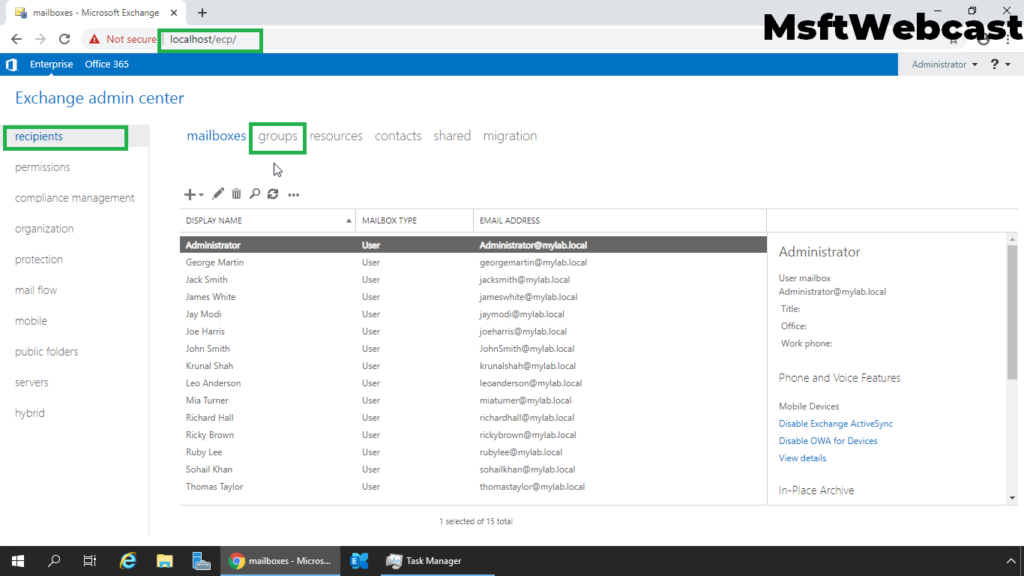
In this guide, we want to setup an alias email address for a distribution group. You can use the same steps to add SMTP alias Email Address for a User or Shared Mailbox in Exchange 2019.
3. On the Groups tab, select the distribution group for which you want to add SMTP alias email address and then click Edit.
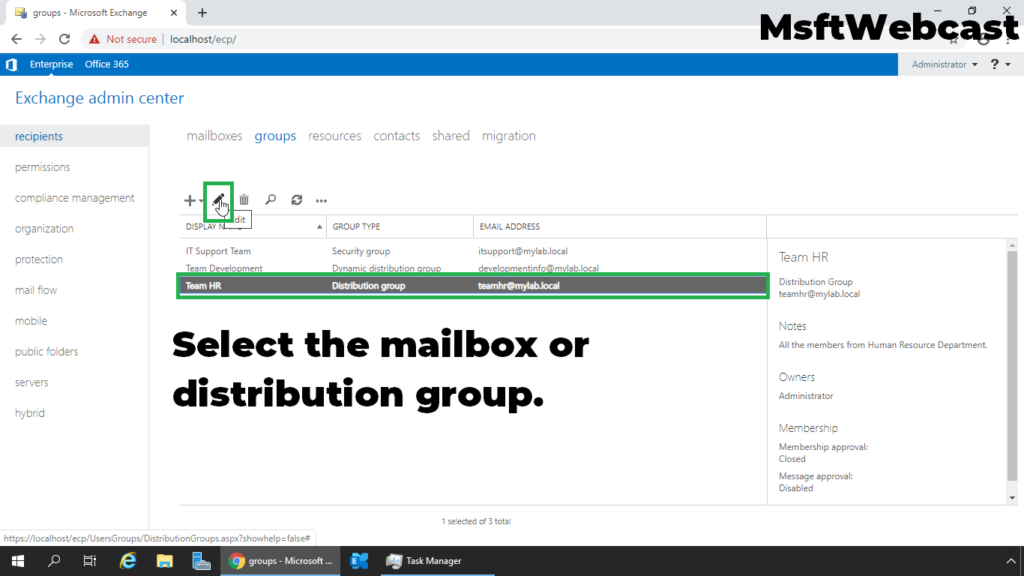
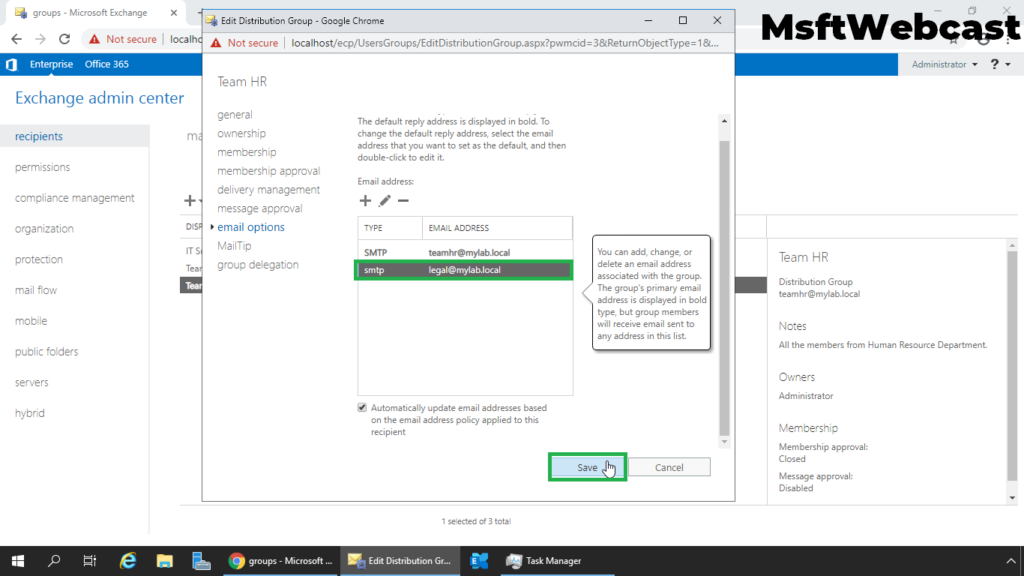
4. On the Distribution Group properties page, click Email Address.
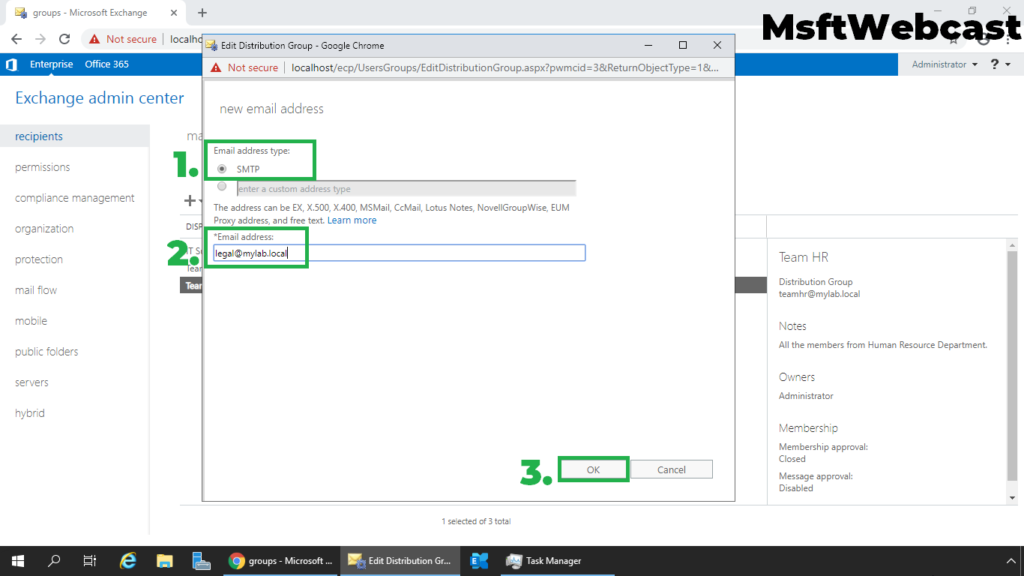
5. Under the Email Address section, click on + (plus) sign.
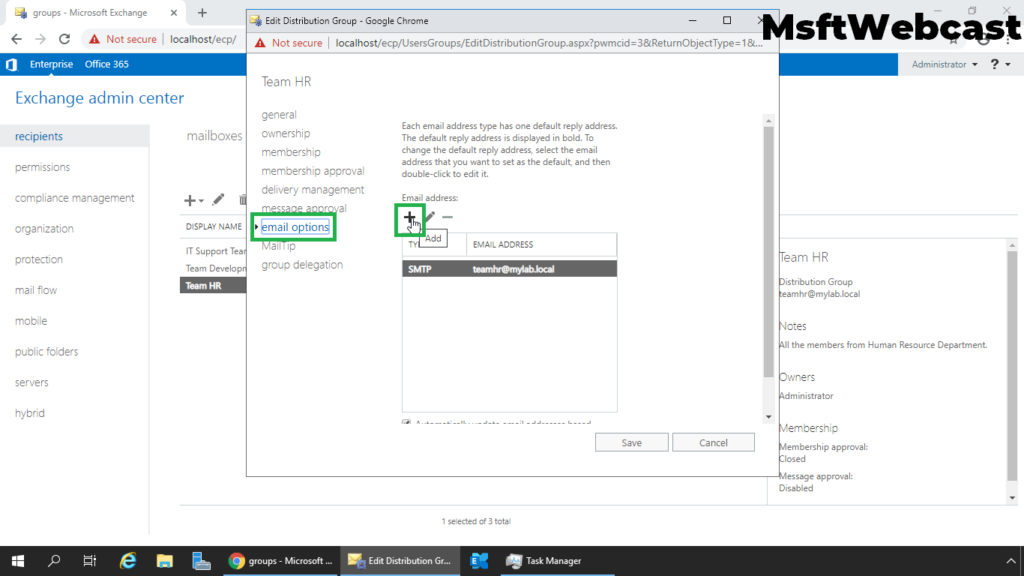
6. Under the Email Address type section, choose the SMTP radio button. Specify the SMTP alias email address for the distribution group and click OK.
7. Click on Save to save the changes.
Verify Alias Email Address for Mailbox or Group using EMS:
8. Open Exchange Management Shell.
9. At EMS, type below cmdlet to get the list of all email address for a mailbox or distribution group.
Get-DisstributionGroup -Identity “Team HR” | fl *EmailAddress*
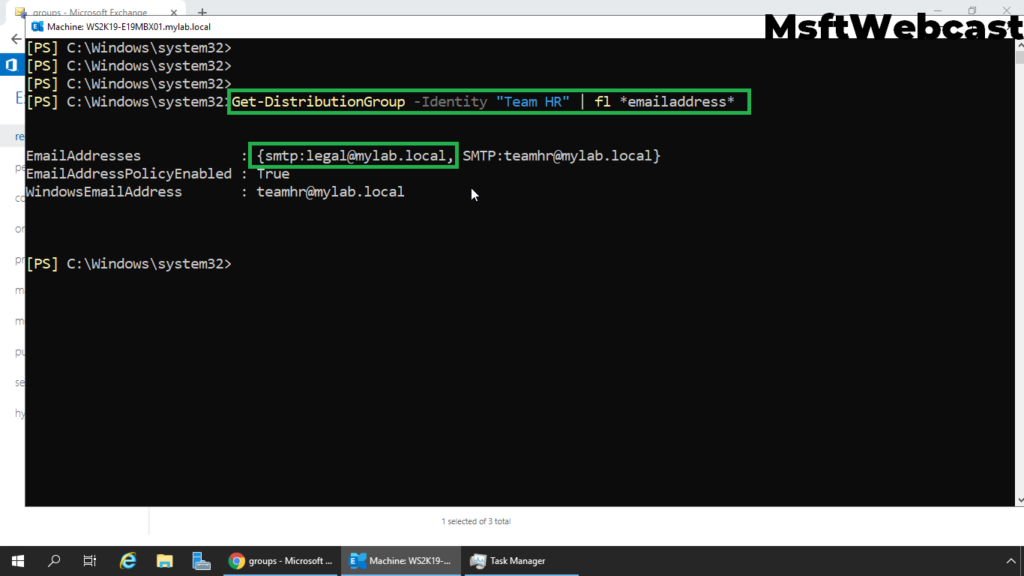
We can verify the Alias email address for the distribution group.
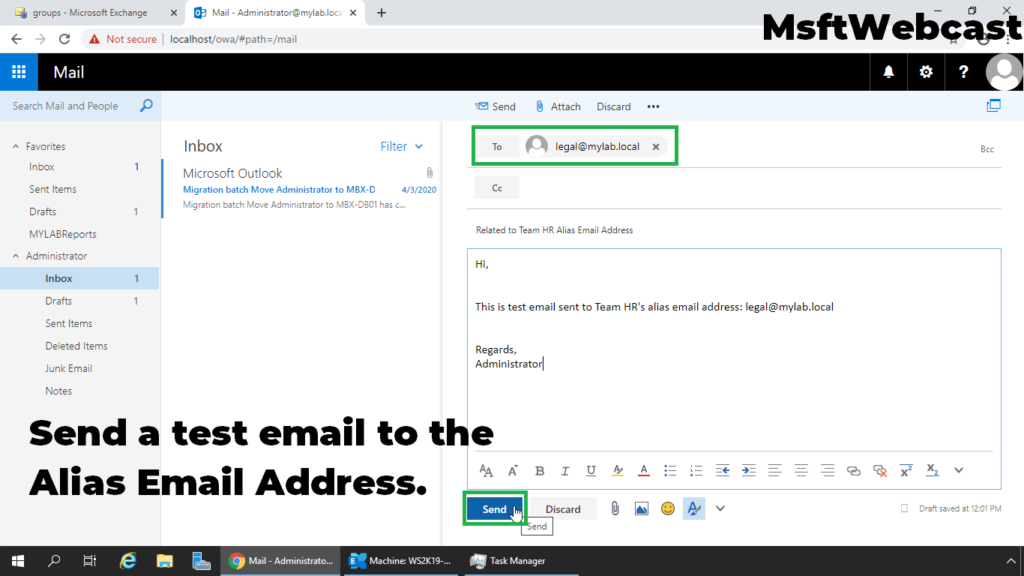
Send a Test Email to the Alias Email Address:
10. Login to outlook on the web using a user account.
11. Try to send an email to the email address of the public folder.
Remove an email address from a Mailbox or Group:
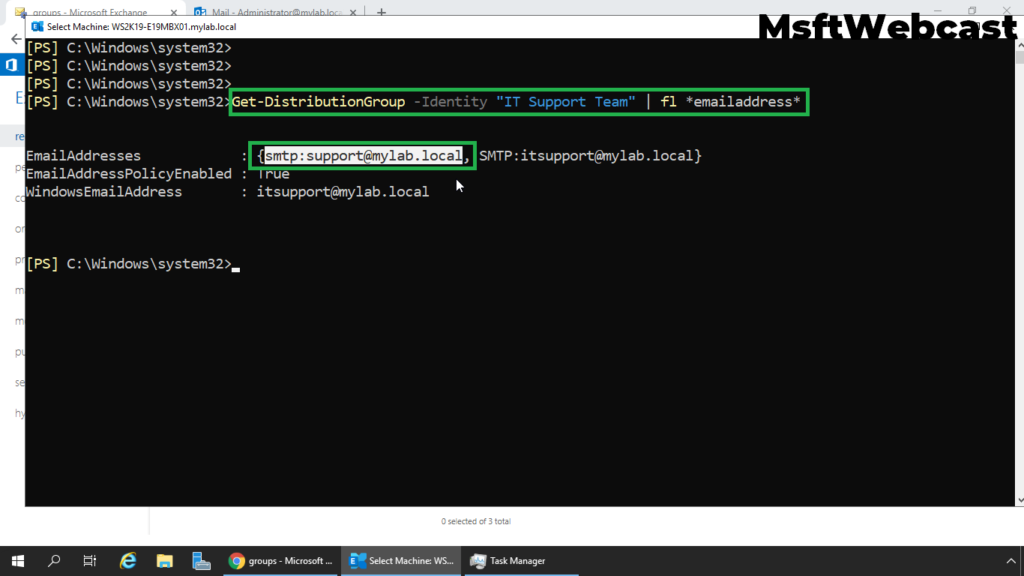
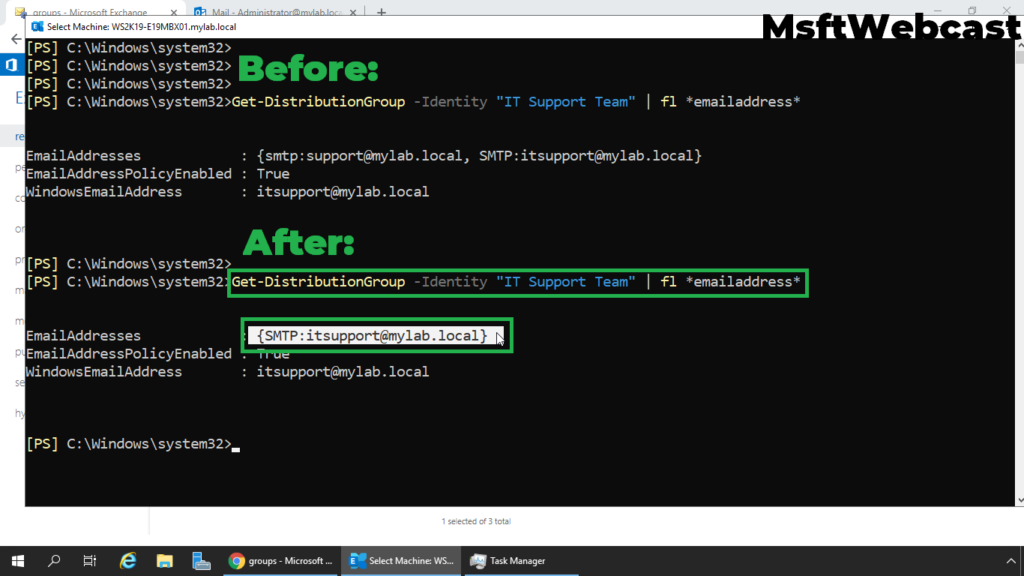
13. Open Exchange Management Shell and run below cmdlet to get the list of all the alias email addresses for the specific mailbox or group.
Get-DisstributionGroup -Identity “IT Support Team” | fl *EmailAddress*
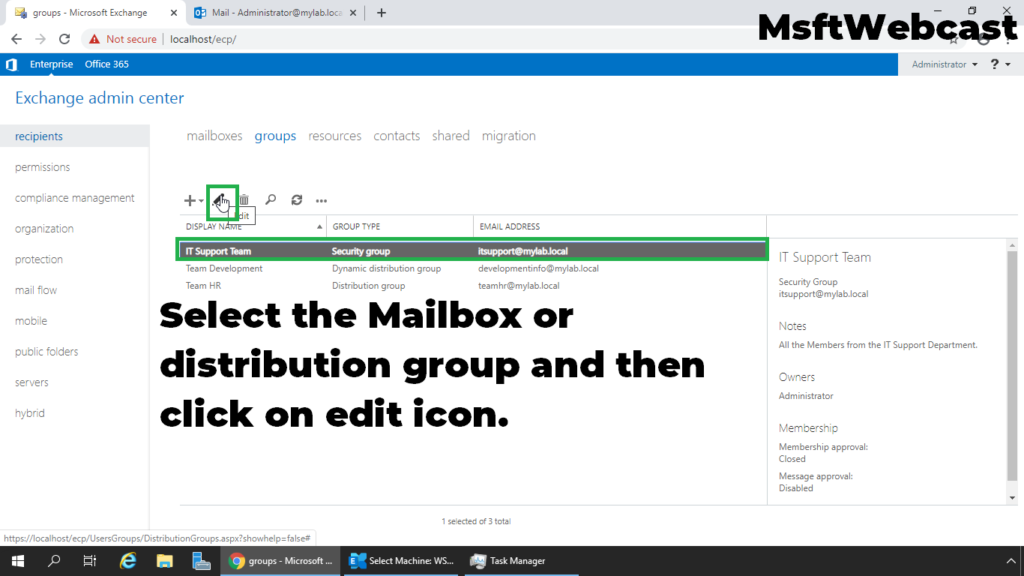
14. In the Exchange Admin Center web interface, navigate to Recipients and click on Groups tab.
15. On the Groups tab, select the distribution group for which you want to remove SMTP alias email address and then click Edit.
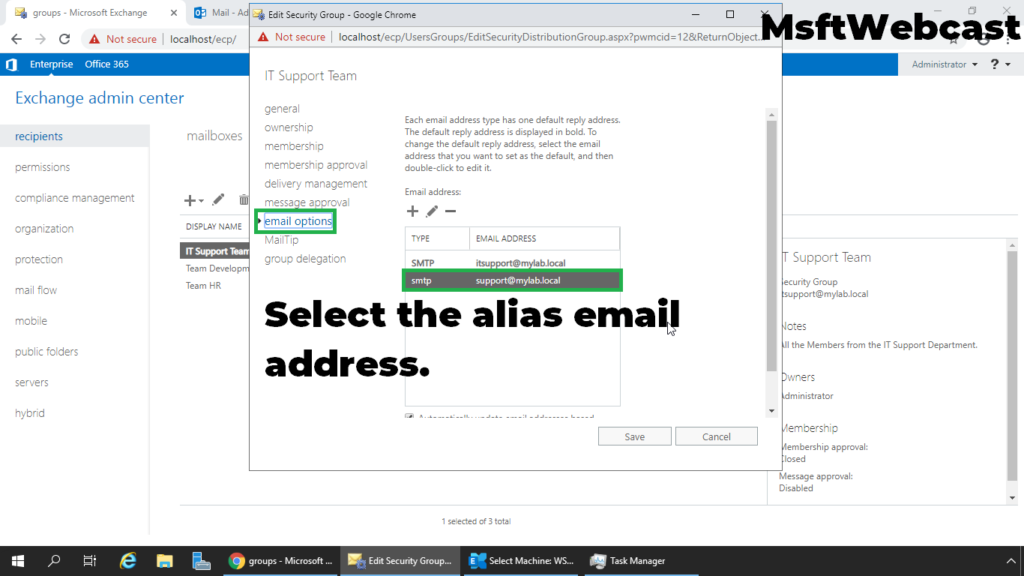
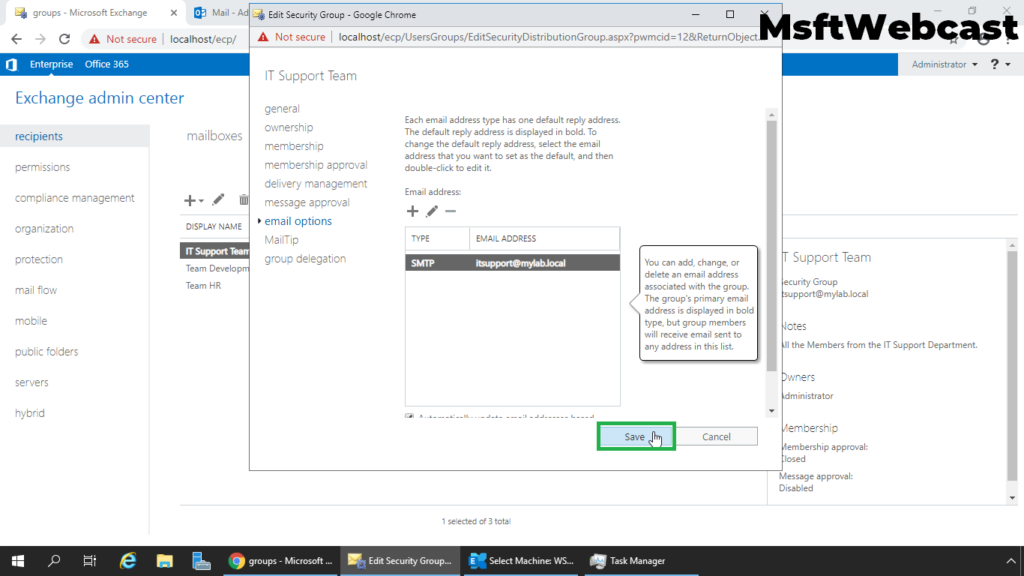
16. On the mailbox properties page, click Email Address. From the list of email addresses, select the address you want to remove.
17. Click on – (minus) sign to remove the selected SMTP alias Address.
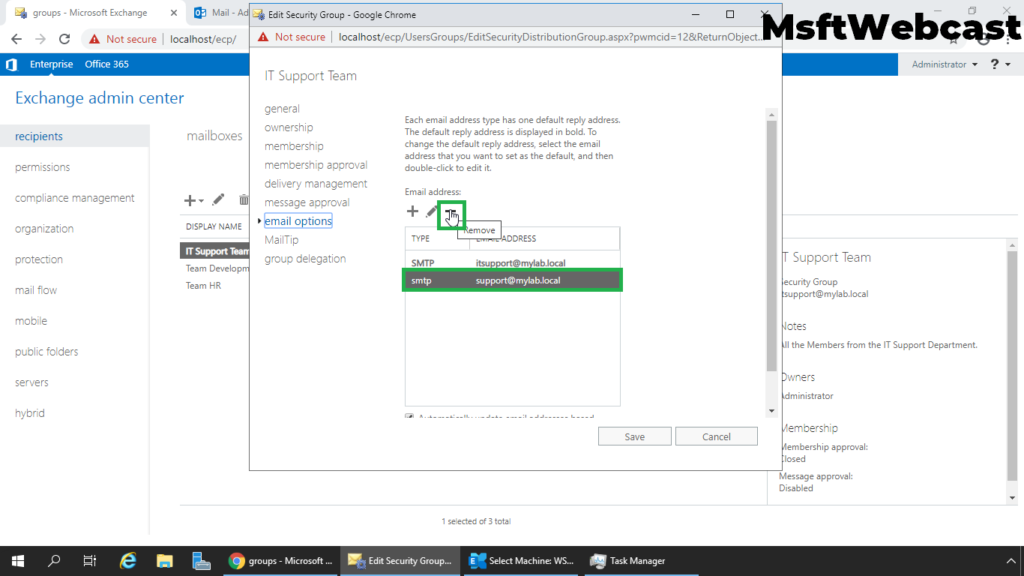
18. Click Save to save the change.
19. Verify the results using Exchange Management Shell.
That’s all. In this article, we have learned the steps to add and remove SMTP Alias Address for a mailbox in Exchange Server 2019.