In this article, you will learn how to configure a DNS stub zone in Windows Server 2019.

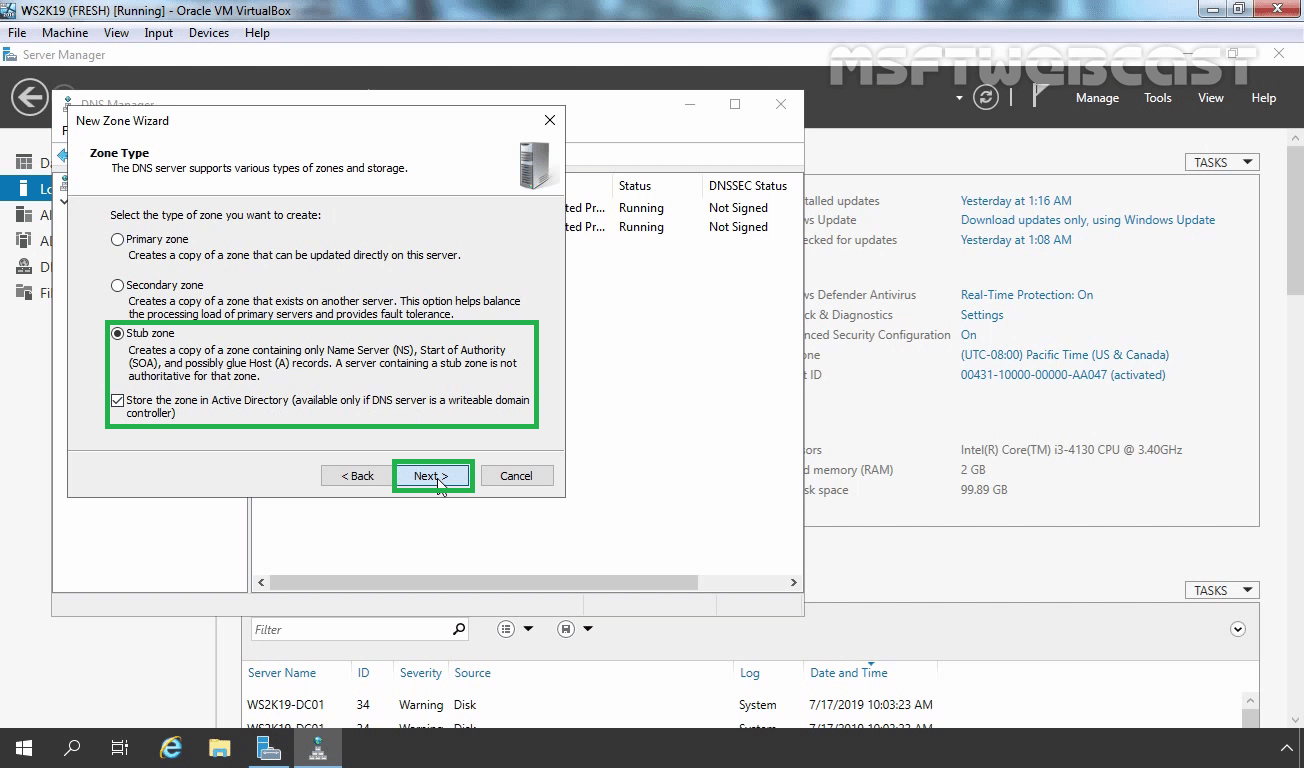
A stub zone is a read-only copy of a DNS zone that contains only resource records that identify the Authoritative DNS servers for that zone. It contains the only information of SOA and NS record from the Master DNS server.

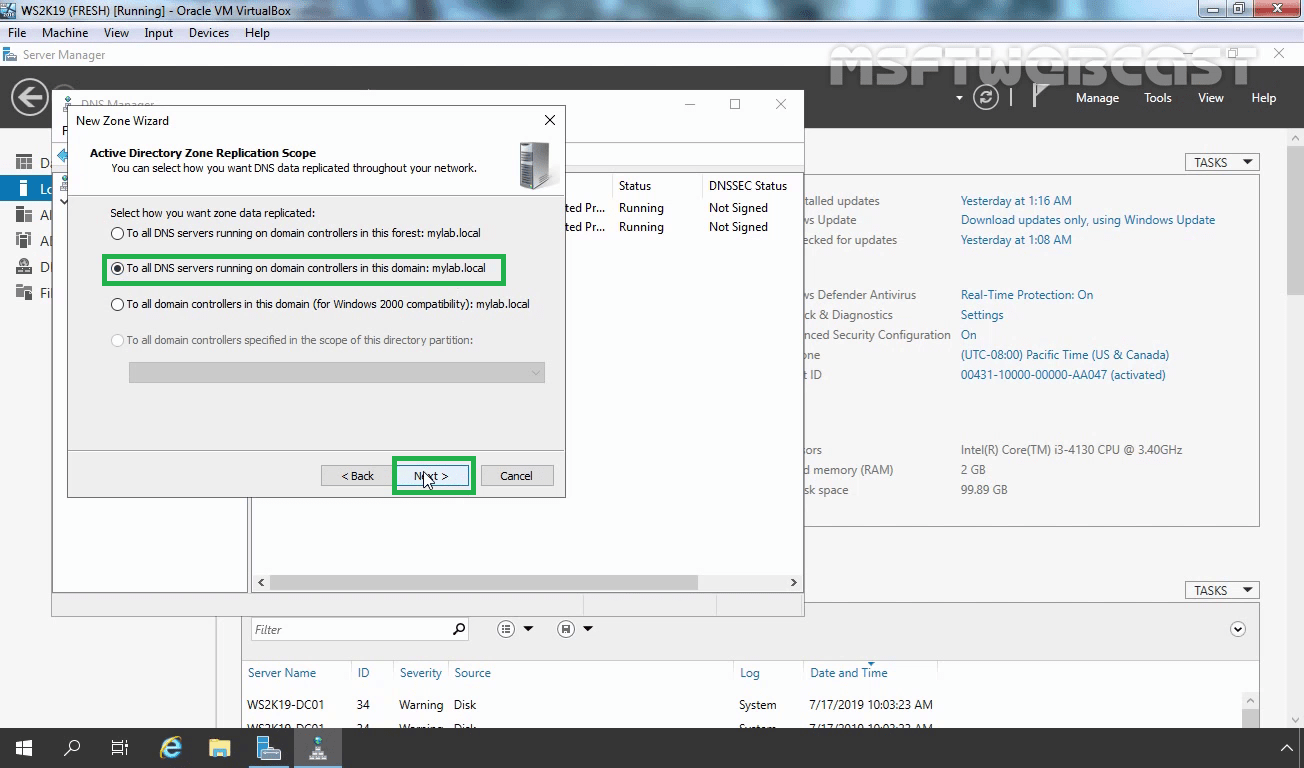
You can add either a forward lookup zone or a reverse lookup zone. You can add either an Active Directory-integrated zone or a file-backed zone.

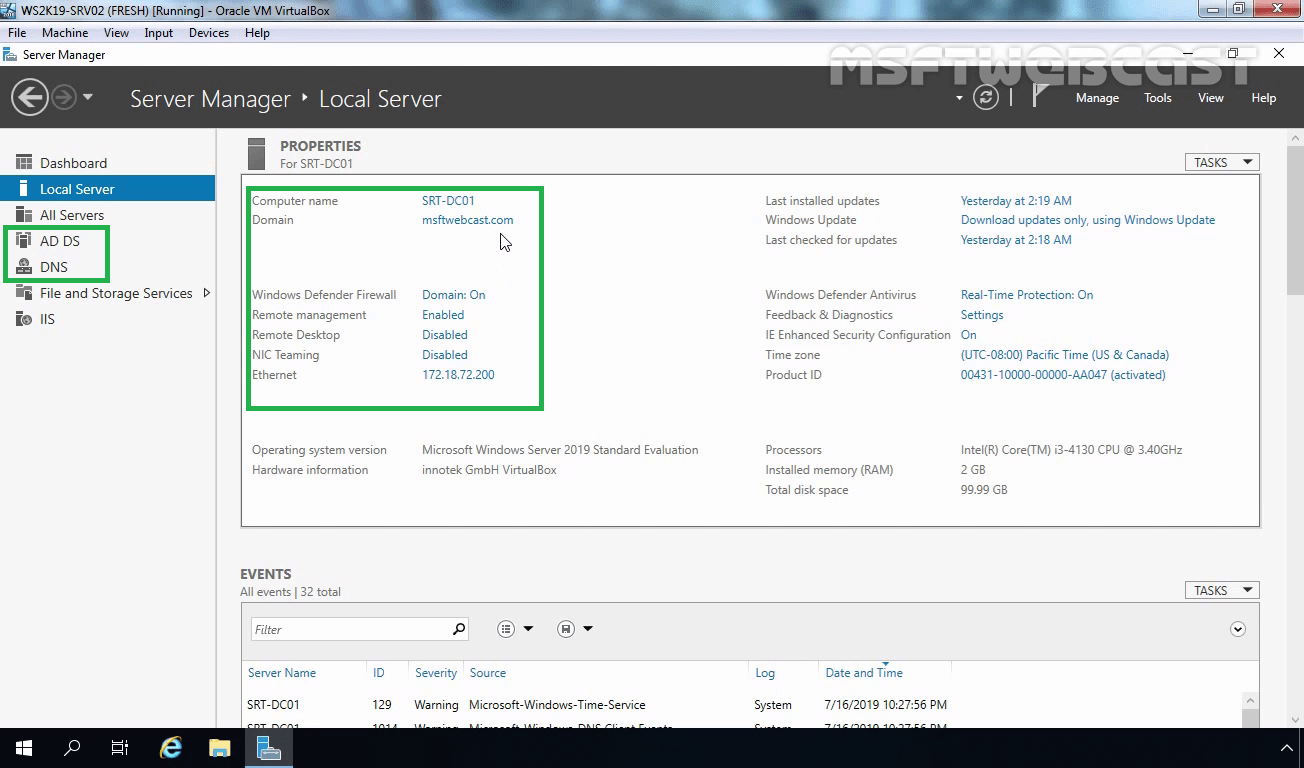
In our lab environment, we have an Active Directory domain named mylab.local and ws2k19-dc01.mylab.local is both the DC and DNS server in the domain. There is another Active Directory domain named msftwebcast.com and srt-dc01.msftwebcast.com is both DC and DNS server in that domain. The hosts in mylab.local need to be able to get name resolution for hosts in msftwebcast.com using the DNS stub zone.

We will configure a DNS Stub zone on ws2k19-dc01.

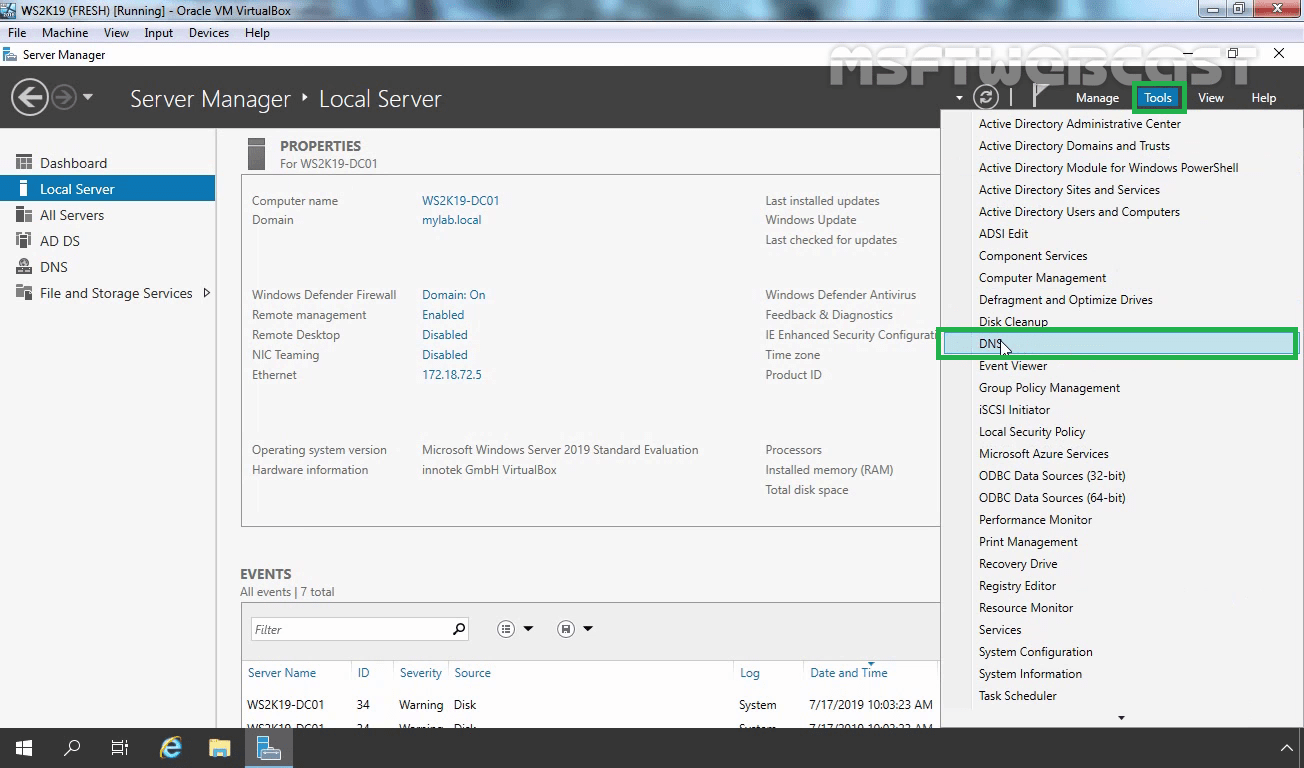
Let’s start by opening the server manager console.

Click on Tools and select DNS to open DNS Manager.

In DNS Manager, expand the server name.
Right-click Forward lookup and select New Zone to create a new Stub Zone.
Click on next to continue on the welcome screen.
In the Zone type window, select the Stub zone. Make sure you also tick on Store the zone in Active Directory to make this zone replicated to other DNS servers. Click on next to continue.
In this step, you will set the replication scope. (This option is only available when you choose to store Stub Zone in Active Directory) In this example, we selected to replicate the zone To all DNS servers running on domain controllers in this domain: mylab.local. Click on Next to continue.
Specify the stub zone name that you want to create. It must be matching with the zone name for which you are creating a stub zone. In our case, it is msftwebcast.com.
The next page will ask you about the Master Server, where you can either provide the IP Address or FQDN for this Zone. In this example, we can get information about zone msftwebcast.com from 172.18.72.200 which is the IP address of SRT-DC01. Click on next to continue.
Click on Finish to close the Wizard. This will create a new stub zone for the msftwebcast.com DNS zone on our local DNS server.
At first, after the creation of a new stub zone, you may see the zone with an error message “Zone not loaded by DNS server”.

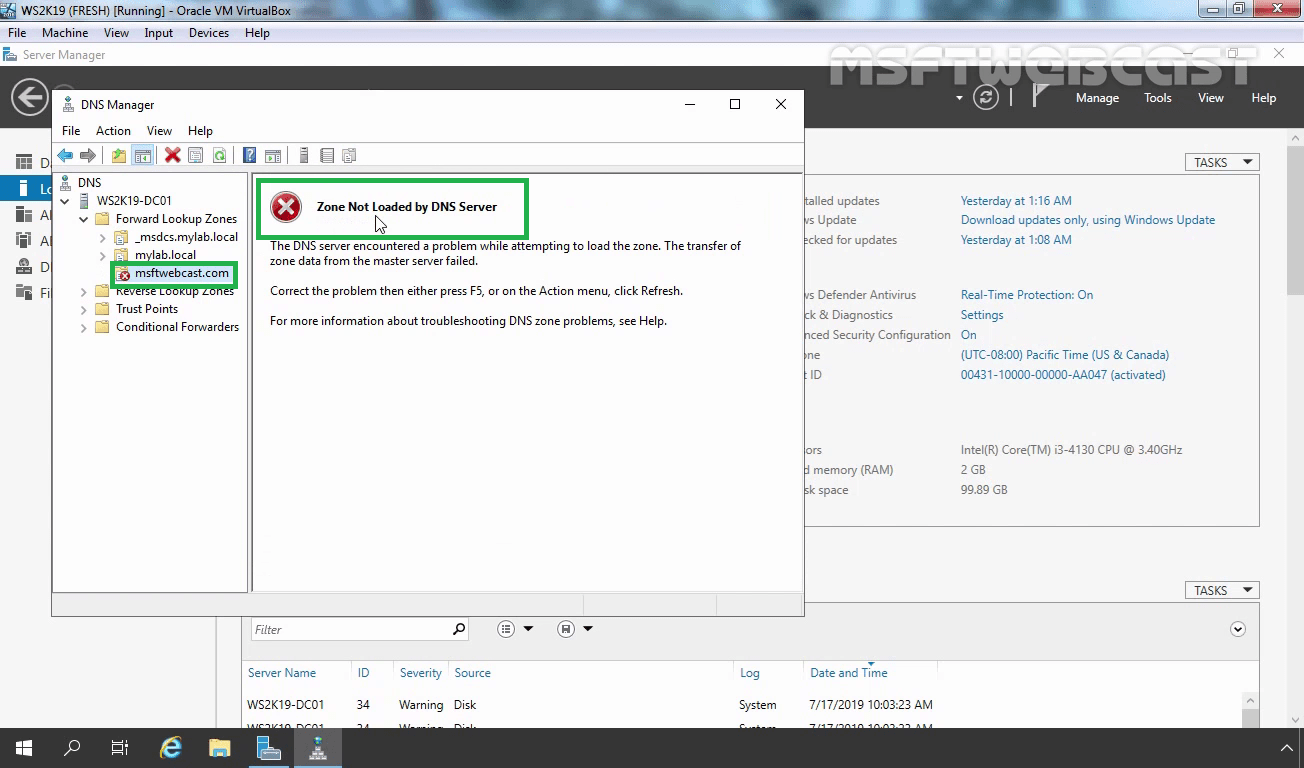
You can wait a while and refresh the view, or you can manually initiate the zone transfer process as well.

To do so, right-click on the stub zone name and select Transfer a new copy of zone from Master.

When the zone transfer completes, you will be able to see the SOA, NS, and A (host) record of the Master DNS server is present under stub zone.
Now after we configure a Stub zone, hosts in mylab.local will be able to resolve IP addresses for hosts in msftwebcast.com.
I hope you will find this information useful. Thank you! I appreciate you for reading my article.