
In this post, we will learn the steps to Move Mailbox from One Database to Other Mailbox Database in Exchange 2019.
We can move mailbox or mailboxes from one database to another database on the same server or between Exchange 2019 mailbox Servers using the Exchange Admin Center or Exchange Management Shell.
In this guide, we will move the user mailbox from one mailbox database to another mailbox database on the same Exchange Server 2019.
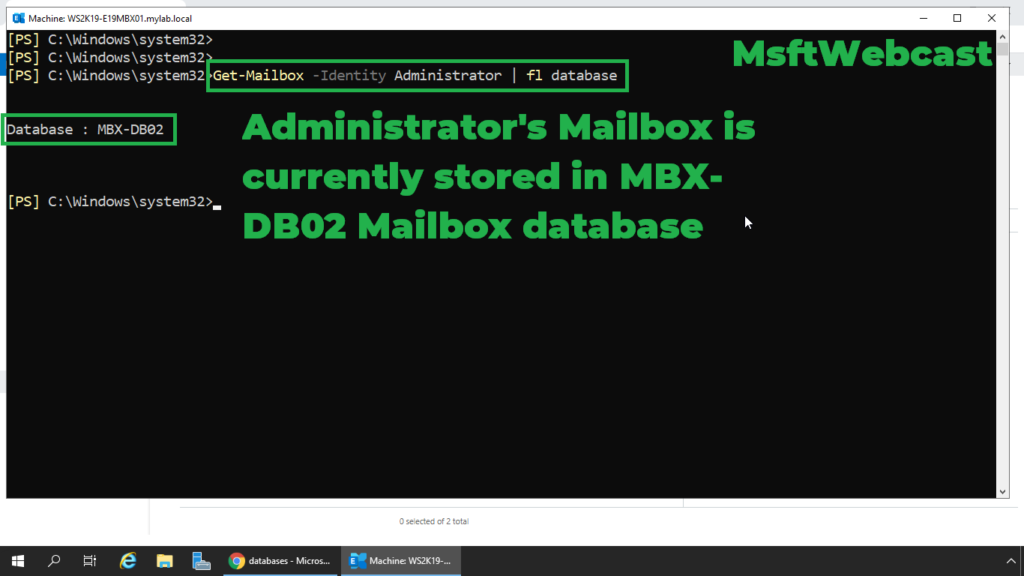
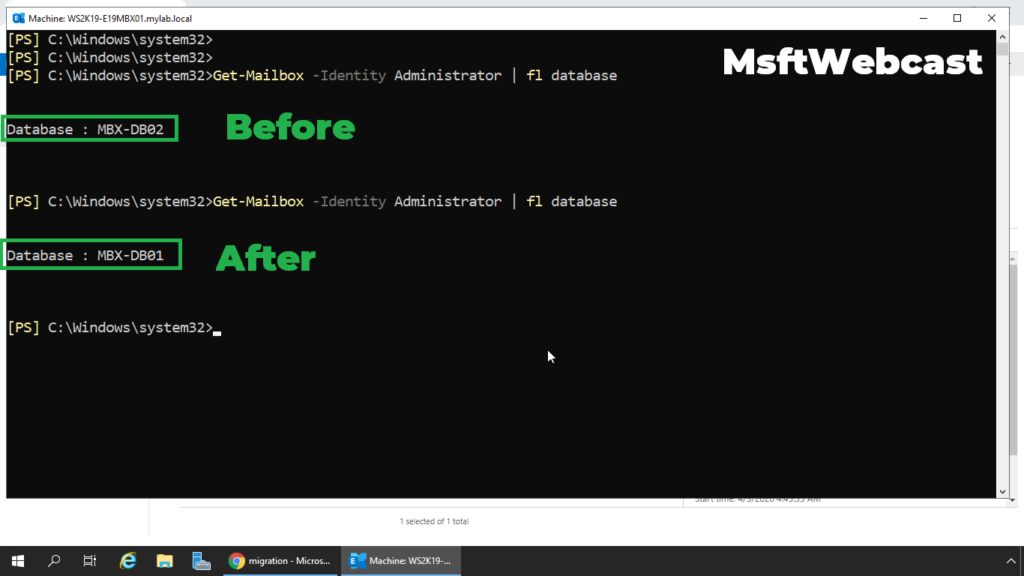
Before we move ahead, let’s use cmdlet Get-Mailbox for find the name of mailbox database where currently user mailbox is stored.
Get-Mailbox -Identity Administrator | fl database
Move Mailbox to another Mailbox Database using EAC:
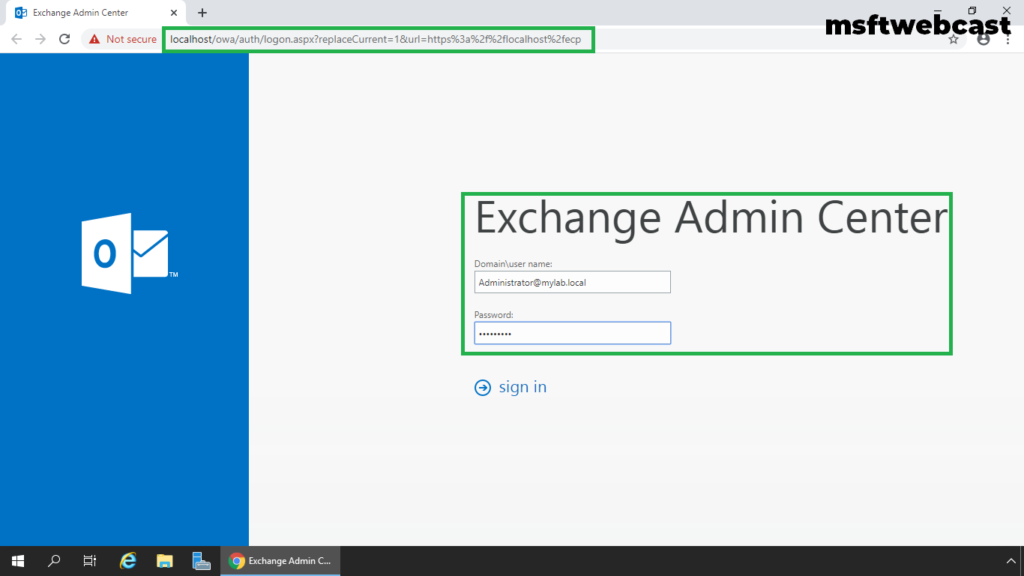
1. To move the mailbox using the Exchange admin center, first log in to the EAC web interface. (Access https://localhost/ecp on Exchange 2019)
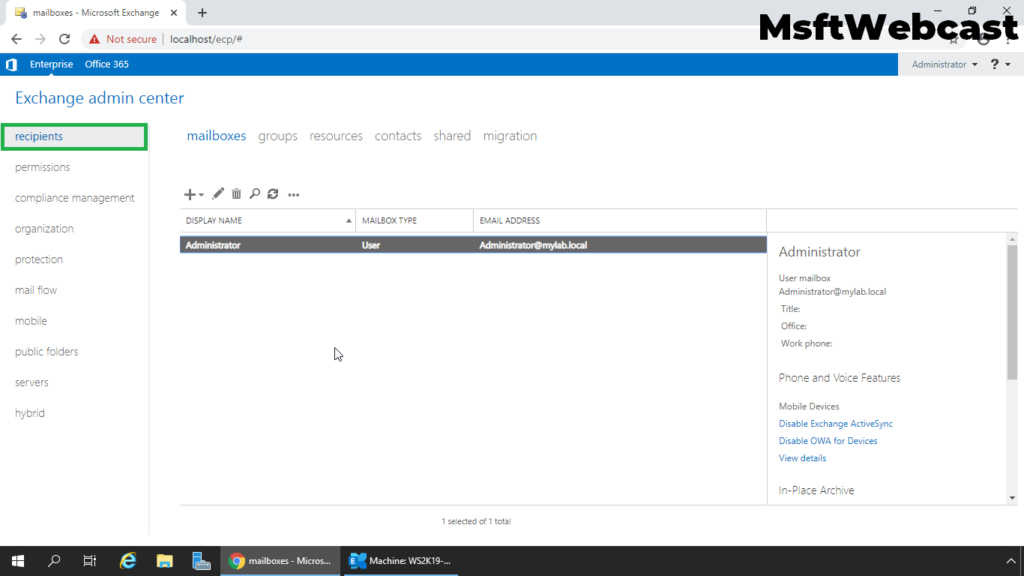
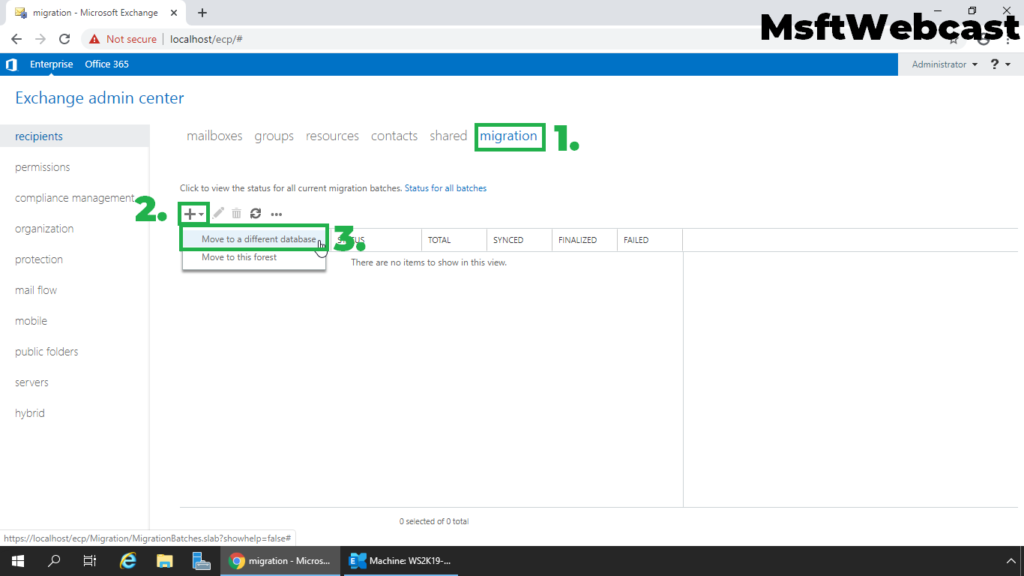
2. In the Exchange Admin Center, navigate to Recipients.
3. Click on the Migration tab. In the migration, click the (+) icon and select the Move to a different Database option.
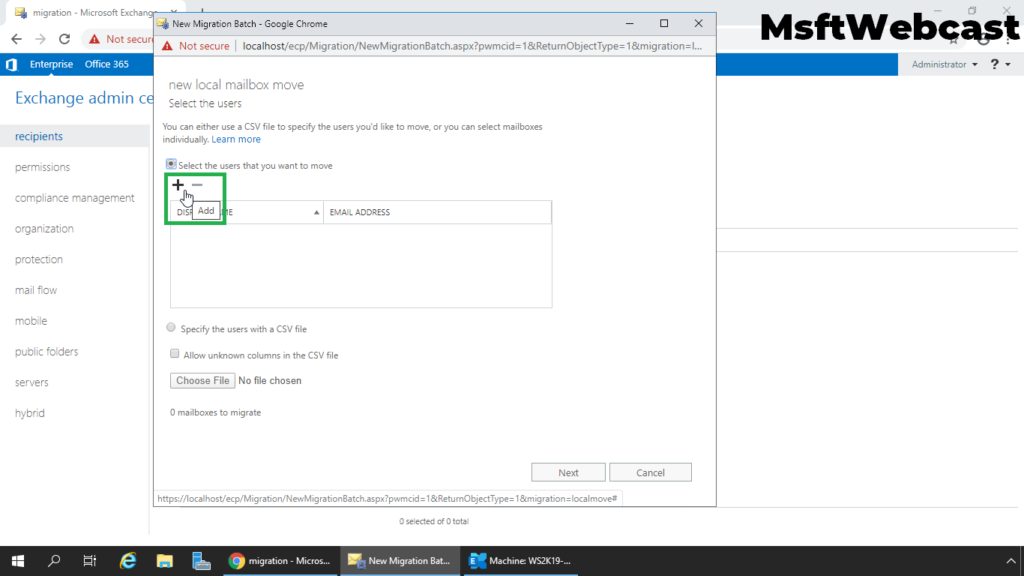
4. Choose the radio button Select the users that you want to move the radio button and click on + sign.
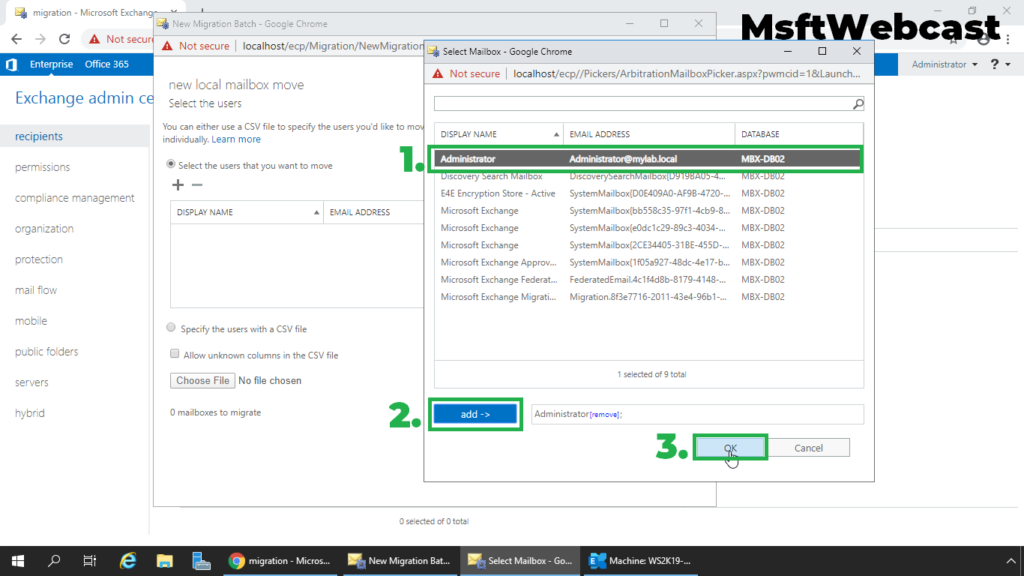
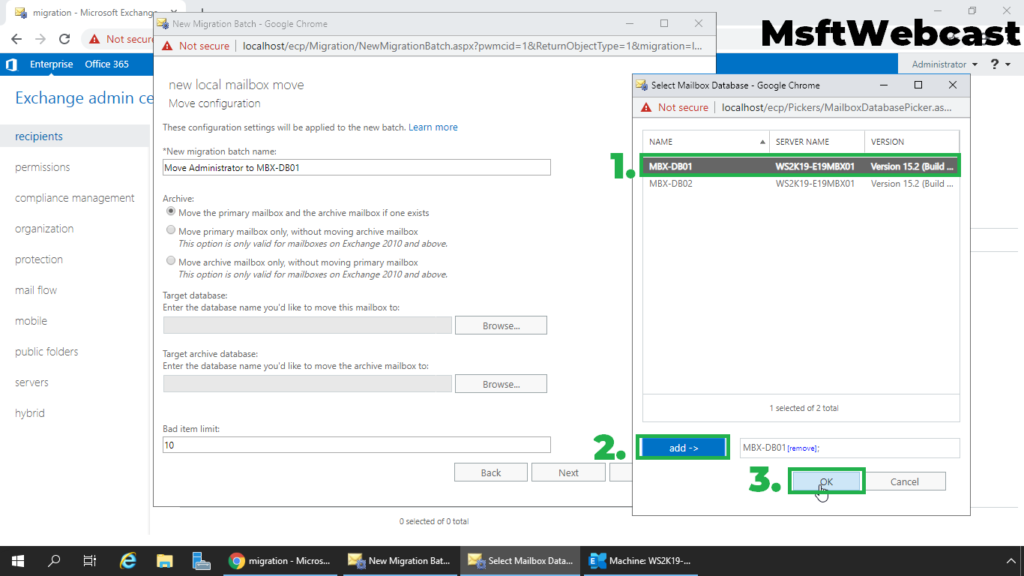
5. Select the mailbox that you want to move from one database to another.
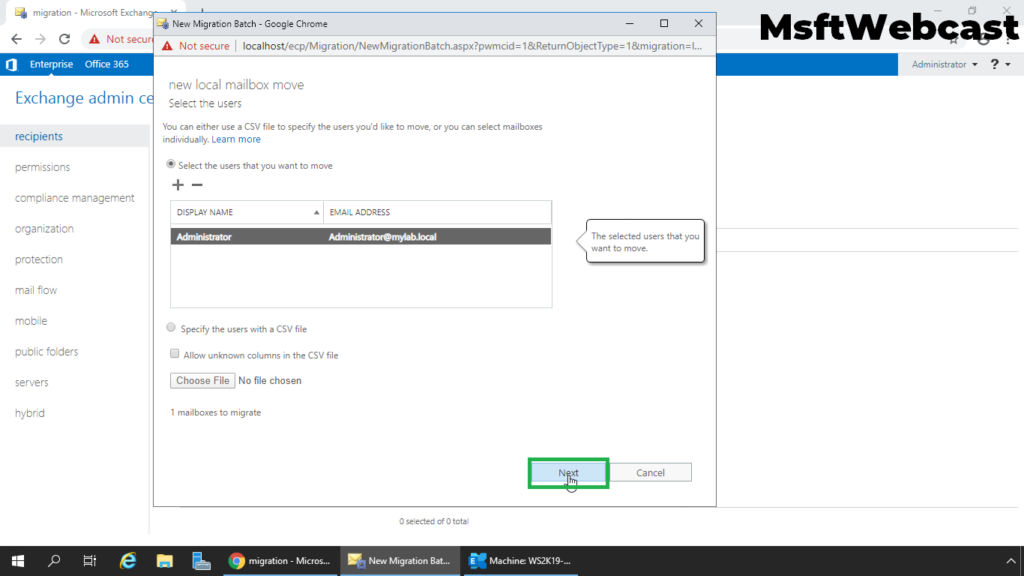
6. Click Next.
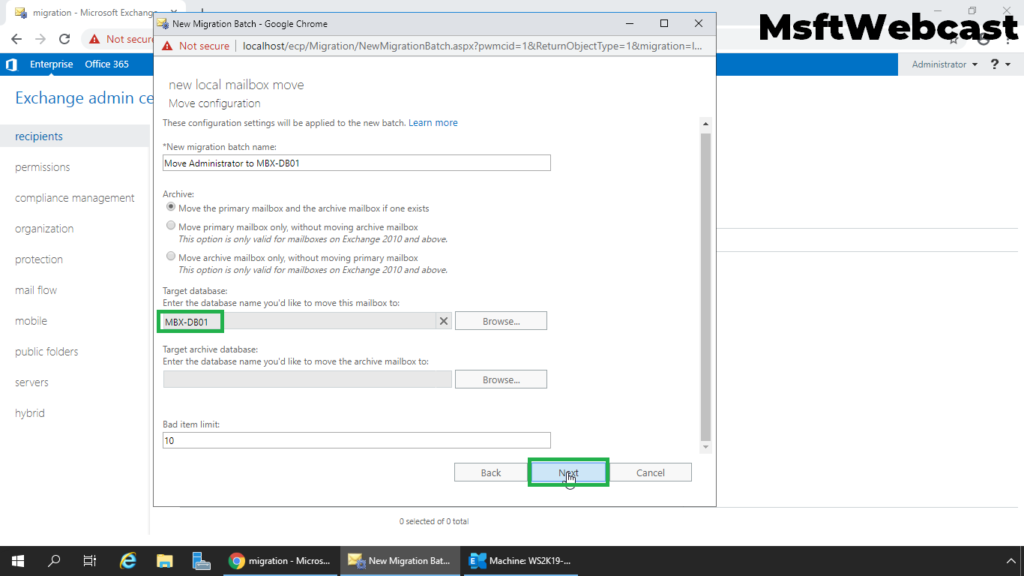
7. Specify the New migration batch name and select Target Mailbox Database. Select the target archive database, if required.
8. Click Next.
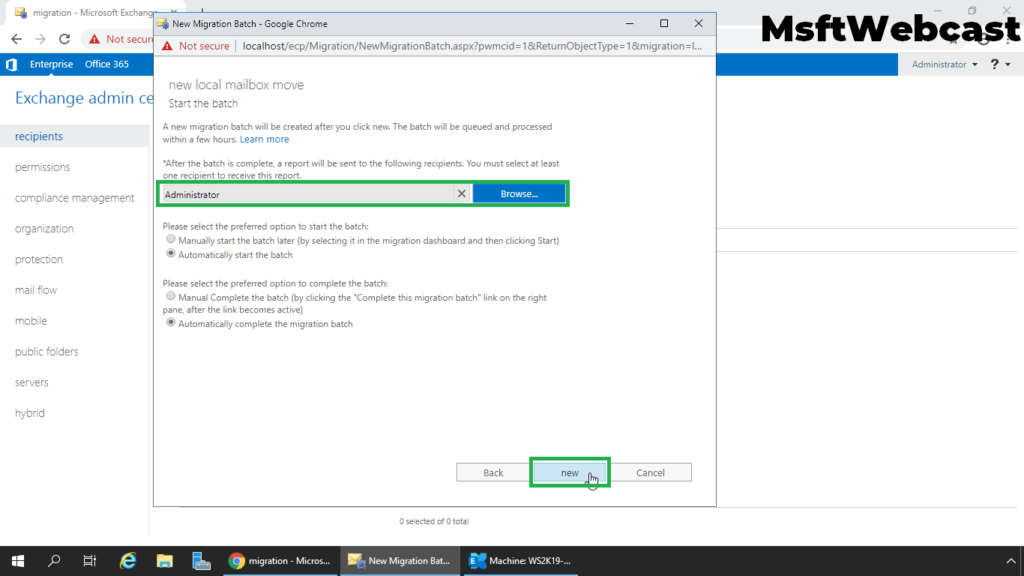
9. Select the recipient account, which will get the report of the migration task. Click Next.
Here, we have some advance options for batch migration, like how to start the migration task automatically or manually? Click New.
We can see the progress of the migration batch task in the Migration view in the Exchange Admin Center.
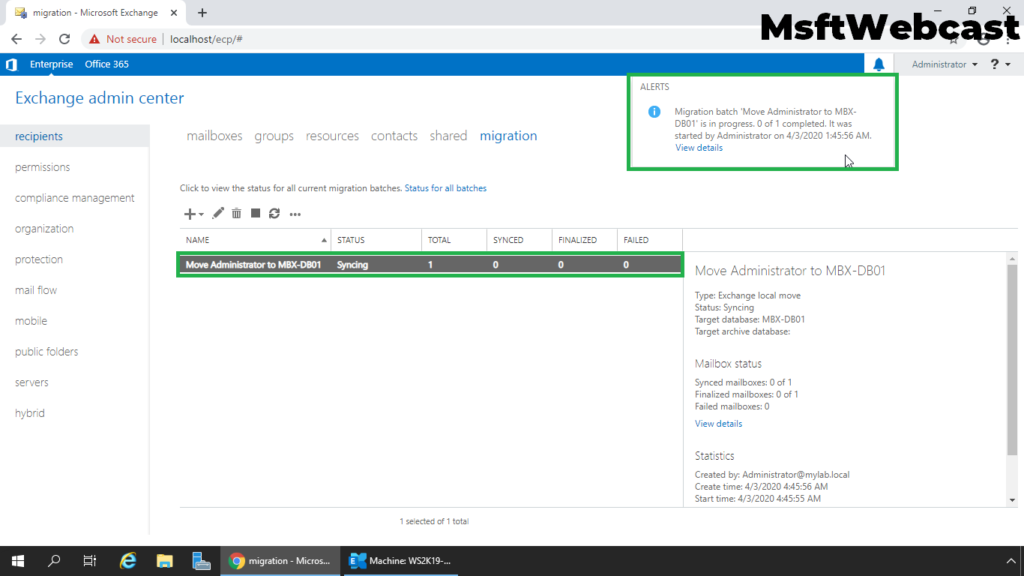
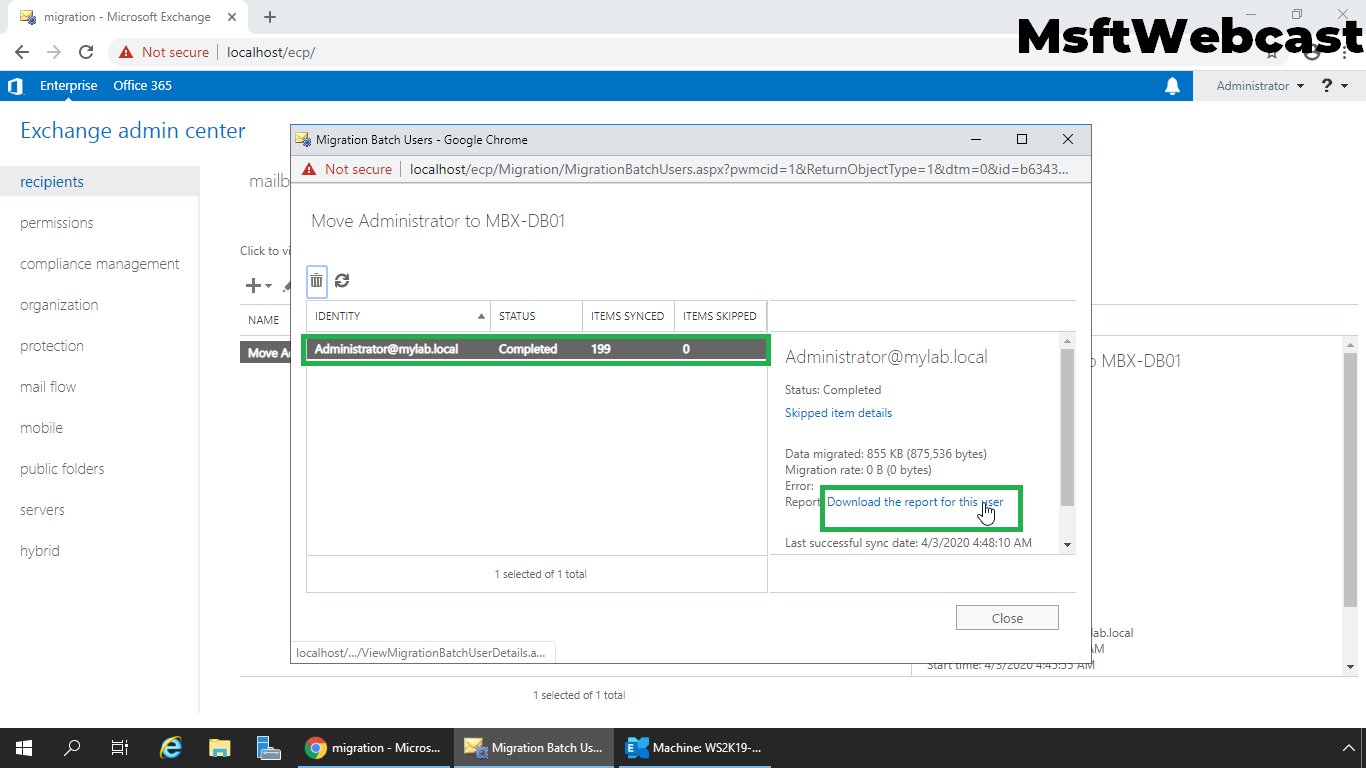
After migration completes successfully, the status of the migration batch will change to Completed. Click on View Option.
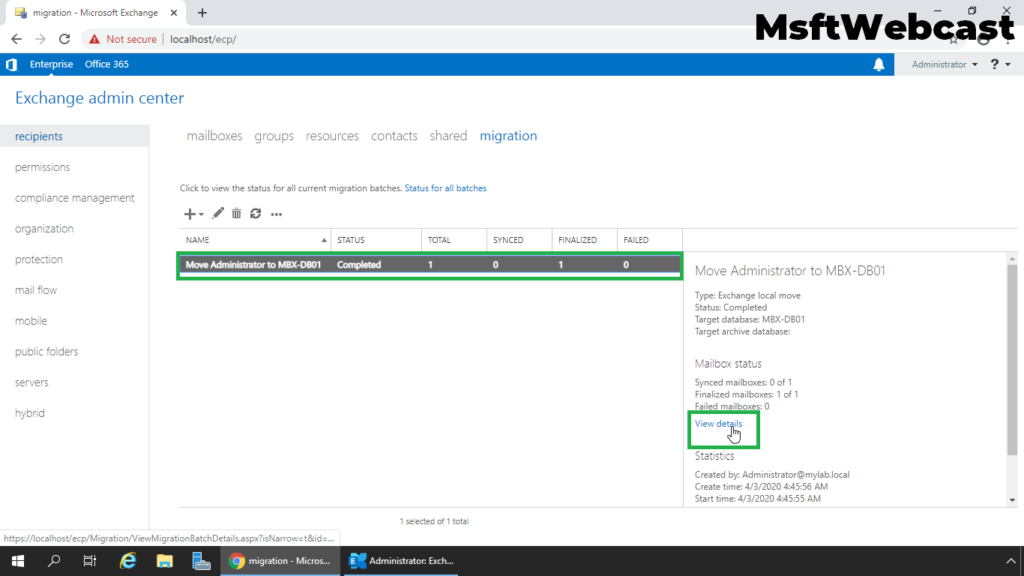
10. Click on Download the report for the user, in order to download the detailed report about the migration task.

Let’s again use Exchange Management Shell to get the mailbox database information for the user mailbox.
That’s all for this guide. In this article, we have learned the steps to move mailbox locally from one mailbox database to another database using Exchange Admin Center in Exchange 2019.