In this blog post, you will learn the steps on how to create a User account in Microsoft 365 without a user License. In Microsoft 365, we can create an unlicensed user account for testing purposes.
Microsoft 365 allows us to create unlicensed users. While unlicensed users will not have an email address, they can access certain Office 365 applications, such as SharePoint or the Office 365 Administration page. You can also configure an unlicensed Microsoft 365 user account for a Service Account in external applications.
Open Microsoft 365 admin center at https://admin.microsoft.com in your favorite web browser.
Log in with a global admin account or an account having the required privileges to create a new user account in Microsoft 365.
In the left part of the window, expand the Users drop-down menu and click the Active users button.
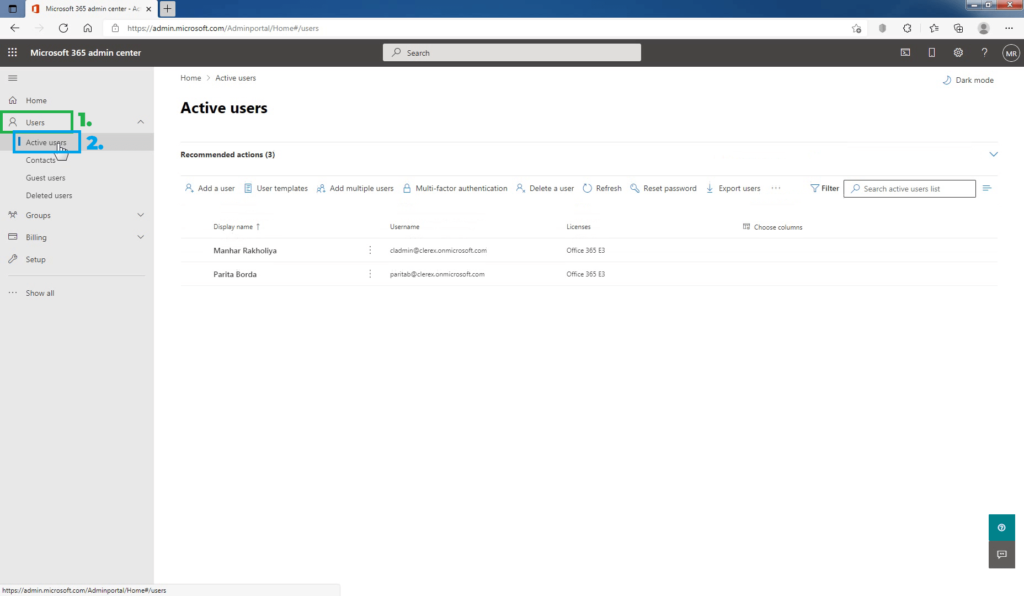
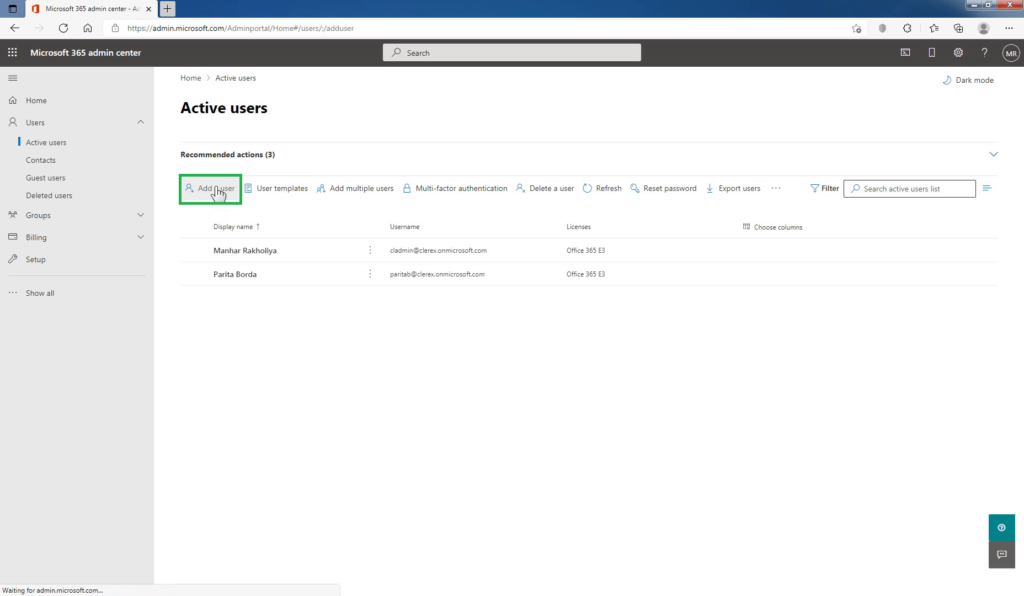
The Active users operation pane will be displayed on the right side of the window. To create a new unlicensed user account in Microsoft 365, click Add a User.
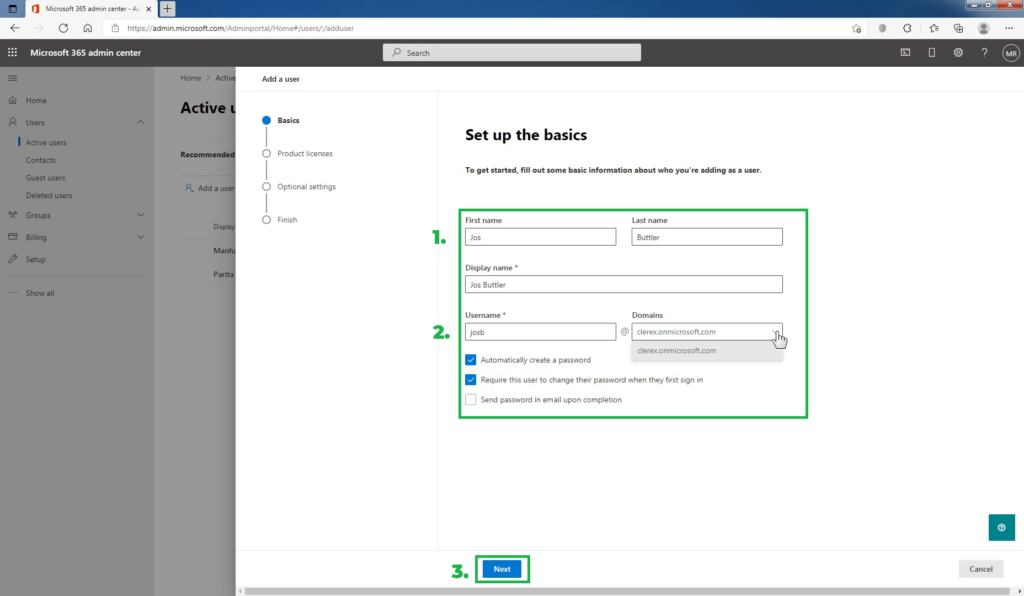
In the Set up the basics pane, fill in the basic user information like Name, Domain, and password settings.
- Name: Fill in the first and last name, display name, and username.
- Domain: Choose the domain for the user’s account. If you have added a custom domain name to Microsoft 365 then use drop-down to select your custom domain name.
- Password settings: Choose to use the auto-generated password or to create your strong password for the user.
The user must change their password after 90 days. Or you can choose to Require this user to change their password when they first sign in.
Choose whether you want to send the password in an email when the user is added. After entering user account details and configuring the password-related settings as per requirement, click on Next.
The Assign product licenses window will open. Select your geographic location in the drop-down list.
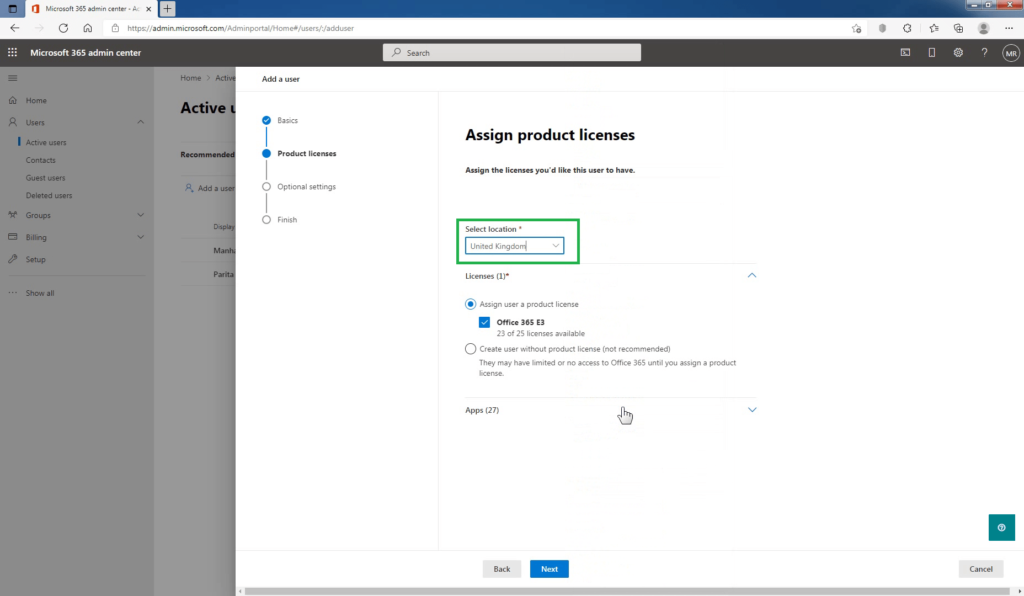
Since you want to create an unlicensed user account, select the Create user without product license (not recommended) option. Click Next.

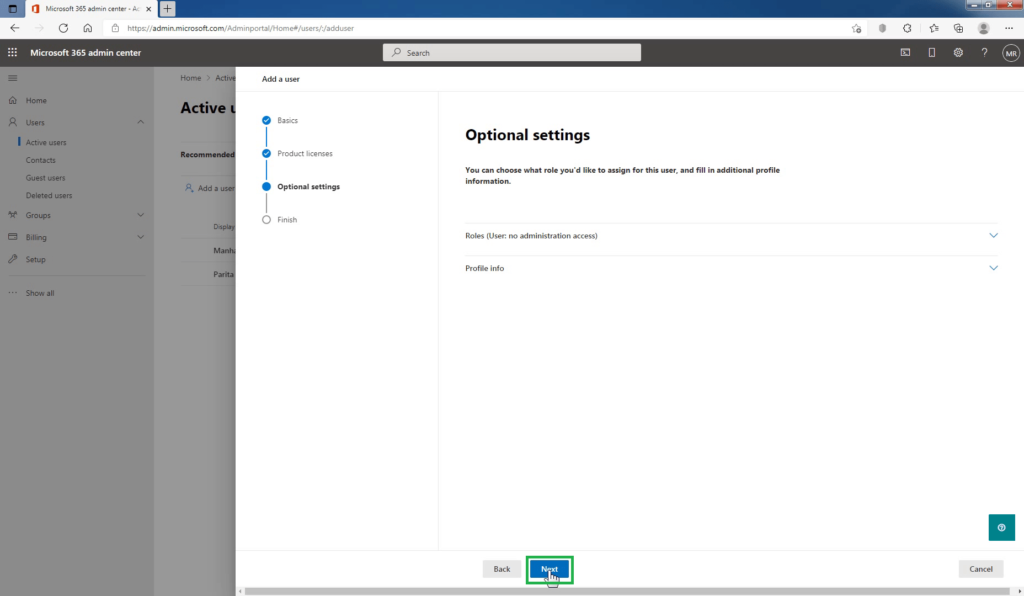
In the Optional settings pane, expand Roles to assign any role to this user. Expand Profile info to add additional information about the user. Click Next.
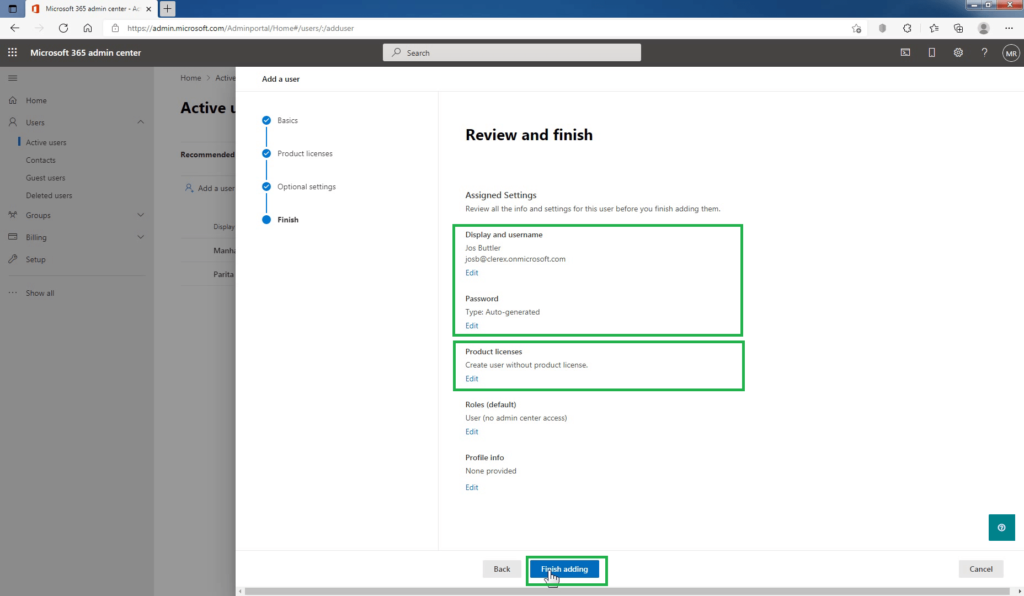
Review your new user’s settings, make any changes you like, then select Finish adding to add Microsoft 365 User Account without License.
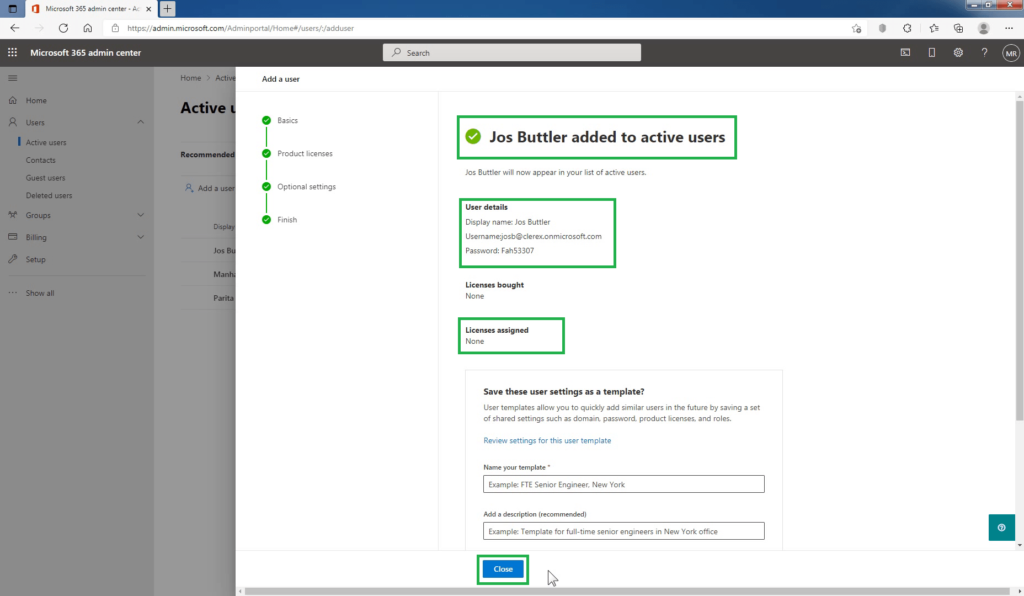
You can see the quick summary of details of the user we just created. Microsoft 365 also automatically generates and assigns a password to the new user we have selected. Make a note of the Username and Password displayed in the window. Click on Close.
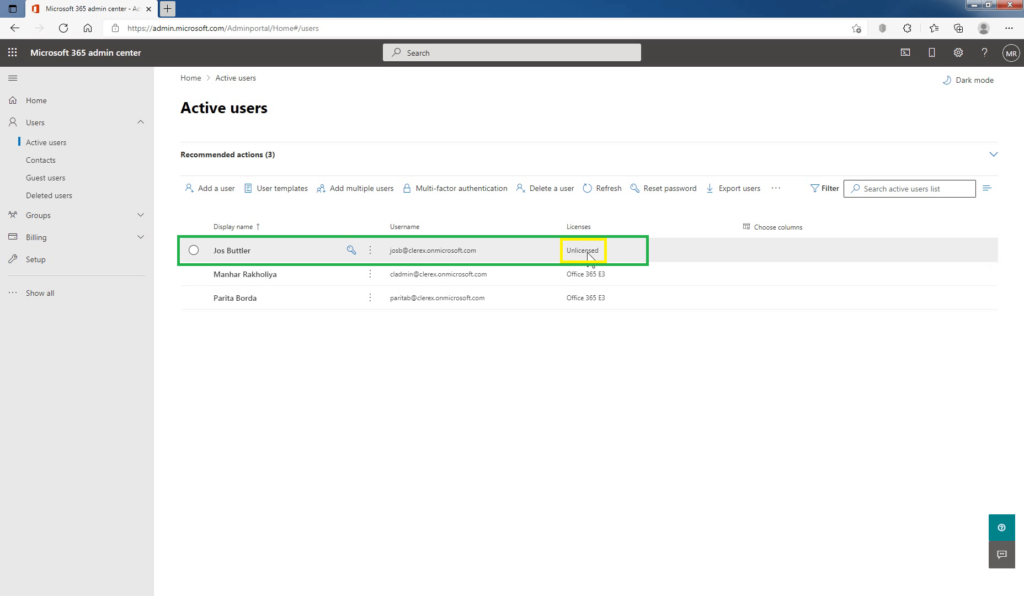
On the Active Users page, you can see the newly created user. But under the license tab, you can confirm that the user is unlicensed.
If this user tries to access Outlook on the web, he or she will receive an error “We couldn’t find a mailbox for this account. Either they don’t have a mailbox or don’t have a license assigned.”
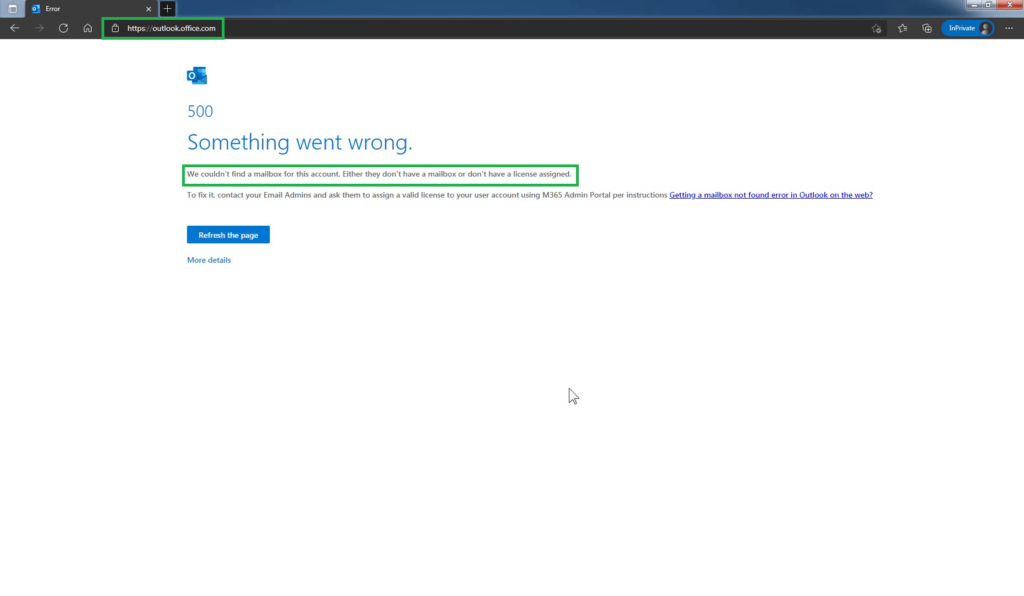
So basically users cannot access their mailbox using Outlook on the web since the user does not have any license.
Conclusion:
In this blog post, you have learned how to create Microsoft 365 User Account without License.