In this blog post, you will learn the steps on how to configure message delivery restrictions for a mailbox in Exchange Online.
What is message delivery restriction?
You may want to place restrictions on who can send messages to exchange recipients. The exchange allows you to control these settings and provides several options when it comes to placing message delivery restrictions on a mailbox. You can also place restrictions on other recipient types in the organization like distribution groups.
You can use the Exchange Admin Center (EAC) or the Exchange Management Shell (EMS) to place restrictions on whether messages are delivered to individual recipients. Message delivery restrictions are useful to control who can send messages to users in your organization.
For example, you can configure a mailbox to accept or reject messages sent by specific users or to accept messages only from users in your Exchange organization.
Configure Message Delivery Restrictions for a Mailbox using the Exchange Admin Center:
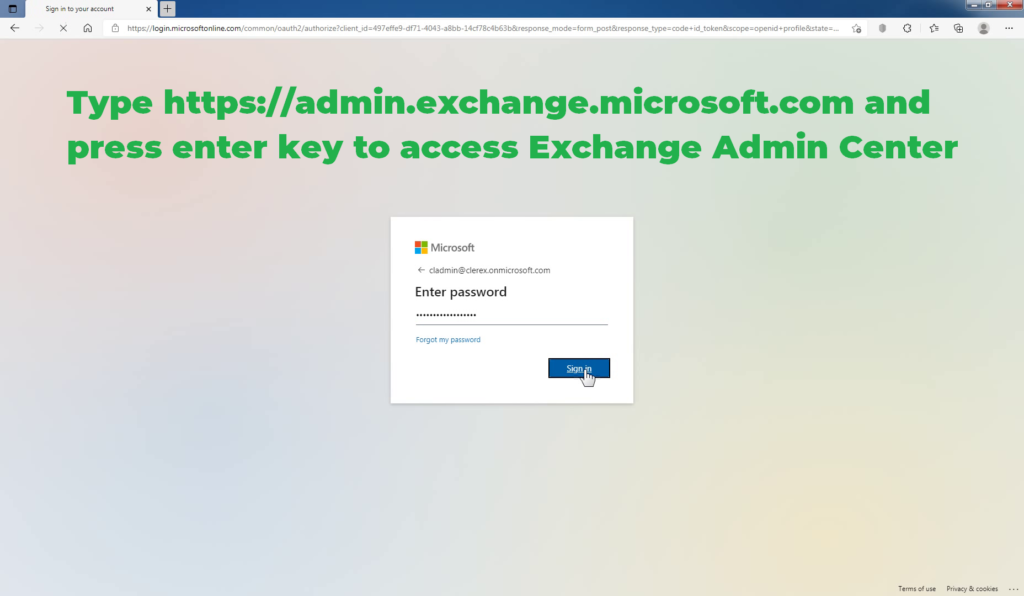
Open your favorite web browser and go to https://admin.exchange.microsoft.com and sign in to the Exchange admin center using the Exchange Administrator account.
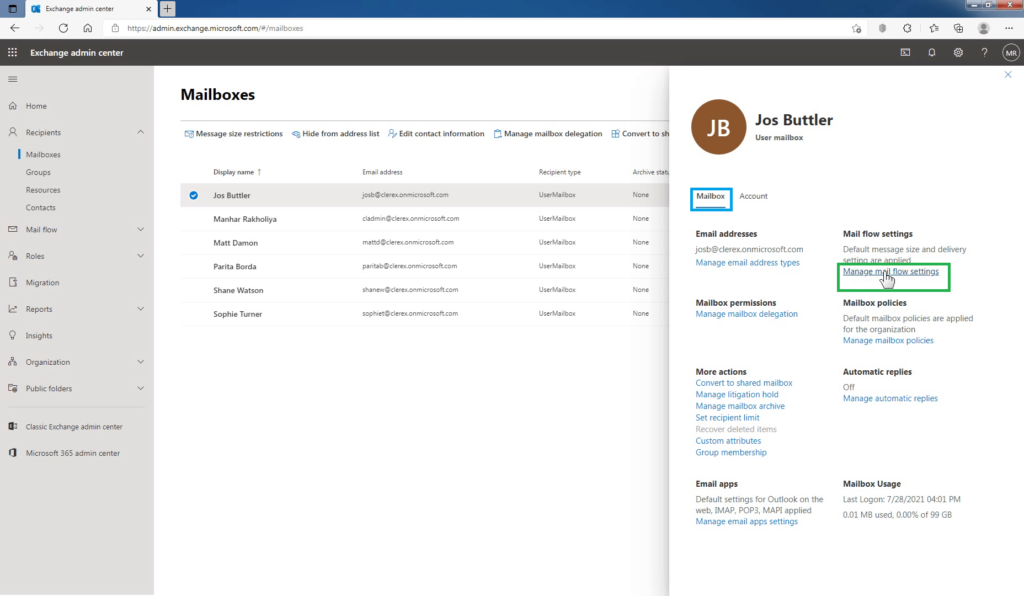
In the left part of the window, expand the Recipients drop-down menu and click the Mailboxes button.
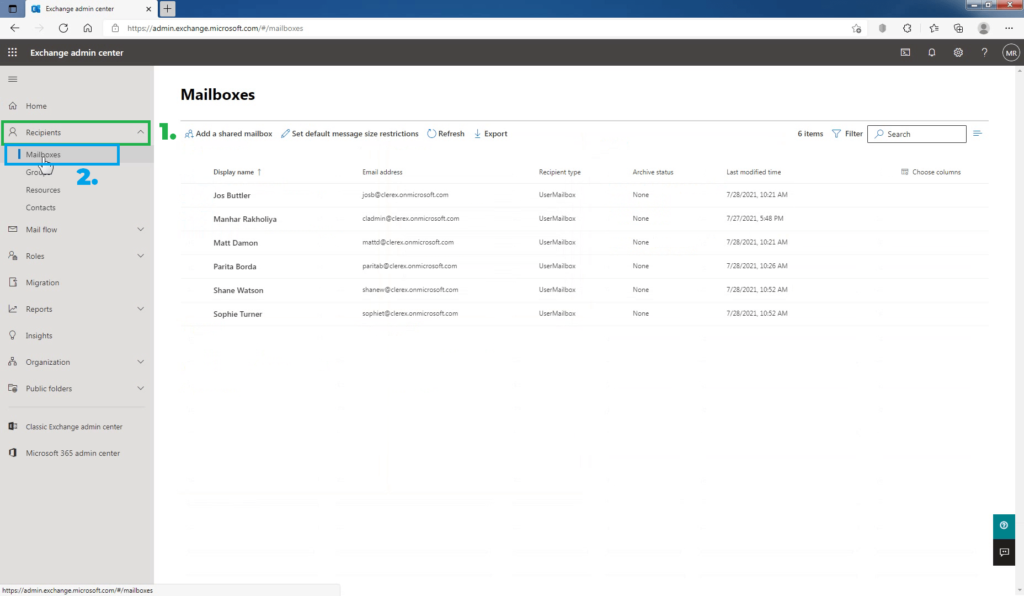
In the list of user mailboxes, click the mailbox that you want to configure message delivery restrictions for. A display pane is shown for the selected user mailbox.

Under Mail flow settings, click the Manage mail flow settings link.
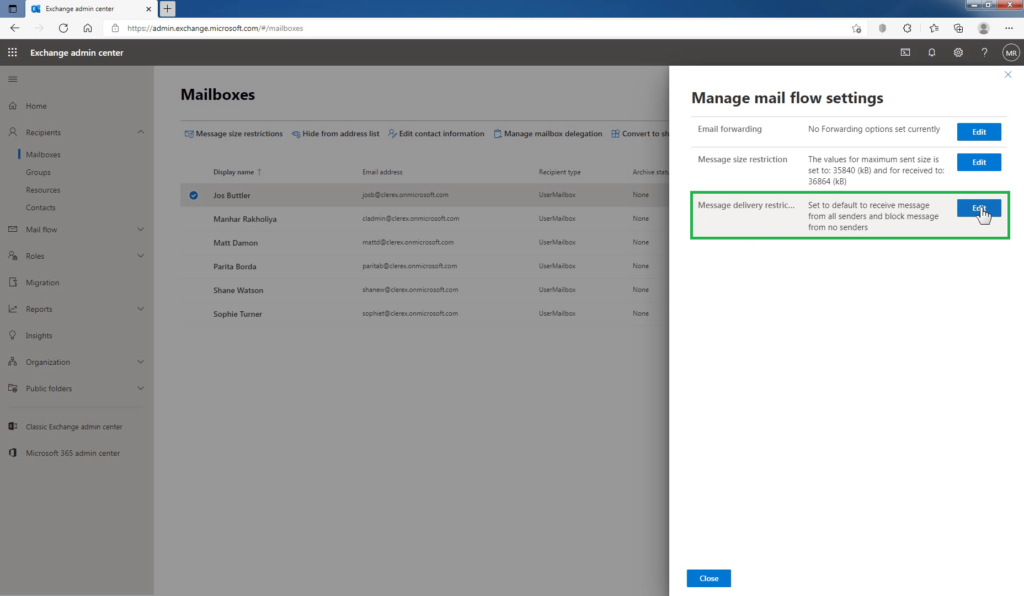
In the Manage mail flow settings display pane, you will see the Message Delivery Restrictions option.
Click the Edit button next to this option.
First, let’s understand all the options available on the Message deliver restriction display pane.
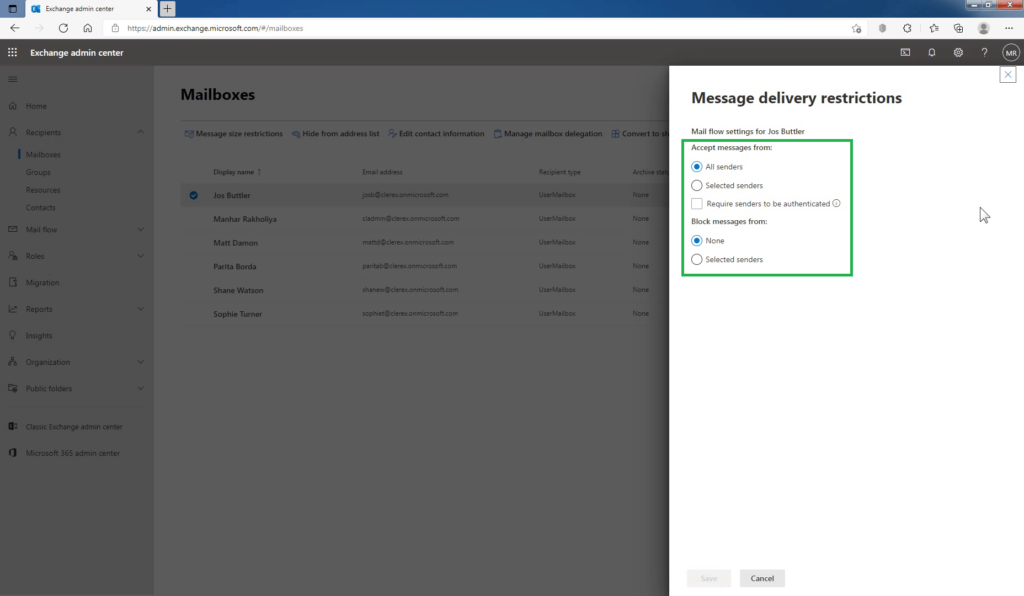
Accept messages from: Use this section to specify who can send messages to this user.
- All senders: This option specifies that the user can accept messages from all senders. This includes both senders in your Exchange organization and external senders. This is the default option. It includes external users only if you clear the Check if all senders are authenticated check box. If you select this check box, messages from external users will be rejected.
- Selected senders: This specifies that the user can choose from a list of senders. Click Add Icon. Add a sender to display the list of all recipients in your Exchange organization. You can also search for a specific recipient by typing the recipient’s name in the search box.
- Check if all senders are authenticated: This option prevents anonymous users from sending messages to the user. This includes external users that are outside of your Exchange organization.
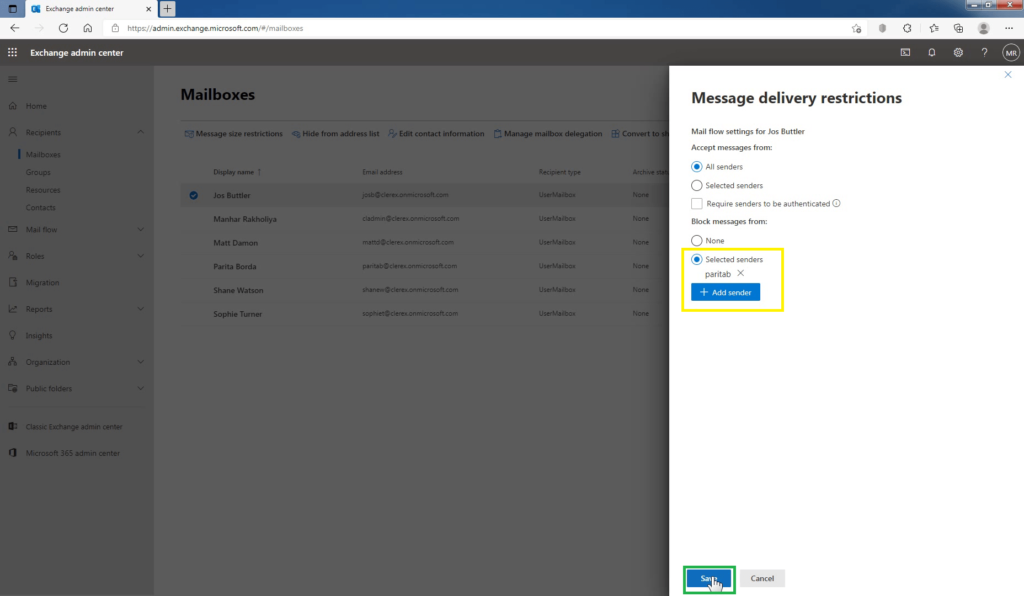
Block messages from: Use this section to block people from sending messages to this user.
- None: This option specifies that the mailbox won’t reject messages from any senders in the Exchange organization. This is the default option.
- Selected senders: This specifies that the user can choose from a list of senders.
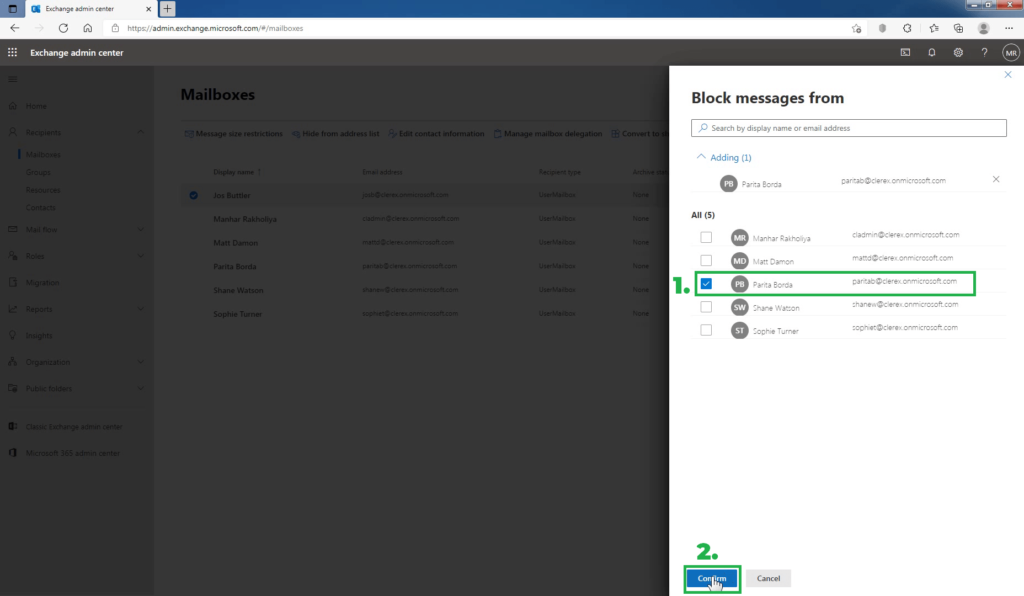
In this example, we want to configure the mailbox of “Jos Buttler” to reject messages from the user “Parita Borda”. Let’s see how we can achieve that.
Under Block messages from, choose Selected senders option. Click on Add sender to display the list of all recipients in your Exchange organization.

You can also search for a specific recipient by typing the recipient’s name in the search box. Select the desired recipients, and then click Confirm.
Click Save to save your changes.
Click Close to exit from the Manage mail flow settings display pane.
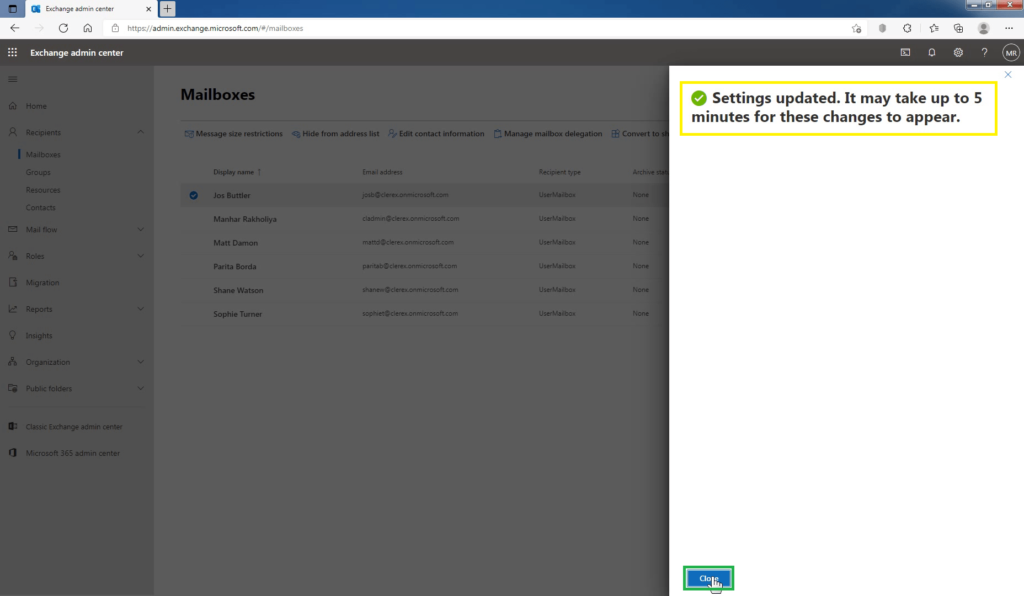
At this point, you have successfully configured message delivery restrictions for a mailbox in Exchange Online. Now Parita Borda is not able to send a message to “Jos Buttler”. If “Parita Borda” sends a message to “Jos Buttler”, the message will be rejected, and “Parita Borda” will get an NDR message for the same.
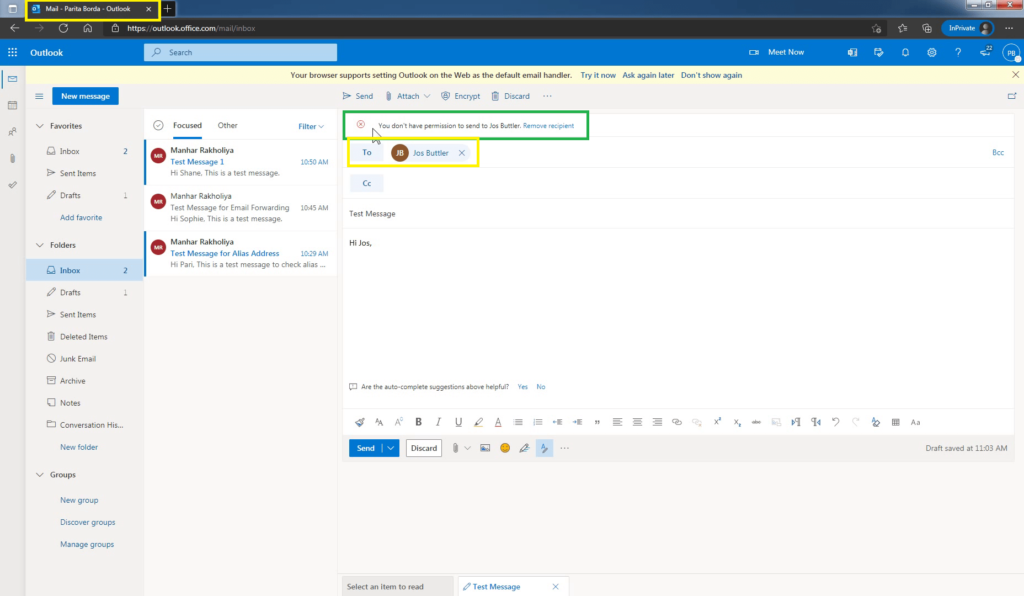
How do we know this worked?
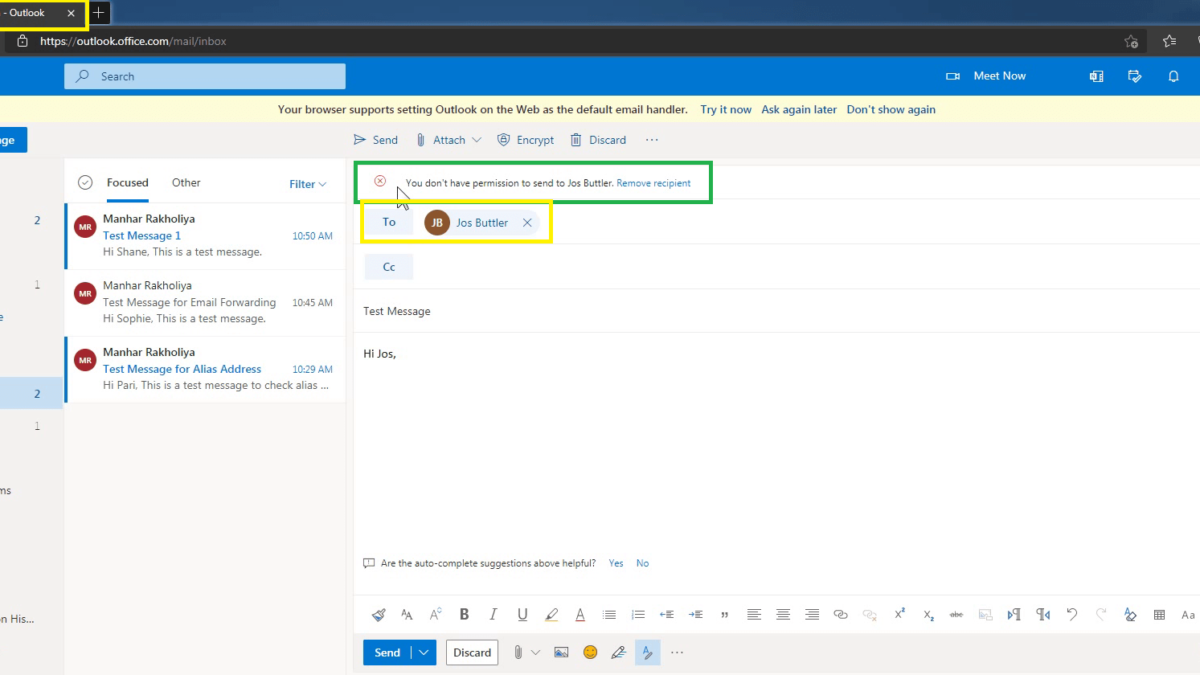
To test this we will send a message from “Parita Borda” to “Jos Buttler” and according to the configuration, the delivery of the message should fail.
As we can see MailTips warns us that the user “Parita Borda” does not have permission to send messages to “Jos Buttler”.
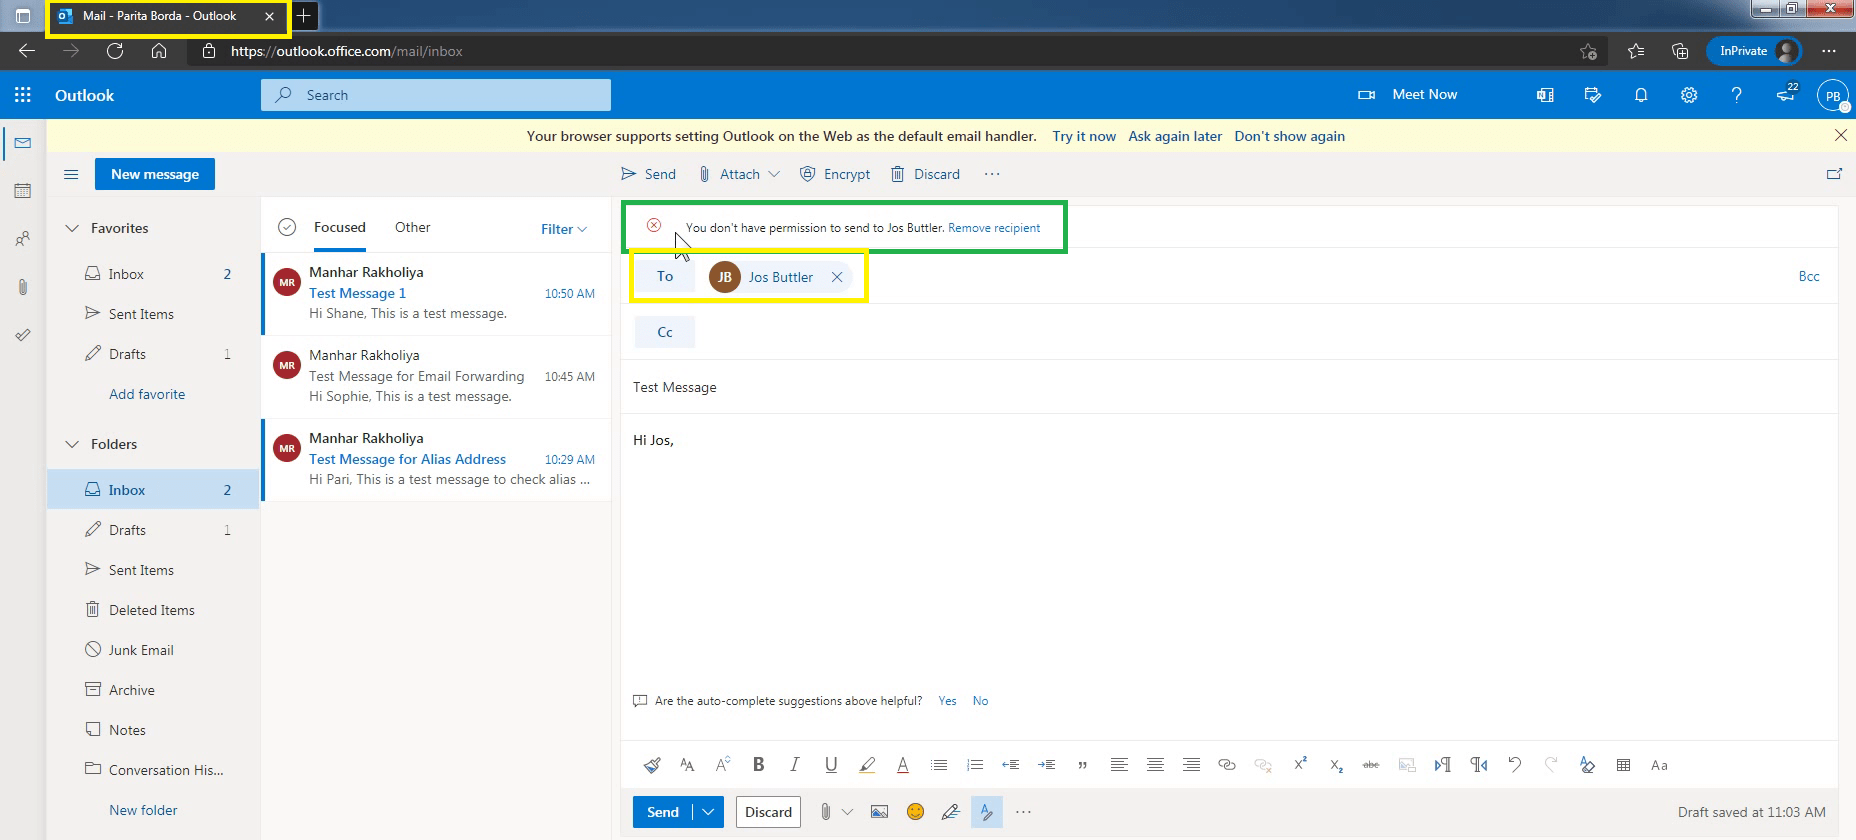
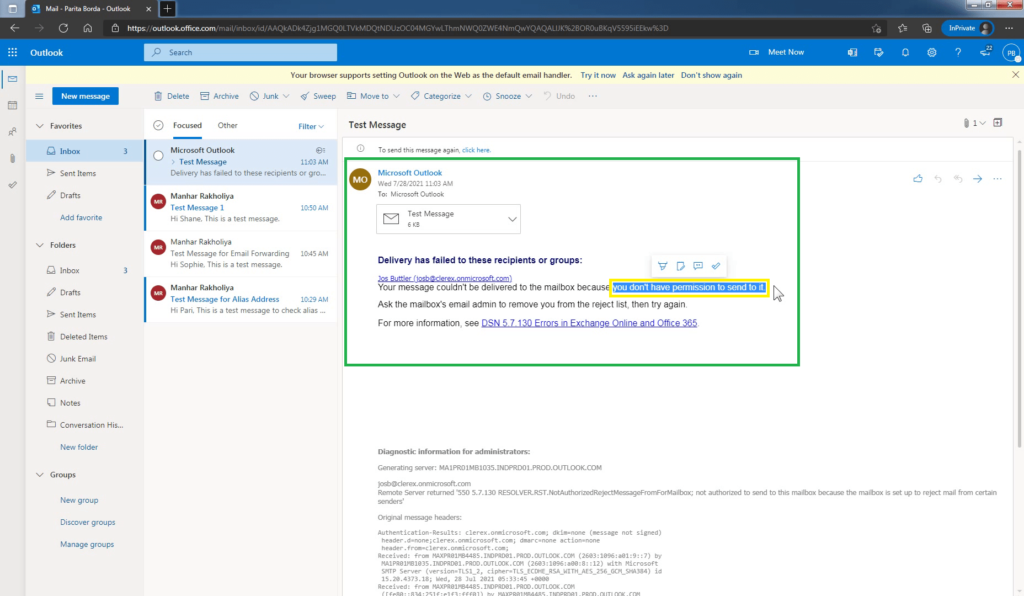
If we ignore the MailTips and go ahead and still send the message we will receive the following message that the delivery failed.
Use Exchange Online PowerShell to configure message delivery restrictions:
Let’s go ahead and look at how we can configure the same message delivery restrictions using the Exchange Management Shell.
This example configures the mailbox of “Jos Buttler” to reject messages from the user “Parita Borda”.
Set-Mailbox -Identity “Jos Buttler” -RejectMessagesFrom “Parita Borda”
Note: If you’re configuring a mailbox to reject messages from individual senders, you have to use the RejectMessagesFrom parameter. If you’re configuring a mailbox to reject messages from senders that are members of a specific distribution group, use the RejectMessagesFromDLMembers parameter.
Conclusion:
That’s it for this guide. In this post, you have learned the steps to configure message delivery restrictions for a Mailbox using Exchange Admin Center (EAC) and Exchange Management Shell (EMS). The process is quite easy to follow.
Let me know if this guide has helped you by leaving a comment about your experience. Please like and share this guide to help others.