
In this post, we will learn the steps on How to create a Public Folder Mailbox in Exchange 2019.
Why Public Folder Mailbox?
Before we can create a public folder in Exchange server 2019, we must first create a public folder mailbox. Public folder mailboxes contain the hierarchy information as well as the content for public folders.
Public Folder mailbox is stored in the Exchange Server mailbox database, where other mailboxes are also stored.
We can create and configure public folder mailbox using the Exchange Admin Center web interface or Exchange Management Shell (EMS). In this guide, we will use the Exchange Admin Center to create and set up the public folder mailbox.
Create a Public Folder Mailbox in Exchange 2019:
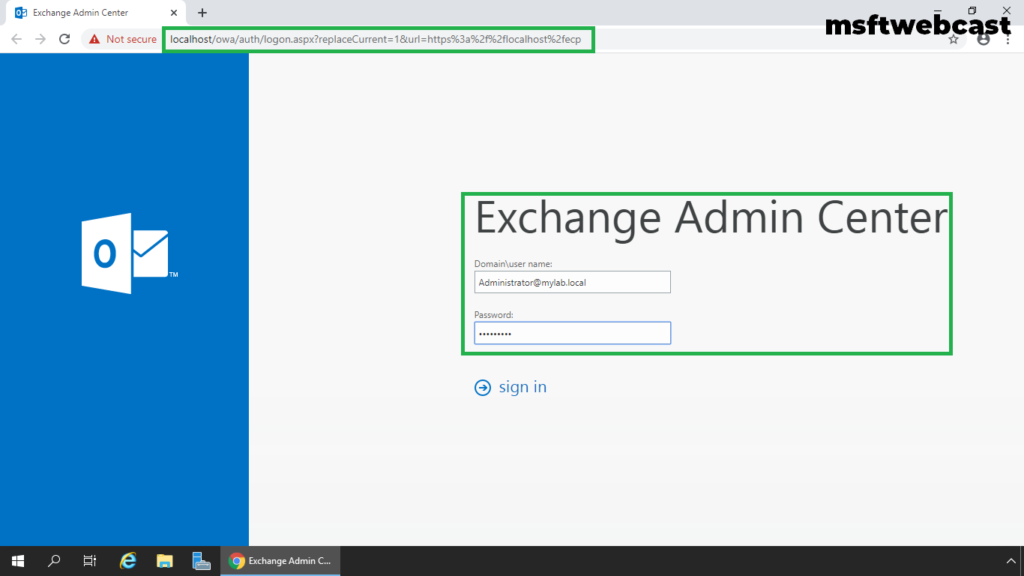
1. On Exchange 2019 Mailbox Server. Open Internet Explorer and type https://localhost/ecp, and then press Enter.
2. Sign in as an Administrator with the password.
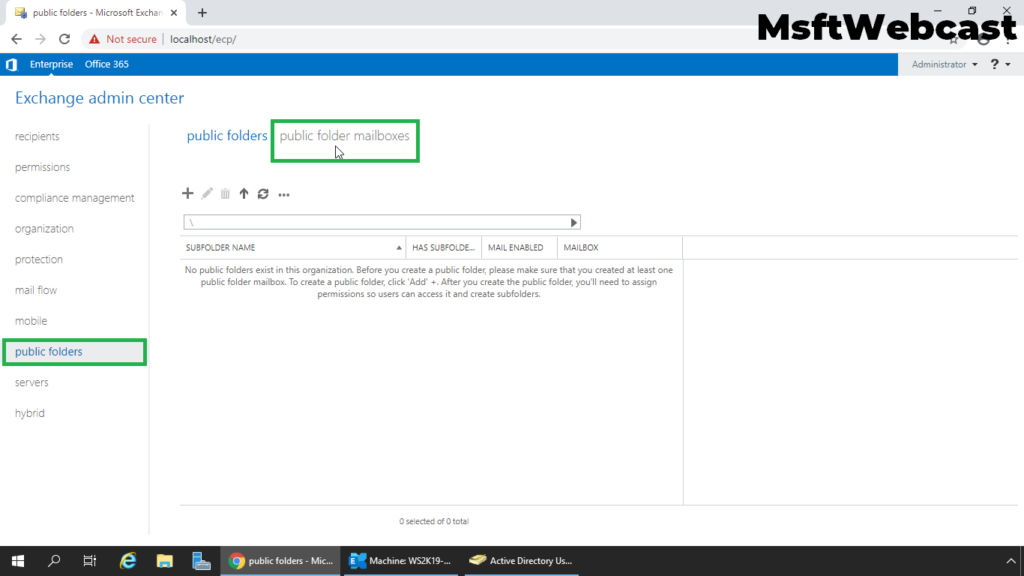
3. In the Exchange Admin Center web interface, navigate to Public Folders. Click on the public folder mailboxes tab.
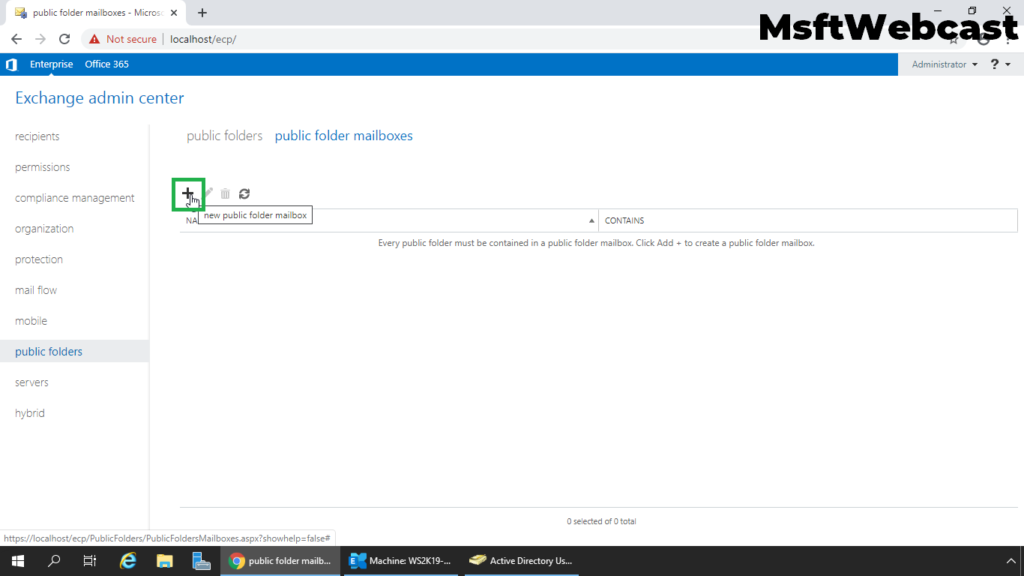
4. Click on + (plus) sign to create a new public folder mailbox.
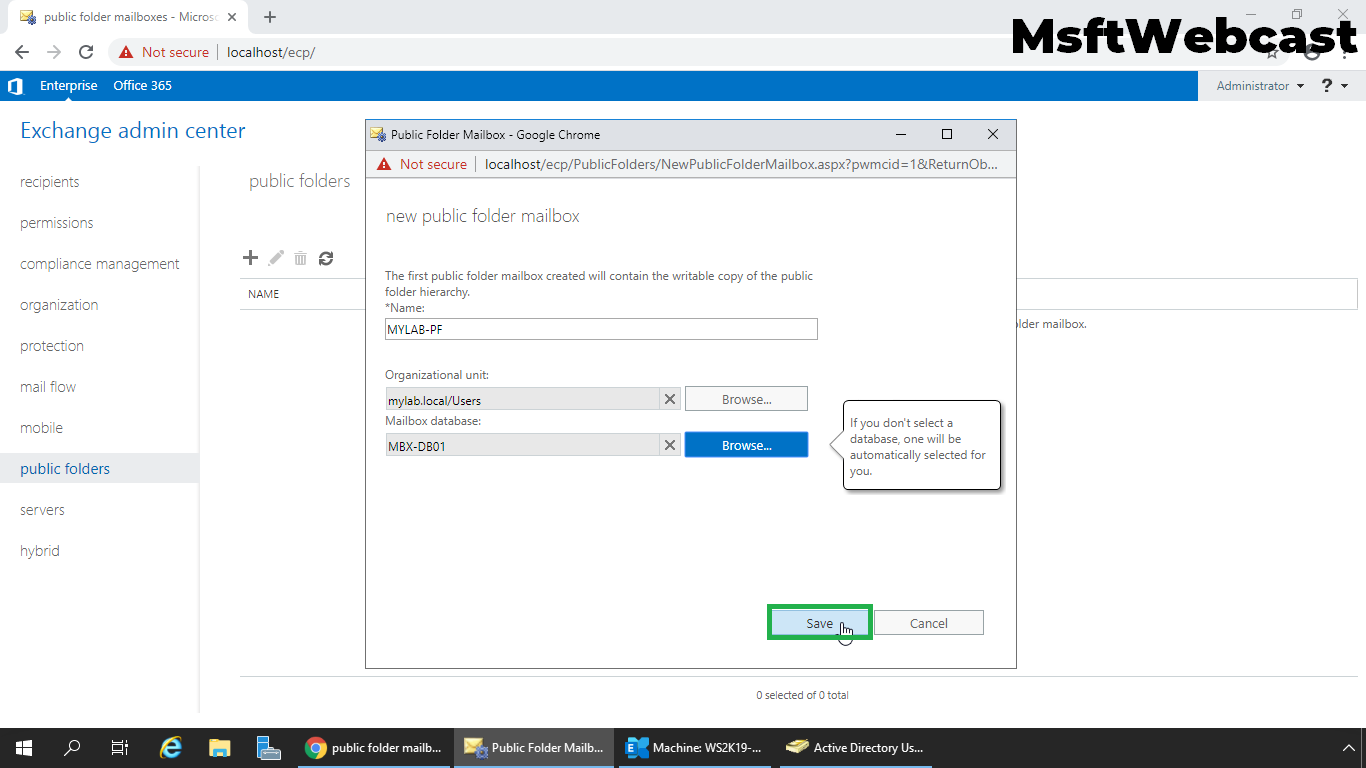
The new public folder page will pop up.
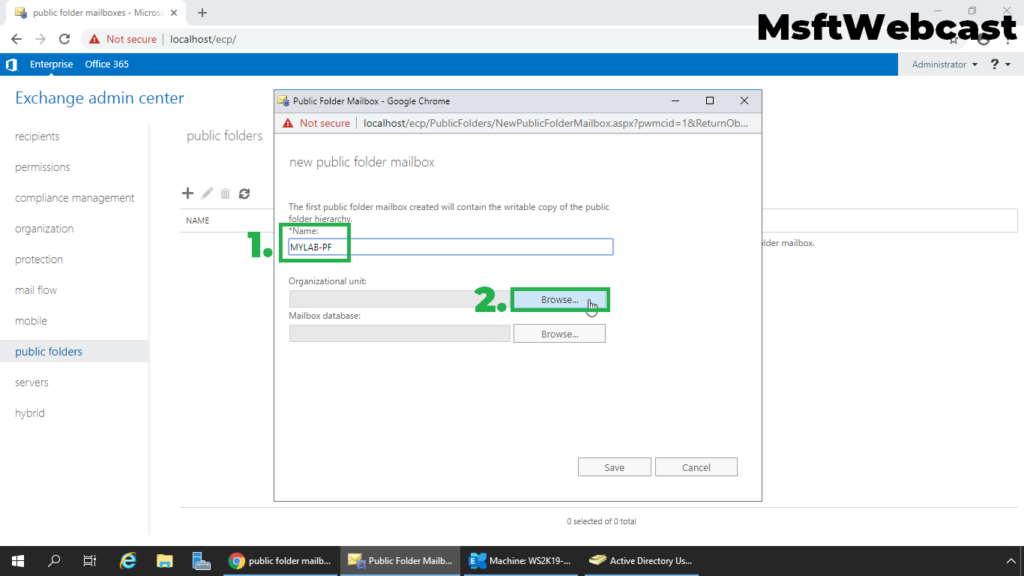
5. Type the name for the public folder mailbox. Click on the browse button.
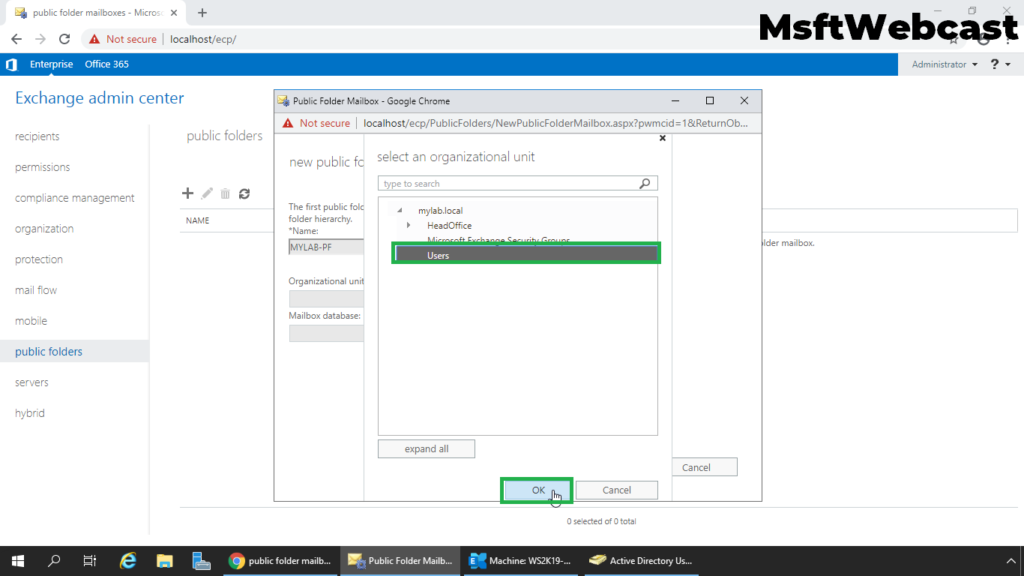
6. Select the OU to store the associated object and click on OK.
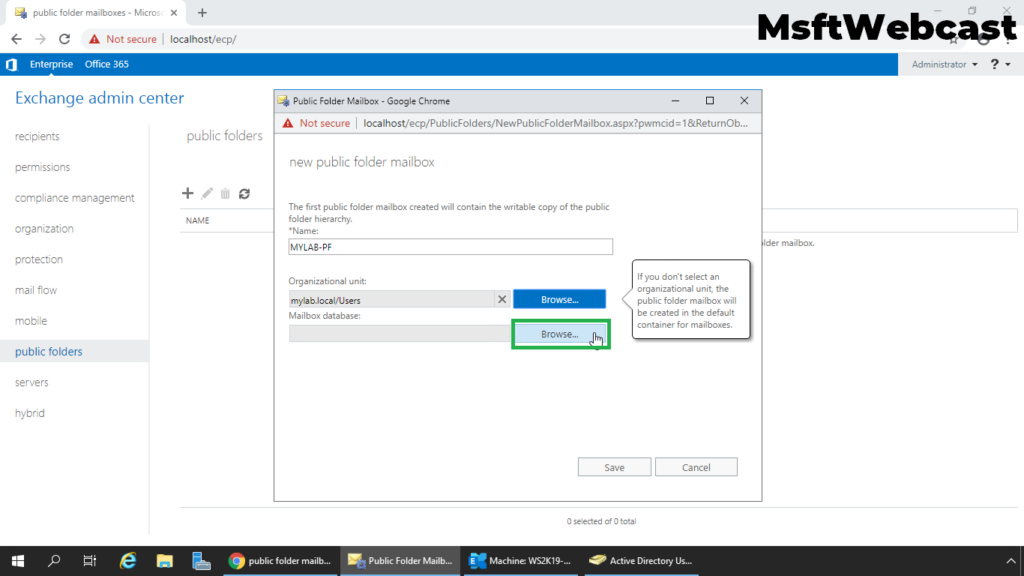
7. Click on the browse button to select the mailbox database to store the public folder mailbox.
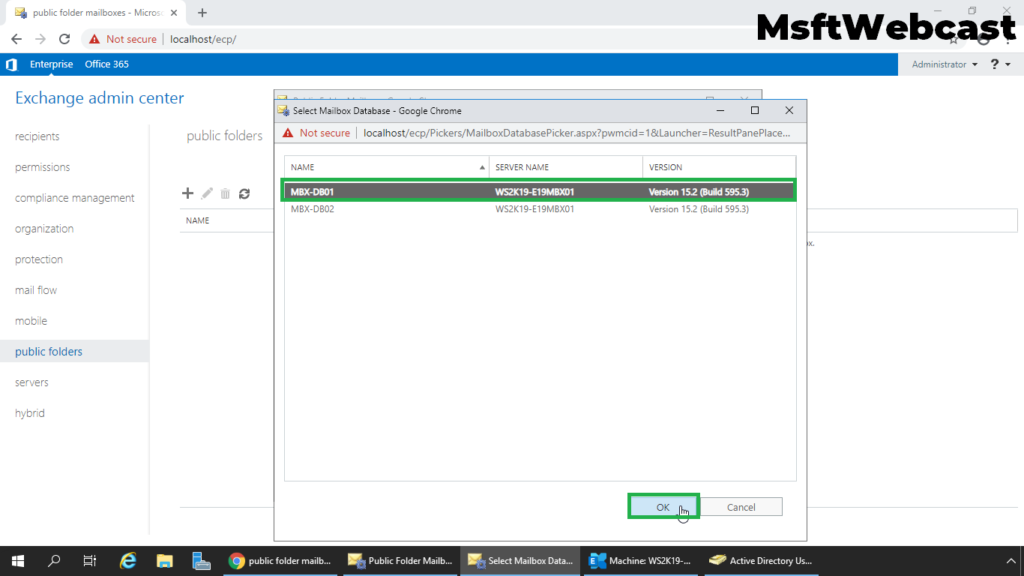
8. Select the mailbox database and click on OK button.
9. Click on Save when you are ready.
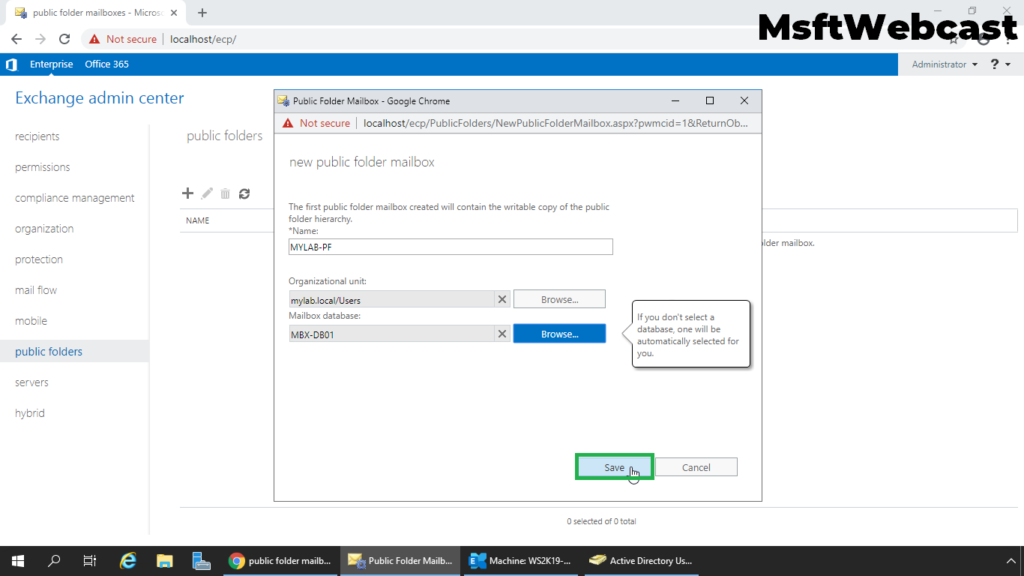
Note: It is a best practice to create a separate mailbox database for the public folder mailbox.
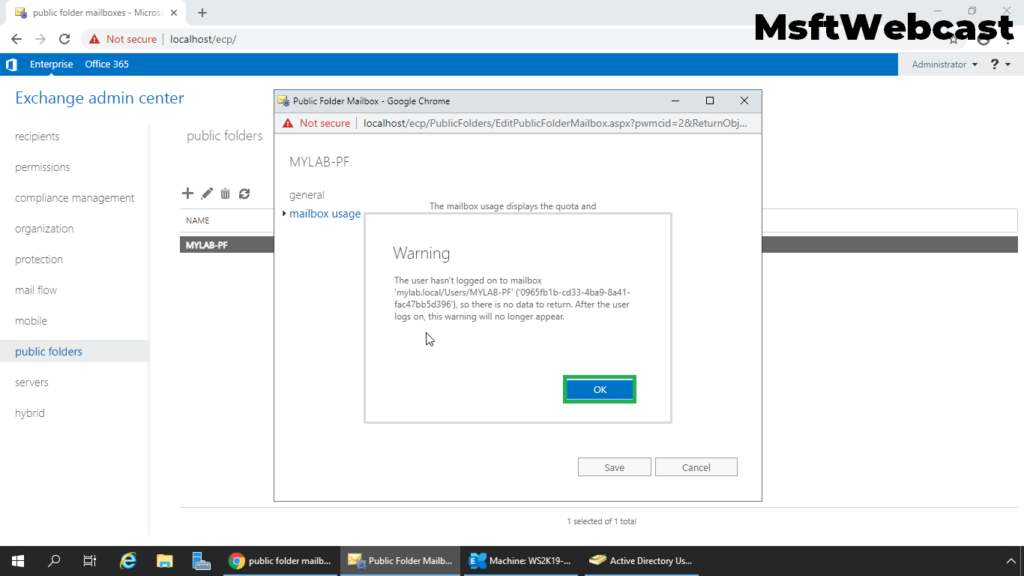
10. We can see the warning, click on OK.
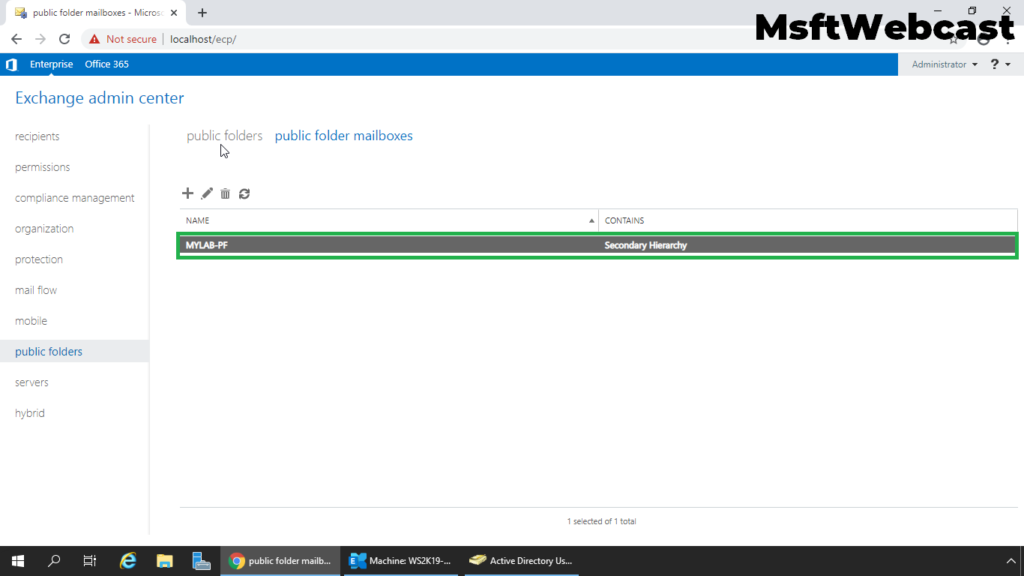
We can verify the first public folder mailbox with the status as the Primary Hierarchy in the Exchange Admin Center.
Now, we are ready to create a public folder in Exchange 2019.
Create a Public Folder in Exchange 2019:
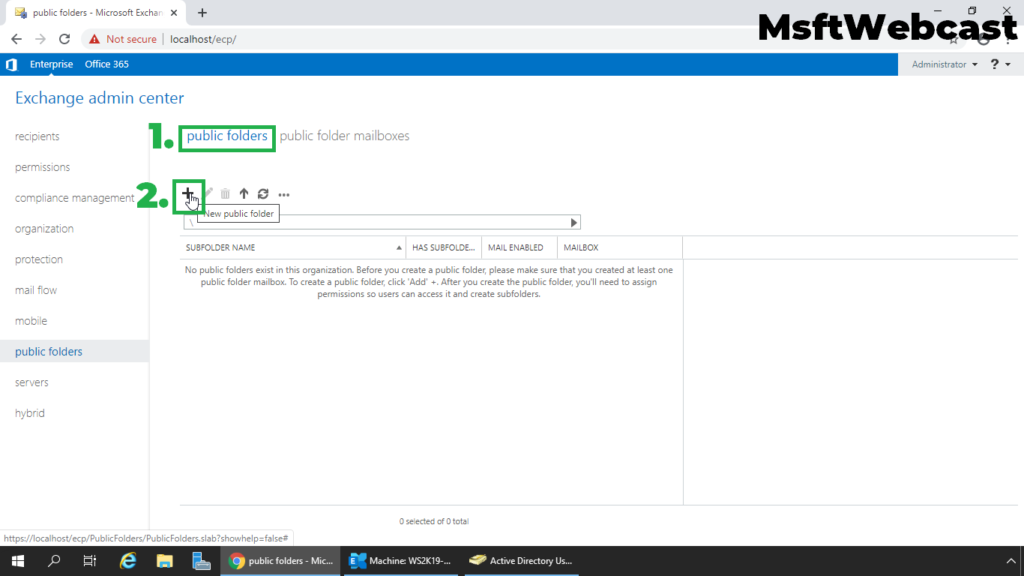
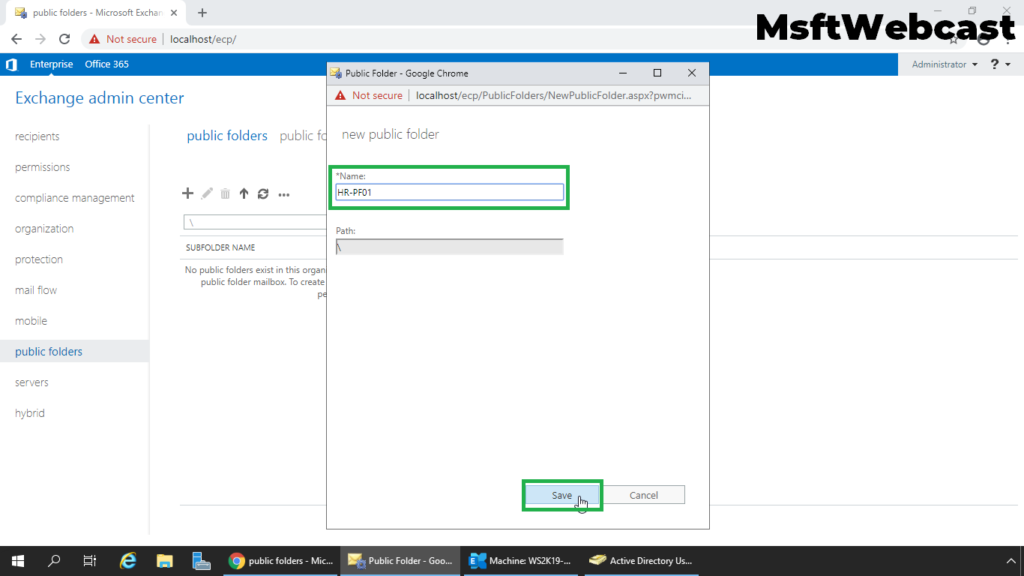
11. Navigate to Public Folders tab and click on + (plus) sign to create a new public folder.
12. Specify a new name to the public folder. Click the Save button.
We can verify the public folder in the Exchange Admin Center.
Create Child Public Folder:
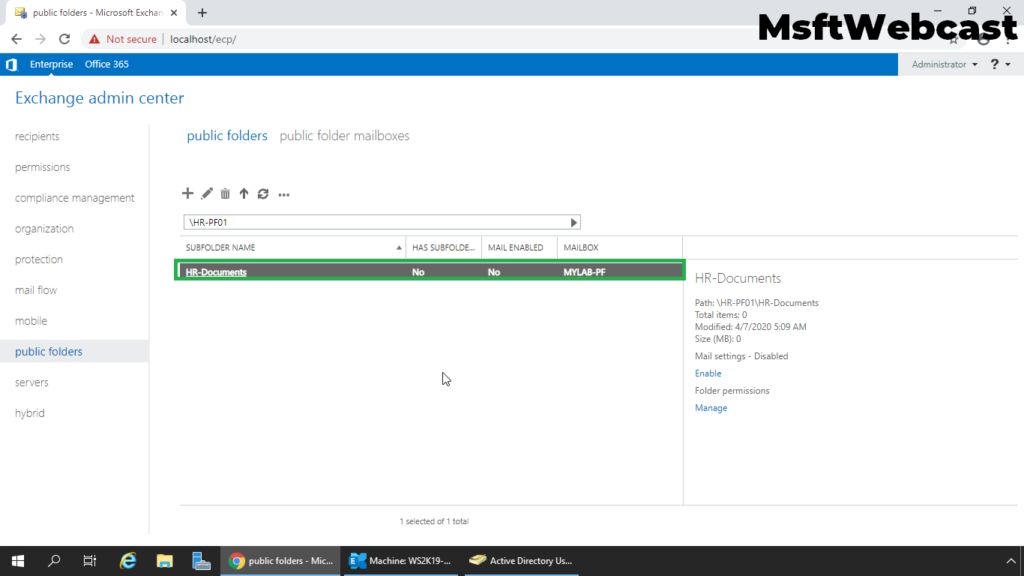
13. Select and double-click on the existing public folder.
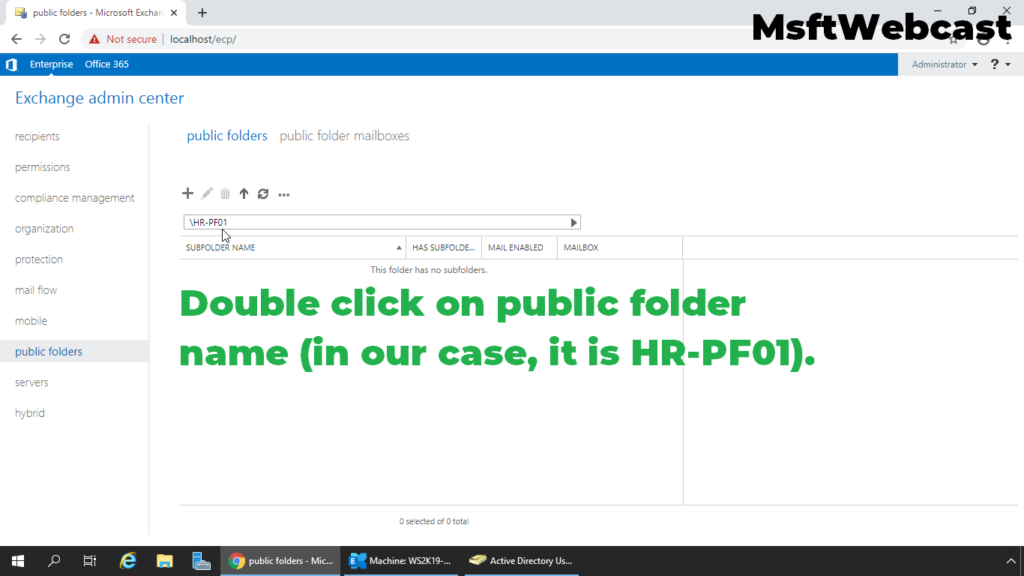
Verify the path has changed.
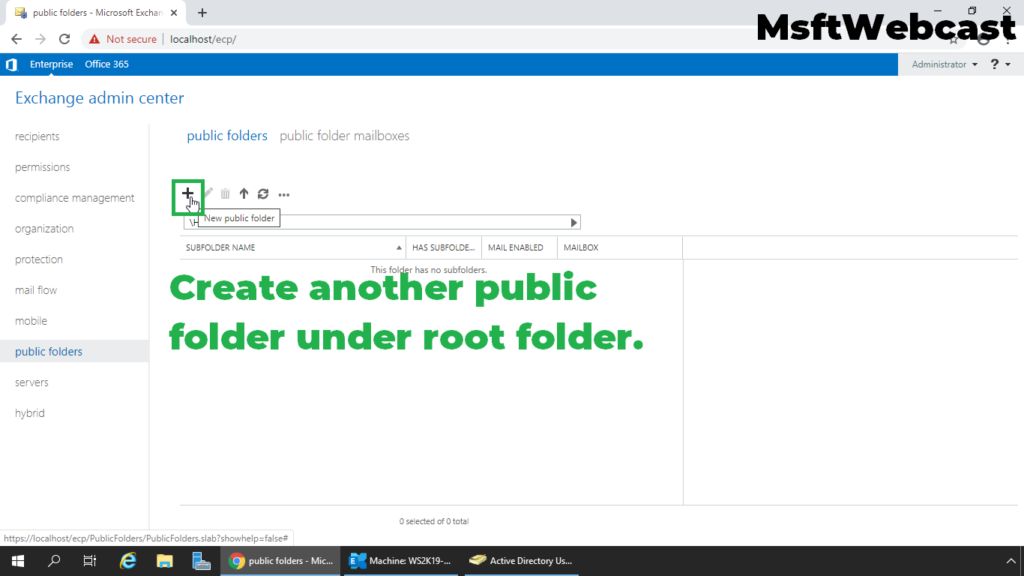
Now, let’s create a sub public folder.
14. Click on + (plus) sign to create child public folder.
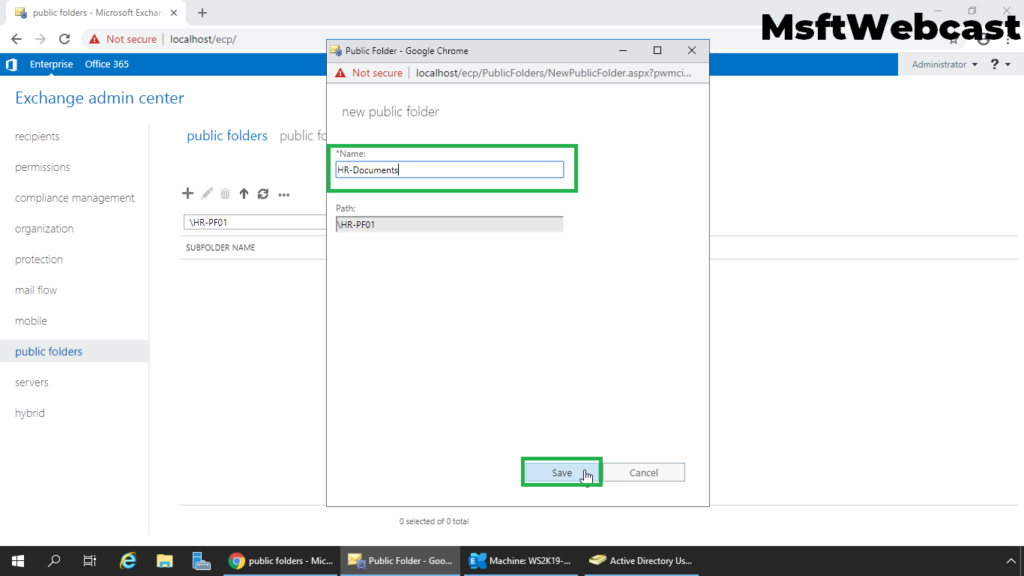
15. Type the name for this public sub-folder. Then click Save.
Verify the child public folder in Exchange Admin Center.
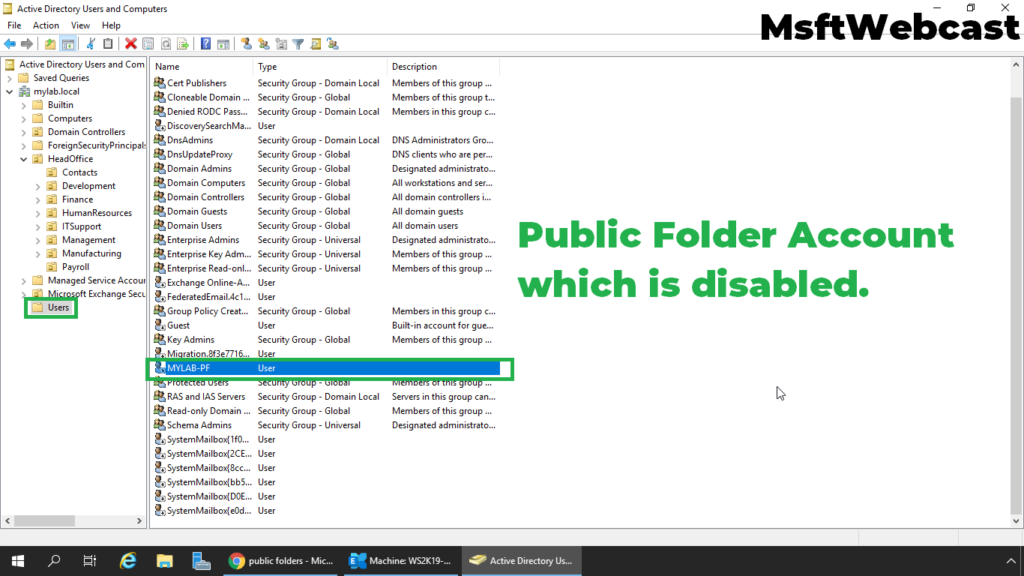
Verify associated AD object to Public Folder Mailbox in Active Directory Users and Computers snap-ins.
In this way, we can create public folder mailboxes and public folder hierarchy in Exchange 2019.
In the next post, we will learn the steps to create a mail-enabled public folder with permission in Exchange 2019.
Related Articles:
1 Comment
Leave a Reply
You must be logged in to post a comment.
[…] 2 days ago 3 min read […]