In this post, we will learn the steps on how to connect a Disabled Mailbox in Exchange 2019. We will also see the steps on how to connect deleted mailbox to new or existing user account in Exchange 2019.
When we disable a mailbox, Exchange retains the mailbox in the mailbox database and switches the mailbox to a disabled state.
The Exchange attributes are also removed from the corresponding user account, but the user account is retained in Active Directory.
The mailbox is retained until the deleted mailbox retention period expires, which is 30 days by default, and then it’s permanently deleted from the mailbox database.
Until a disabled mailbox is permanently deleted from the Exchange mailbox database, we can use the Exchange Admin Center or the Exchange Management Shell to reconnect it to the original Active Directory user account.
In the last post on how to delete or disable mailbox in Exchange 2019, we have disabled Mailbox for Active Directory User name “George Martin”. We will connect the disabled mailbox to the same user account.
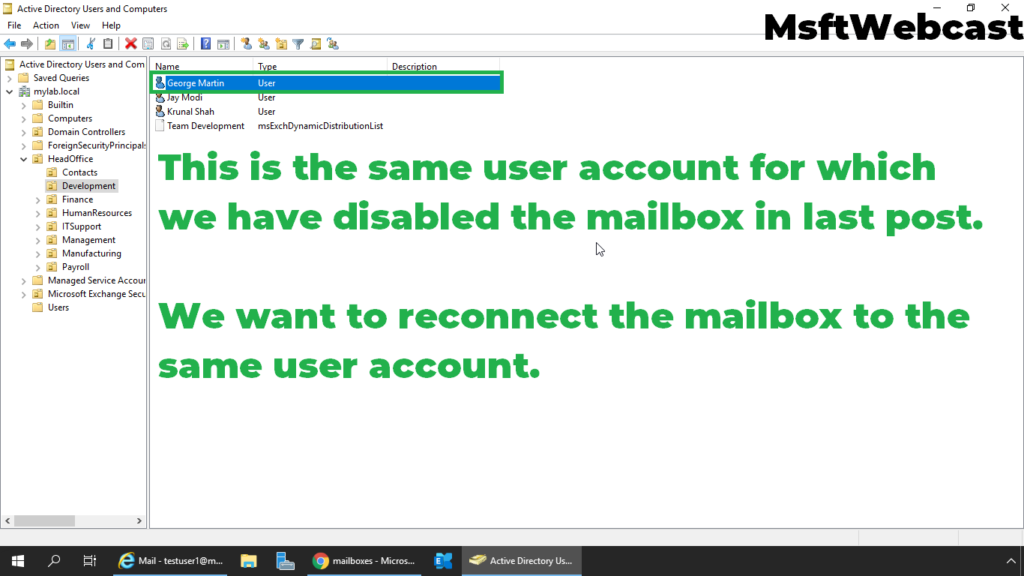
How to connect a Disabled Mailbox in Exchange 2019:
On Exchange 2019 Mailbox Server.
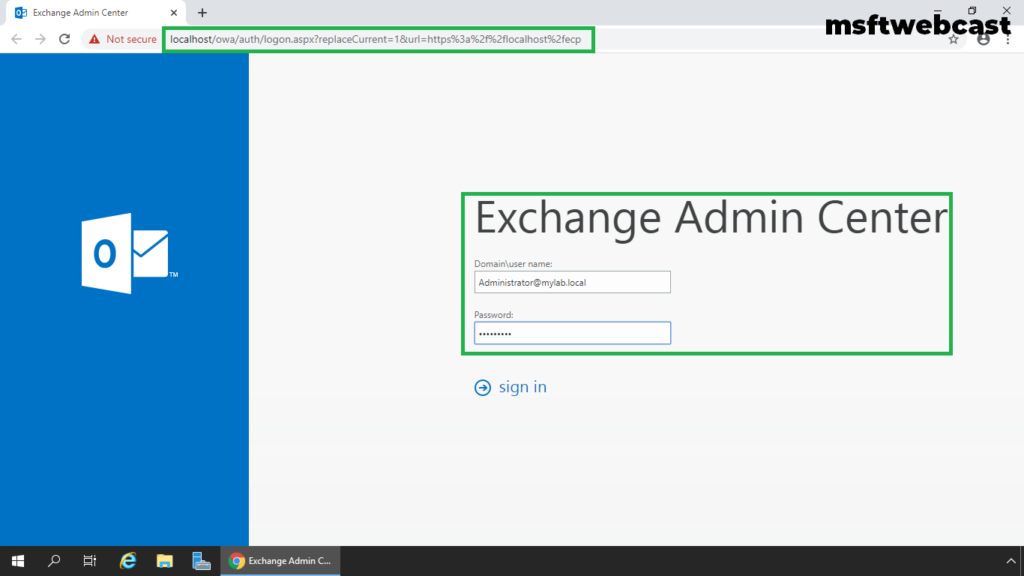
1. Open Internet Explorer and type https://localhost/ecp, and then press Enter. Sign in as an Administrator with the password.
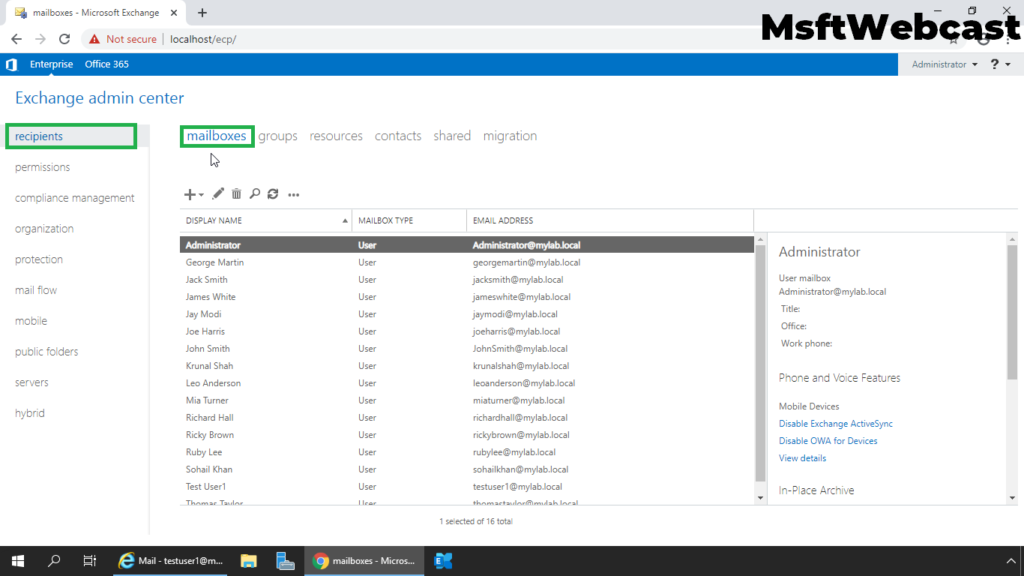
2. In the Exchange Admin Center web interface, navigate to Recipients. Click on the Mailbox tab.
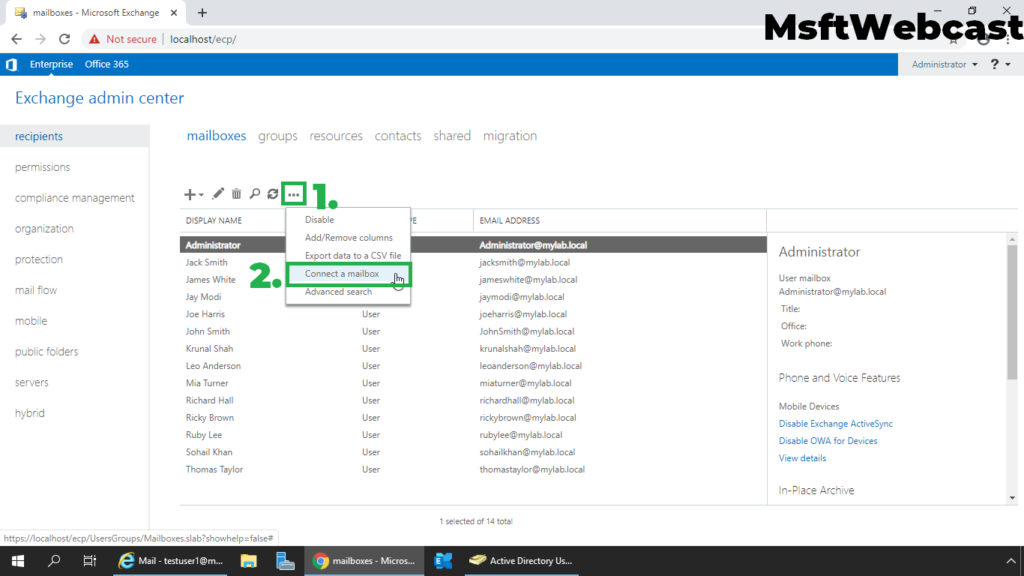
3. Click on More (three dots), and then click on Connect a mailbox option.
4. A list of mailboxes that are disconnected on the selected Exchange server in your Exchange organization will be displayed.
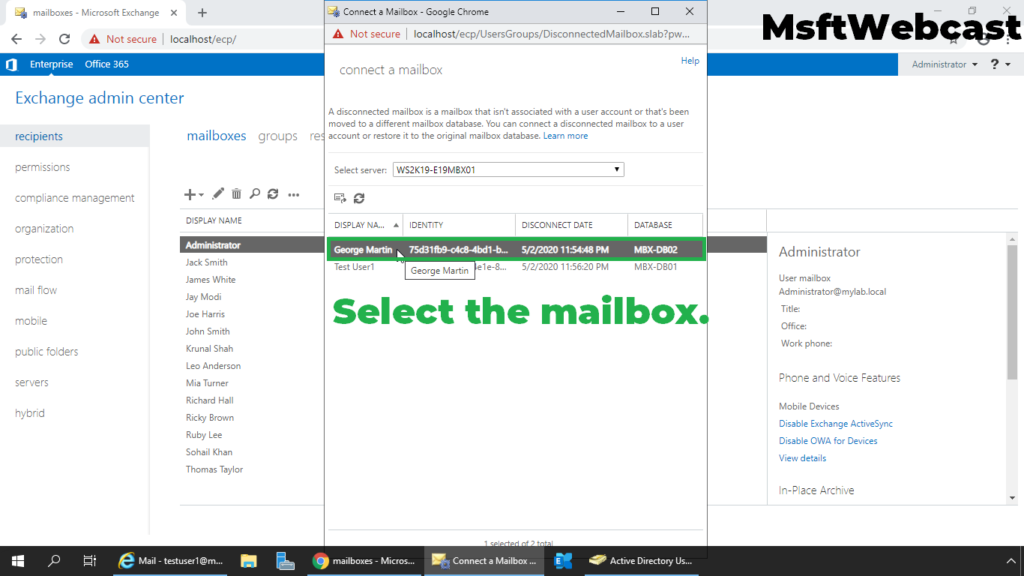
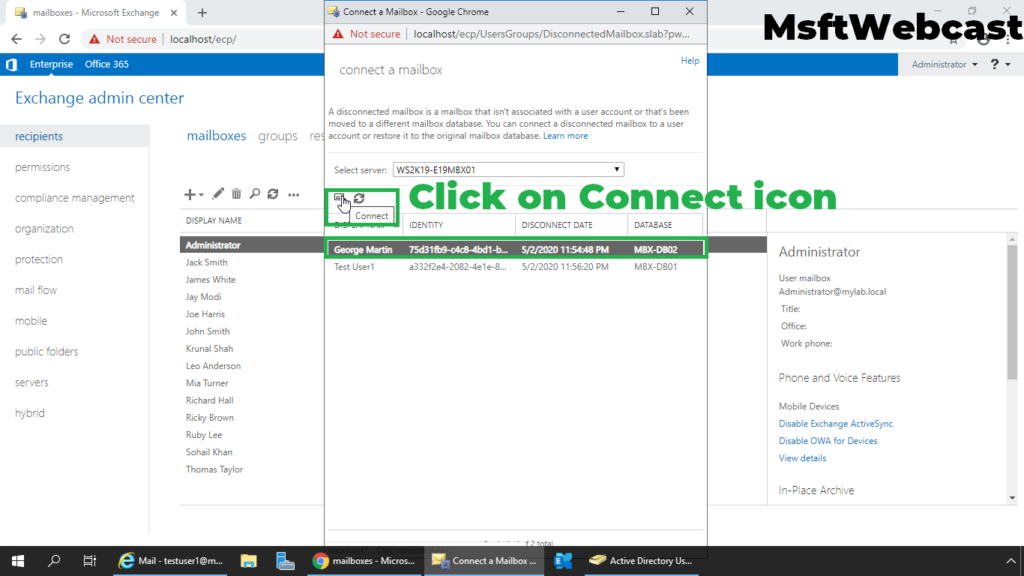
5. Click the disabled mailbox that you want to reconnect, and then click Connect.
6. Click Yes on the confirmation window to reconnect the disabled mailbox.
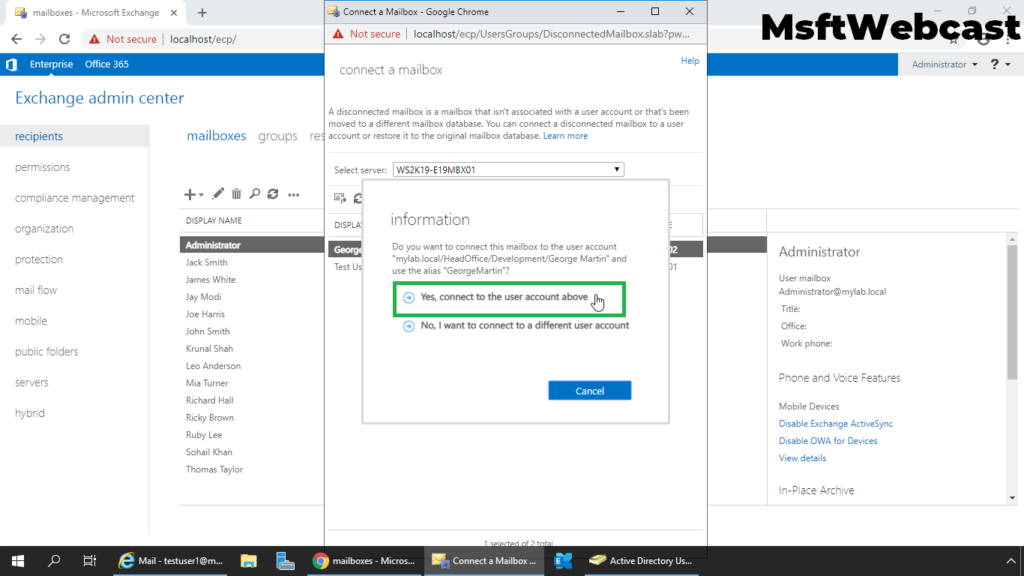
Exchange 2019 will reconnect the disabled mailbox to the corresponding user account from the active directory.
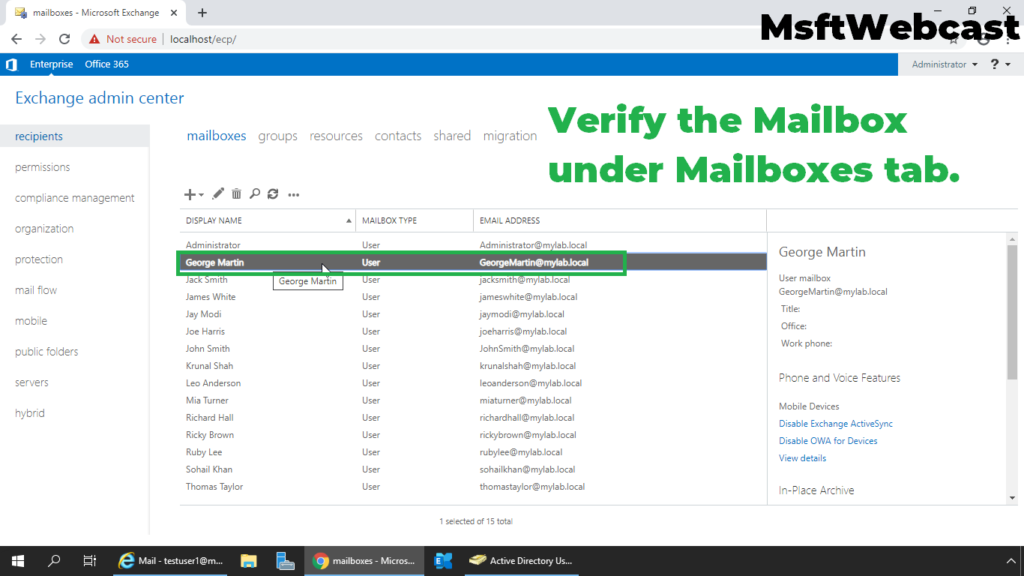
7. We can verify the user mailbox in Exchange Admin Center.
How to Reconnect Deleted User Mailbox in Exchange 2019:
We can connect deleted mailbox to existing AD user account before the deleted mailbox retention period expires, which is 30 days by default, and then it’s permanently deleted from the mailbox database.
For this guide, I have created a new AD user account named “Test User1”. We will connect deleted mailbox (of Test User2) to the “Test User1”.
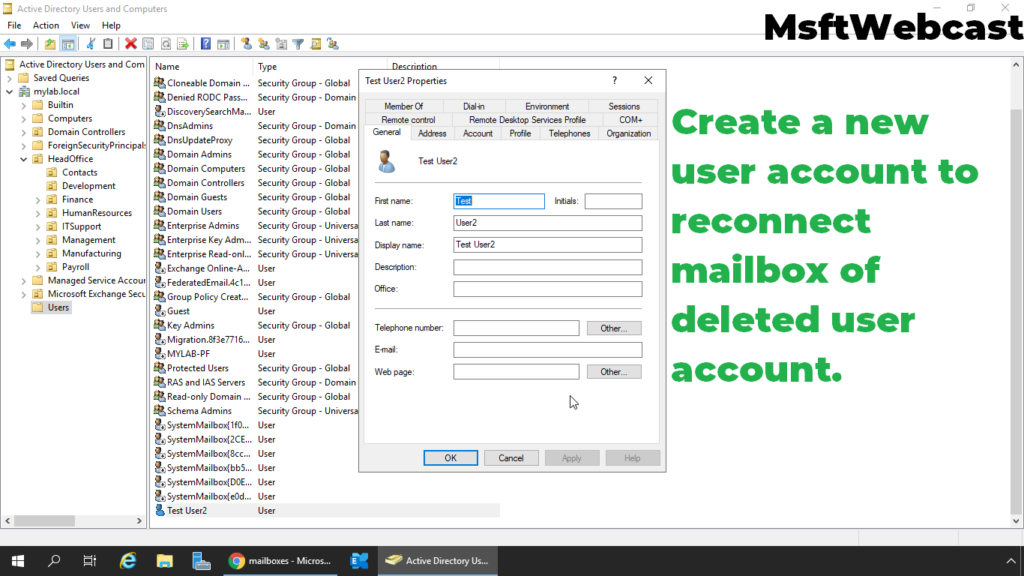
8. In the Exchange Admin Center web interface, navigate to Recipients. Click on the Mailbox tab.

9. Click on More (three dots), and then click on Connect a mailbox option.
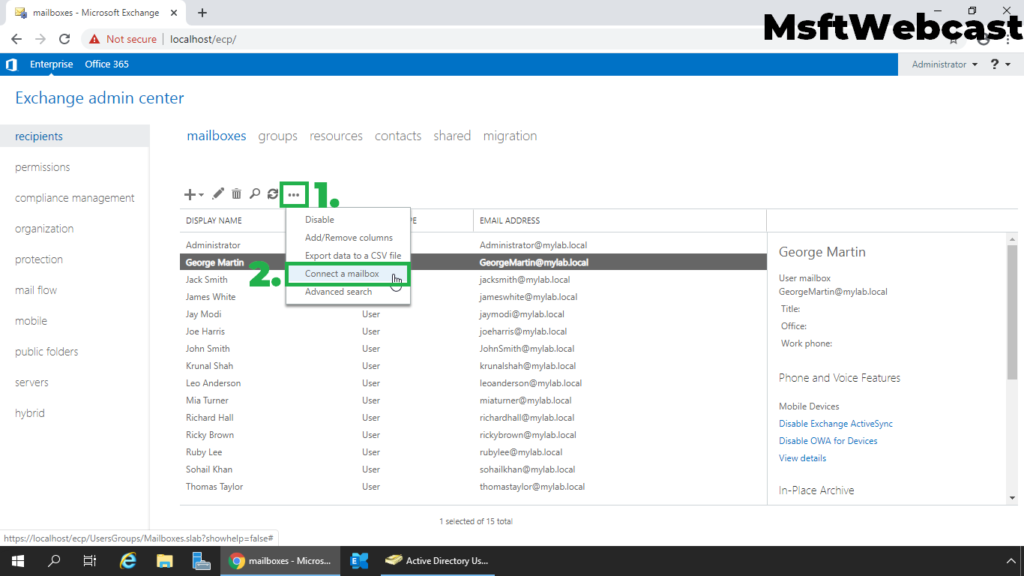
10. Click the disabled mailbox that you want to reconnect, and then click Connect.
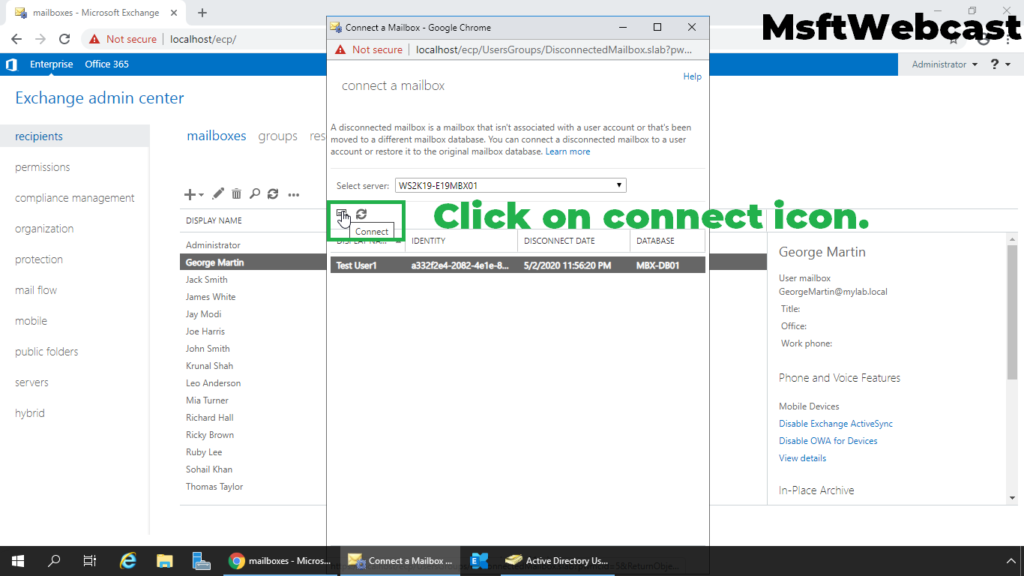
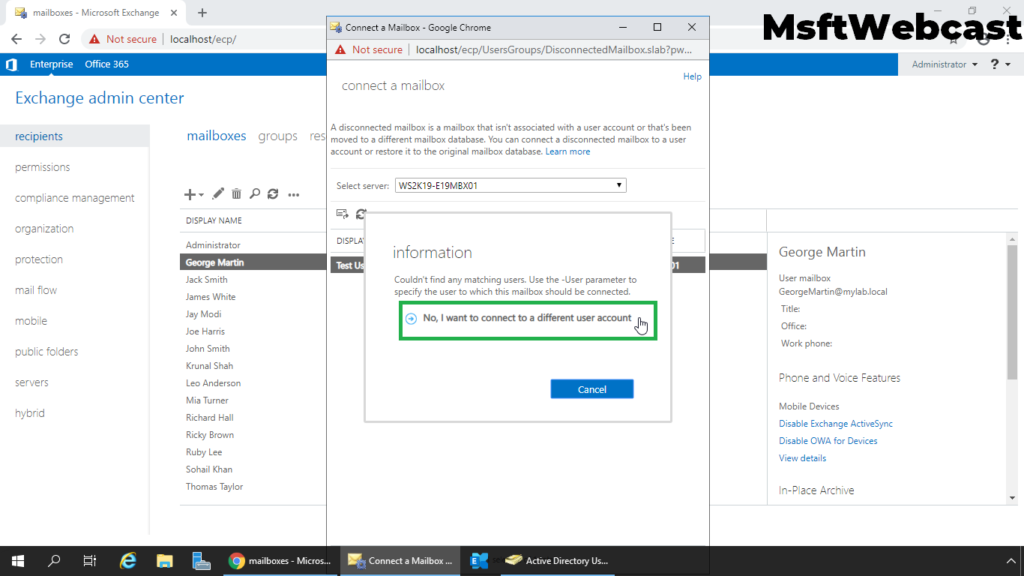
11. Click on “No, I want to connect to a different user account option”.
12. Select User Mailbox as a type of mailbox and click Next.
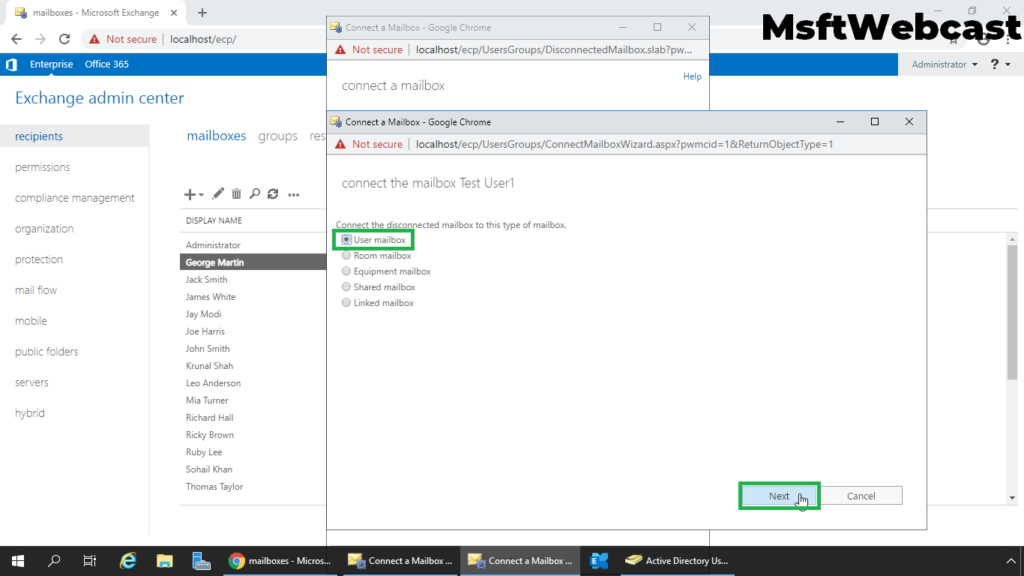
13. Click on Browse to select the existing user account.
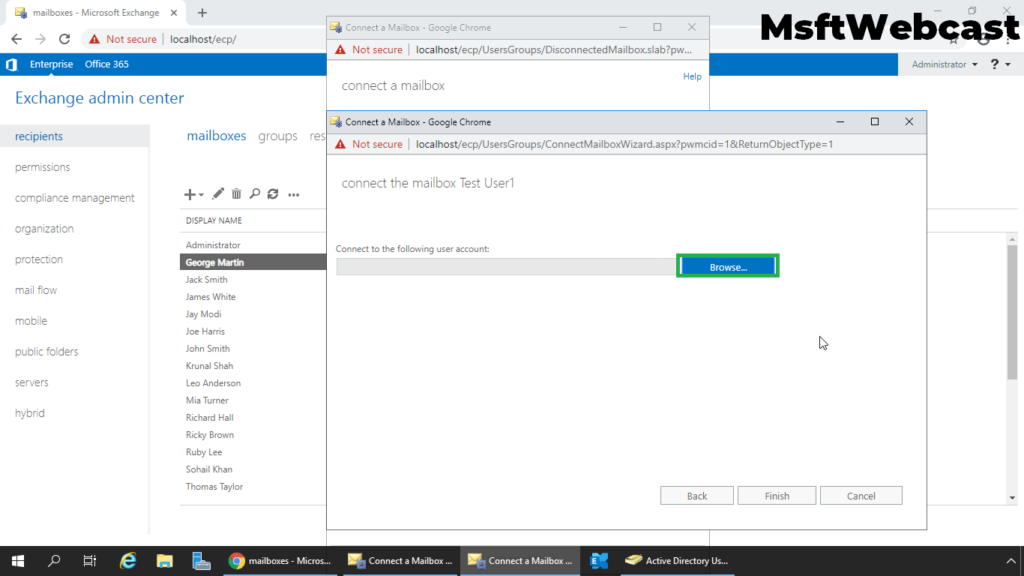
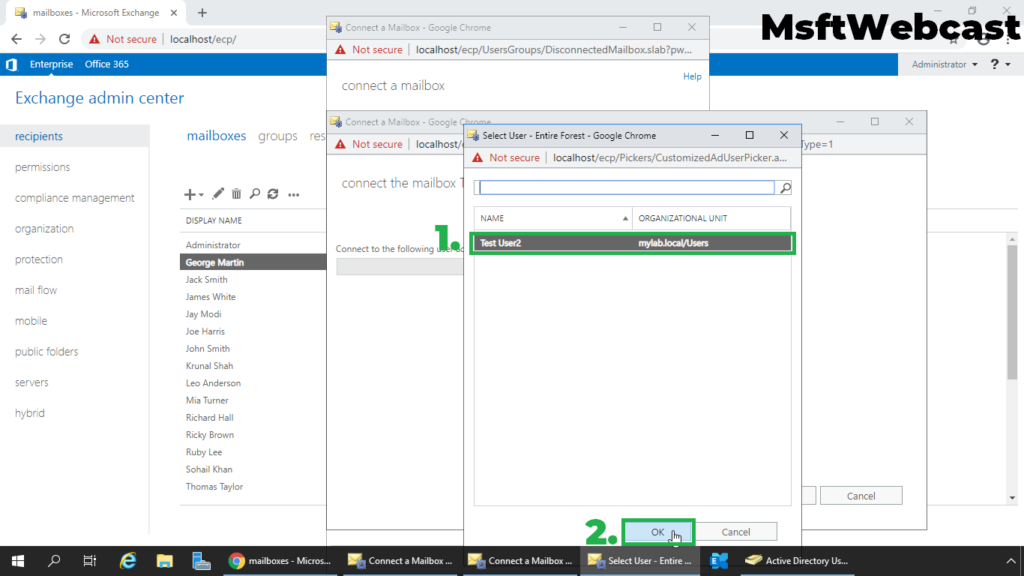
14. Select the user account and click OK.
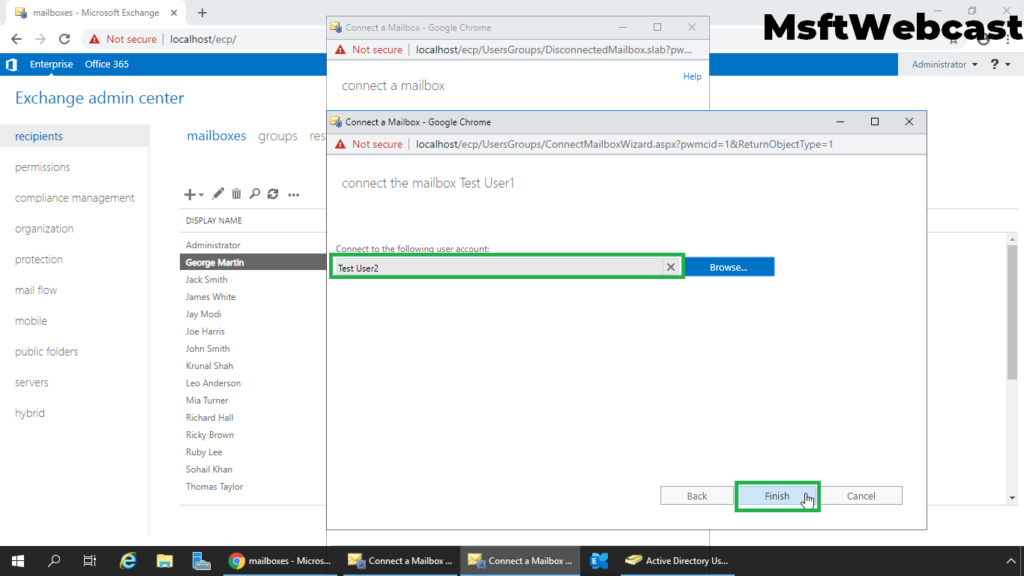
15. Verify the correct user account is selected. Click on Finish to connect user account to deleted mailbox.
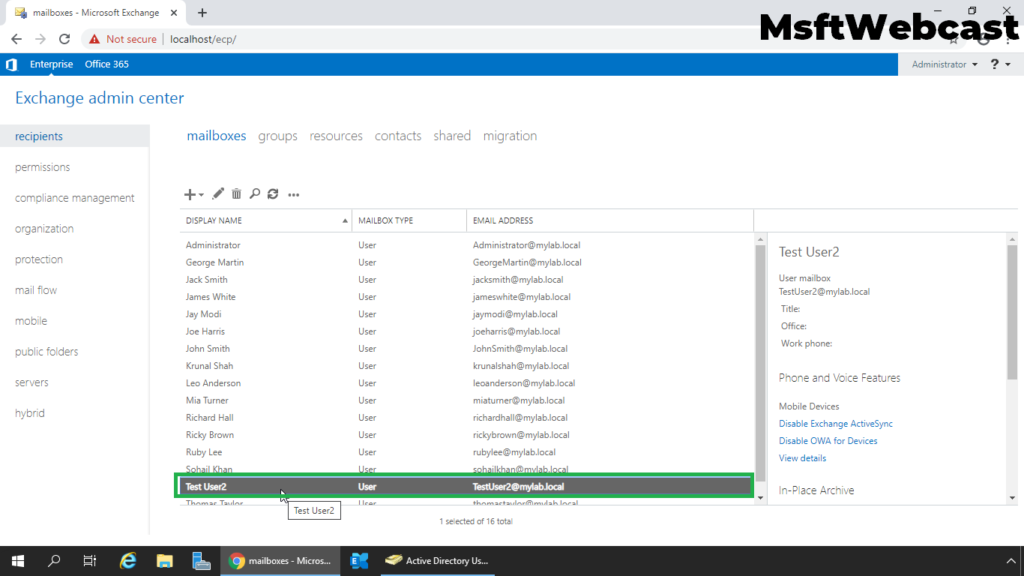
16. We can verify the user mailbox in Exchange Admin Center.
Verify the Old Message by Accessing Mailbox:
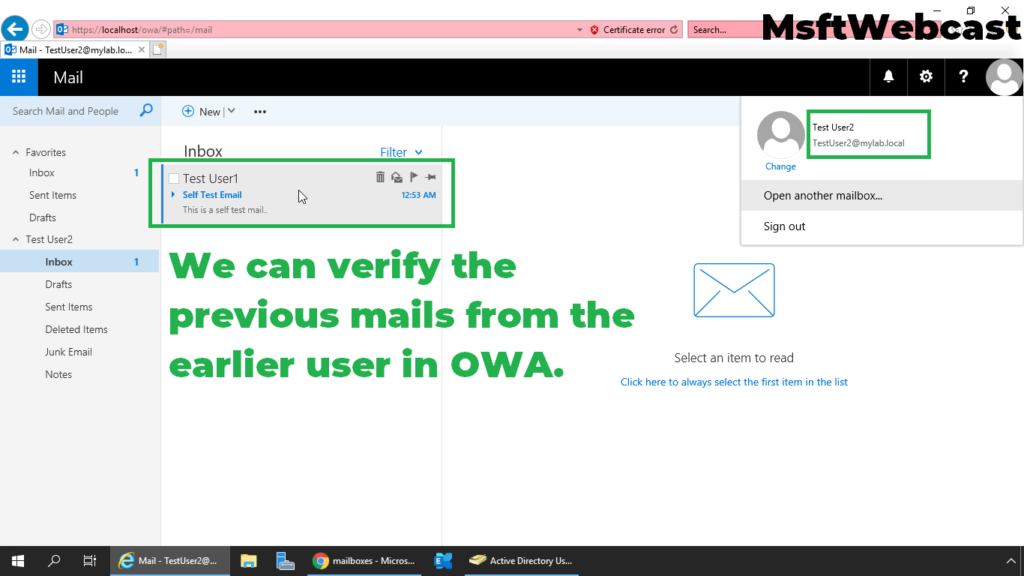
17. Login to Outlook Web Access.
18. We can see the old messages from the earlier user.
That’s all for this guide.
In this article, we have learned the steps to reconnect the disabled mailbox to the corresponding user account in Exchange 2019.
Related Articles:
- How to Configure Email Forwarding for a Mailbox Exchange 2019
- Configure Message Delivery Restrictions for a Mailbox in Exchange 2019
- Disable or Delete a Mailbox in Exchange 2019


