
Introduction:
In CCNA, we have learned about IP Routing and routing protocols. Routing is the process of transferring data from one network to another by selecting the best path from all available paths.
We can use a device called router to route traffic between two subnets or networks. For small networks, we can use a Windows server 2019, to perform the IP forwarding and LAN routing.
In this post, we will learn the steps to configure LAN Routing in Windows Server 2019.
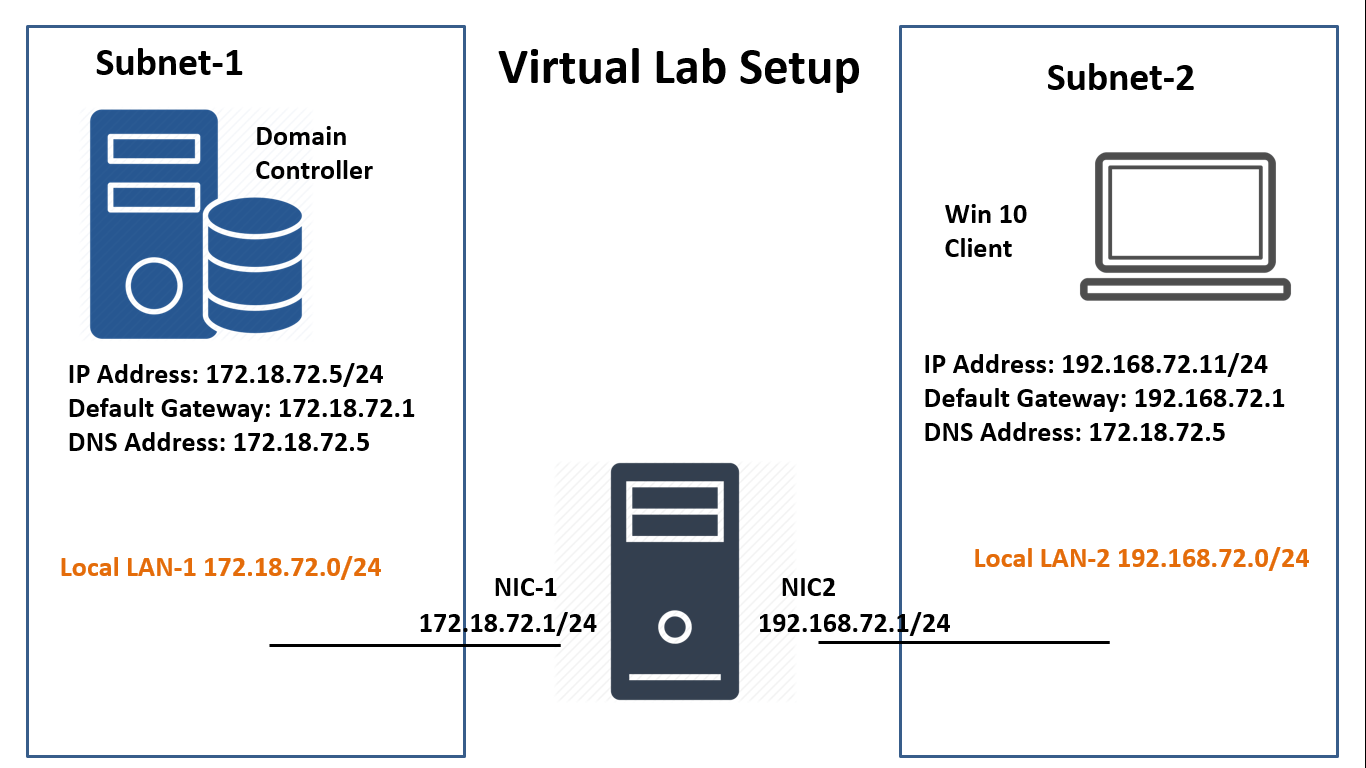
Understand the Test Lab for LAN Routing:
Note: For this guide, we will use the test lab created in VirtualBox.
- WS2K19-DC01: Domain Controller with DNS. (172.18.72.5/24)
- WS2K19-SRV02: Server 2019 with 2 NICs (NIC-1 with IP 172.18.72.1/24 and NIC-2 with 192.168.72.1/24)
- WS10-1903: Windows 10 client machine. (192.168.72.5/24)
Look at the below image for complete IP configuration details for all VMs.

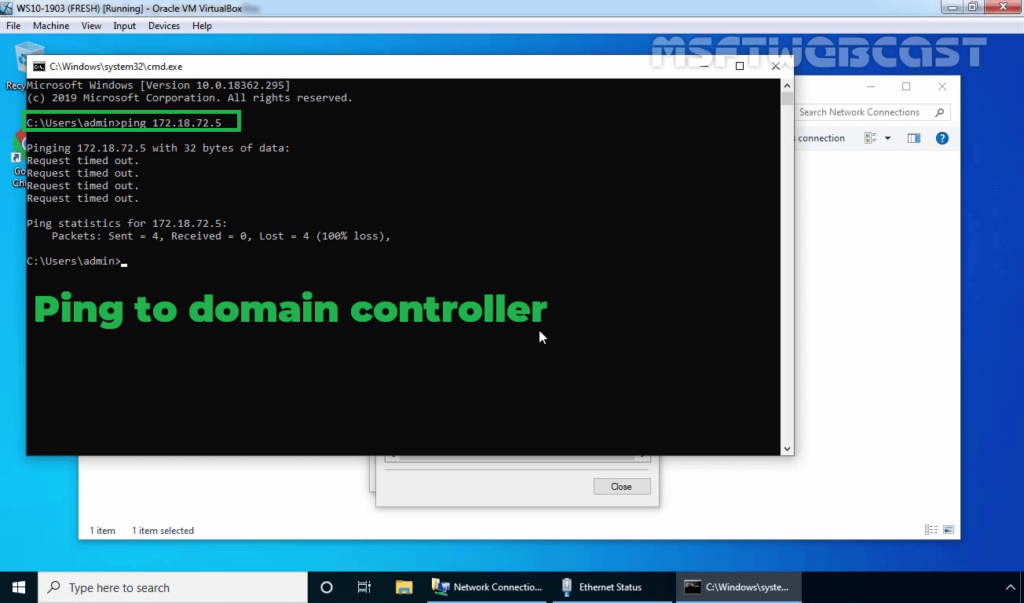
Before we start configuration, check ping from Windows 10 machine to Domain Controller. (Ping 172.18.72.5)
Install LAN Routing service on Windows Server 2019:
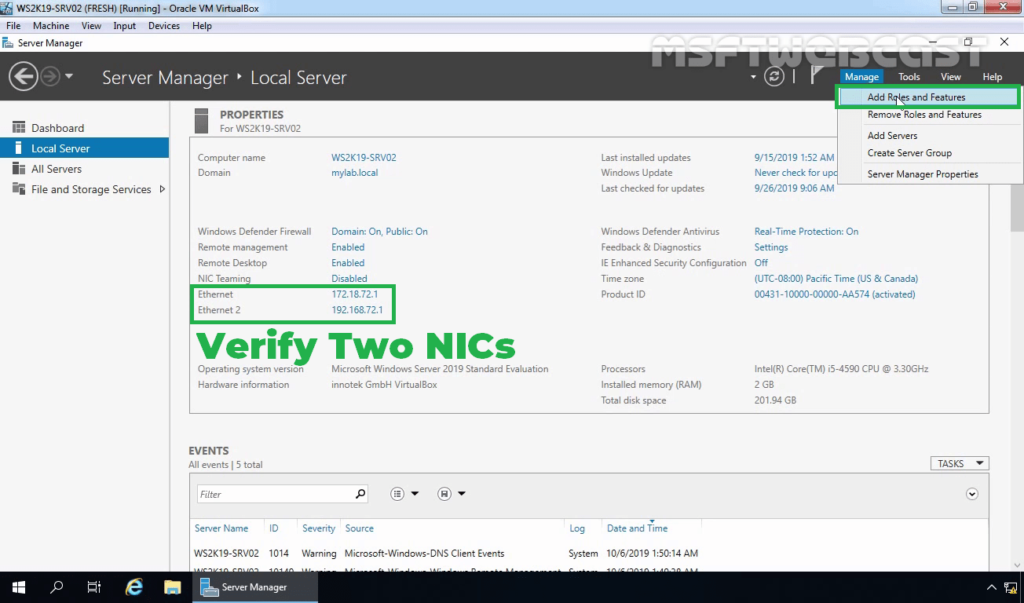
The LAN routing role service is part of the Remote Access server role. Let’s install the Remote Access server role on the WS2K19-SRV02 server. Open Server Manager Console.
1. Click on Manage and select Add Role and Features.
2. On the Before you begin page, click Next.

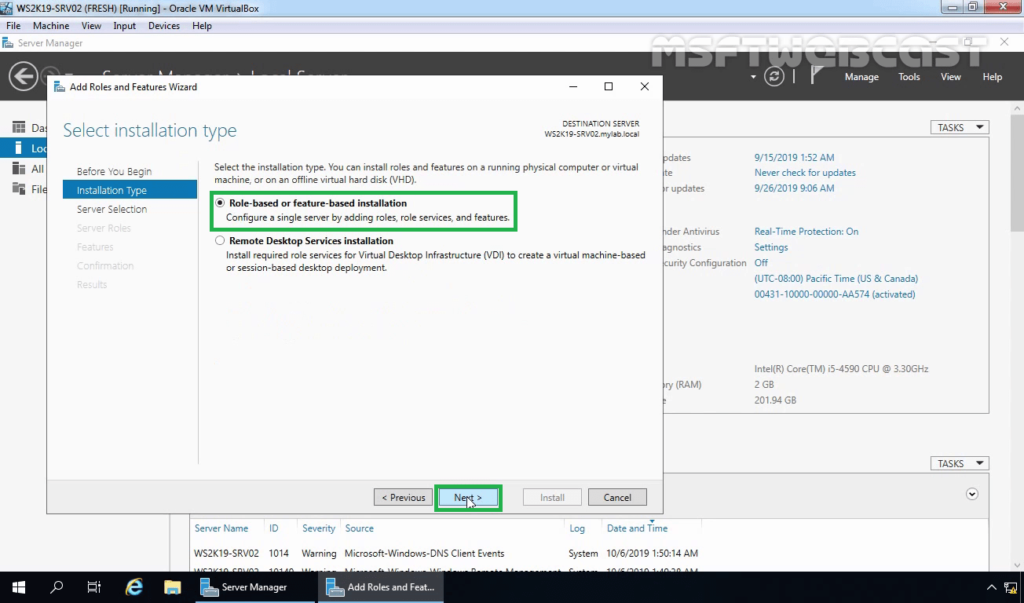
3. Select Role-based or feature-based installation and click Next.
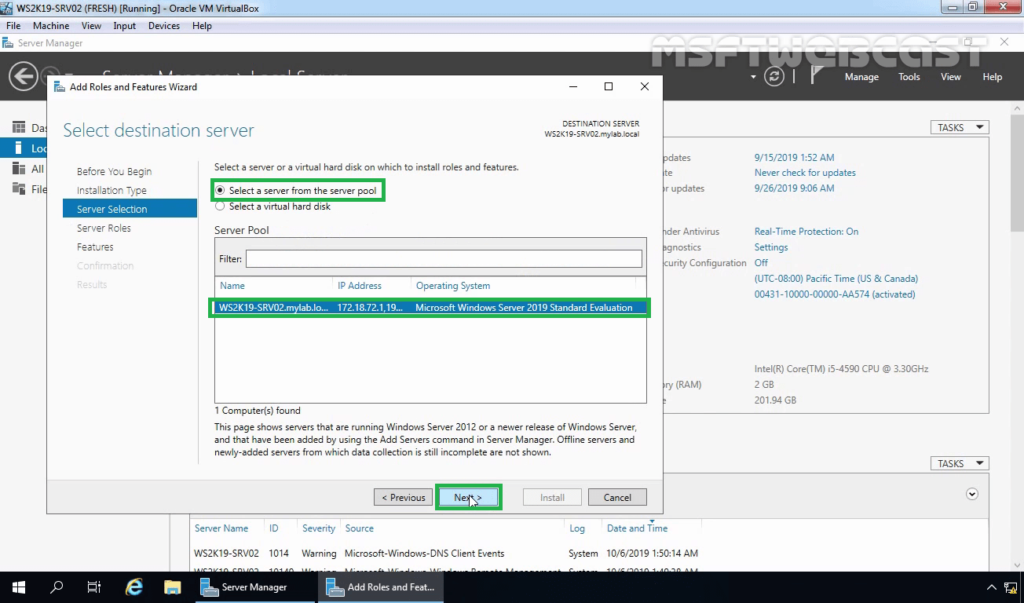
4. Select a server from the server pool on which you want to install the Remote Access Service role, click Next.
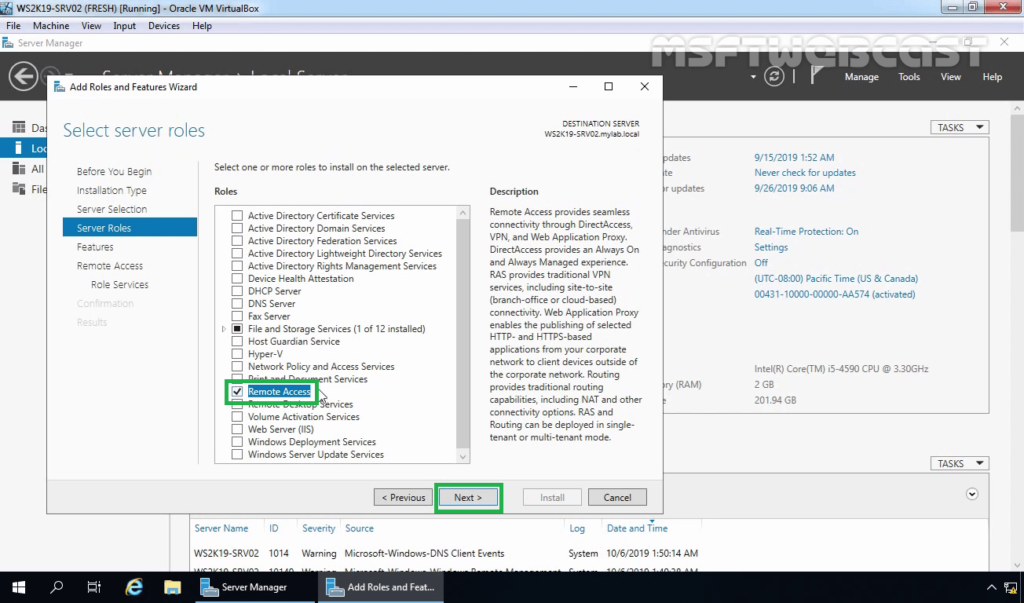
5. On select server roles page, select the Remote Access Service checkbox. Click Next.
6. On select features, click Next.
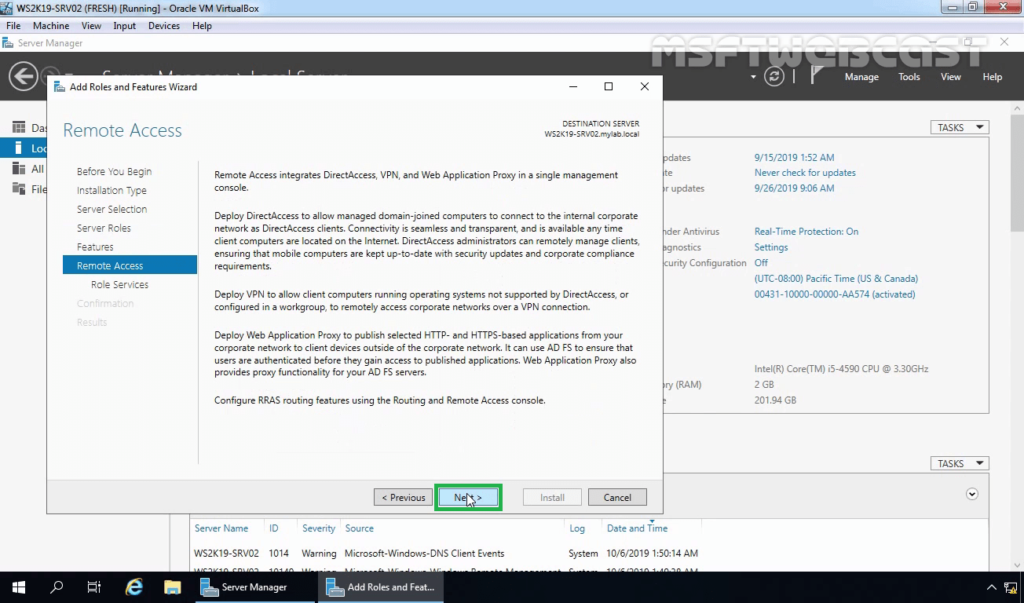
7. Read overview information about Remote Access Services and click Next.
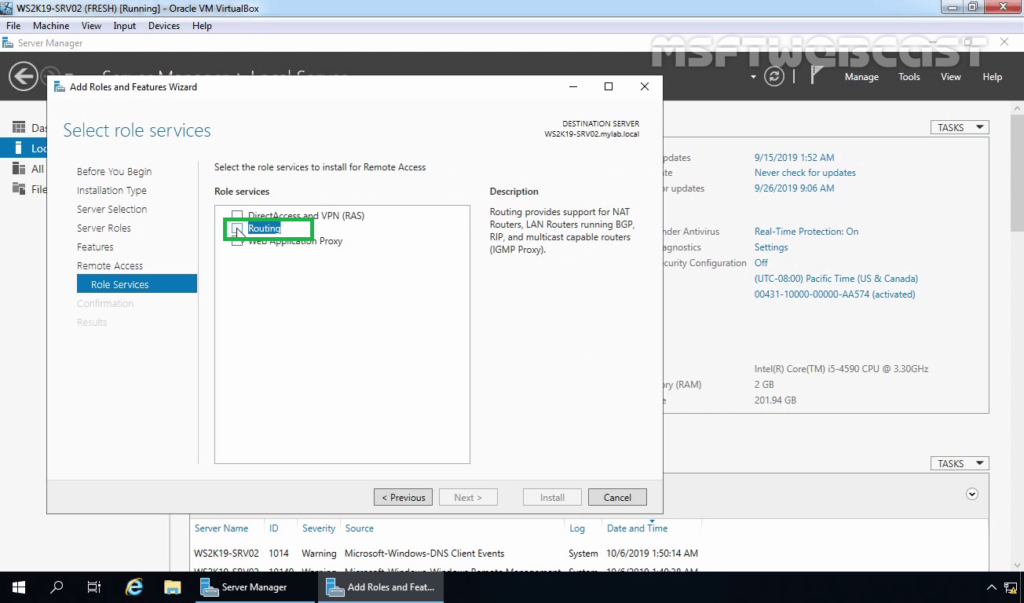
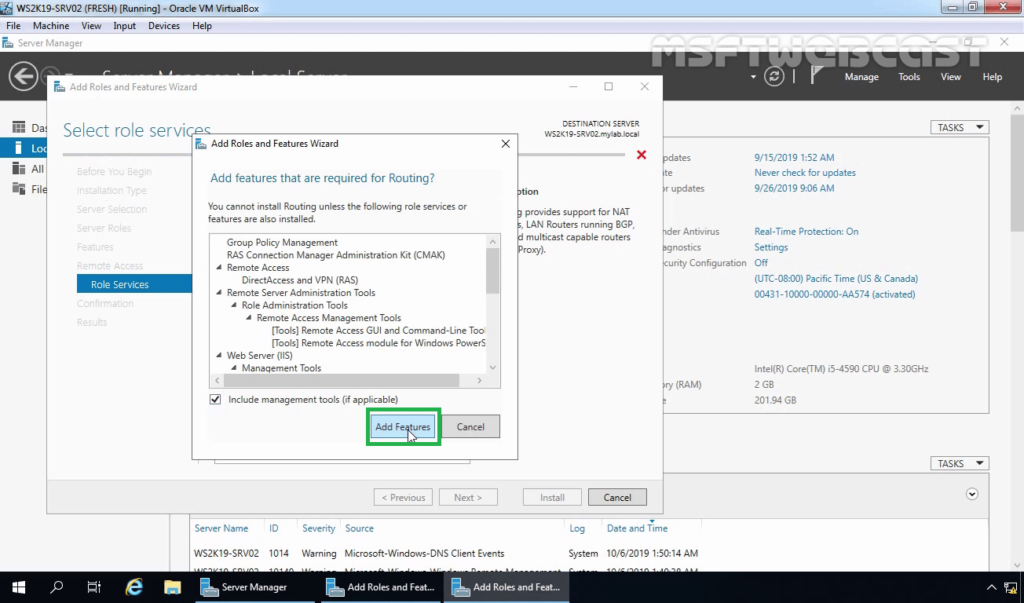
8. On Select Role Service console, select the Routing checkbox to install the LAN Routing role service.
9. Click the Add Features button to add the required feature for LAN Routing. Click Next to continue.
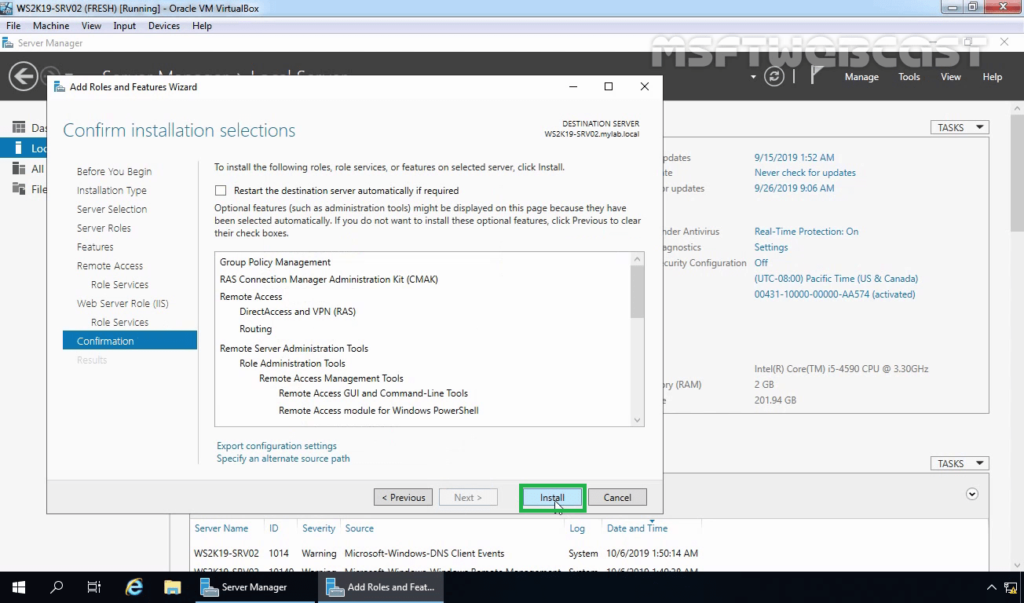
10. Click Next.
11. Click Install and complete the installation process.
12. Click Close to finish the installation.
Configure and Enable LAN Routing on Windows Server 2019:
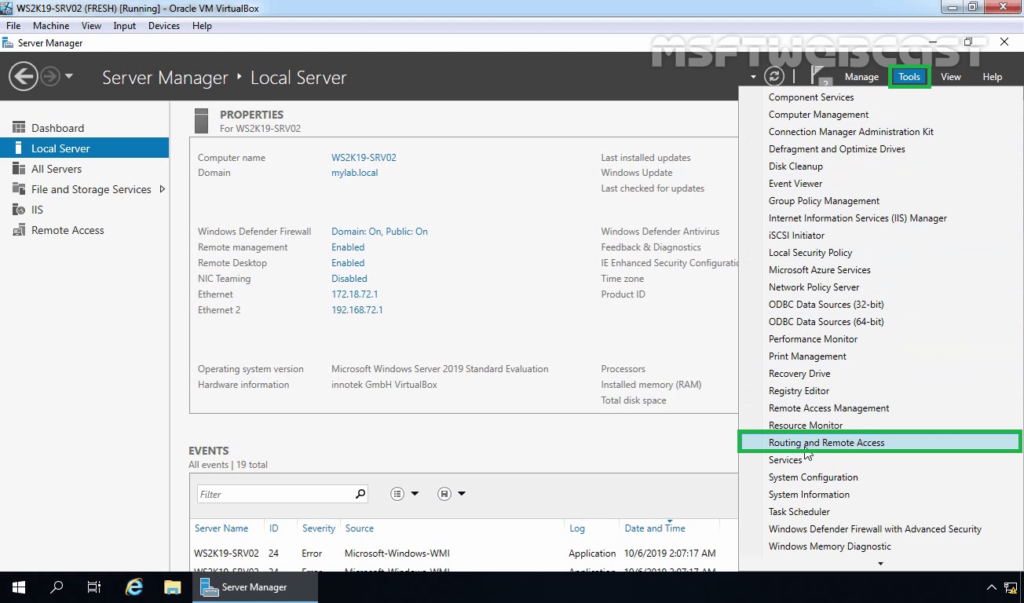
To enable and configure LAN routing, open the Remote and Routing Access console using the Server Manager console.
13. Click on Tools and select Remote and Routing Access.
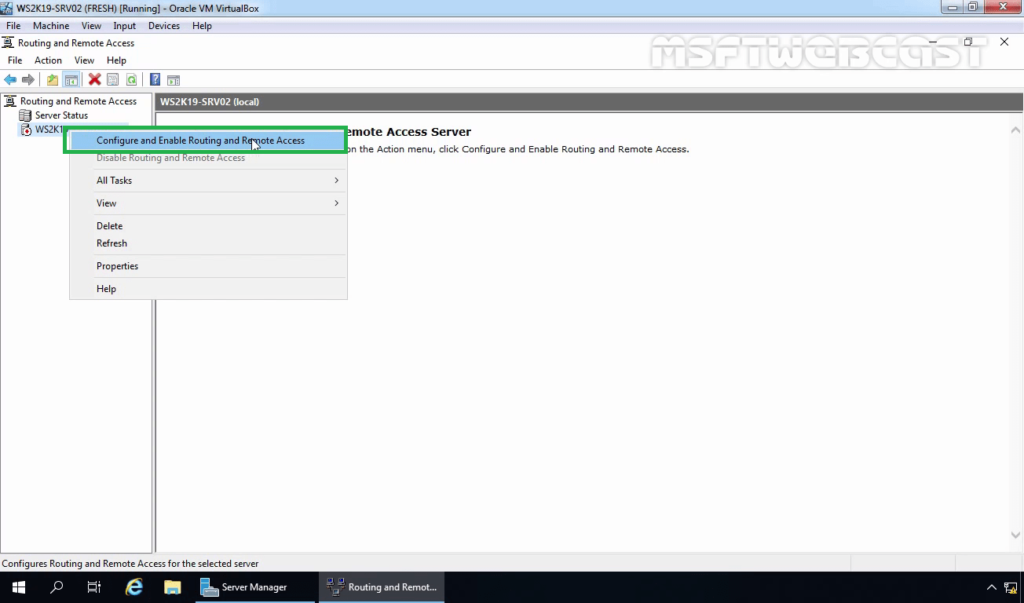
14. Select and right-click on the local server name and then select Configure and Enable Routing and Remote Access.
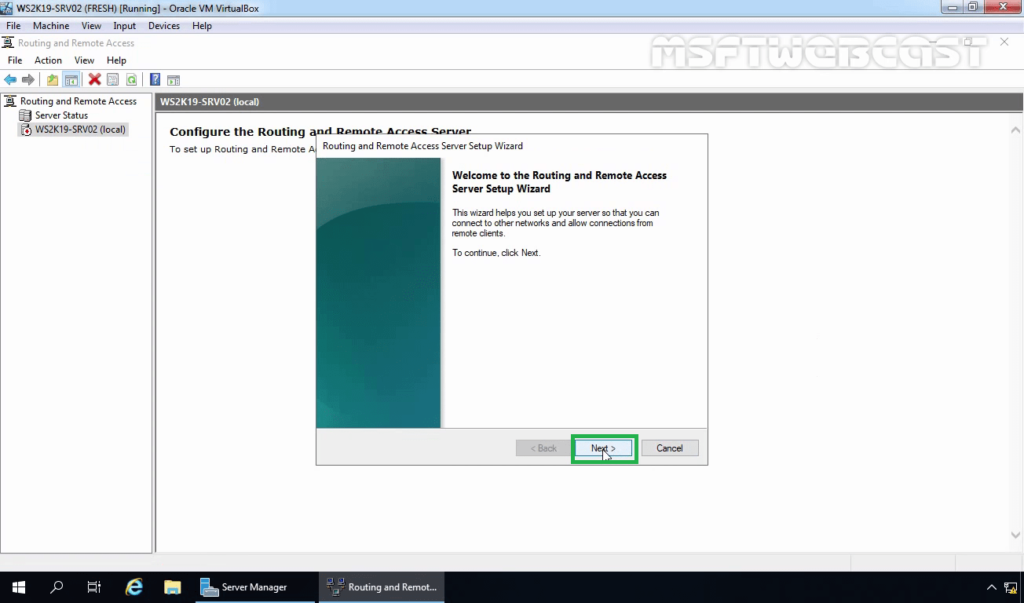
15. On the welcome page, read the description, and click Next.
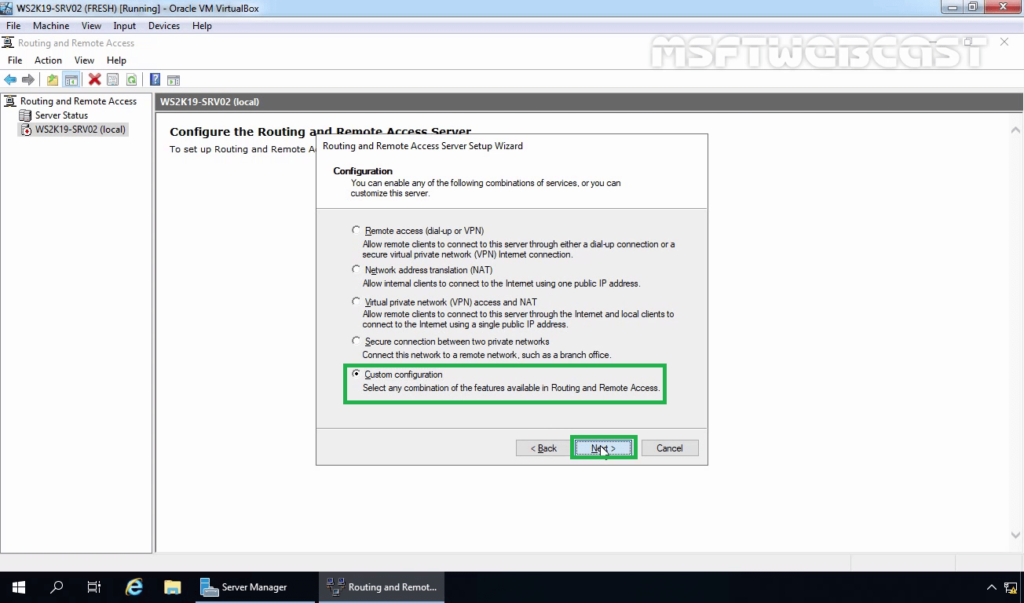
16. On the Configuration page, select custom configuration. Click Next.
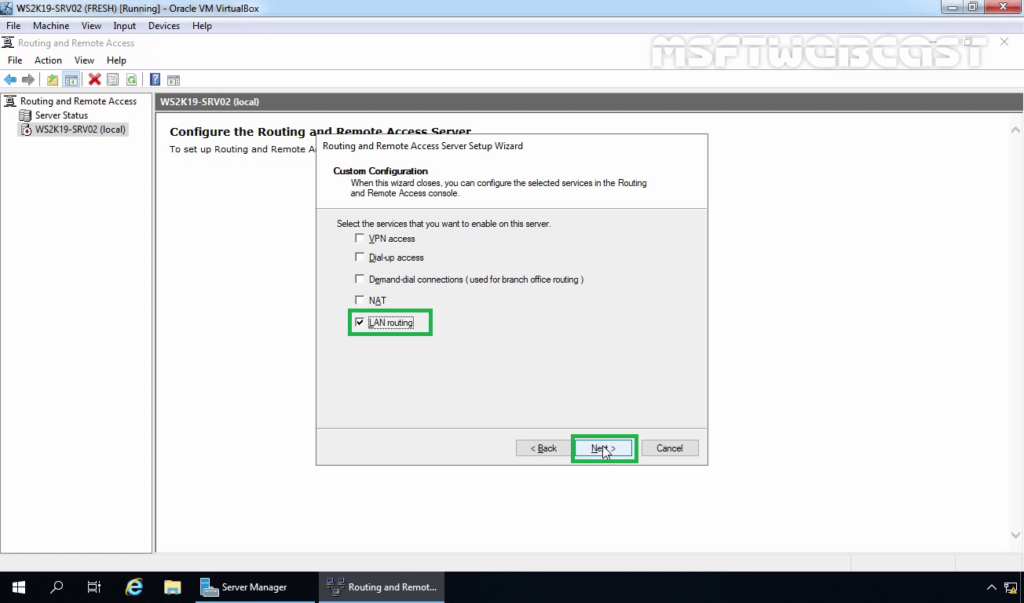
17. On the Custom Configuration page, select the LAN Routing feature and click Next.
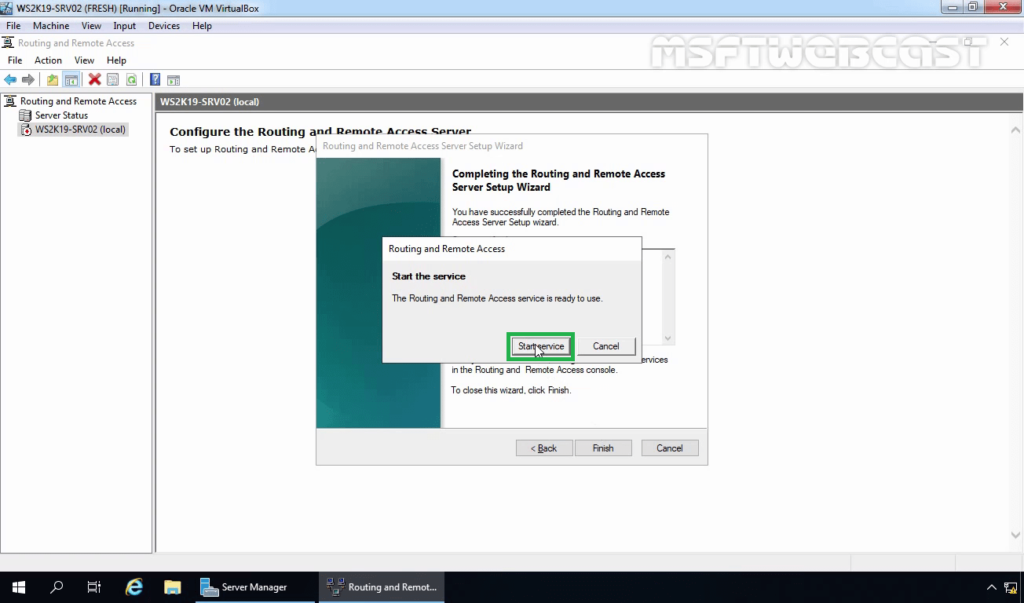
18. Click Finish.
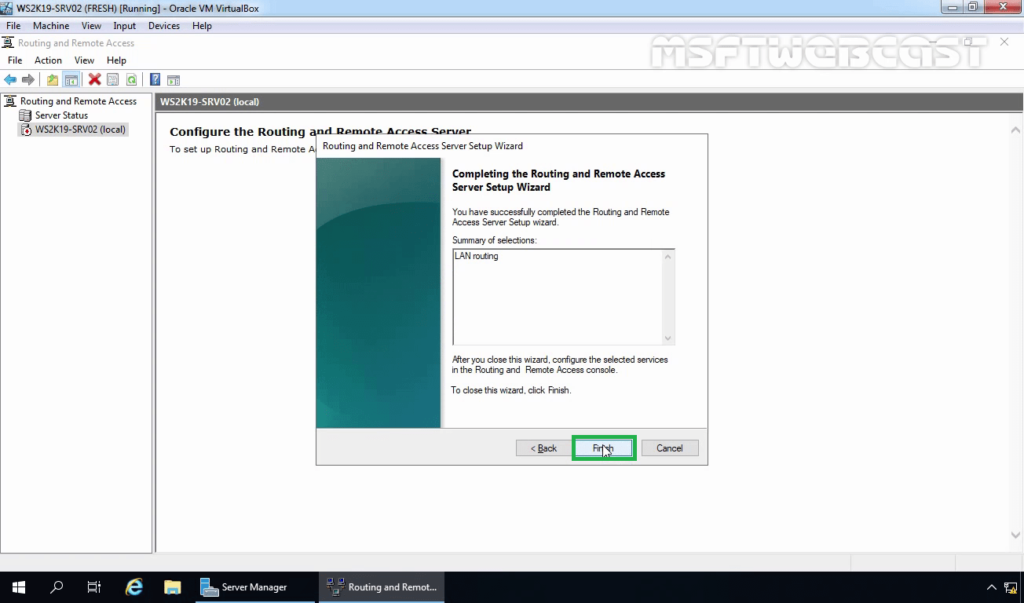
19. When the service message box displays, click Start Service to start the Routing and Remote Access service.
Verify the LAN Routing Configuration:
We have enabled and configured LAN routing on our software router (Windows Server 2019). Now, it’s time to test our LAN Routing configuration.
Before you proceed, make sure the Windows firewall on the router (WS2K19-SRV02) allows the ICMP packet for the ping to pass successfully. Even we can temporarily close the Windows Firewall for testing purposes.
Read this post on how to Create ICMP exception rule in Windows Firewall to allow ping.
Next, move on to Windows 10 machine. Open Command prompt.
First, run the below command: ping 172.18.72.5
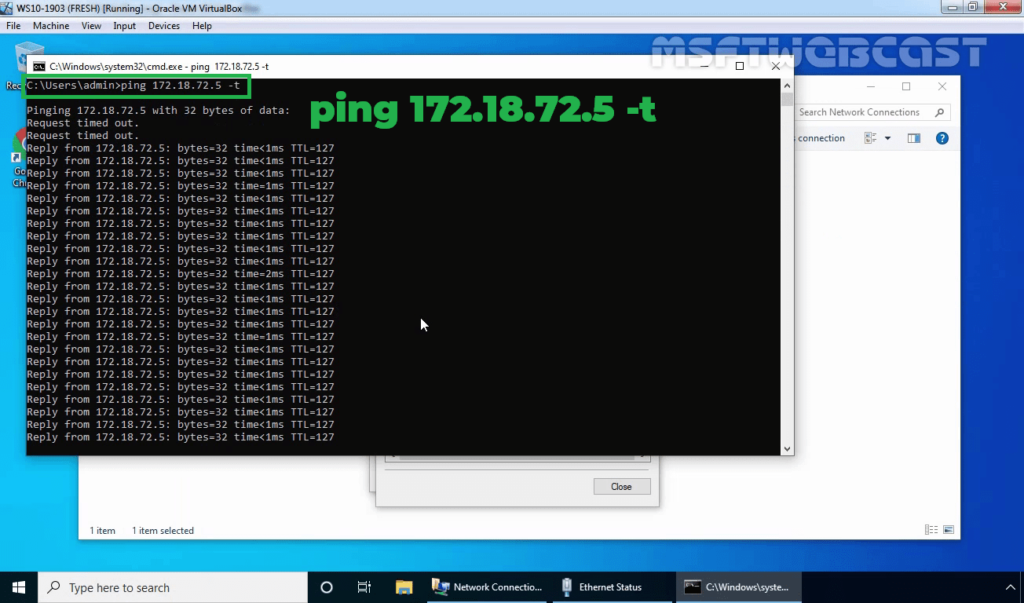
This time you must be able to receive ICMP reply from Domain Controller as we have LAN routing place.
Second, run the below command: tracert 172.18.72.5
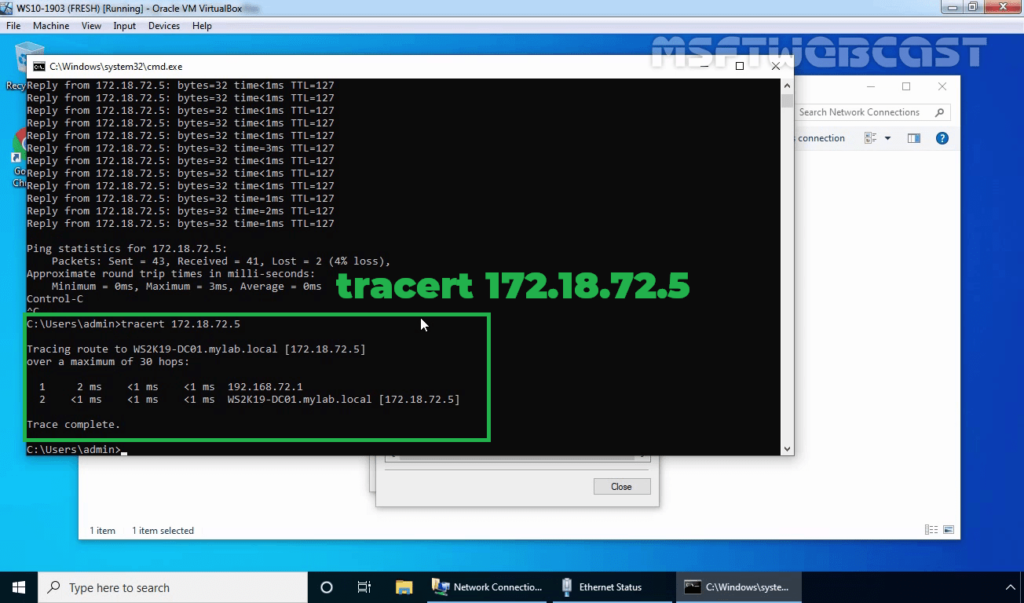
As we see the result, the packet will be first delivered to Router and then to Domain Controller.
In this post, we have learned a step by step guide to enable and configure LAN Routing in Windows Server 2019.
Thank you for reading.