Introduction:
In our previous post, we have learned the steps to install and configure the iSCSI Target Server role in Windows Server 2019. After creating iSCSI virtual Disk with iSCSI Target, the next step will be configuring iSCSI Initiator to connect iSCSI Storage Server.
To connect the iSCSI Target virtual disk created on iSCSI Storage Server, we can use iSCSI initiator. But before we can use it, we need to configure iSCSI initiator on the server where the iSCSI Storage should be accessible.
In this guide, we will learn the required steps to connect to the iSCSI Storage server by configuring iSCSI initiator on Windows Server 2019.
Test Lab Setup:
Note: For this, we will use the virtual test lab created in VirtualBox.
- WS2K19-DC01: iSCSI Storage Server (DC and DNS)
- WS2K19-SRV02: Member Server (iSCSI Initiator)
Configure iSCSI Initiator on Windows Server 2019:
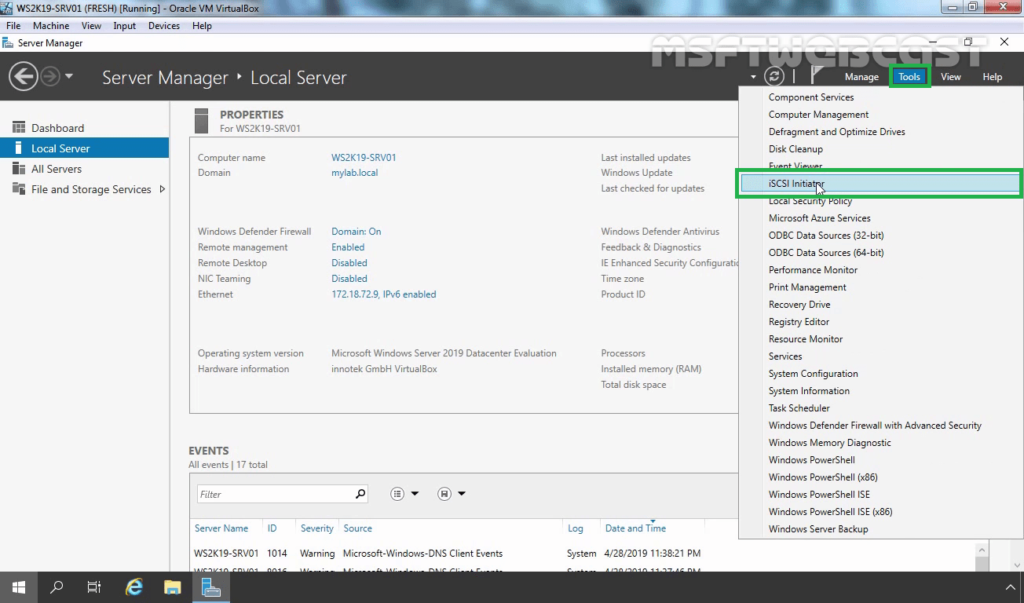
1. Logon to the WS2K19-SRV02 member server and open Server Manager Console.
2. Click on Tools and select iSCSI Initiator.
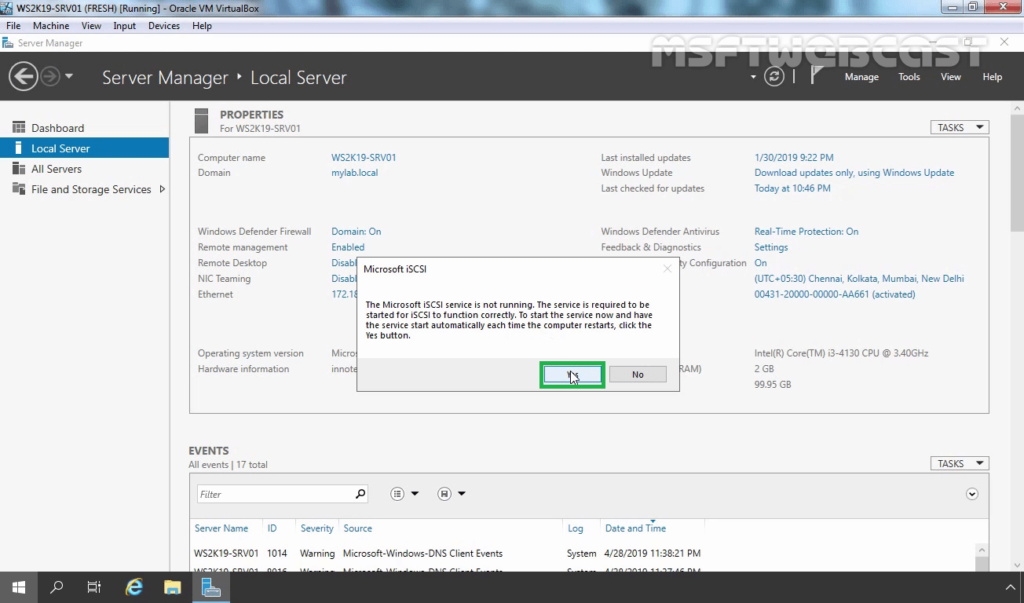
3. A pop-up window will come up. Click on Yes to start iSCSI service and change its startup mode to Automatic.
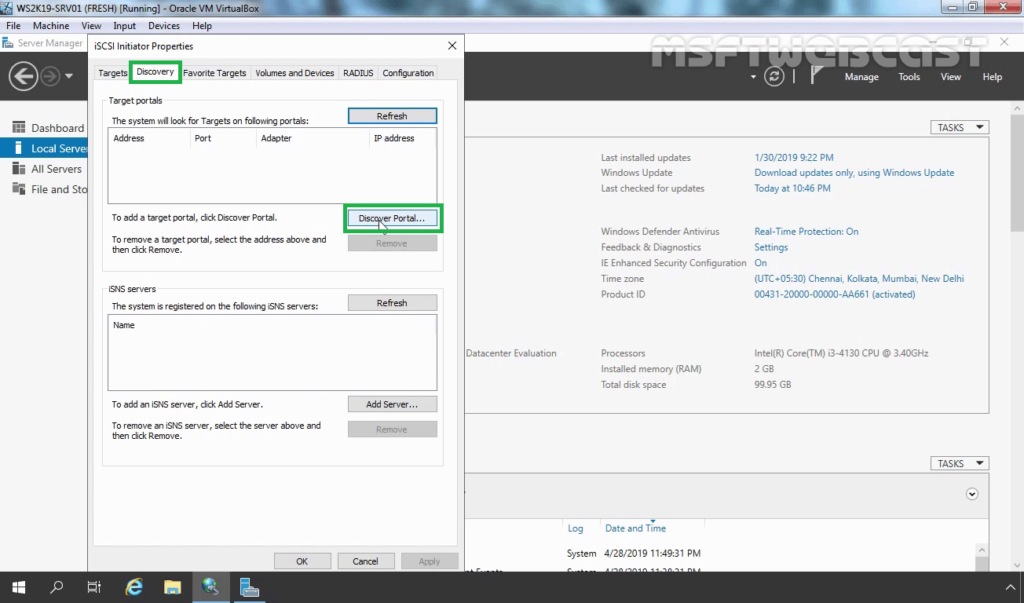
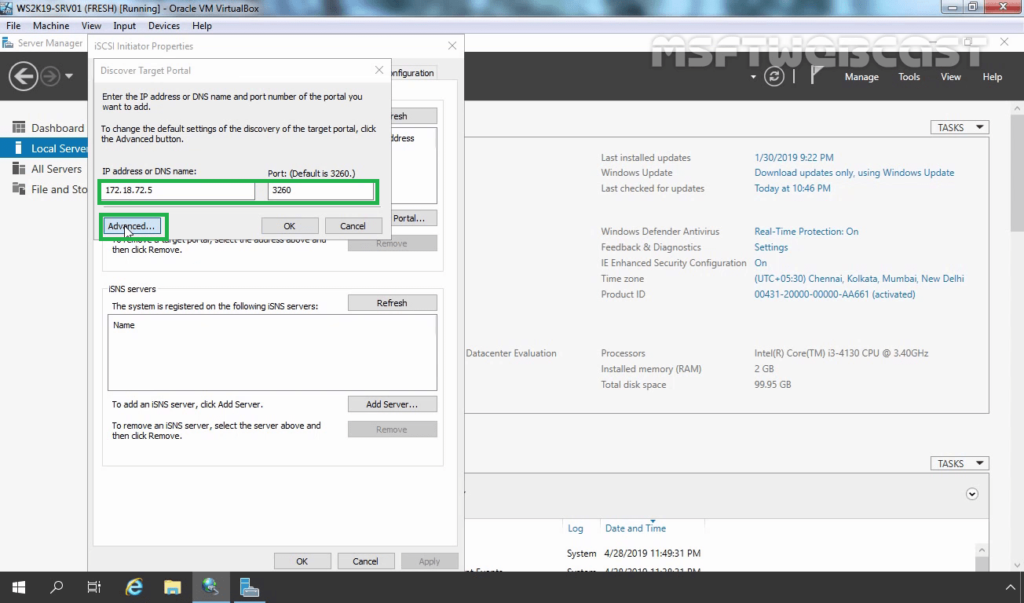
4. On iSCSI Initiator properties, click on the Discovery tab. Click on Discover Portal.
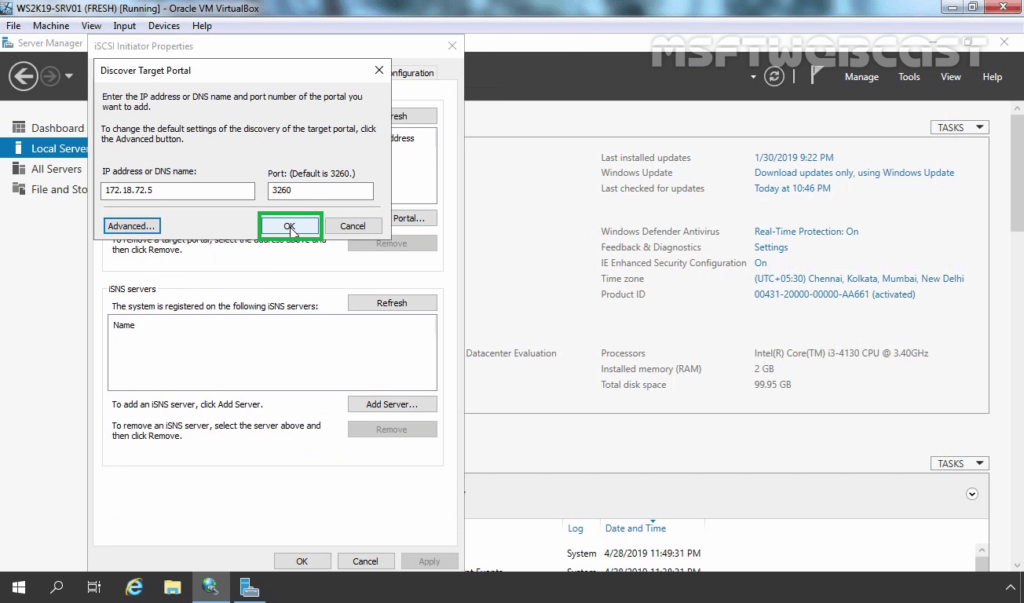
5. Enter the IP Address or FQDN of iSCSI Target Server. Click on Advanced.
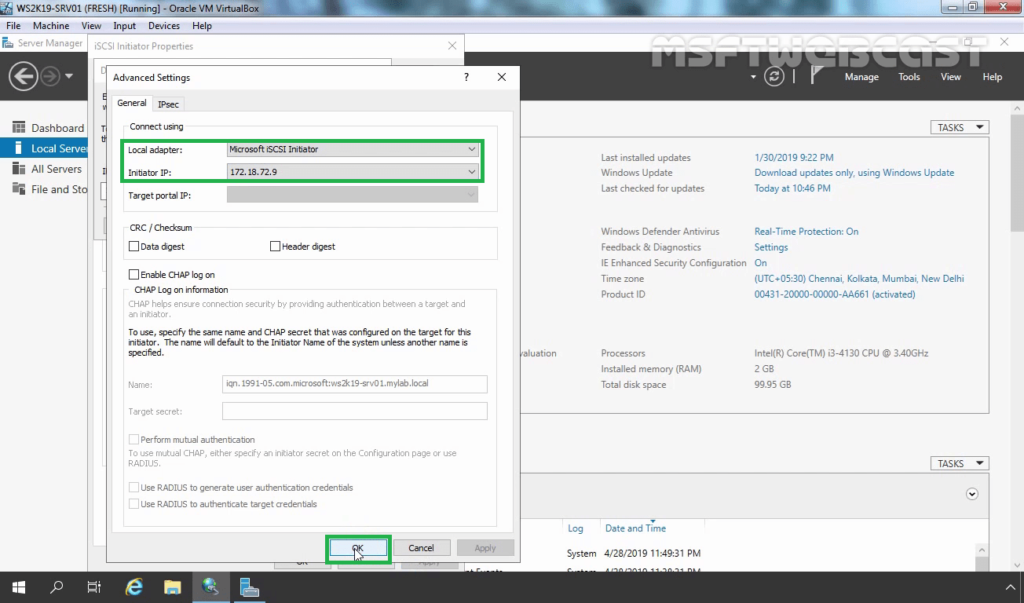
6. Choose the Local Adapter as Microsoft iSCSI Initiator and the Initiator IP Address from the drop-down list. Click OK.
7. Click on OK.
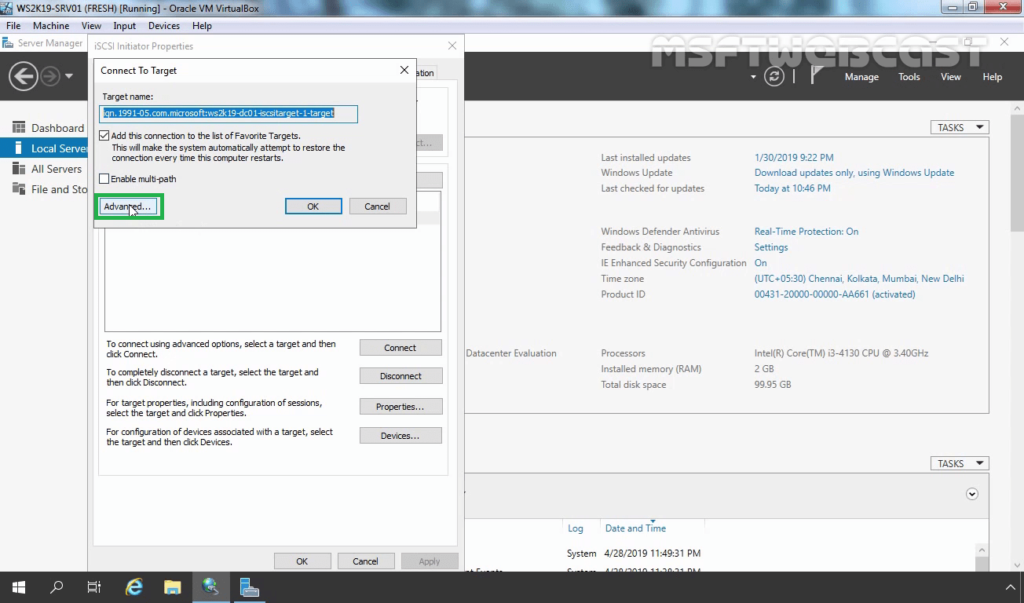
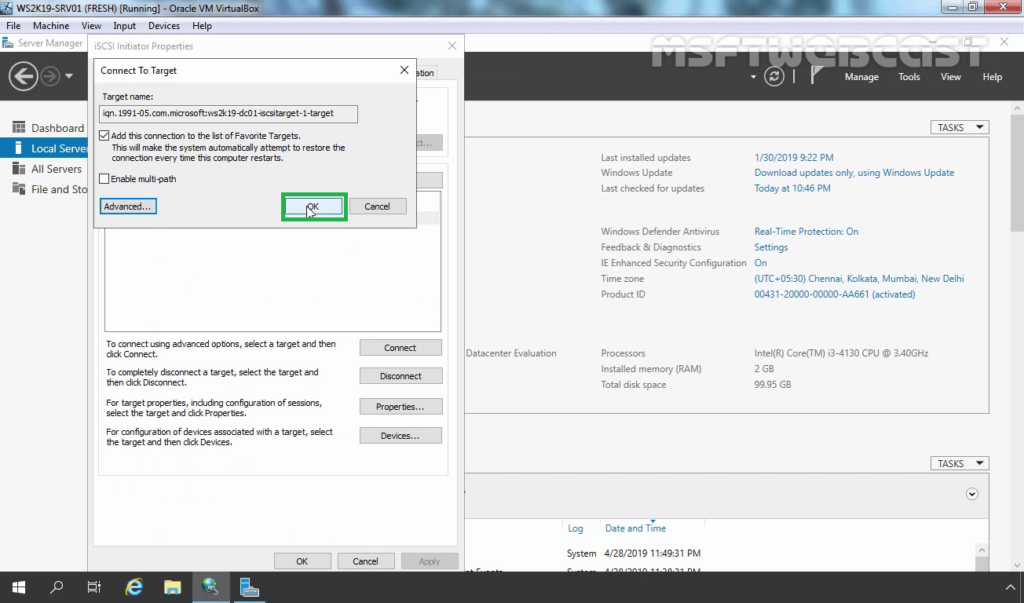
8. Click on the Target tab. Select the discovered target and click Quick Connect.

9. Click on Advanced.
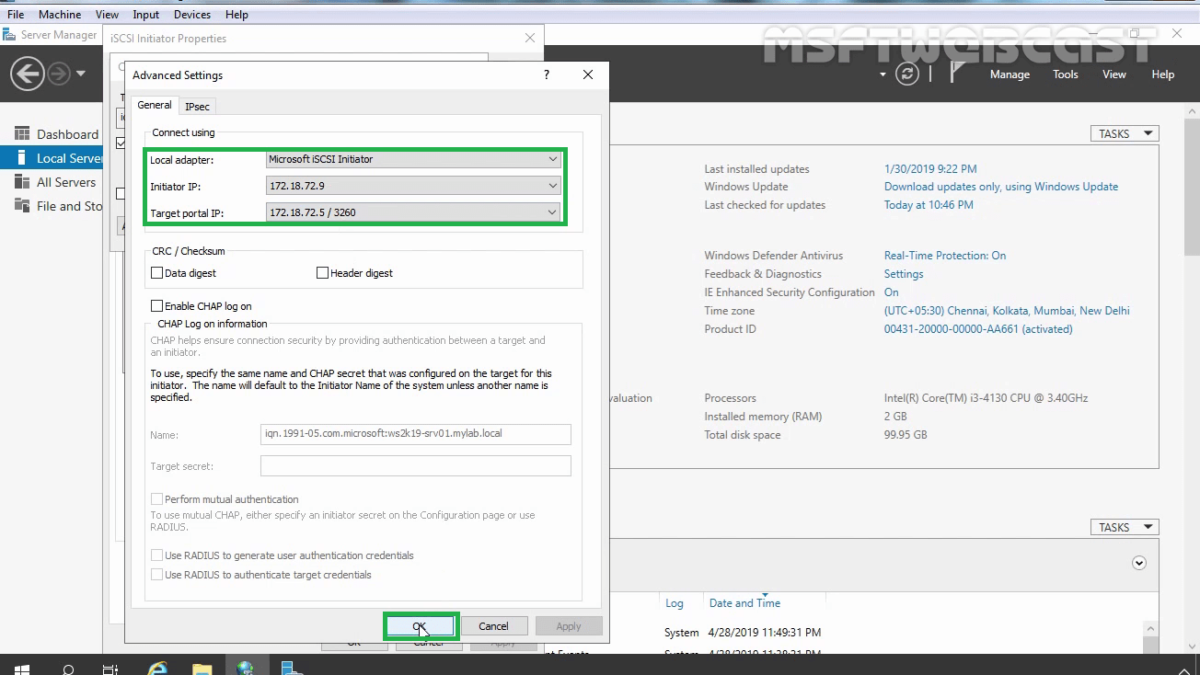
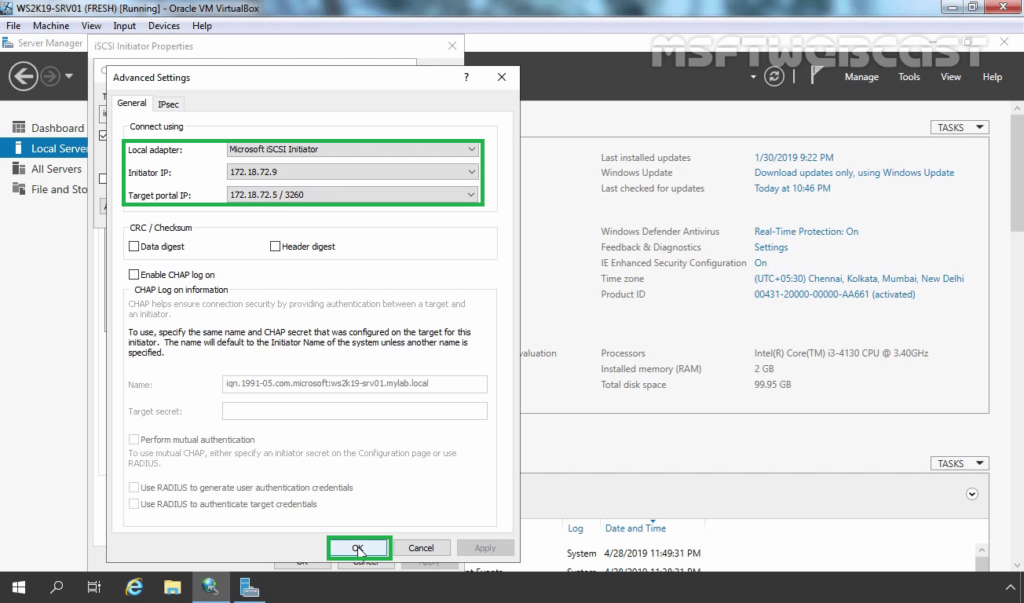
10. Set up the options as mentioned below:
- Local Adapter: Microsoft iSCSI Initiator
- Initiator IP: 172.18.72.9 (IP Address of WS2K19-SRV02)
- Target Portal IP: 172.18.72.5 (IP Address of WS2K19-DC01)
11. Click OK when you are ready.
12. Click OK
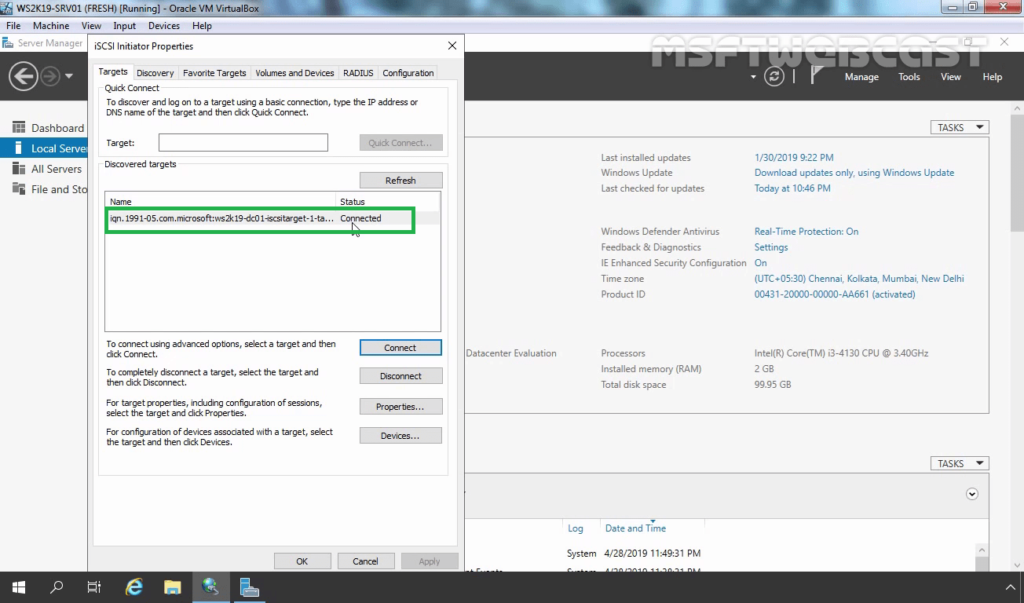
13. After a successful connection, verify the target status is Connected.
Initialize the Disk and Create Volume:
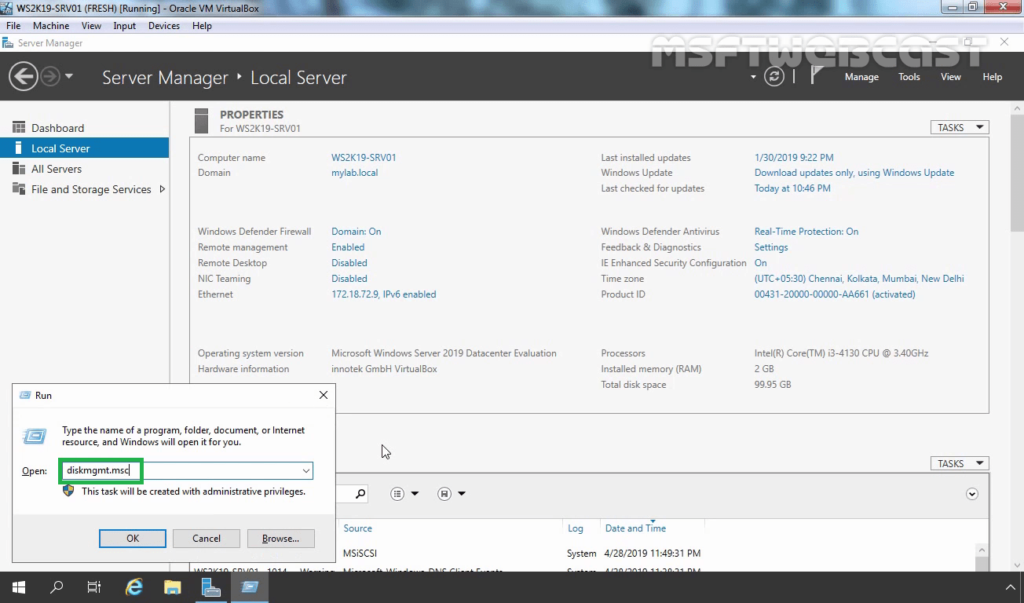
14. Open Disk Management console.
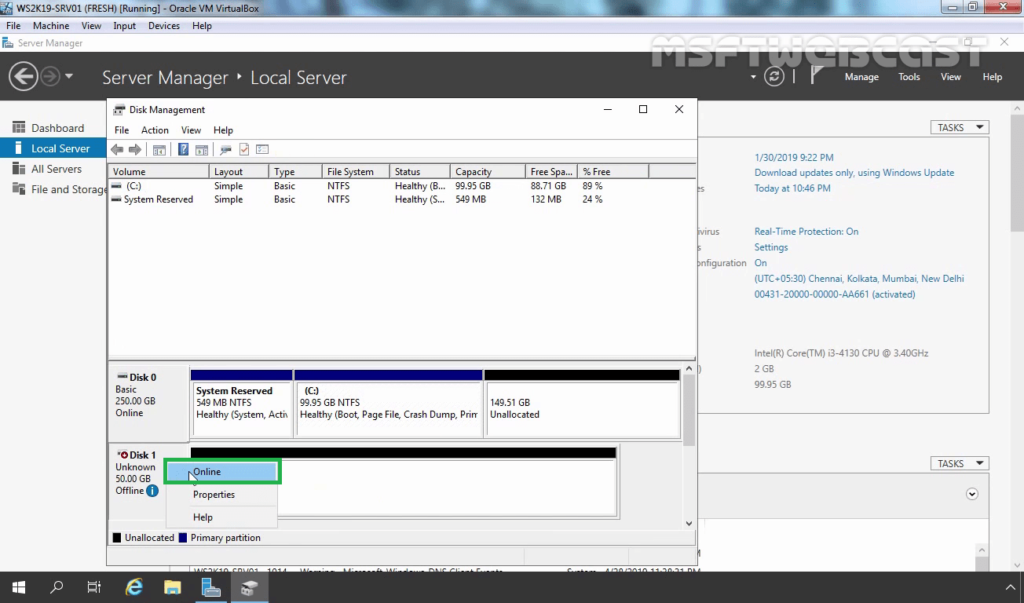
15. Right-click on the iSCSI (Disk1) and choose Online.
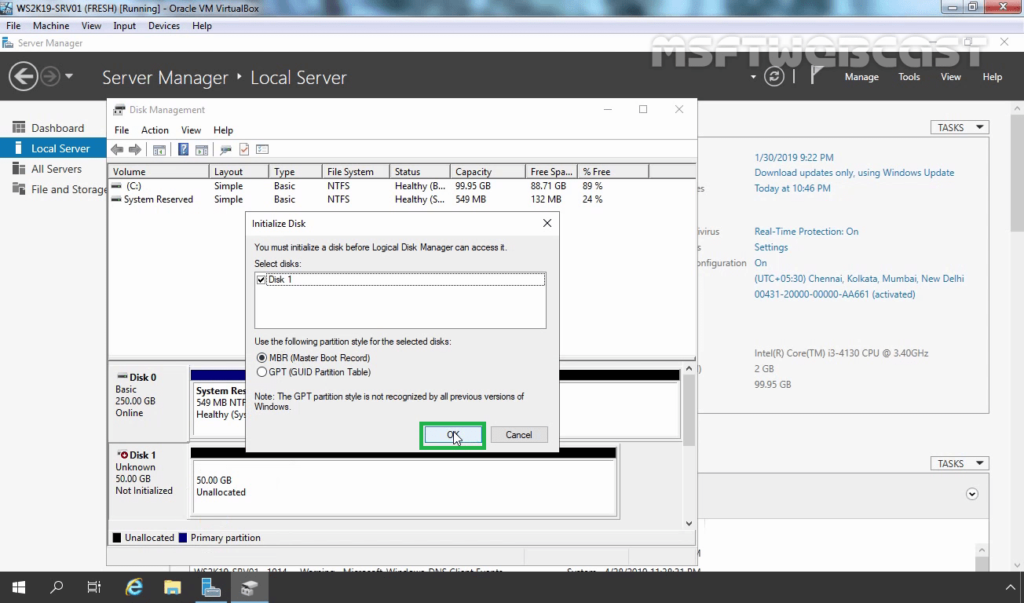
16. Right-click on the iSCSI (Disk1) again and choose Initialize Disk.

17. Please select a partition style as per your requirement. Click on OK.
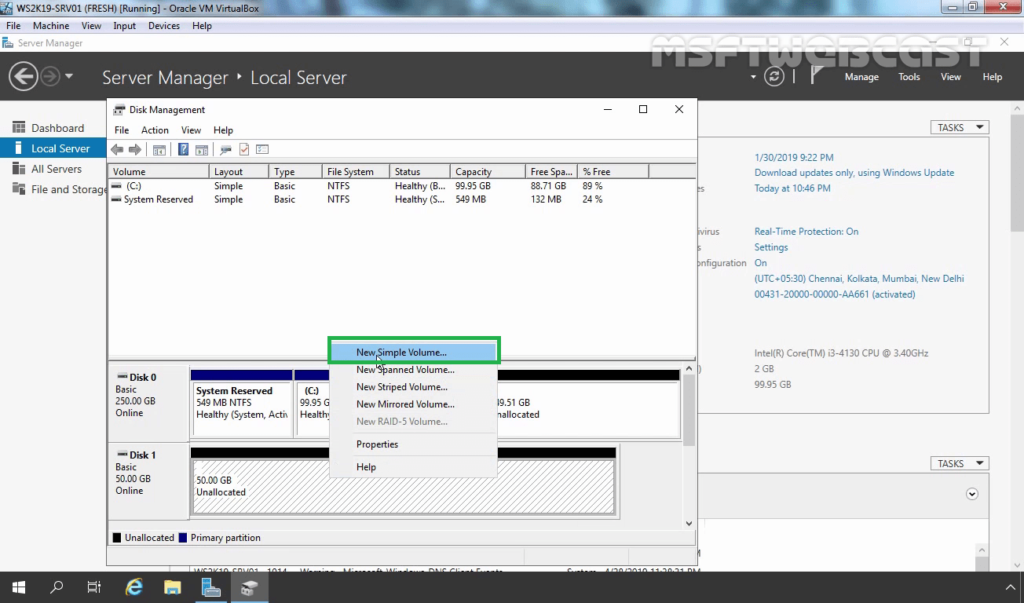
18. Right-click on the new disk, select New Simple Volume.
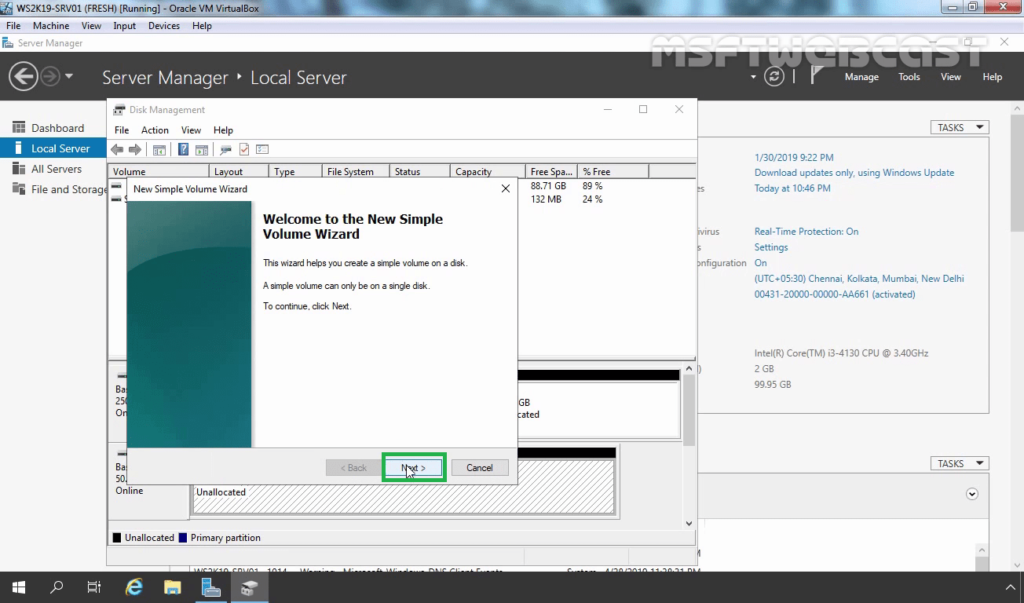
19. Click Next.
20. Specify Volume size and click Next.

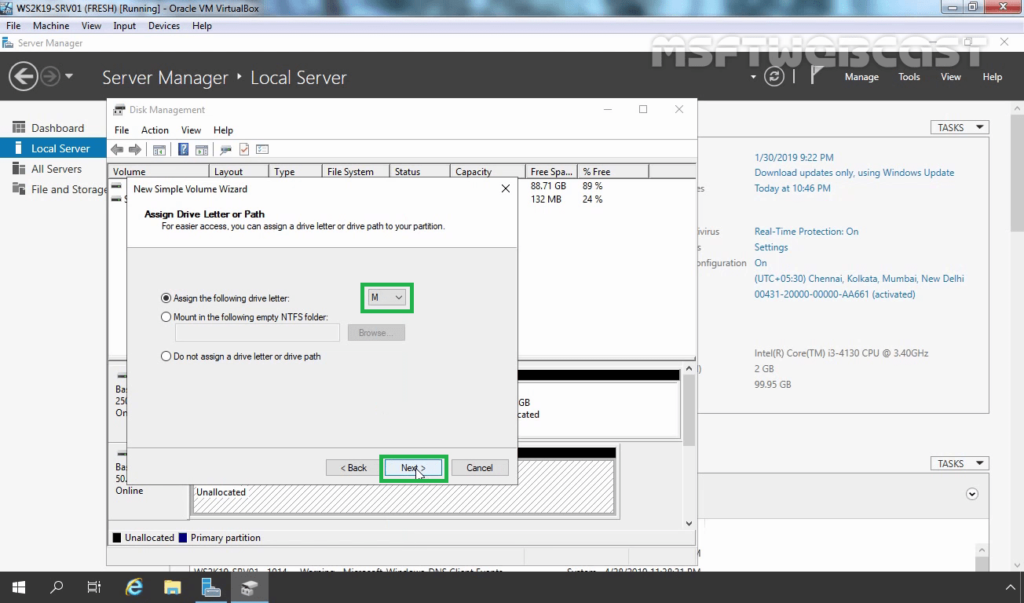
21. Assign a drive letter for the new volume then click on Next.
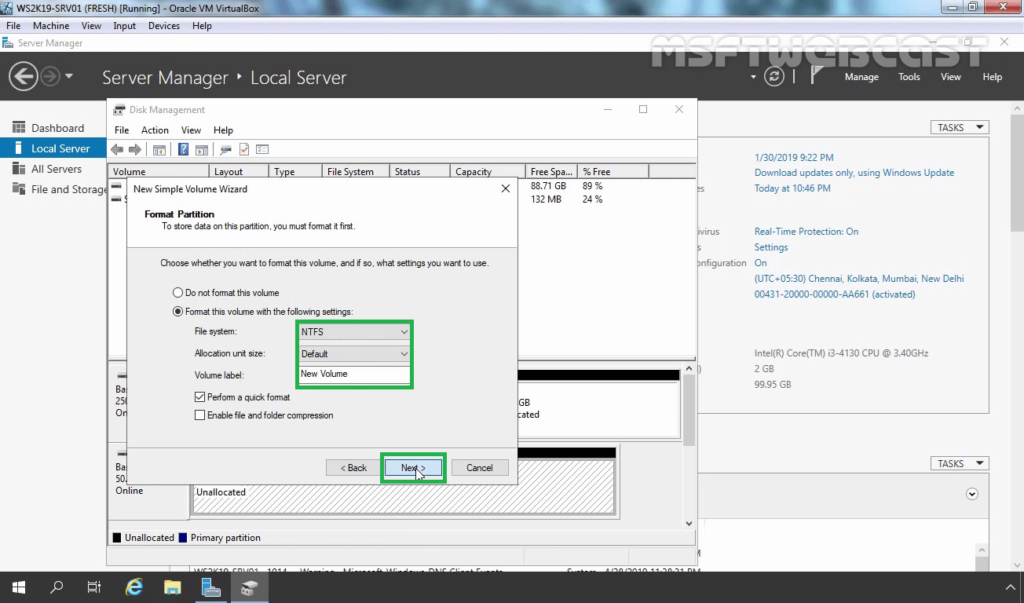
22. Select File System to format the volume and click Next
23. Click on Finish.

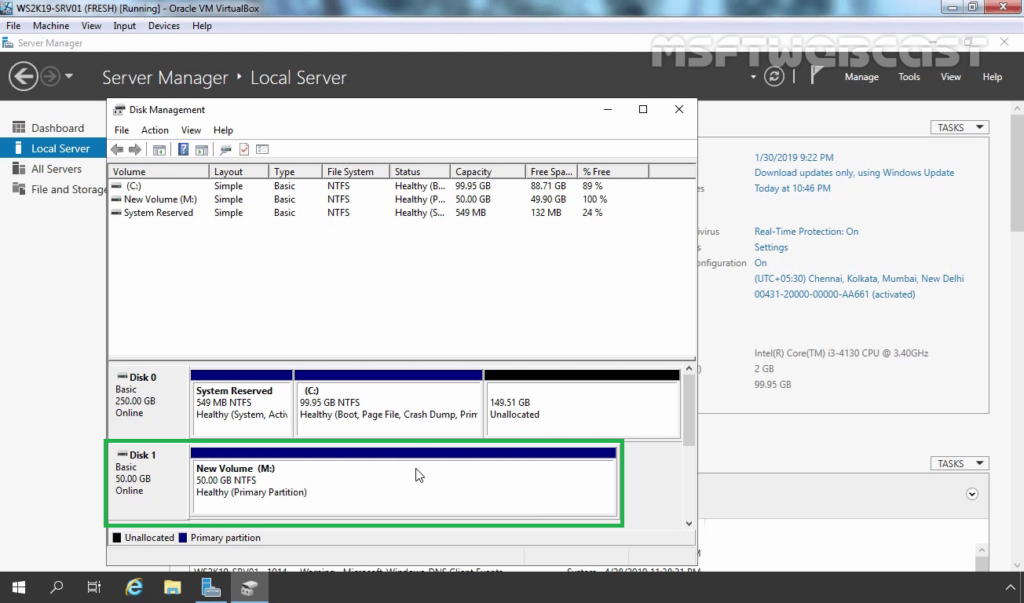
24. Verify the newly created volume in disk management console.
In this article, we have learned the steps to configure iSCSI initiator on Windows Server to connect iSCSI Target Storage Server.
Thank you for reading.