
In this article, we will learn the steps on How to Setup L2TP/IPsec VPN with a Pre-Shared key on Windows Server 2019.
What is a VPN?
A Virtual Private Network (VPN) is a secure network tunnel that allows you to connect to your private network from internet locations. So, you can access and use your internal resources based on assign permission.
Layer 2 Tunneling Protocol (L2TP):
L2TP is the industry standard when setting up secure VPN tunnels. L2TP supports either computer certificates or a Pre-shared key as the authentication method for IPsec. L2TP/IPsec VPN connections provide data confidentiality, data integrity, and data authentication.
Understanding the SSTP Test Lab:
- WS2K19-DC01: Domain Controller and DNS.
- WS2K19-VPN01: Member Server.
- WS10-CLI01: Windows 10 Client Machine.
Step:1 Install Remote Access Server role on Windows Server 2019:
1. The first step is the installation of the Remote Access Server role. Open Server Manager Console and start role and feature installation wizard. Select the Remote Access Server role.

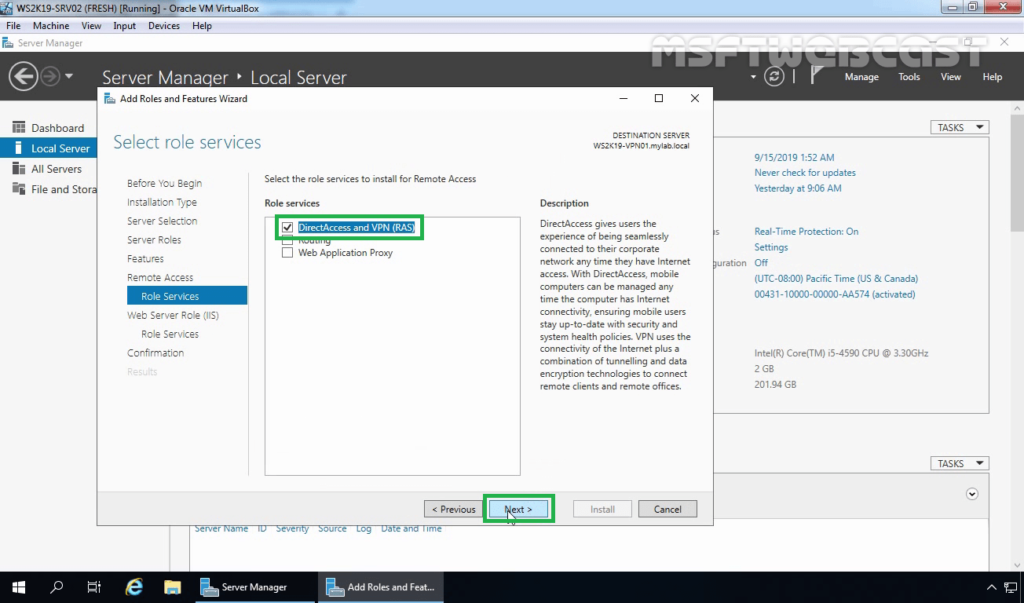
2. On select role services, select DirectAccess and VPN (RAS) role service. Click Next and finish the installation.
3. When the installation finished, click on close.
Step:2 Configure L2TP/IPsec VPN on Windows Server 2019:
4. On Member Server, Open Server Manager. Click on Tools and select Routing and Remote Access Console.
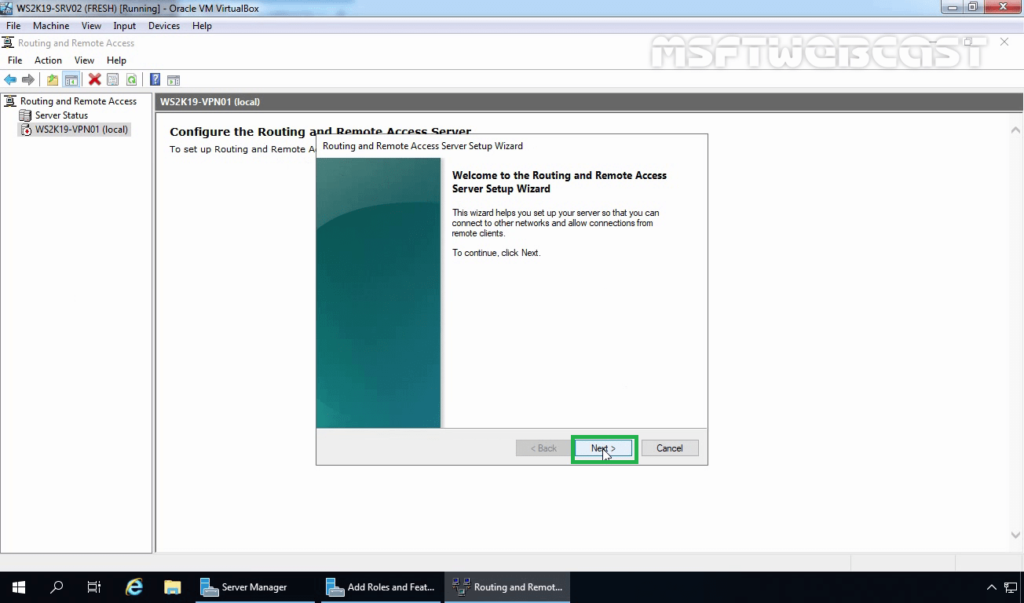
5. Right-click on the Server name and select Configure and Enable Routing and Remote Access.

6. On Welcome screen, click Next.
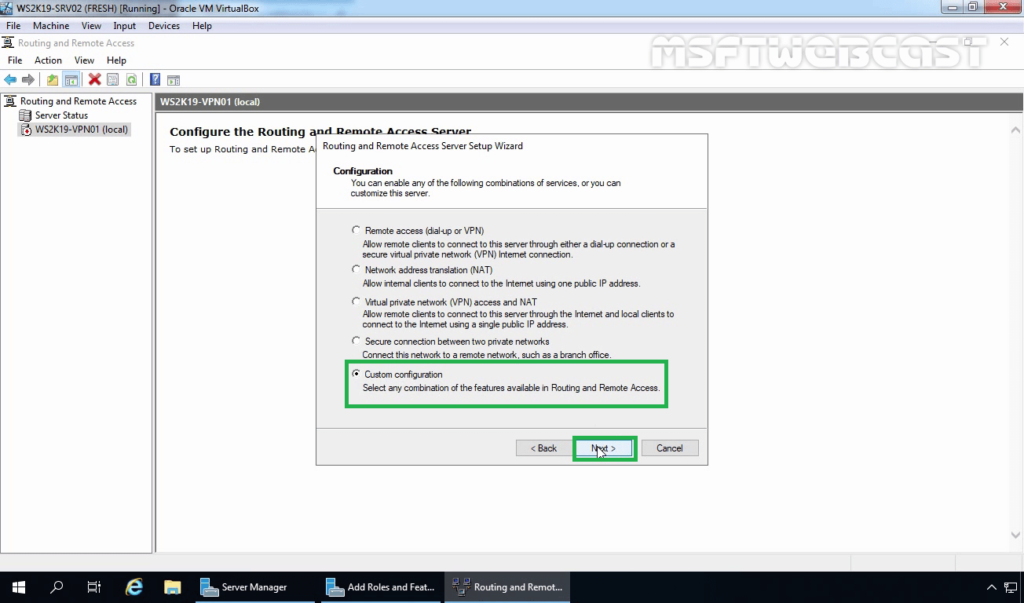
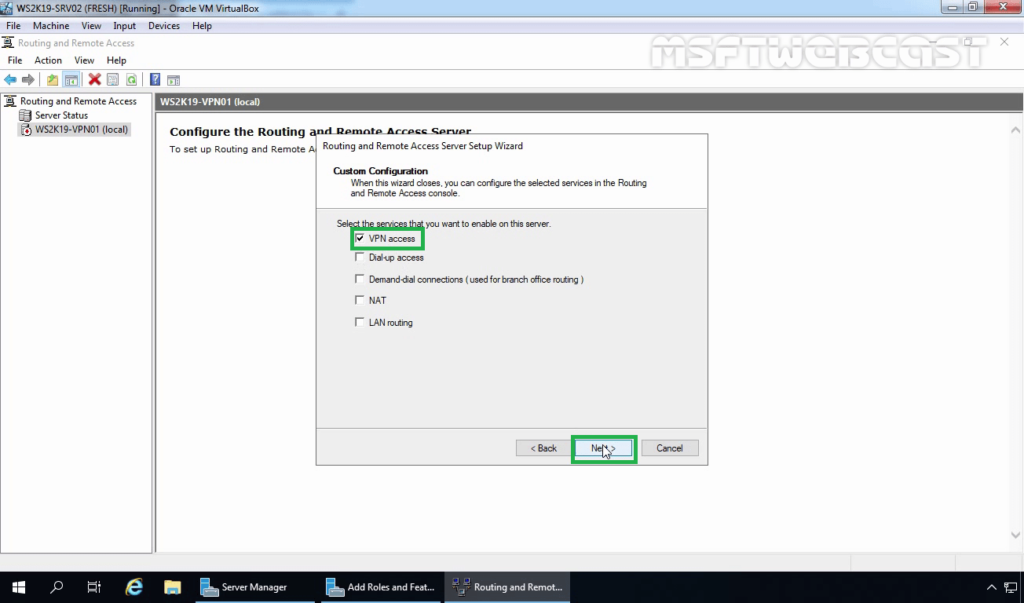
7. On the Configuration page, select the Custom configuration radio button. Click Next.
8. On select the service page, select VPN Access. Click Next.
9. After clicking on the Finish, it will ask you to start the service. Click on Start service.
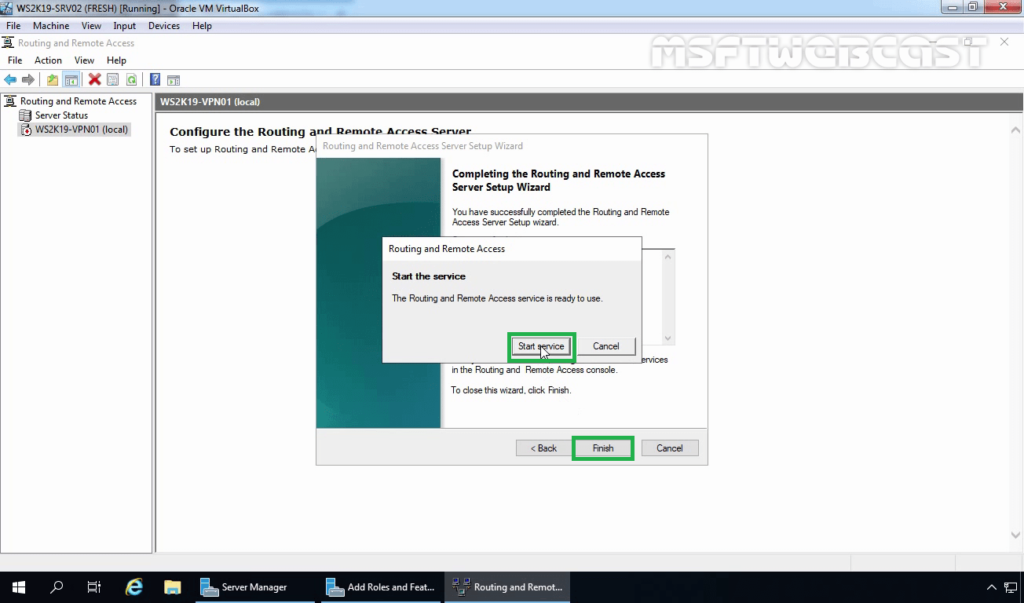
10. Now you will see a green up arrow beside your server name.
Step:3 Configure Pre-Shared Key for IPsec Authentication.
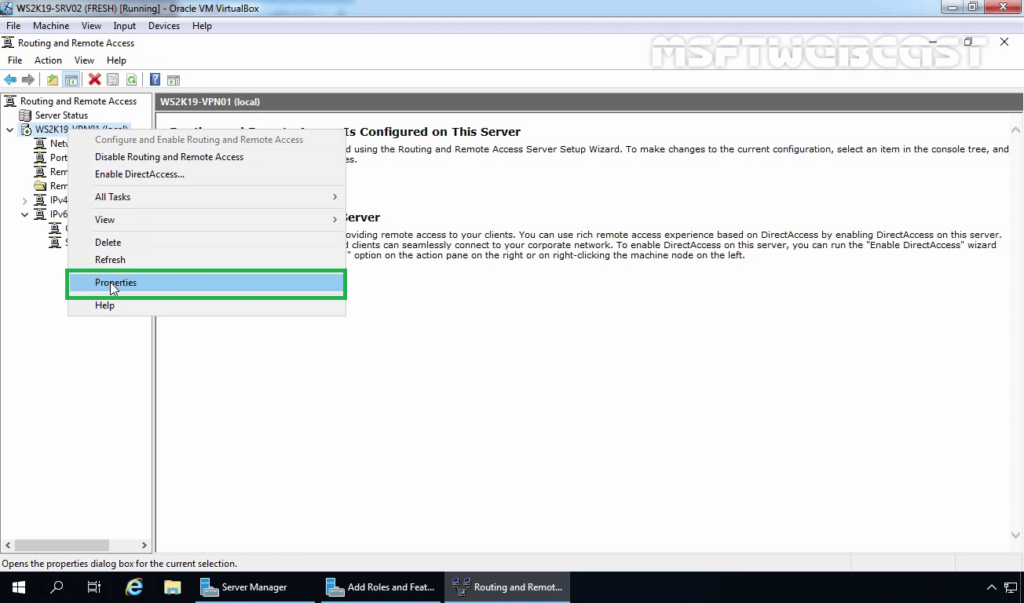
To configure the Pre-shared Key for L2TP/IPsec VPN, we need to set up specific settings in the VPN server’s properties section.
11. Right-click on the server name and click on Properties.
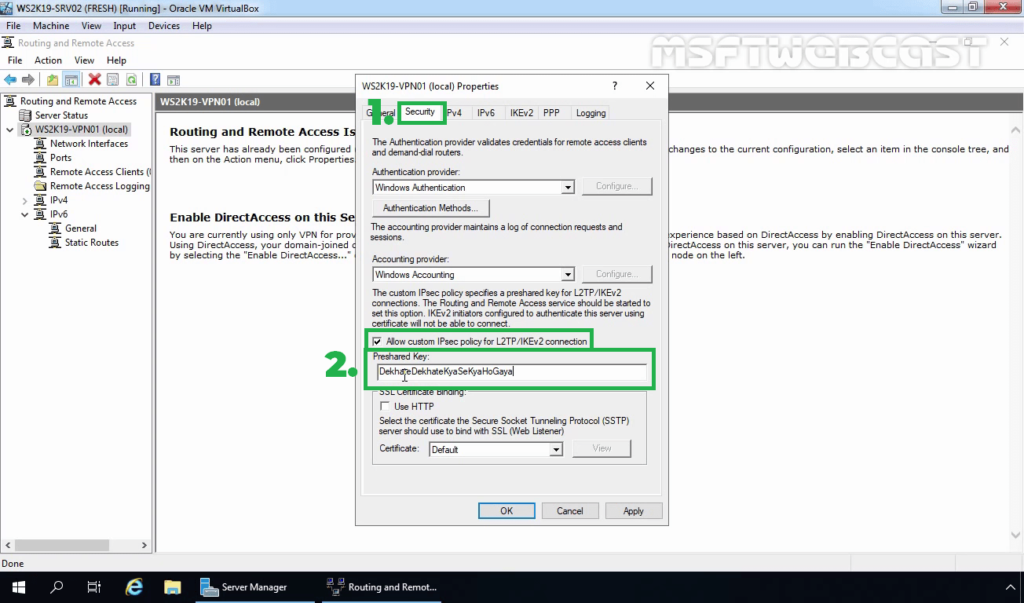
12. On the Security tab, select the checkbox Allow Custom IPsec Policy for L2TP/IKEv2 Connection. Specify a strong Pre-Shared Key for L2TP/IPsec VPN connection.
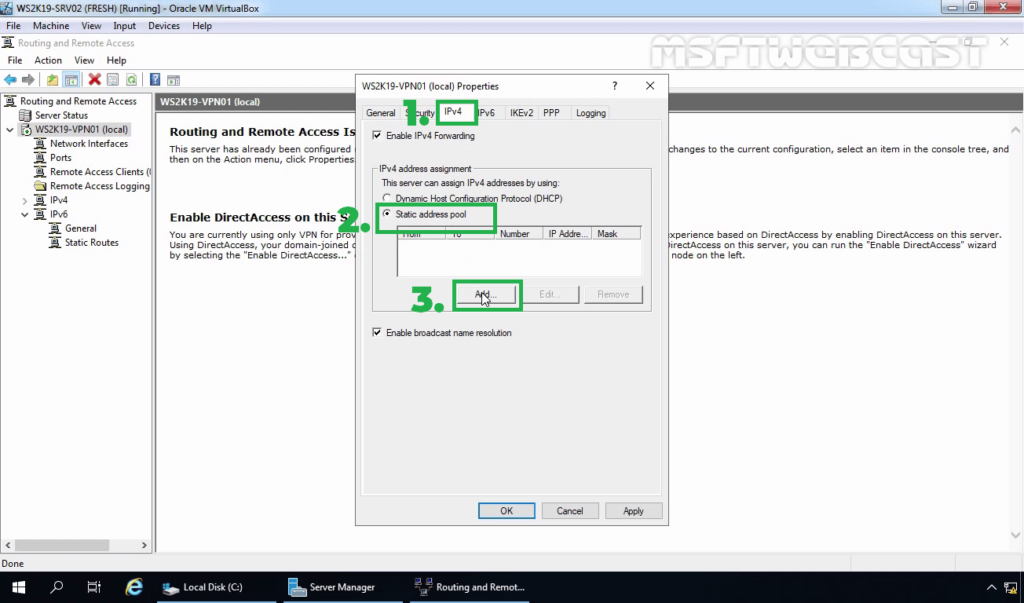
13. Click on IPv4 Tab. Select the Static Address Pool radio button. Click on Add button.
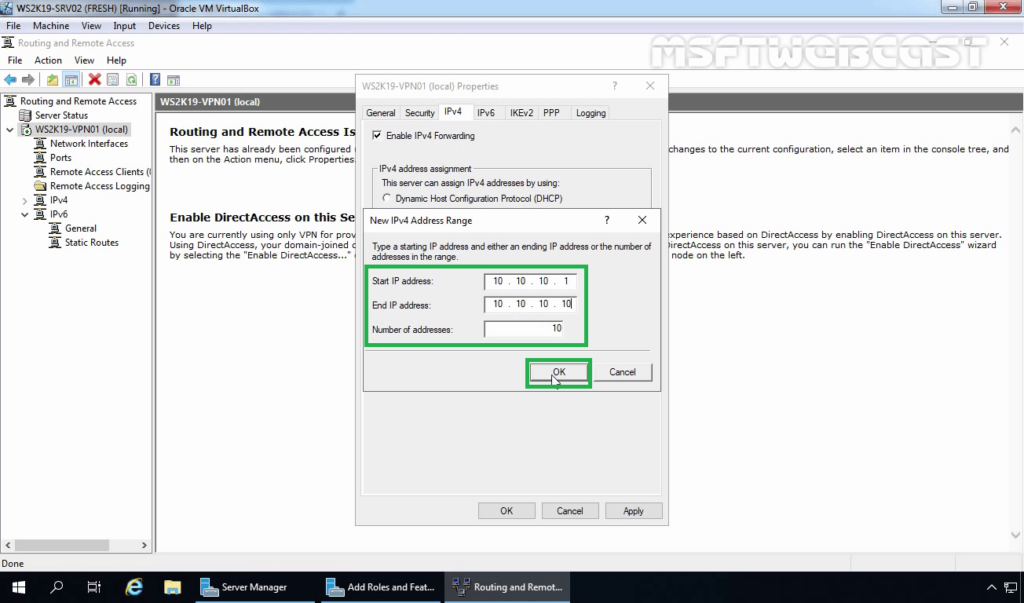
14. Specify the IP address range. Click on OK.
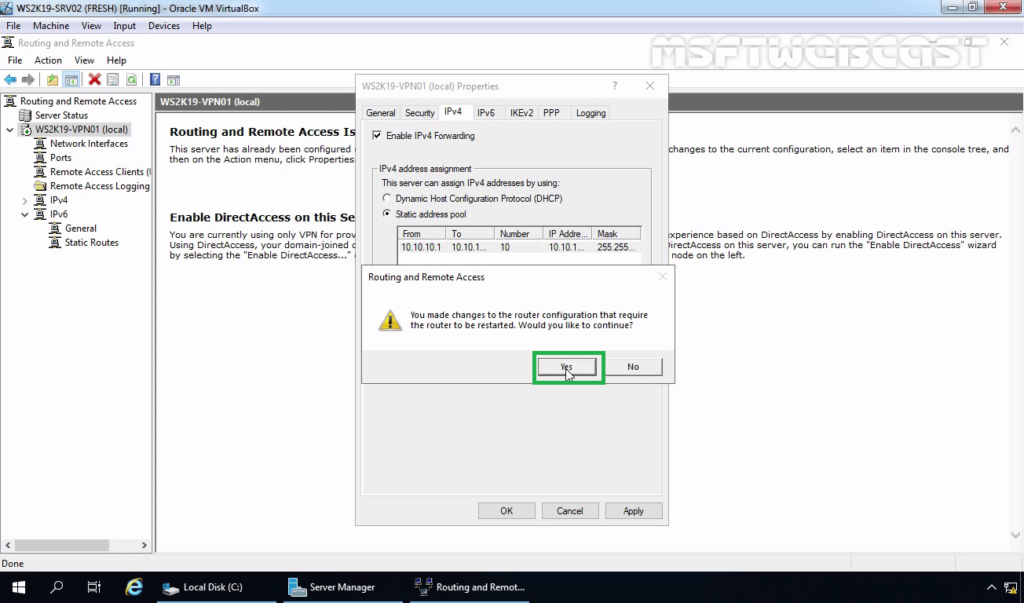
15. Click on Apply to save the changes to the VPN server. It will ask to restart the Routing and Remote Access service. Click on yes to do so.
Step:4 Create AD User and allow dial-in access:
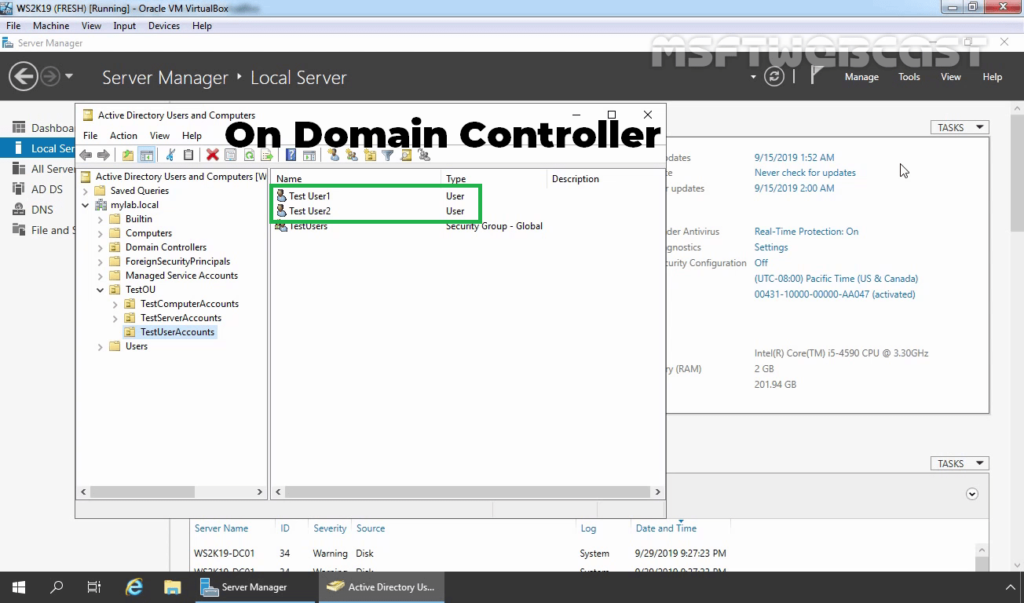
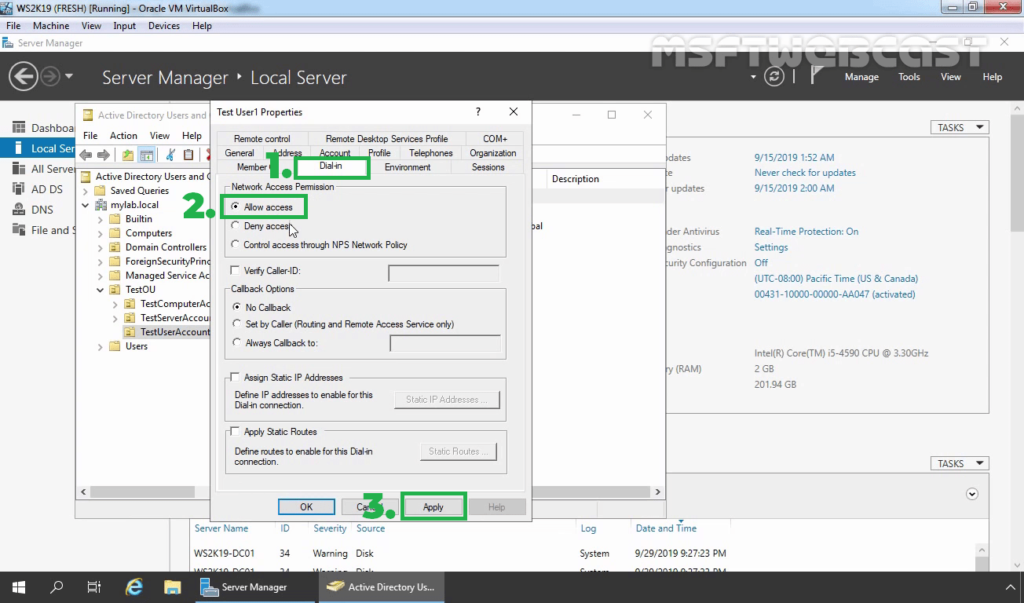
16. On Domain Controller, Open Active Directory Users and Computers snap-ins. Create AD users name Test User1 and Test User2.
17. Enable dial-in access for selected VPN users by opening the user properties and selecting Allow access on the tab Dial-in.
Note: If you want, you can configure Network Policy Server to allow VPN users to connect to the VPN server running on Windows Server 2019.
Step:5 Setup a VPN Connection for L2TP/IPsec VPN:
On Windows 10 client machine, we need to create a new VPN connection.
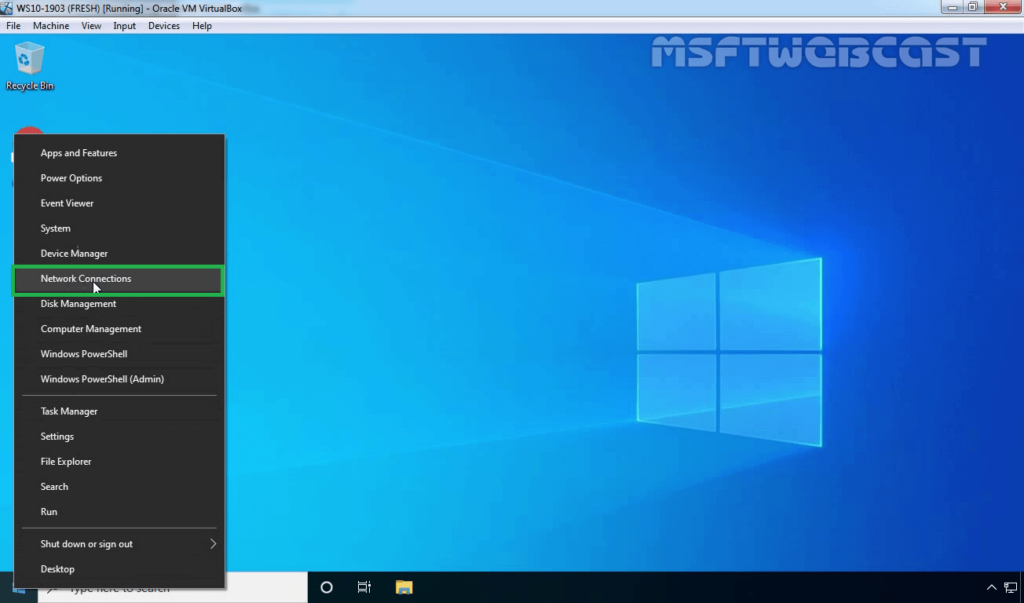
18. Right-click on the Start button and select Network Connections.
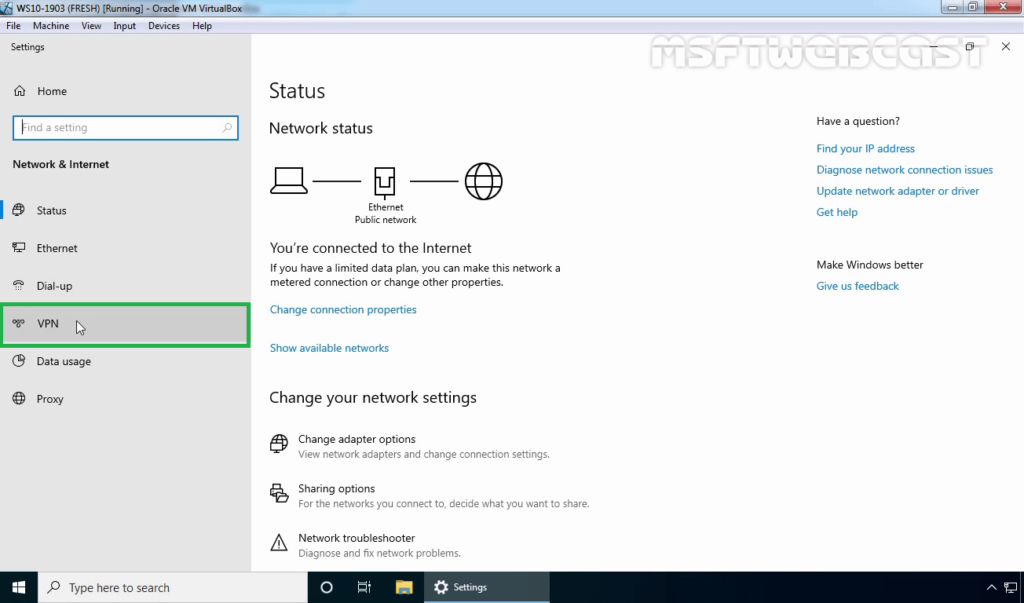
19. On left-pane, click on VPN.
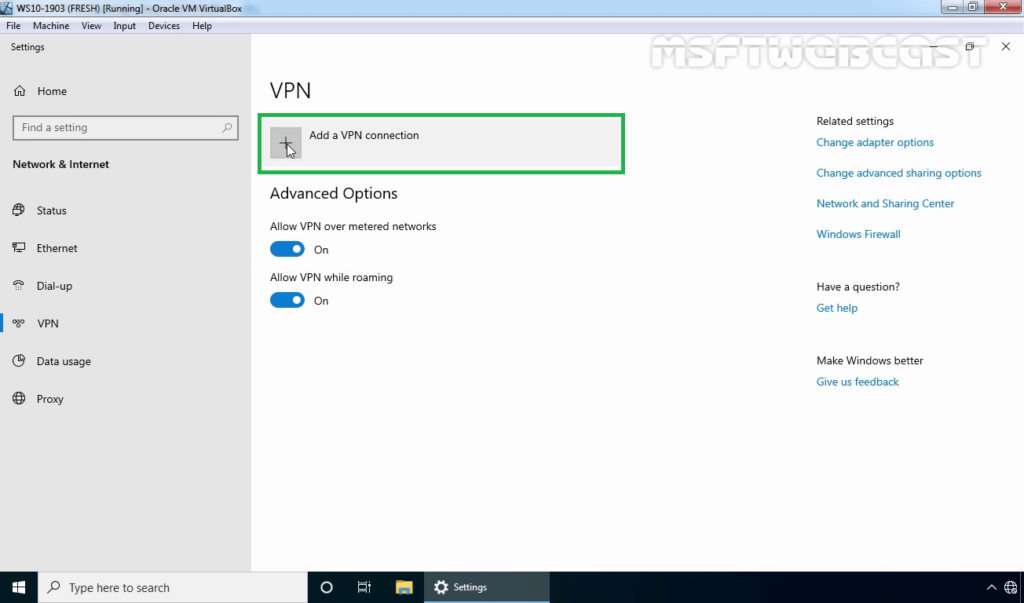
20. Click on add a new VPN connection.
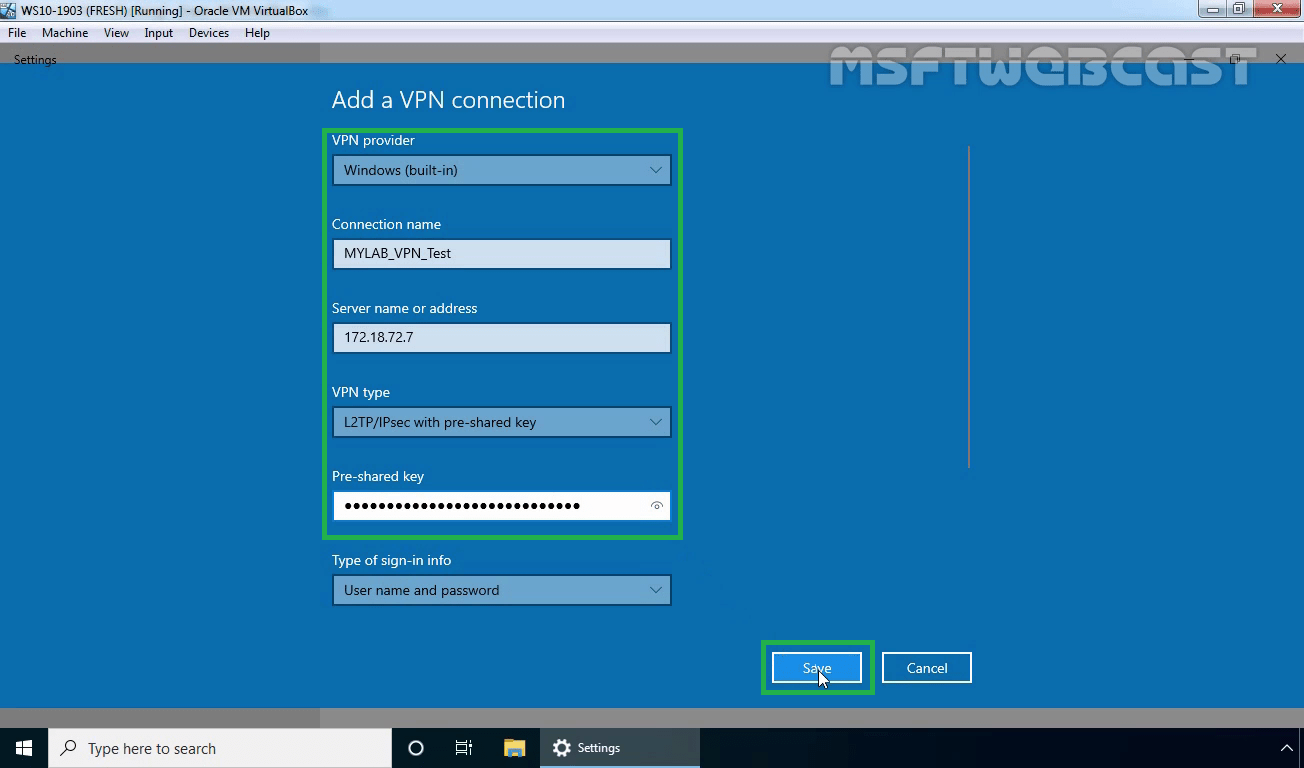
21. Specify the required information for the VPN connection.
- VPN Provider: Windows (Built-in)
- Connection Name: Name of your choice
- Server Name or IP Address: Public IP Address of VPN server
- VPN Type: L2TP/IPsec with Pre-shared key
- Pre-Shared Key: Specify the key which we had assign on VPN Server.

22. Click on Save.
Step:6 Test L2TP/IPsec VPN Connection:
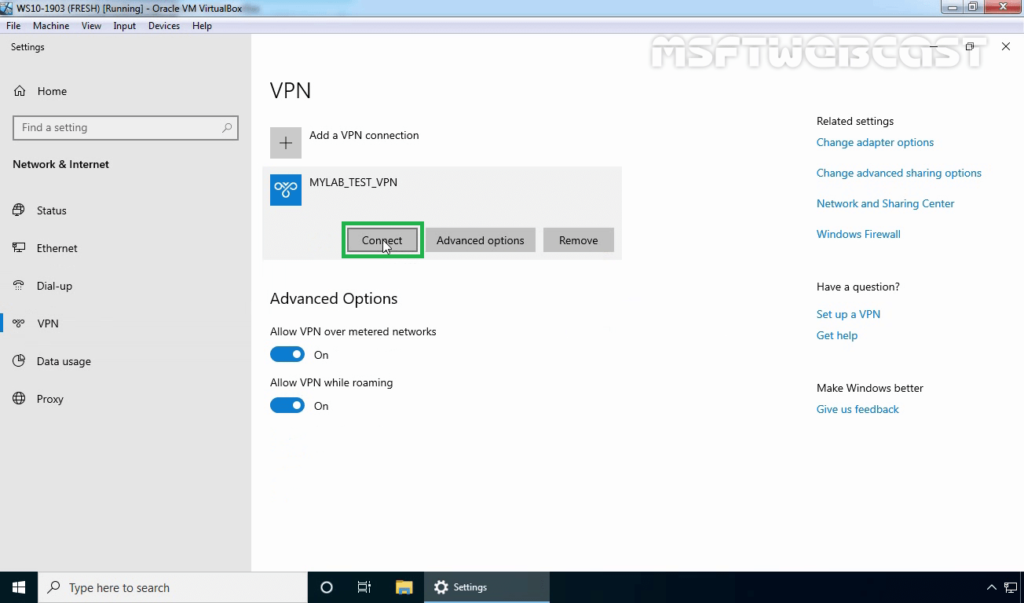
23. Click on VPN connection and select Connect.
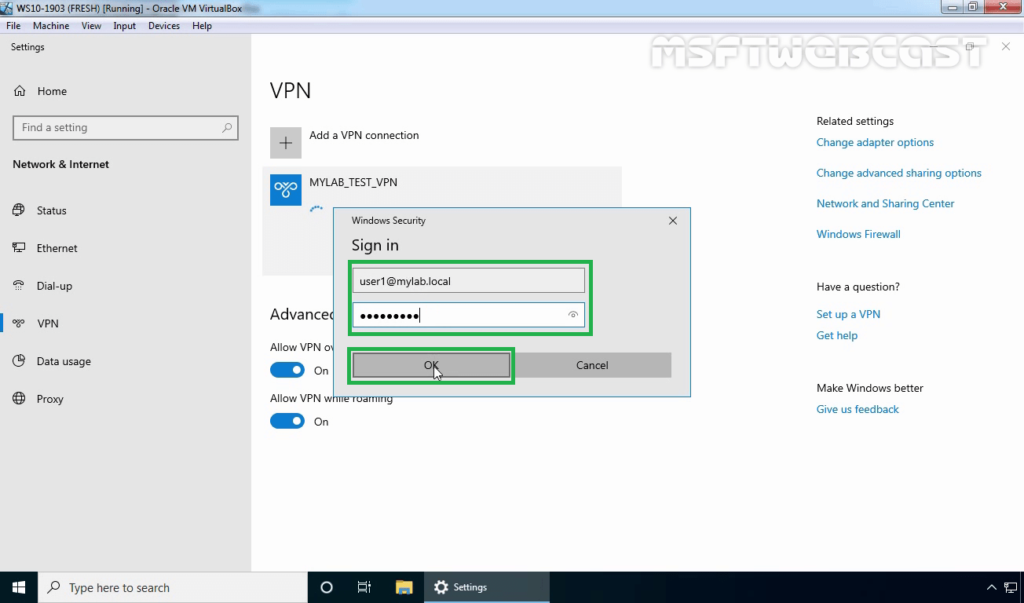
24. Specify a username and password to connect the VPN server. Click OK to connect.
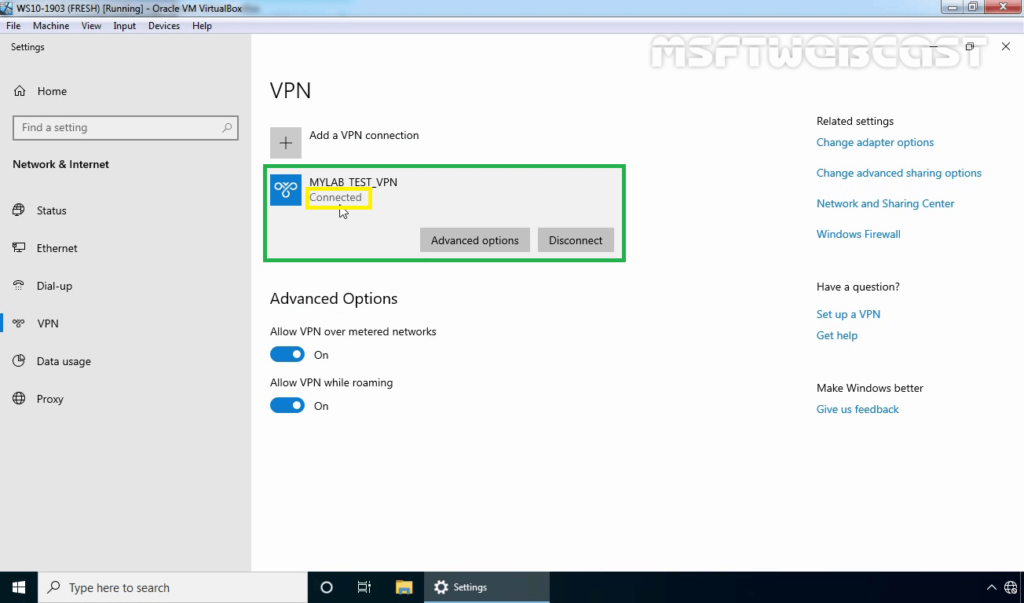
25. Verify the VPN connection is successfully connected with the VPN server using the L2TP/IPsec protocol.
Step:7 Monitor L2TP/IPsec VPN Connection:
On Windows 10 Client Machine:
26. Press Windows Key and R key together. At Run menu type ncpa.cpl and press enter to open Network Connection console.
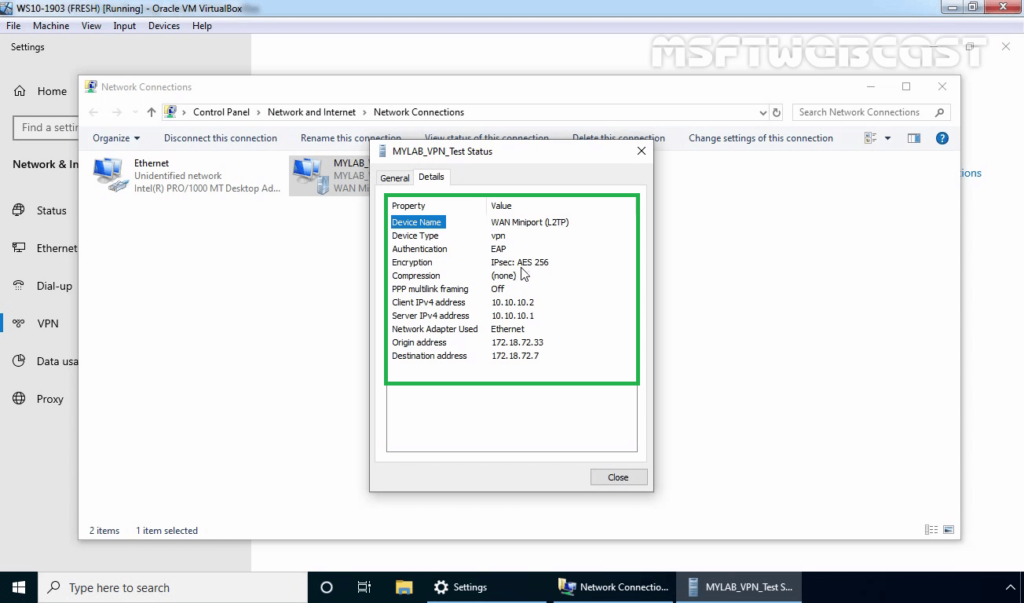
27. Right-click on VPN connection and click on the Status button.
28. Click on details to see information about VPN connection like Authentication Method, Encryption Mod, etc.
On VPN Server:
29. Press Windows Key and R key together. At Run menu type wf.msc and press enter to open Windows Defender Firewall and Advanced Security console.
30. Expand Monitoring, Expand Security Associations. Expand and Click on Main Mode.
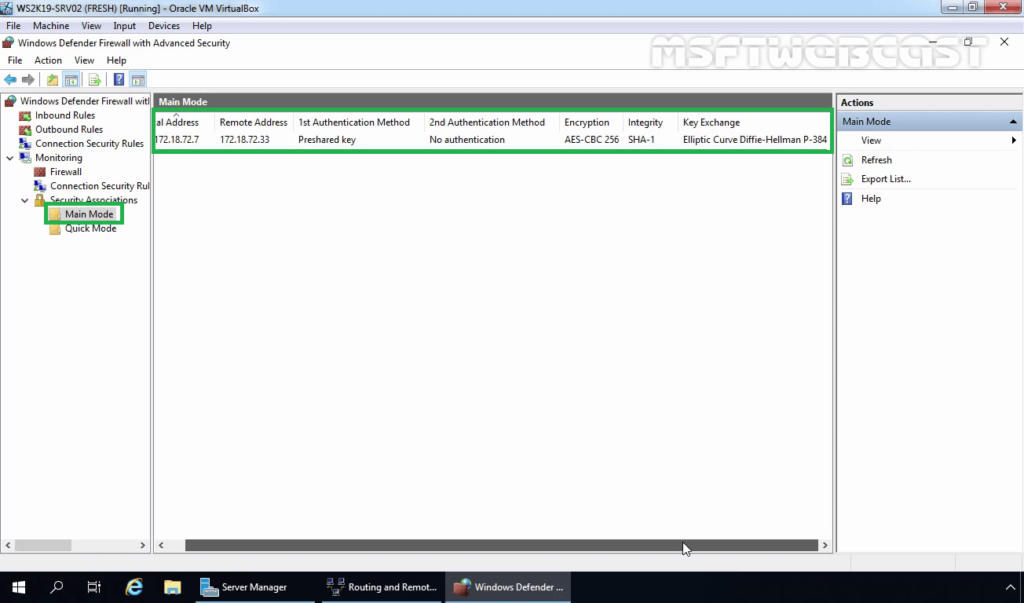
You can verify the authentication method and Encryption Standard for IPsec main mode connection.
- Authentication Method: Pre-Shared Key.
- Encryption Standard: AES-CBC 256 Bit
- Integrity Algorithm: SHA-1
- Key-Exchange Mode: Elliptic Curve Diffie-Hellman P-384.
31. Also, check Quick Mode Tunnel Information.
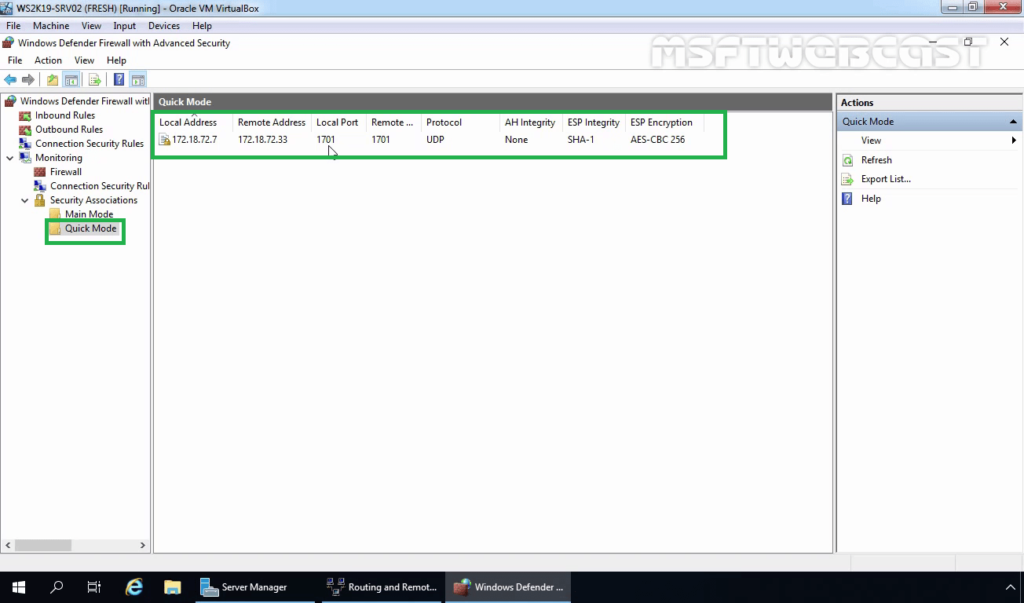
- Local Address: Local IP Address of VPN Server.
- Remote Address: VPN Client IP Address.
- Local Port: UDP 1701
- Remote Port: UDP 1701
- ESP Integrity Mode: SHA-1
- ESP Encryption Mode: AES -CBC 256 Bit
In this post, we have learned the steps to setup L2TP/IPsec VPN with a Pre-shared key on Windows Server 2019 and Windows 10.
Thank you for reading. Have a nice day.