This article is a step by step guide on how to install and configure a DNS Server role on Windows Server 2019. This guide also covers the steps on how to create forward and reverse lookup zones with associated DNS resource records.
Assign a Static IP to the DNS server:
Before you install the DNS server role, make sure that your DNS server has a static IP-address.

Install the DNS Server Role:
Open the server manager dashboard.
Click on Manage and select Add roles and features.


As soon as you choose the DNS role, a new window will pop up. Click Add features to add required features.
After selecting the DNS server role with management tools, click on Next to continue.
No additional features required at this moment. Click on Next.
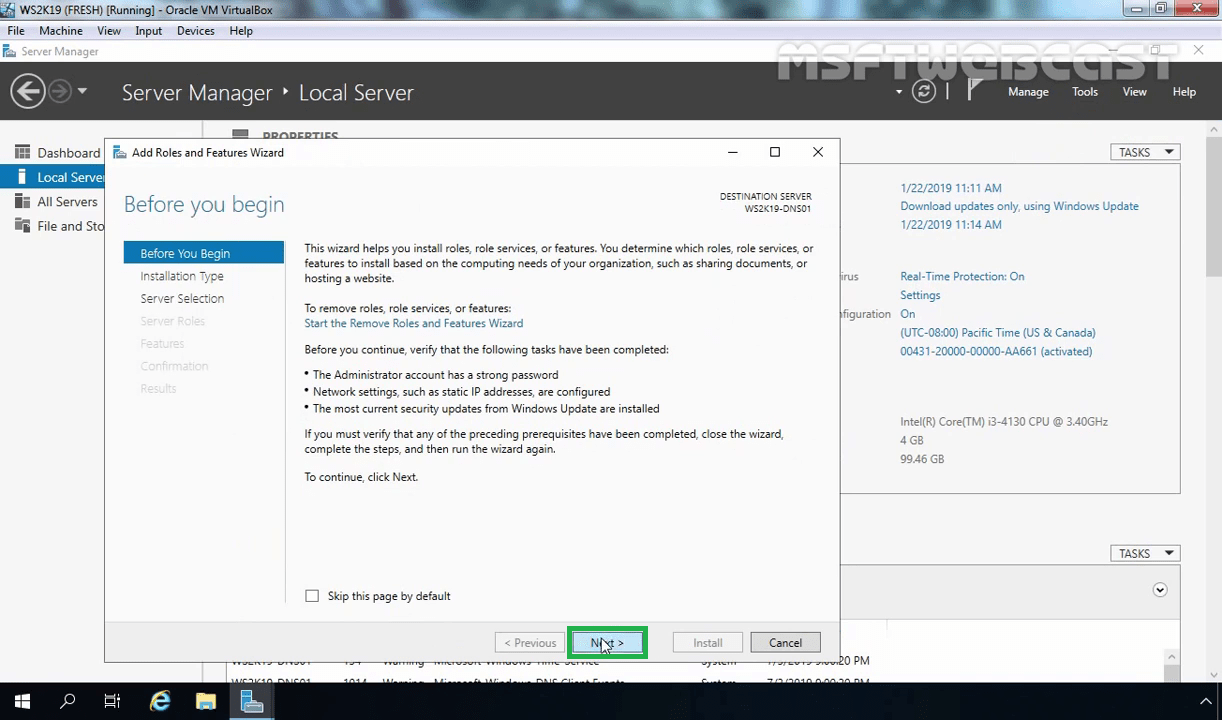
You can read brief overview information about the DNS server. Click on Next.
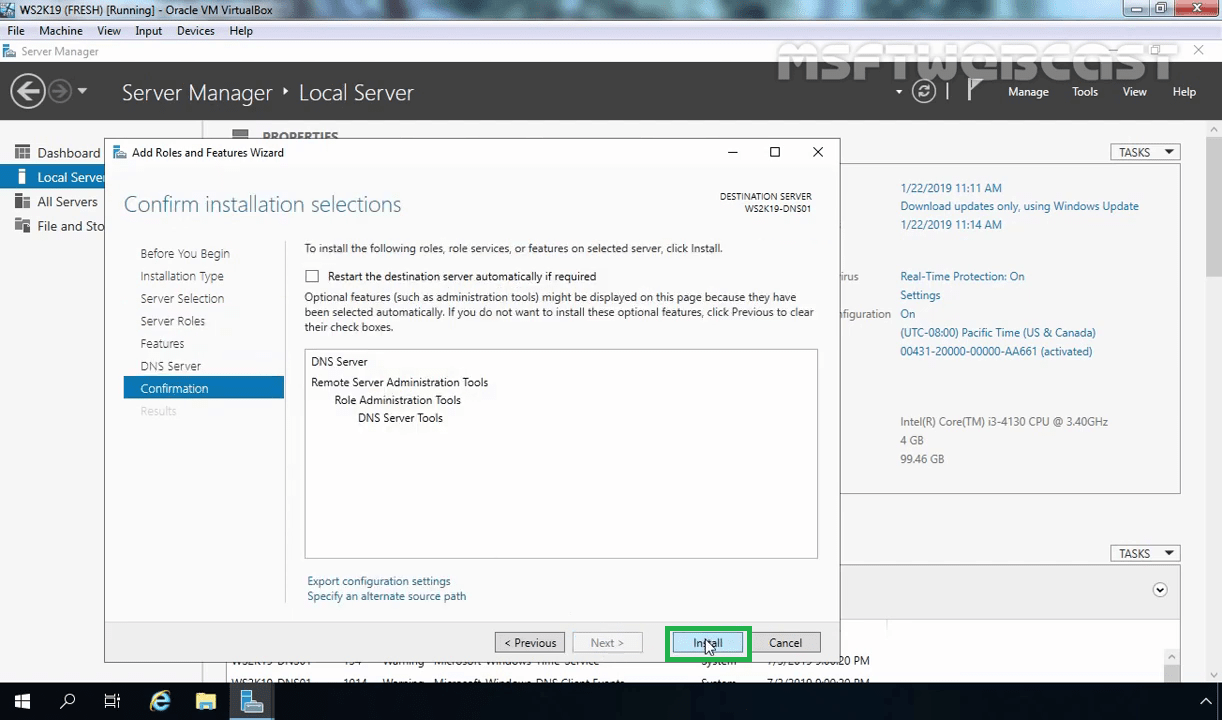
Click on Install to start the installation process.

Create a Forward Lookup Zone:
We can create and manage the DNS zone from the DNS management console.
Open the server manager dashboard (If you have closed).
Click on Tools and select DNS.

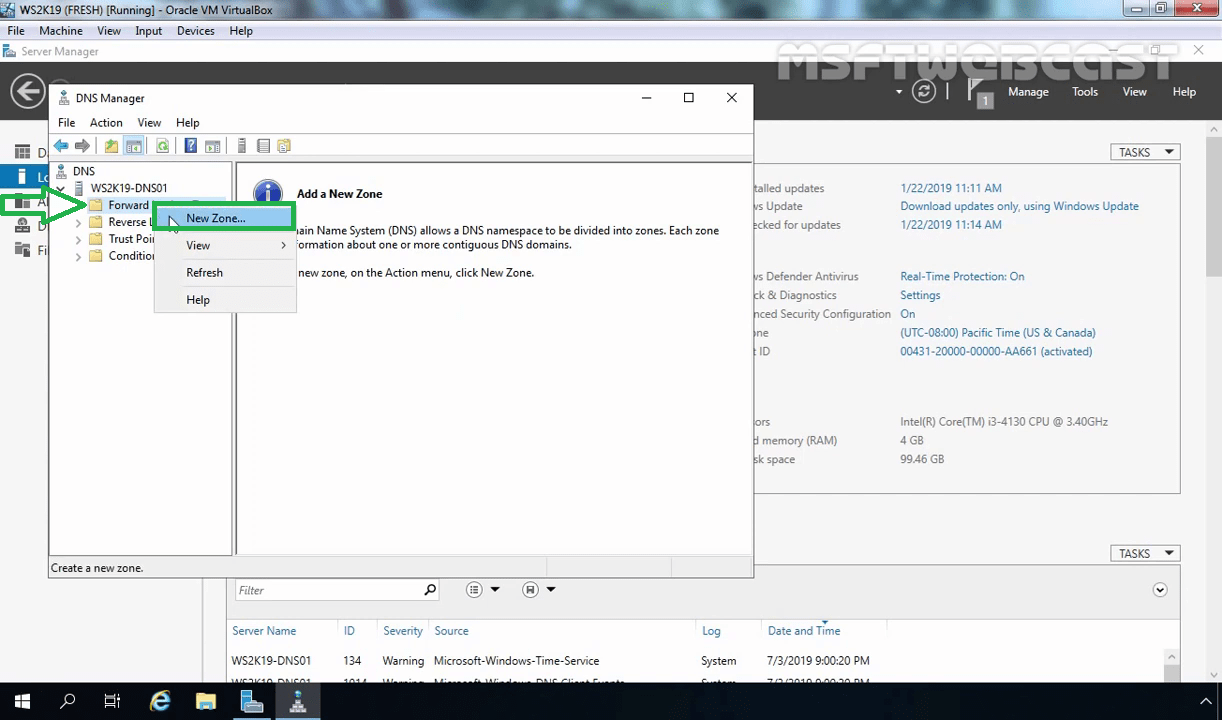
In the DNS Manager console, expand the DNS server.
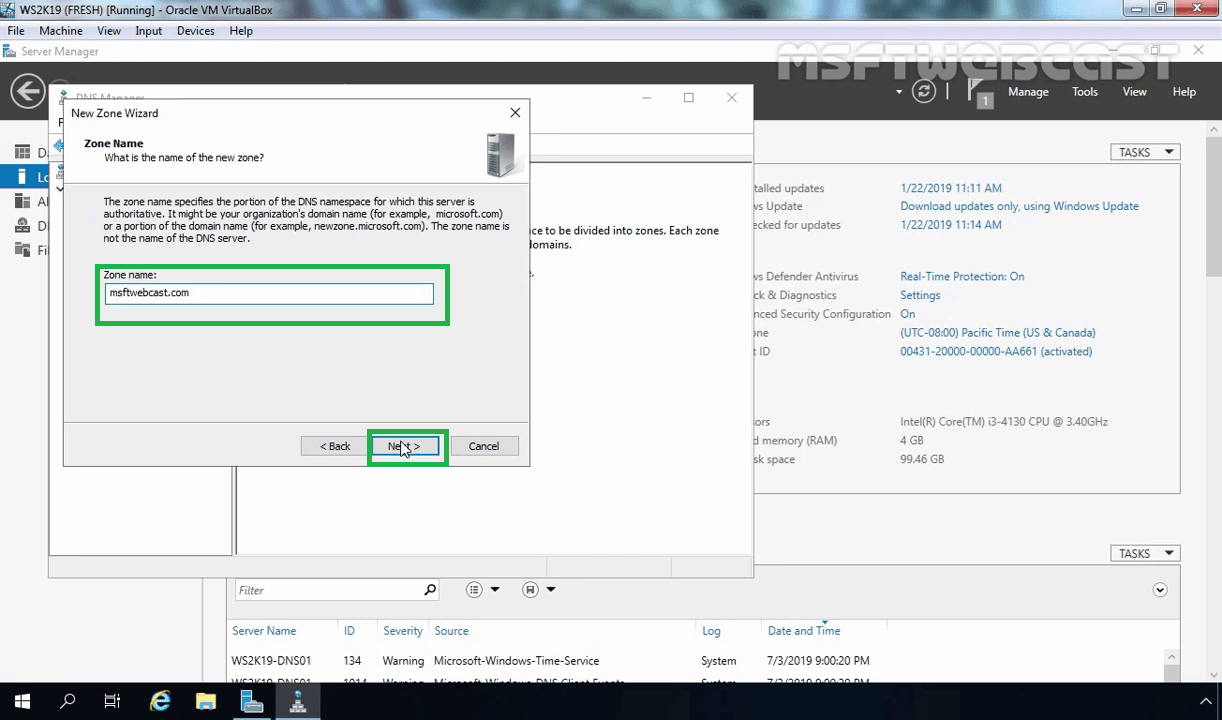
Right-click on Forward Lookup Zones and select New Zone.
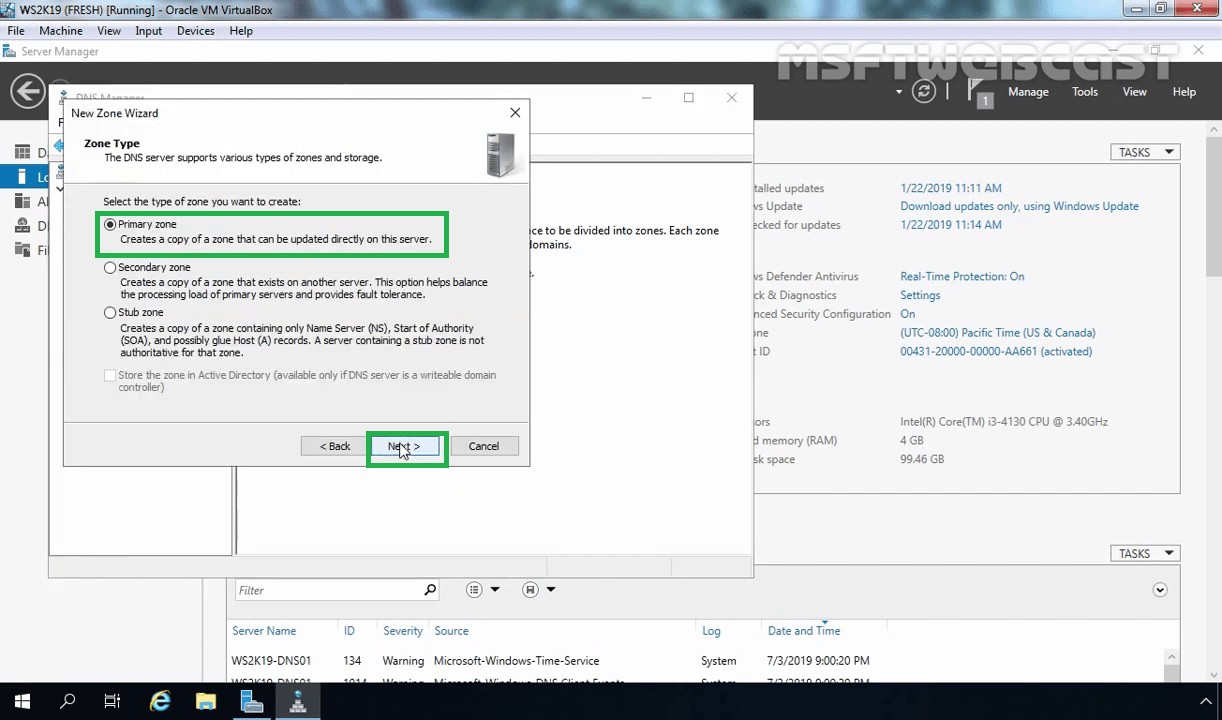
Click on Next on the welcome wizard.
In this step, you can select the type of DNS you want to use. This is our first DNS server that’s why we will select Primary Zone. (The primary zone is a read and write copy of DNS zone hosted by your DNS server.)

Click on Finish.
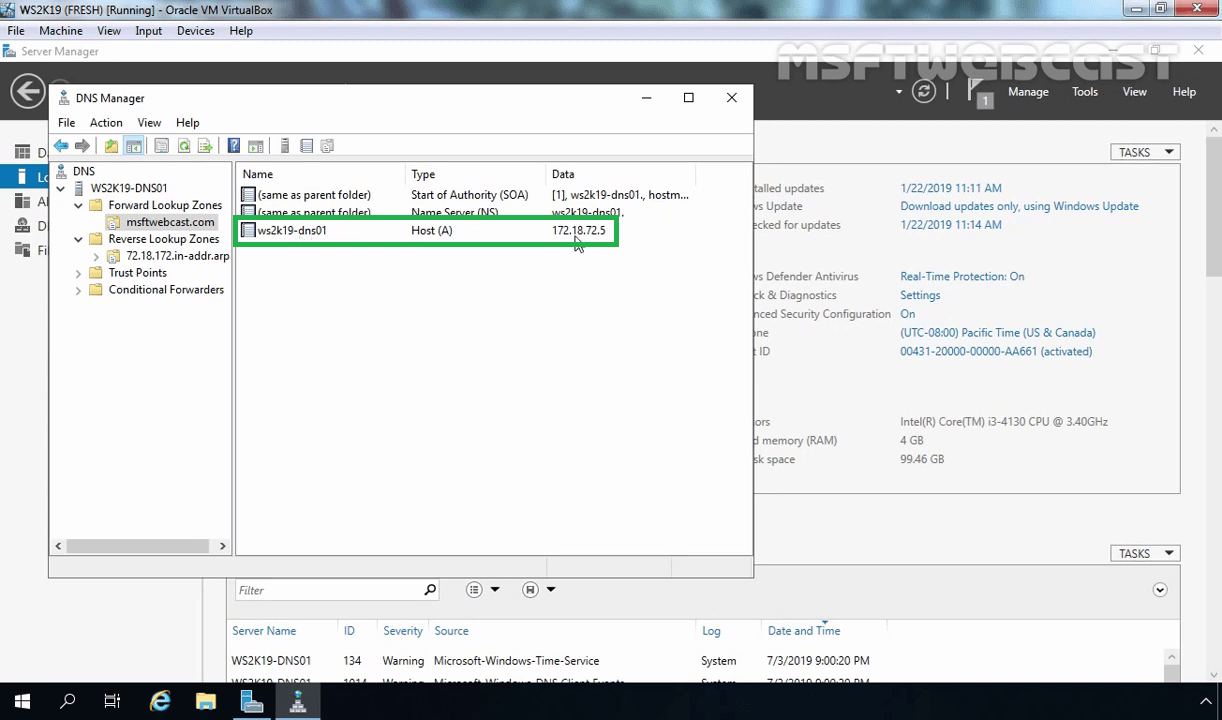
That’s all, forward zone created.
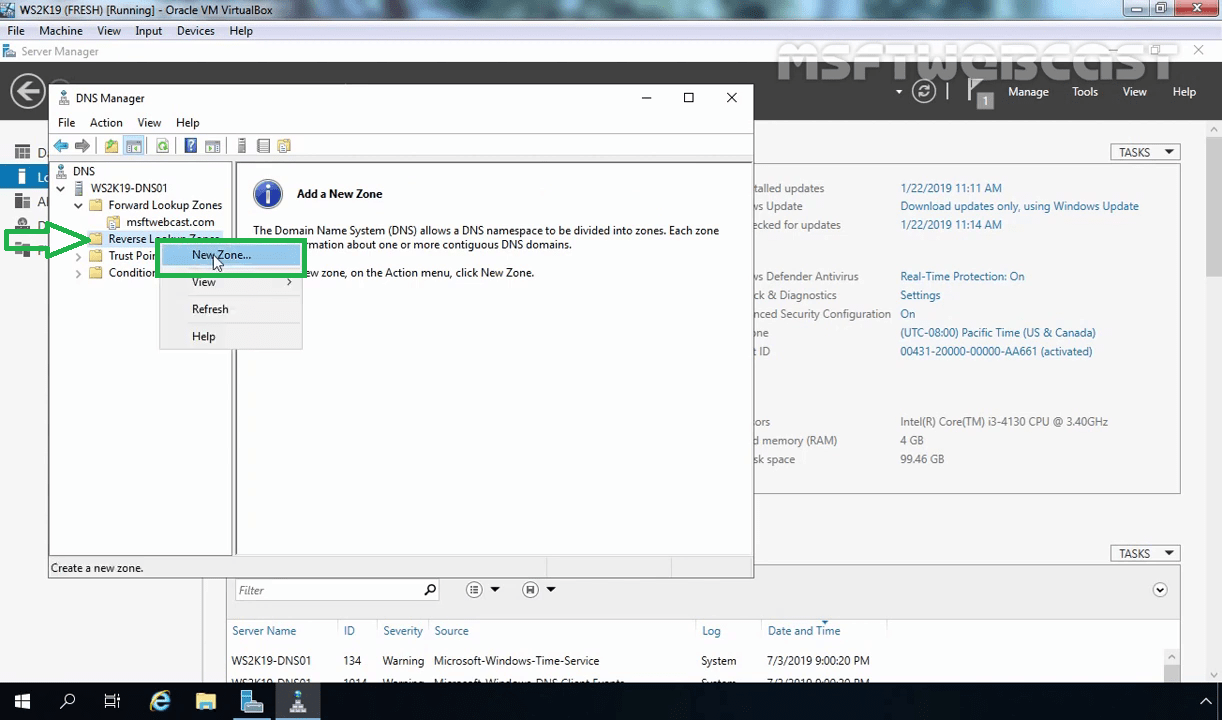
Create a Reverse Lookup Zone:
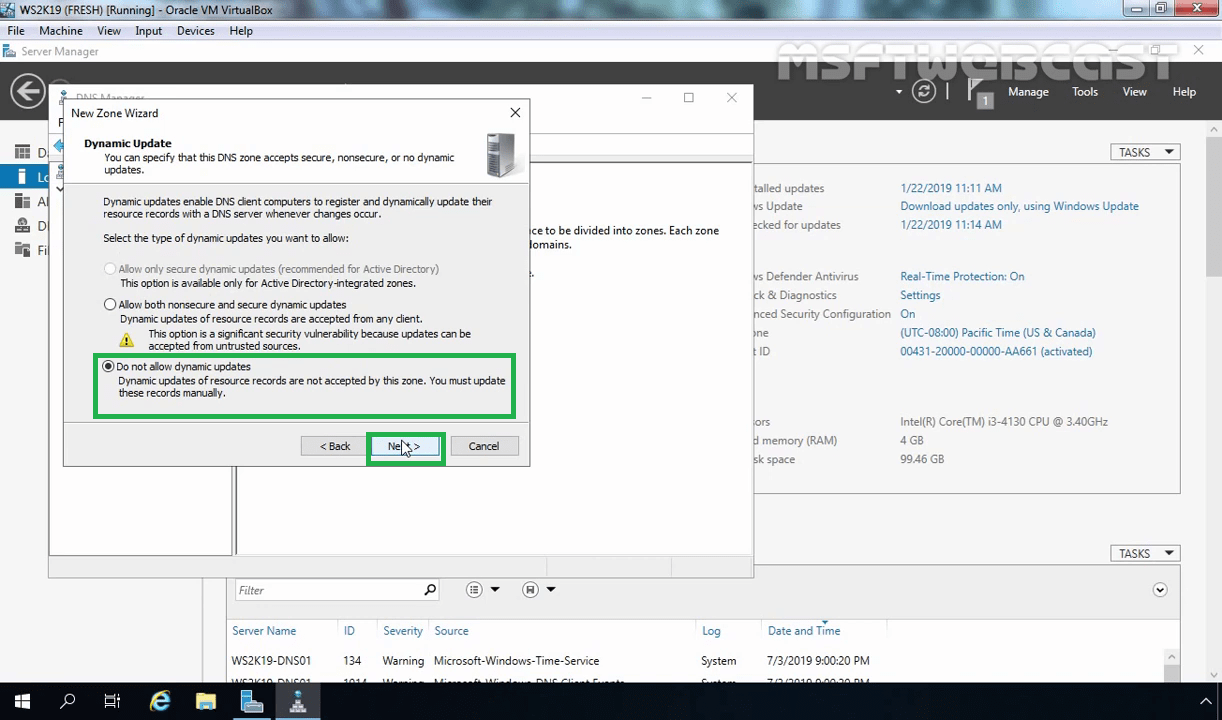
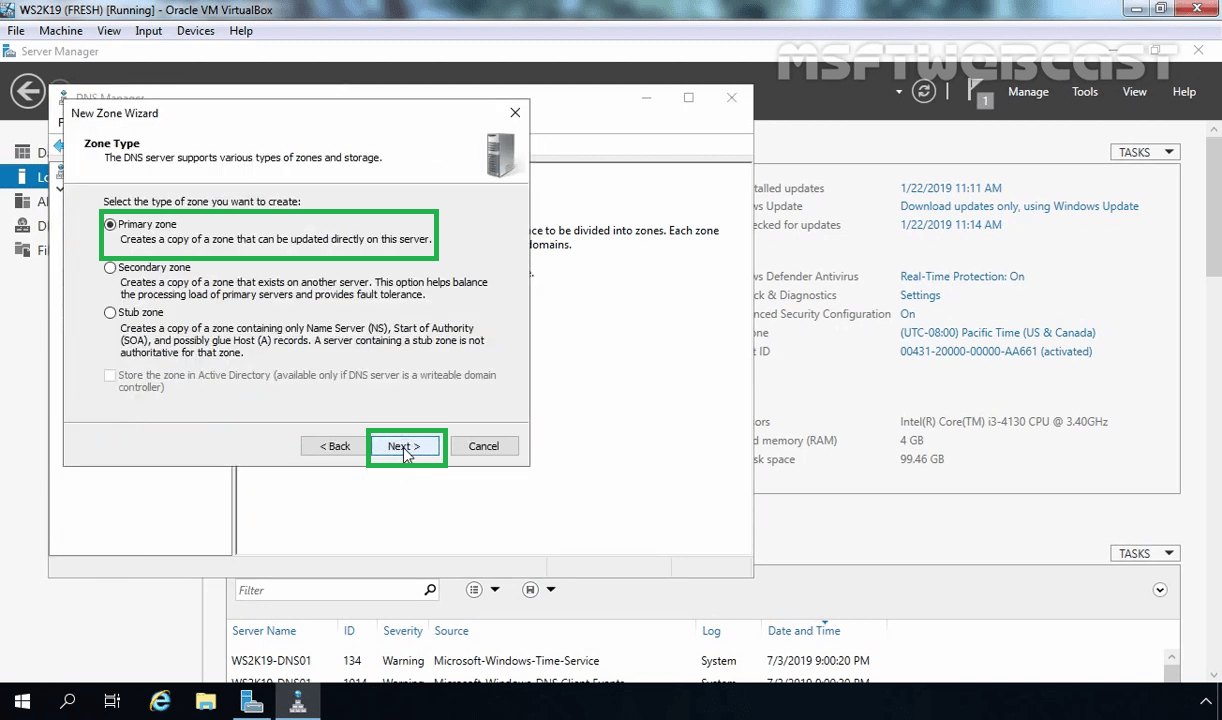
To do this right-click on Reverse Lookup Zone and click on New Zone.
Click on Next.
Select Primary zone and click on Next.


Click on Next.
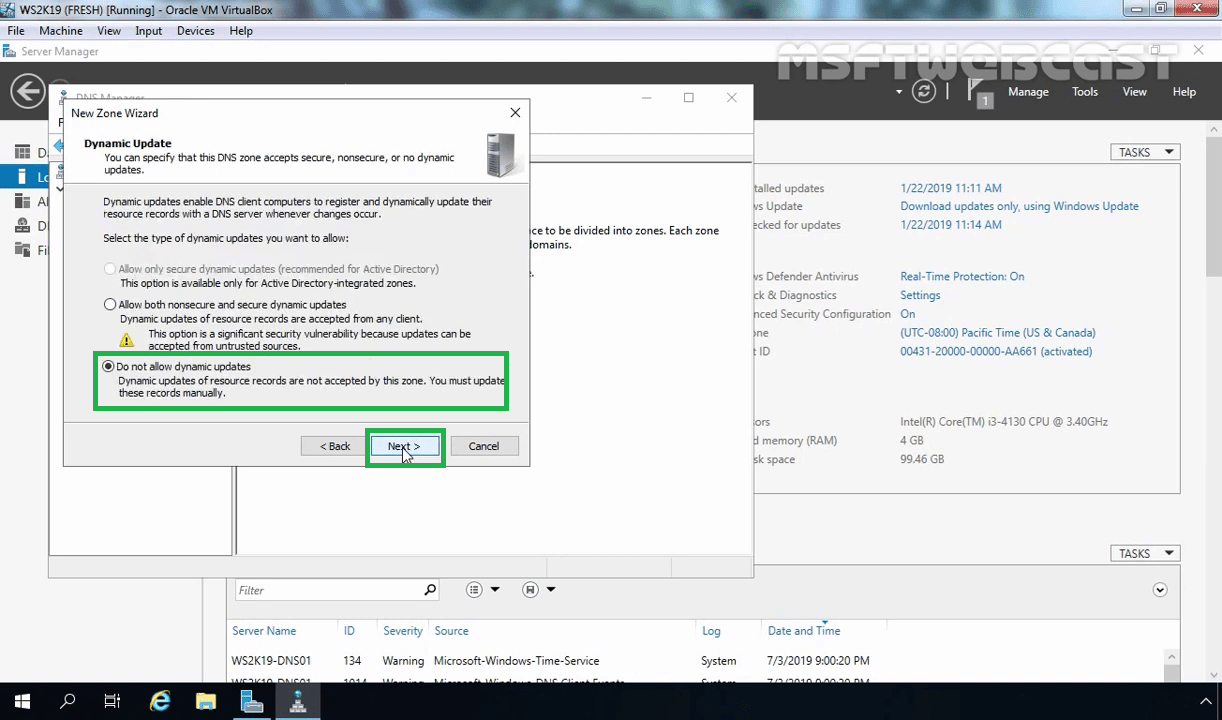
Choose Do not allow dynamic updates and click on Next.


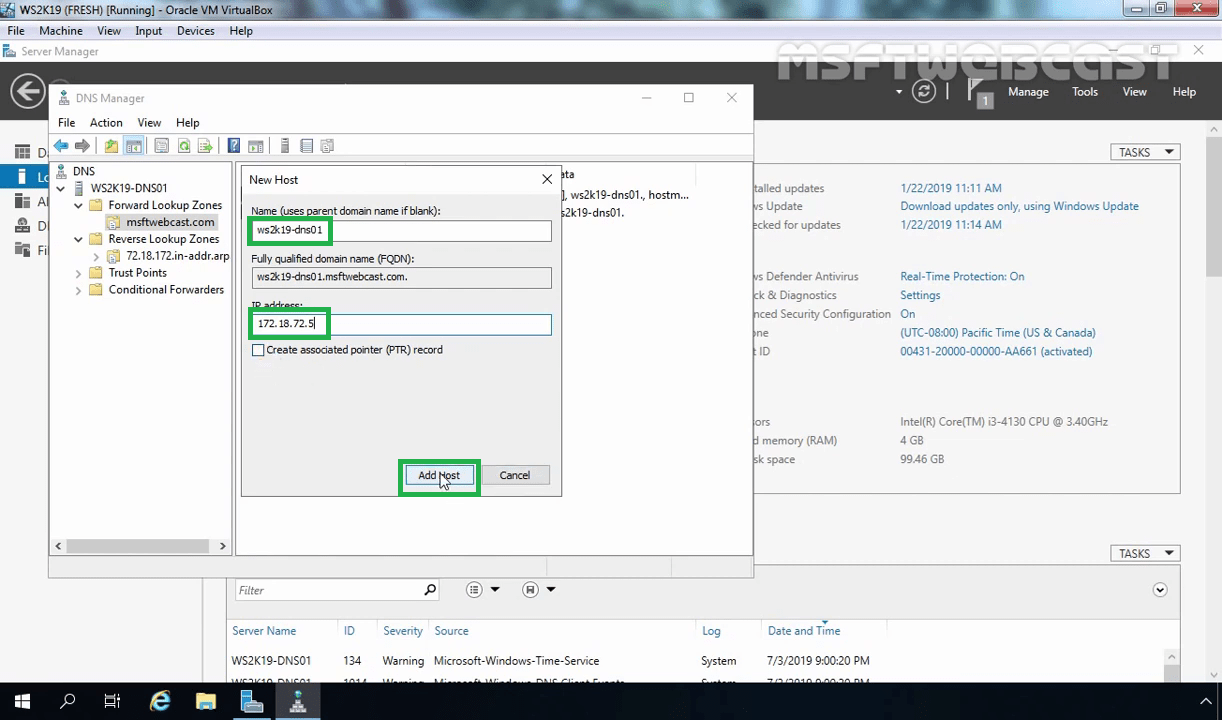
Add Host Record in a Forward Lookup Zone:
Right-click your forward lookup zone (In our case, right-click on msftwebcast.com) where you would like to create a host record and select New Host (A or AAAA) record.


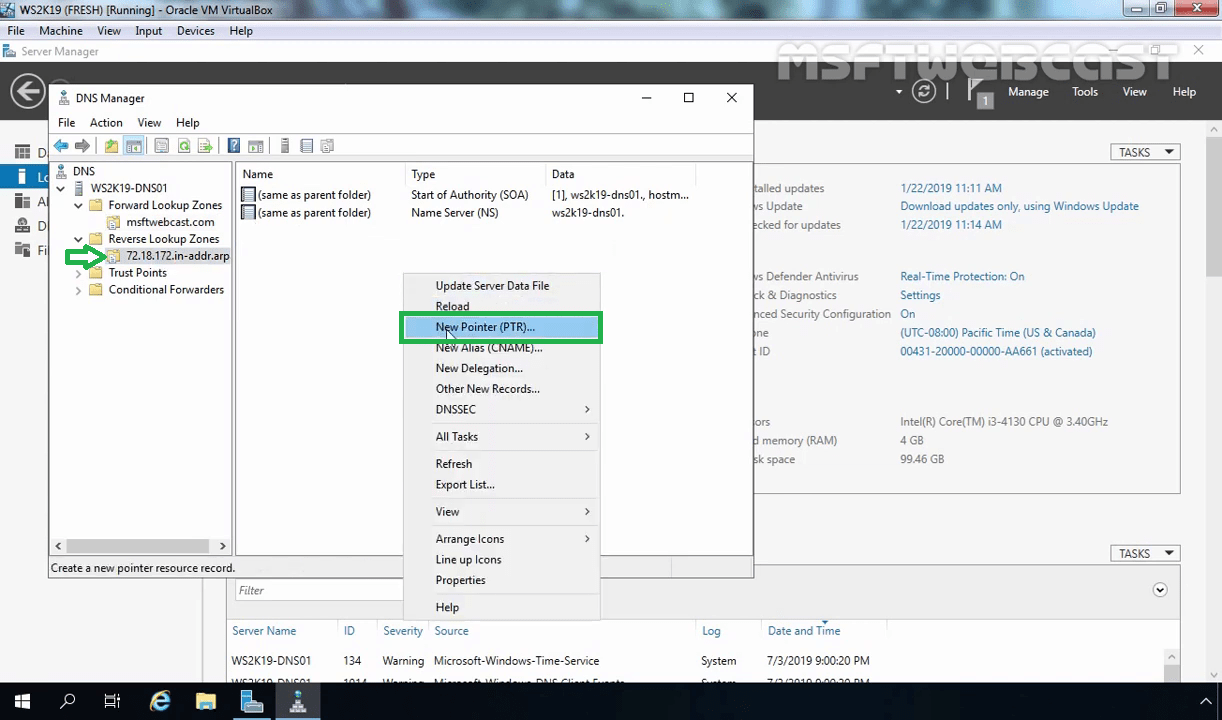
Add Pointer Record in a Reverse Lookup Zone:
Right-click your forward lookup zone where you would like to create a pointer record and select New Pointer (PTR) record.
Type the IP-address (172.18.72.5) and host name (ws2k19-dns01.msftwebcast.com) of your DNS Server in appropriate fields and then click on OK.


Launch nslookup:
Right-click on DNS server and select launch nslookup.

