In the previous articles, we have described the steps on How to Install and Configure the WSUS server role on Windows Server 2019. In this post, we will configure the group policy settings to deploy automatic updates for client computers.
Overview:
After installing and configure the WSUS server role, the next step is to configure group policy settings to determine how WSUS clients will receive the updates.
We need to direct each client to communicate with WSUS Server to check for new updates instead of using Microsoft Update over the Internet. Using group policy, you can point your client machines to use the local WSUS server instead of Microsoft Update Server.
With an active directory environment, you can use Group Policy to specify the WSUS server. You can create the group policy and apply it at the domain level. You can also apply the GPO to a specific OU if you want to target specific computers only.
Steps to create a new GPO:
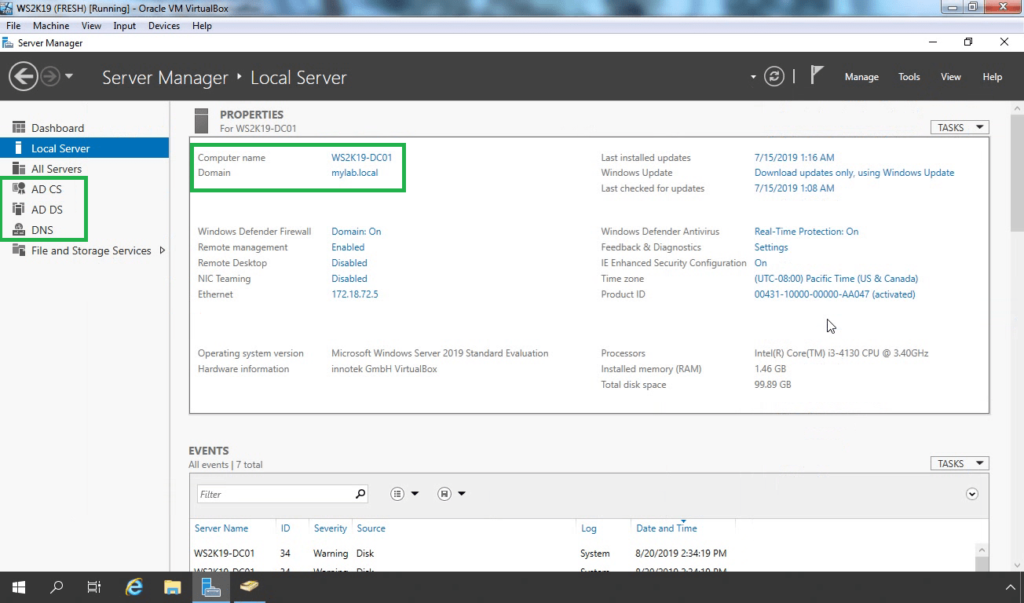
Login to your domain controller and open Server Manager.
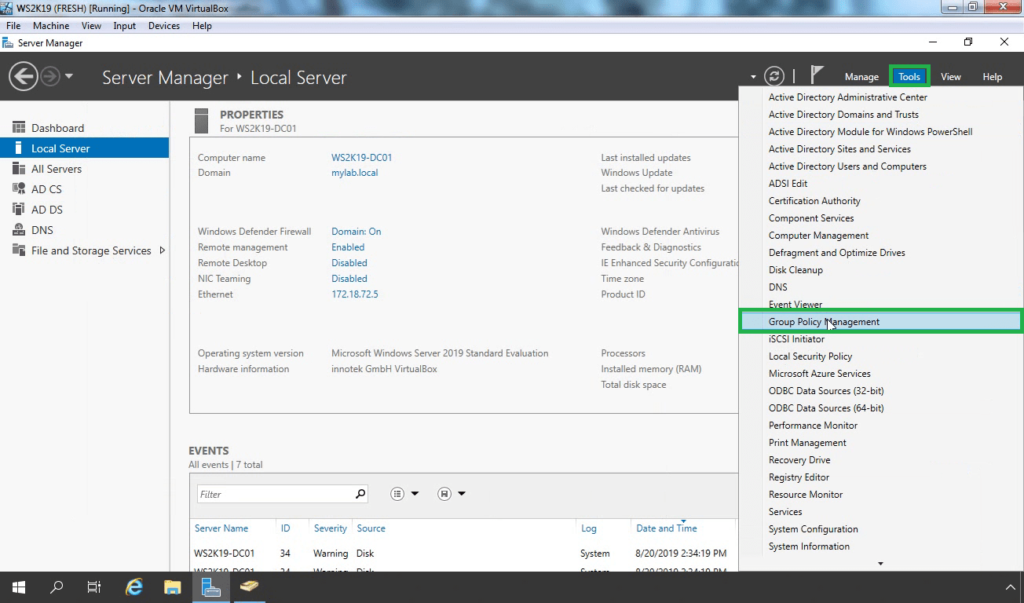
From Server Manager, click on Tools. Then select Group Policy Management.
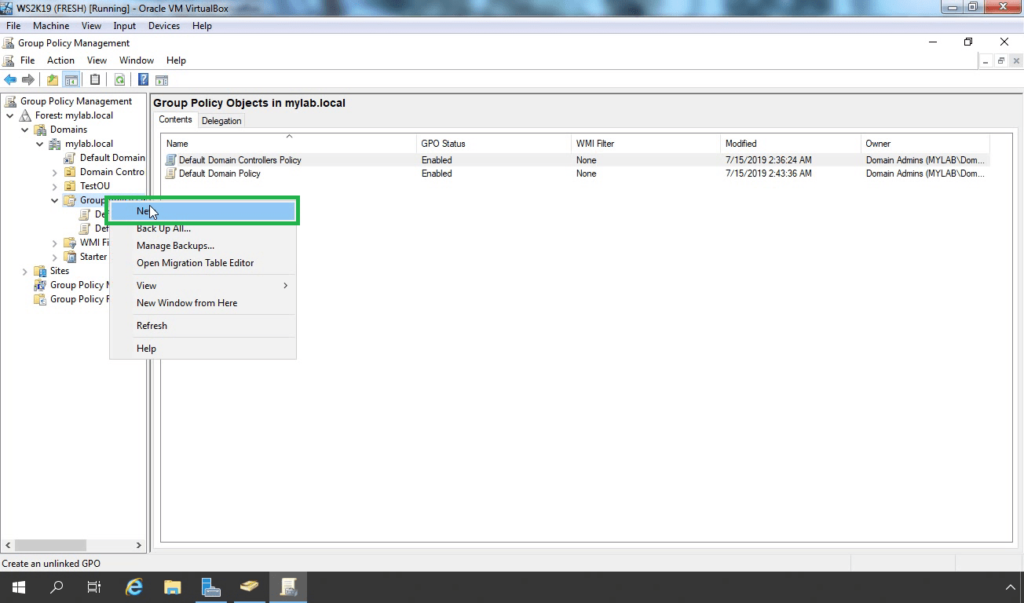
Expand your domain name. Then expand the Group Policy Objects container.
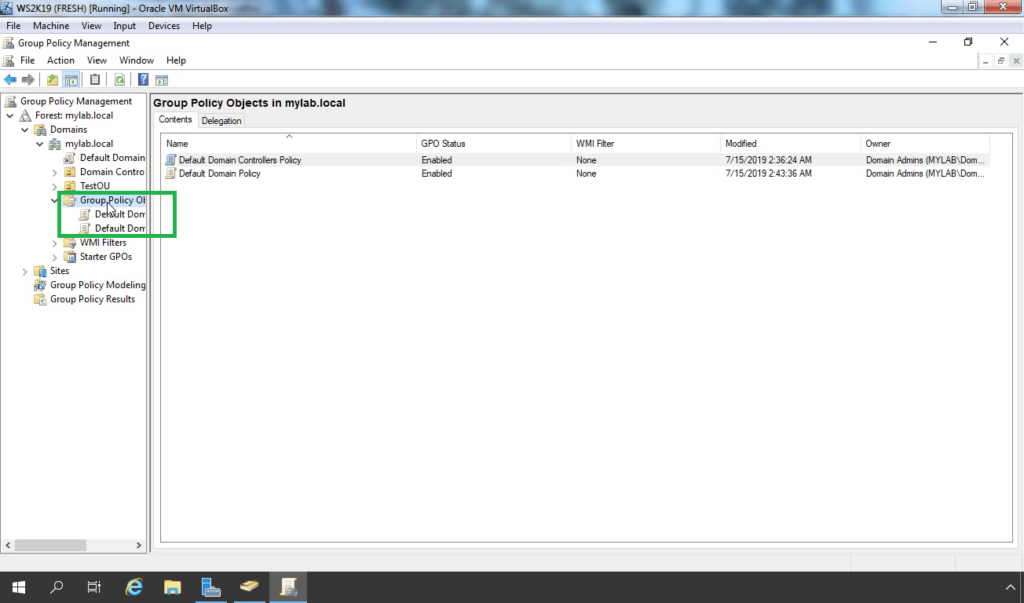
To create a new GPO, Right-click on the Group Policy Objects and select new.
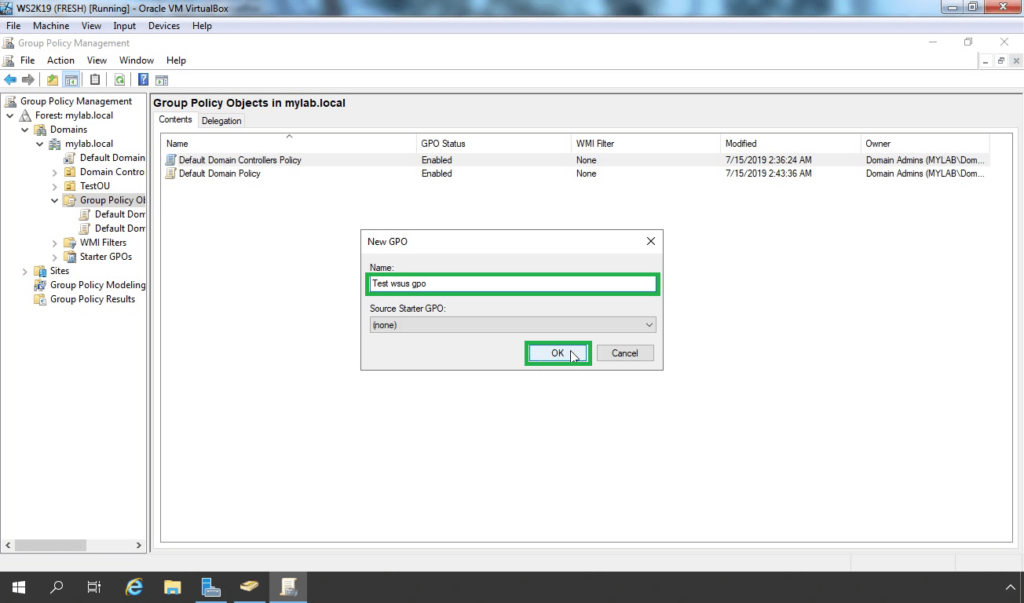
Give a meaningful name to the new GPO. For example, Test WSUS GPO. Click on OK.
Steps to setup the WSUS group policy settings:
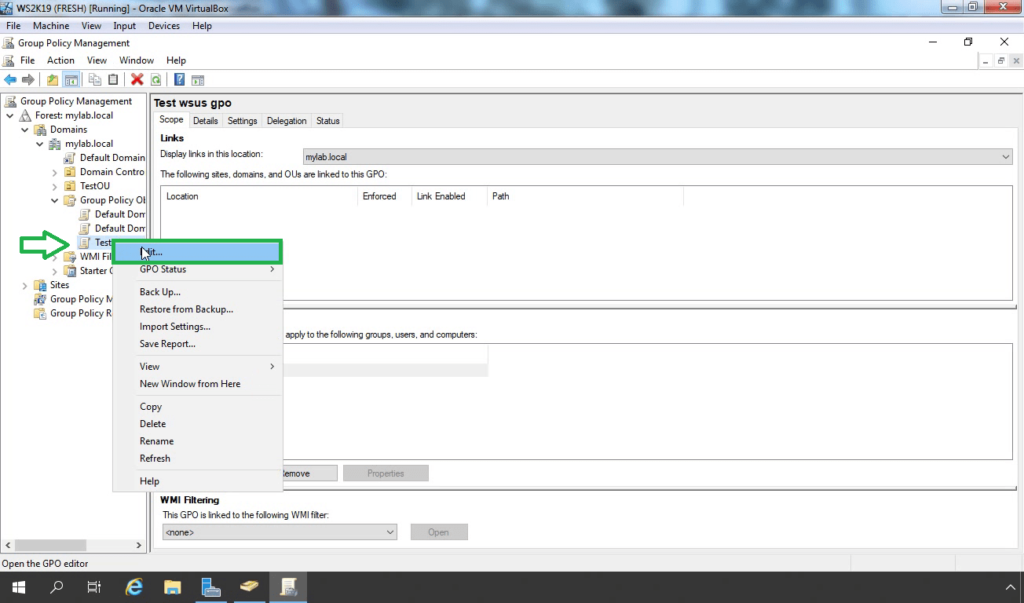
Right-click on newly created GPO and select edit.
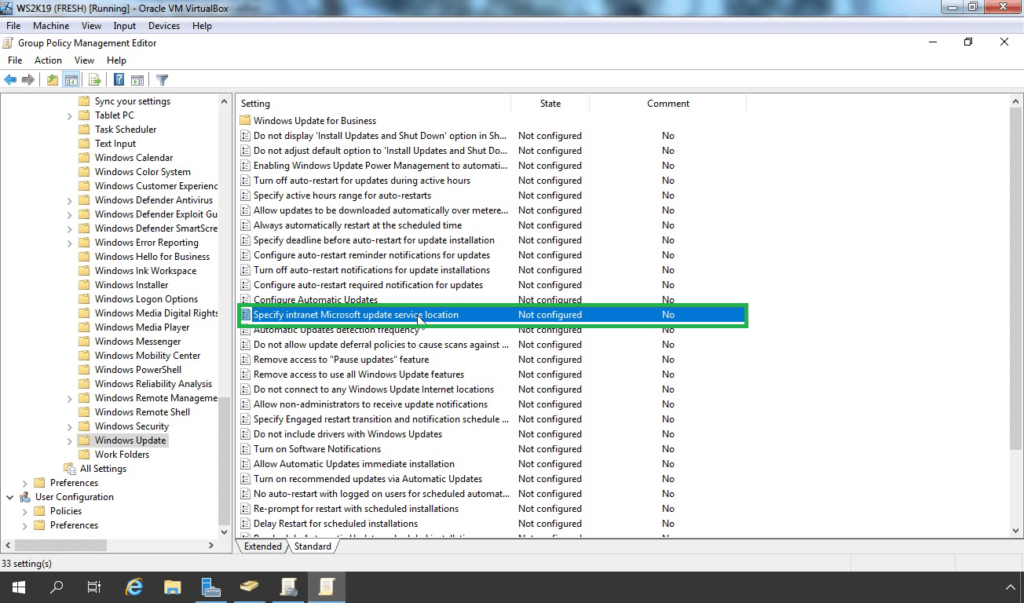
Navigate to Computer Configuration > Policies > Administrative Templates > Windows Components > Windows Update.
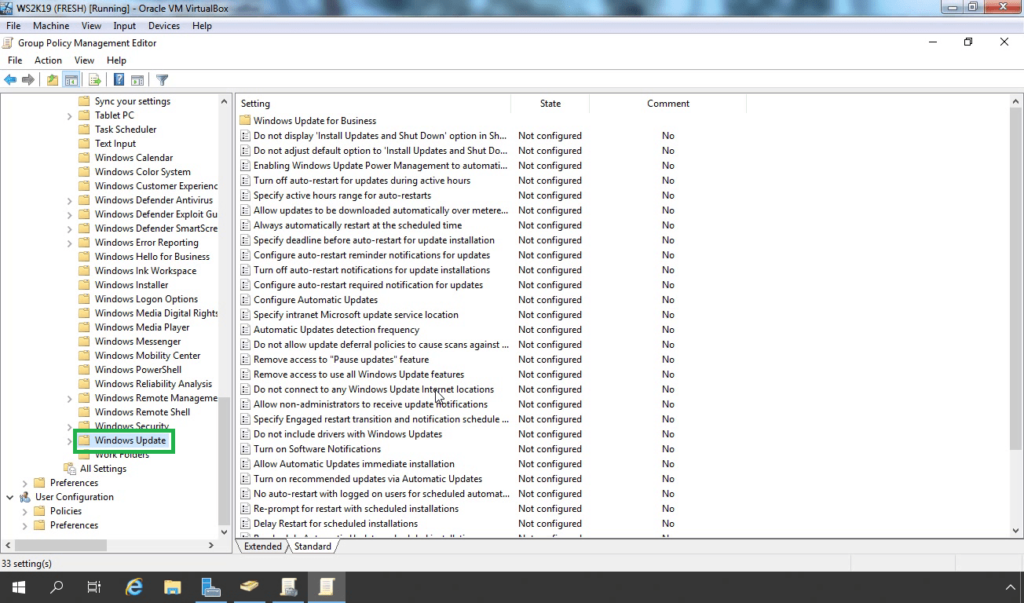
There are several policies related to WSUS settings. Of course, you do not have to enable all of them.
Locate and double-click a policy name “Specify Intranet Microsoft Update Service Location”.
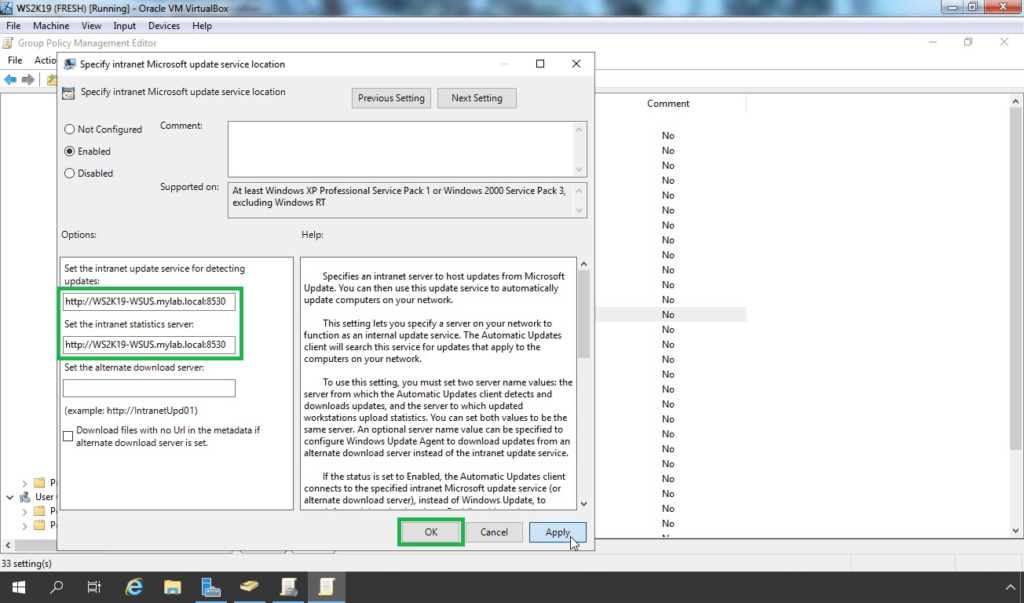
To enable the policy, select the Enabled radio button.
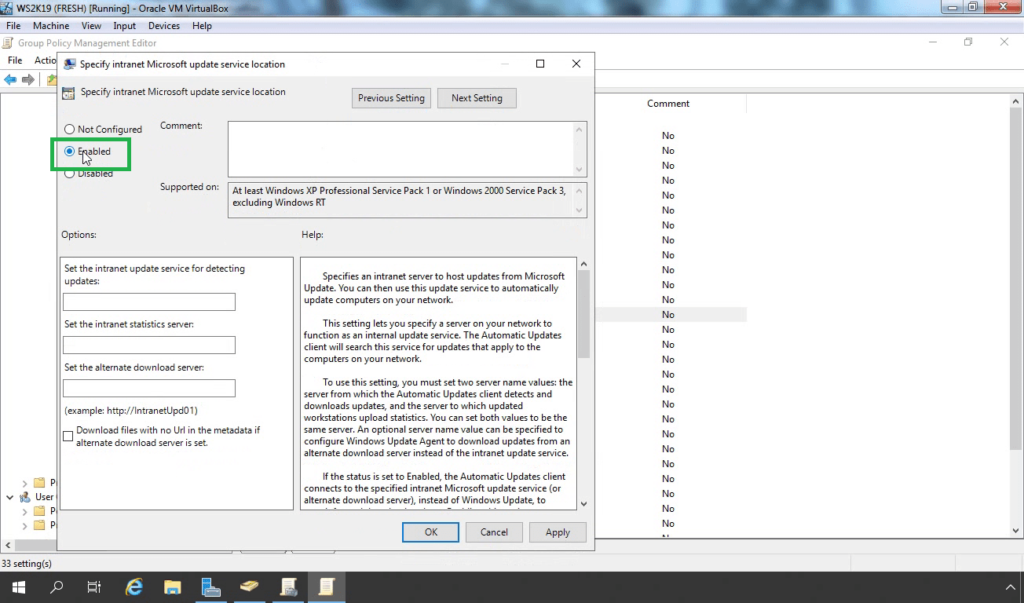
Specify the intranet update service and intranet statistics server. In our case, the location will be http://ws2k19-wsus.mylab.local:8530. Click Apply and OK.
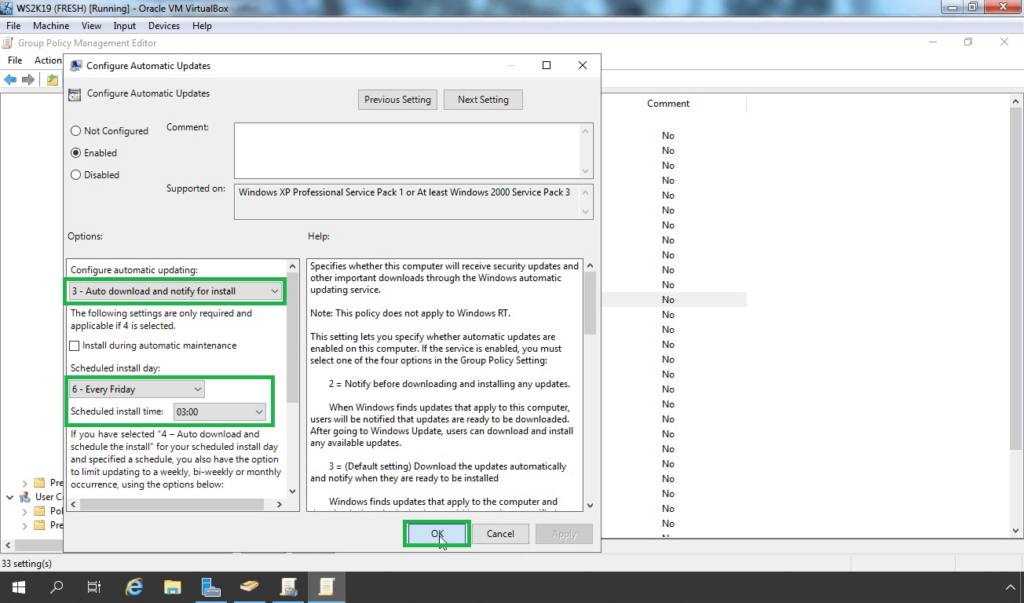
Locate and double-click on a “Configure Automatic Updates policy”.
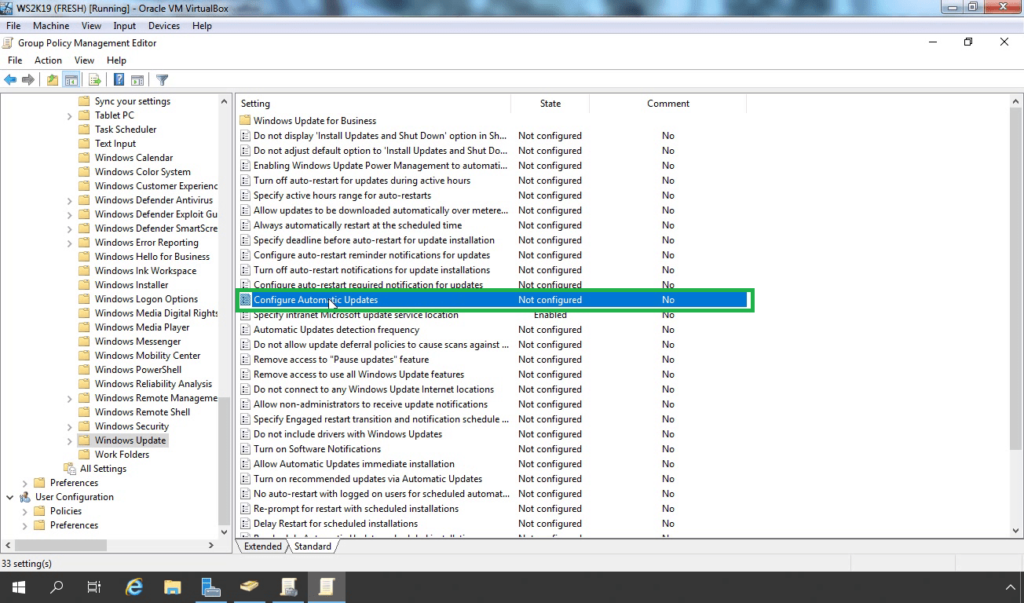
Click Enabled and select one of the following options:
Notify for download and auto-install: This option notifies a logged-on administrative user before the download and before the installation of the updates.
Auto download and notify for install: This option automatically begins downloading updates and then notifies a logged-on administrative user before installing the updates.
Auto download and schedule the install: If Automatic Updates is configured to perform a scheduled installation, you must also set the day and time for the recurring scheduled installation.
Allow local admin to choose setting: With this option, the local administrators are allowed to use Automatic Updates in Control Panel to select a configuration option of their choice. For example, they can choose their own scheduled installation time. Local administrators are not allowed to disable Automatic Updates.

Once you ready, click on Apply and OK.
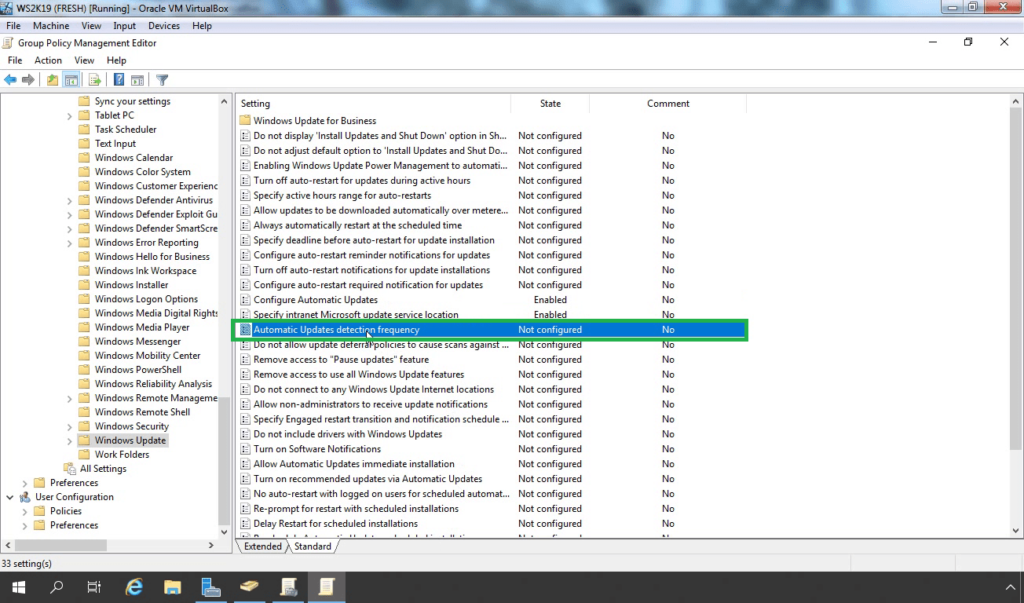
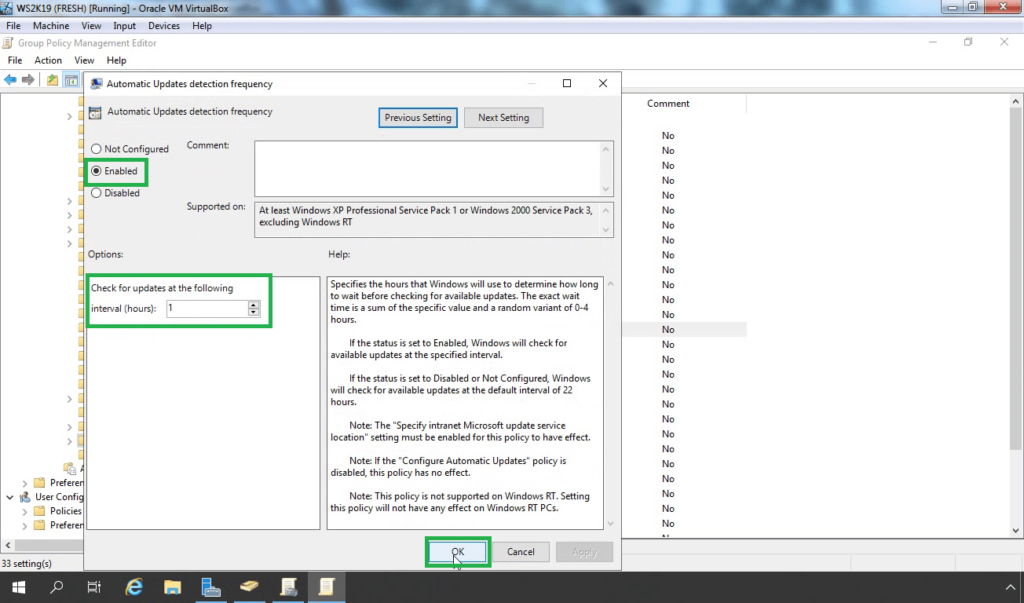
Automatic Update detection frequency policy specifies the hours that Windows will use to determine how long to wait before checking for available updates.
Double click on “Automatic Update detection frequency” policy.
Set the option as per your requirement. Click on Apply and OK.
Close the group policy editor console.
At a minimum, we need to configure these three policies for WSUS server.
Link the GPO to the OU containing computer accounts.
Steps to link the WSUS GPO to OU:
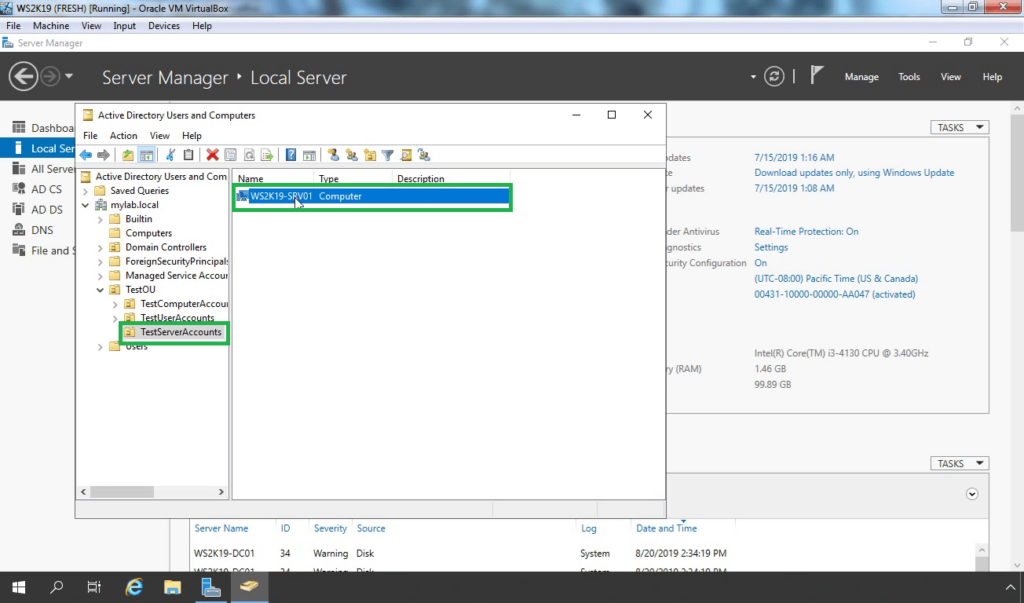
For this article, we have created one OU name TestServerAccounts. Under the OU we have stored the computer account of our member server WS2K19-SRV01. For testing purposes, we will link the GPO to this OU and check the result on the WS2K19-SRV01 server.
Right click on TestServerAccounts OU and select Link an existing GPO option.
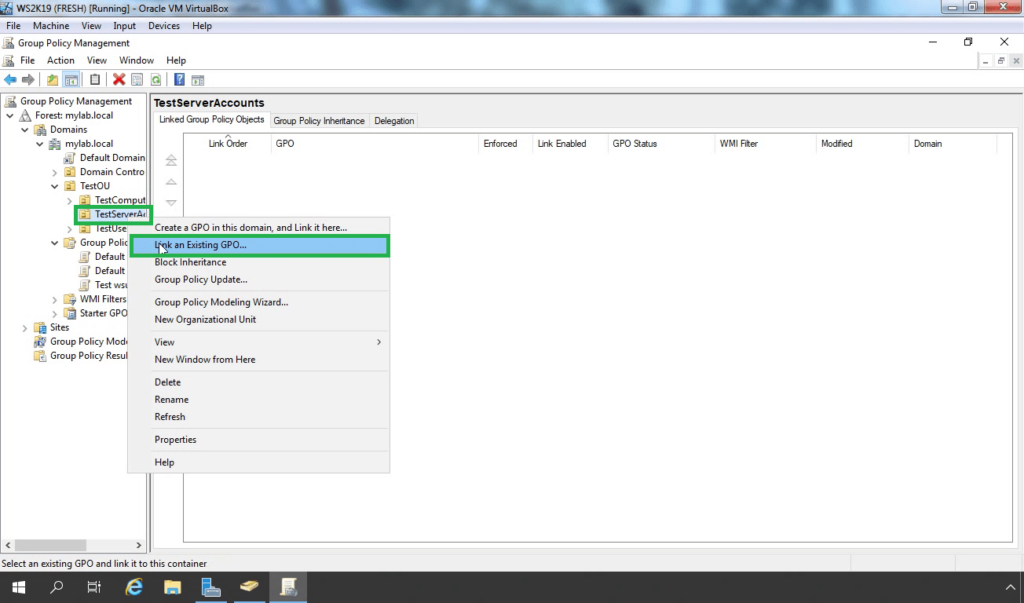
Select the GPO which we have created earlier. Click on OK.

Test the GPO settings:
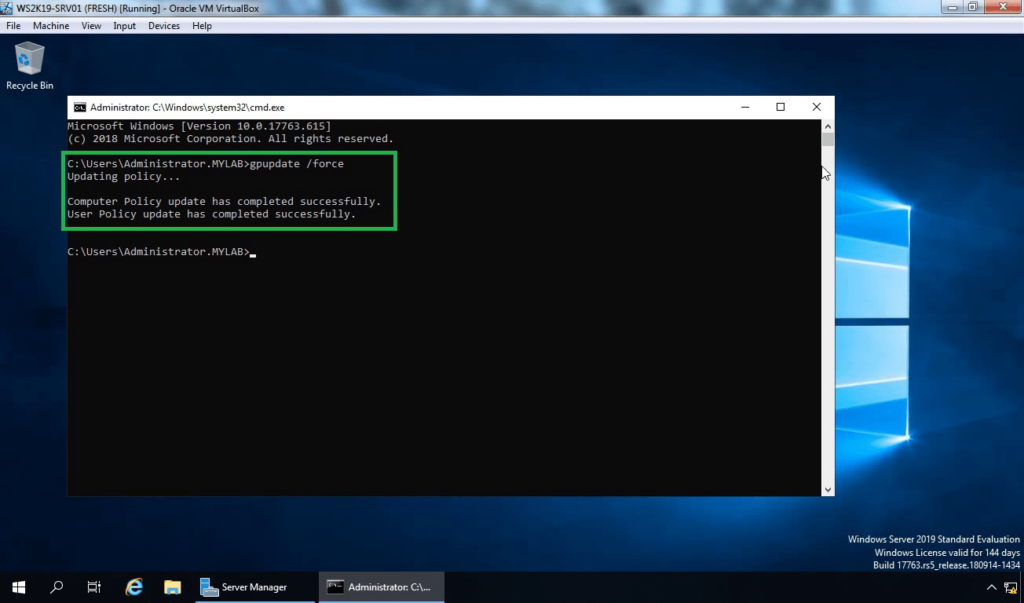
It will take about 20 minutes after Group Policy refreshes the new settings to the client computer. By default, Group Policy refreshes in the background every 90 minutes, with a random offset of 0 to 30 minutes. If you want to refresh Group Policy sooner, you can go to a command prompt on the client computer and type: “gpupdate /force”.
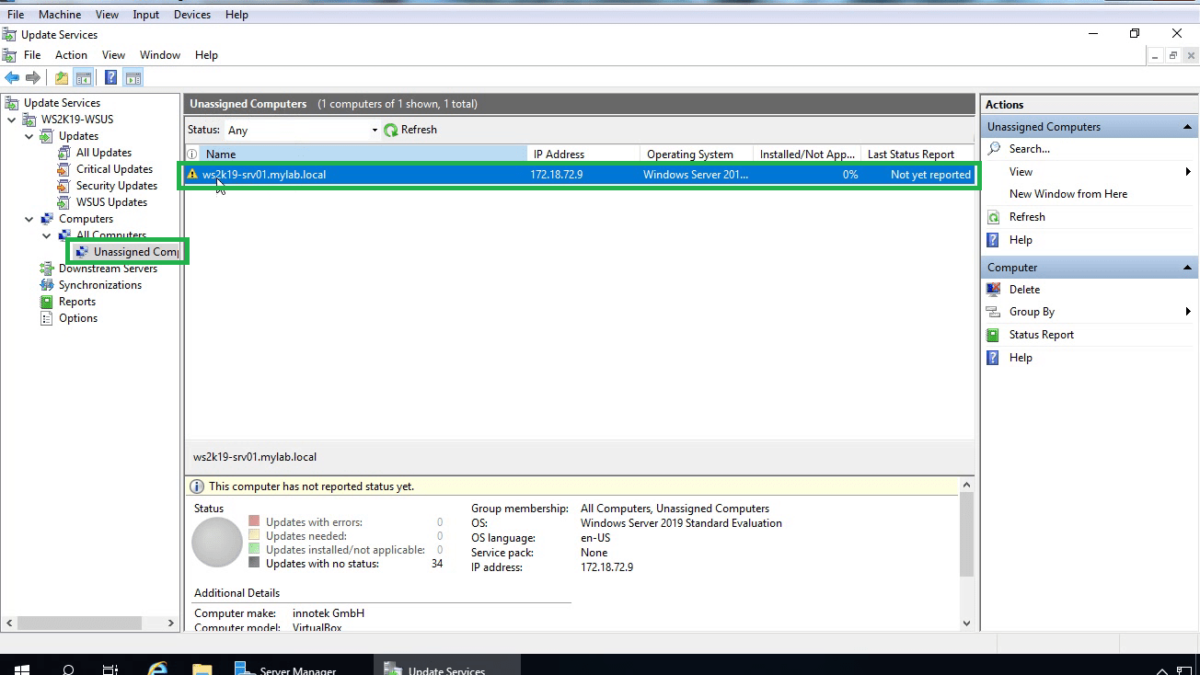
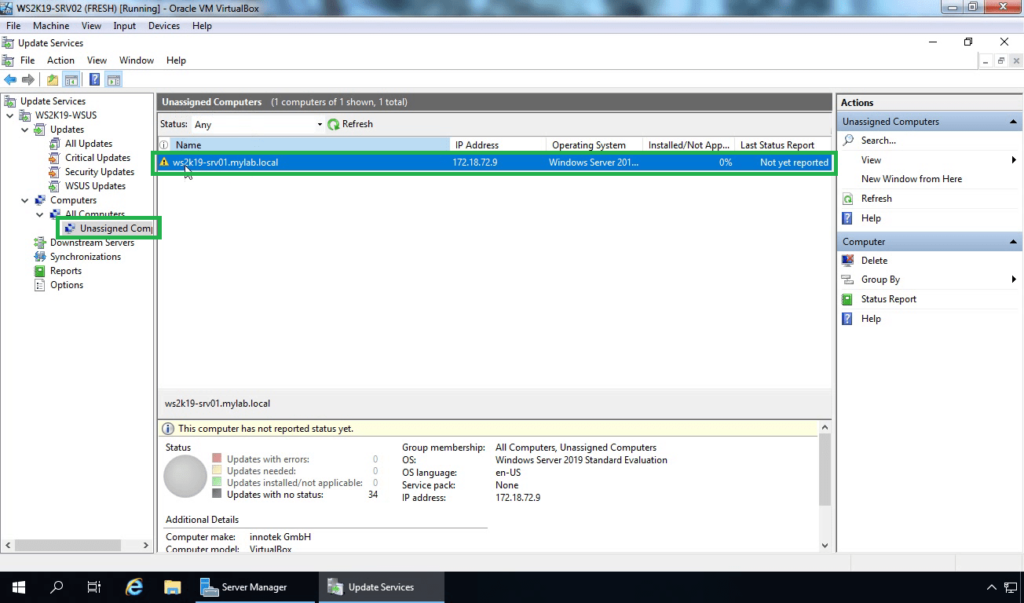
If you’ve followed this article, you should see your servers or computers under the Unassigned Computers group.
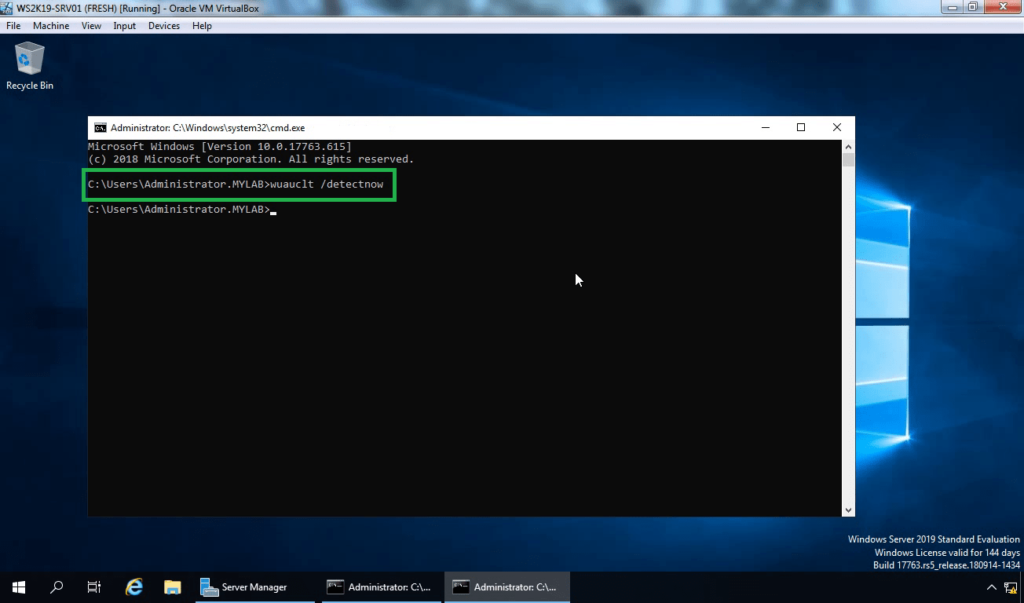
In case, your computer account does not appears in WSUS console, you can run command “wuauclt /detectnow” and “wuauclt /reportnow” on client PCs.
That command will force client PC to contact the WSUS server immediately.
This completes the steps to configure the Group Policy Settings for WSUS in Windows Server 2019. I am sure this guide will help you to set up the WSUS.