In this blog, we are covering steps on how to configure proxy settings using group policy preferences in windows server 2019 Active Directory.
A proxy server can act as an intermediary between the user’s computer and the Internet to prevent the attack and unauthorized access.
For this demo, as usual, I used my existing Domain Controller VM (ws2k19.dc01.mylab.local) and my Windows 10 Client VM (ws10-cli01.mylab.local).
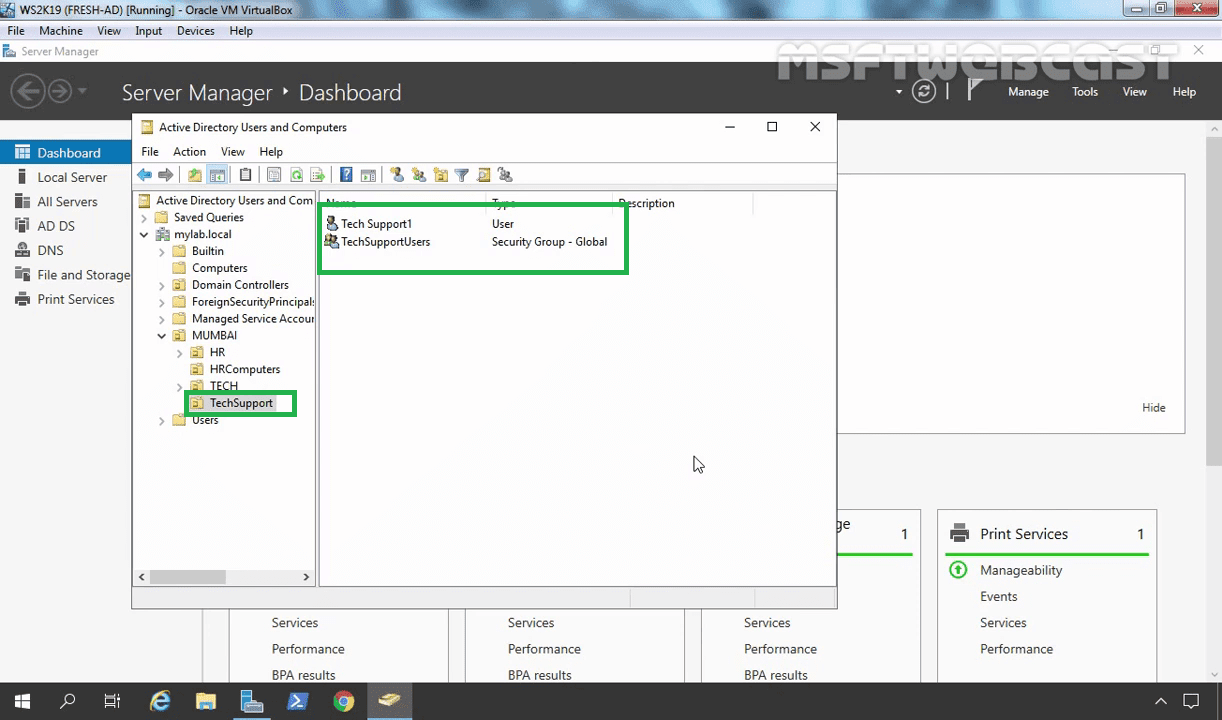
For this example, I have created one OU name TechSupport. We are going to link the group policy object to this OU.
- User: Tech Support1
- Group: TechSupportUsers
Create a Group Policy Object to apply proxy server settings:
On server manager console, click on Tools and select Group Policy Management.


On the newly created group policy object right-click and select the edit option.
(Note: You can apply this group policy setting to the User account and Computer account. But for this guide, we will apply this policy on user account only)


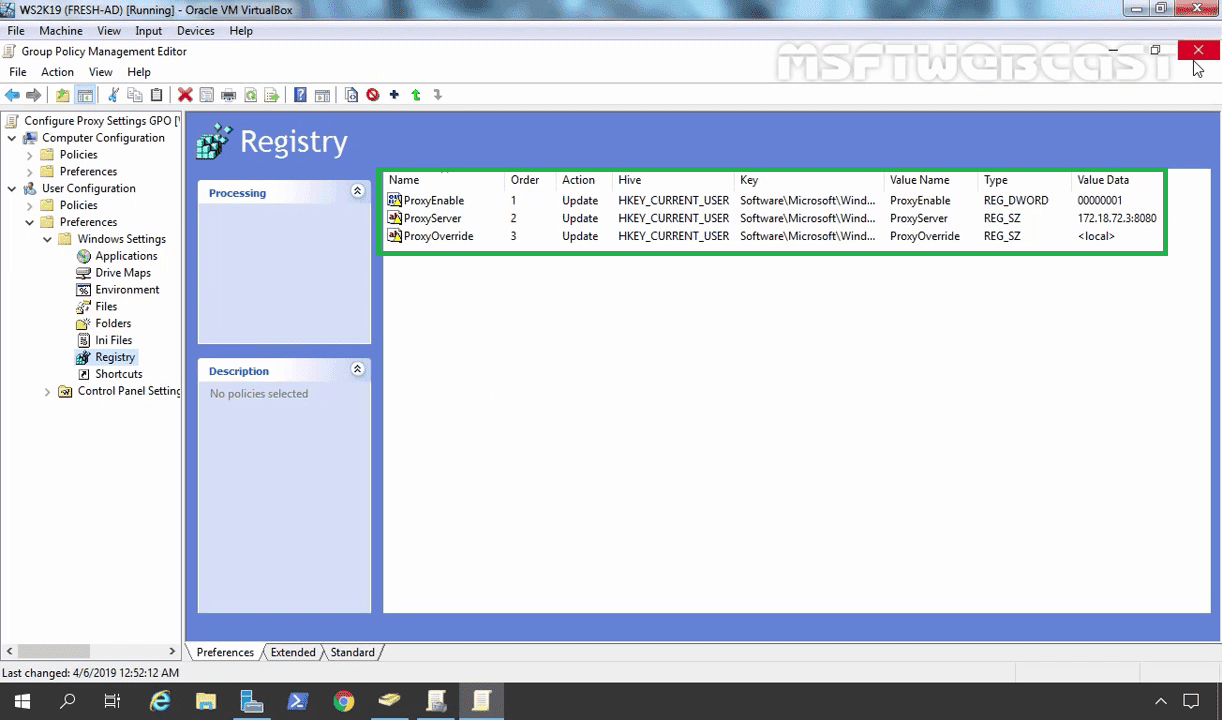
1. Enable Proxy Settings:
Right-click on Registry, Select New –> Registry Item.

This step will enable proxy settings in the web browser.
In the New Registry Properties, fill the information fields as below:
- Key path: SoftwareMicrosoftWindowsCurrentVersionInternet Settings.
- Value name: ProxyEnable
- Value type: REG_DWORD
- Value data: 00000001
Click on Apply and OK to save the settings.

2. Specify the Proxy Server Address:
Right-click on Registry, Select New –> Registry Item.
This step will specify the proxy server’s IP address and port number.
In the New Registry Properties, fill the information fields as below:
- Key path: SoftwareMicrosoftWindowsCurrentVersionInternet Settings
- Value name: ProxyServer
- Value type: REG_SZ
- Value data: 172.18.72.3:8080 (Where 172.18.72.3 is the IP address of the proxy server and 8080 is the port of the proxy service.)
Click on Apply and OK to save the settings.

3. Bypass Proxy Server for Local Addresses:
Right-click on Registry, Select New –> Registry Item.
This step will enable the bypass proxy server for the local address setting. This step is optional.
- Key path: SoftwareMicrosoftWindowsCurrentVersionInternet Settings
- Value name: ProxyOverride
- Value type: REG_SZ
- Value data: <local>
Click on Apply and OK to save the settings.

Link group policy object:
In the Group Policy Management Console, right-click on the Domain/OU where you want to link the group policy object. (In our case, OU will be TechSupport.)

Select Link an existing GPO. Select the GPO (In our, case it will be Configure Proxy Settings GPO).
Click on the OK button.

Test the result:
On the client computer, Login with the user account Tech Support1.

Open the Microsoft Edge web browser.
Click on three dots to open the settings menu.
Click on the Advanced button.
Click on open proxy settings.
Under Manual proxy setup, we can verify the proxy settings which we have configured using group policy preferences.
