In this post, we will learn the steps to enable BitLocker Drive Encryption (BDE) on Windows 10 without TPM (Trusted Platform Module).
What is BitLocker Drive Encryption?
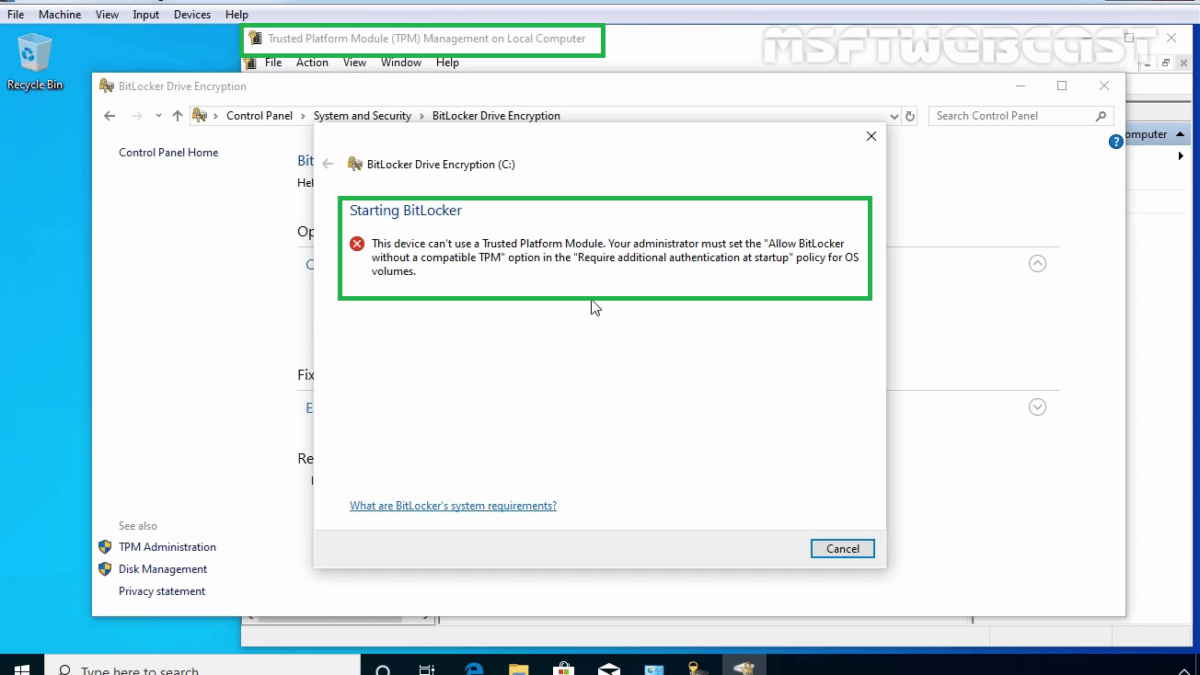
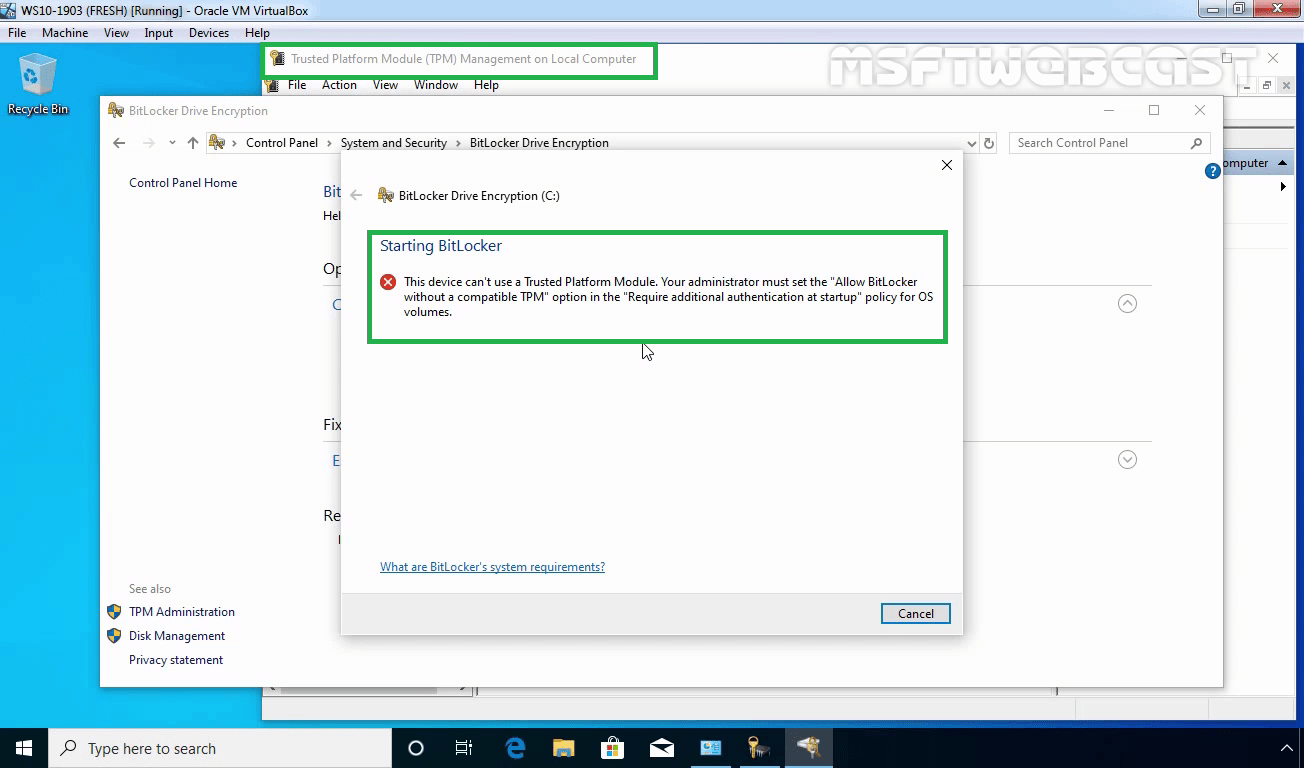
BitLocker is a data protection feature that encrypts any drives on your computer to help prevent data theft or exposure. BitLocker requires a TPM (Trusted Platform Module) chip on your computer’s motherboard.
TPM chip generates and stores the actual encryption keys. TPM can automatically unlock your PC’s drive when it boots so you can sign in just by typing your username and password.
You can use BitLocker Drive Encryption without the TPM chip, but it requires some extra steps for additional authentication.
Notes:
- BitLocker Drive Encryption is available only on Pro and Enterprise edition of Windows 10.
- BitLocker Drive Encryption a time-consuming process.
- Take a full backup before starting the BDE process.
How to Turn On BitLocker Without a TPM in Windows 10:
If we want to use BitLocker Drive Encryption without the TPM chip, then we need to use the Local Group Policy Editor to enable additional authentication at startup.
Open Group Policy Editor Console.
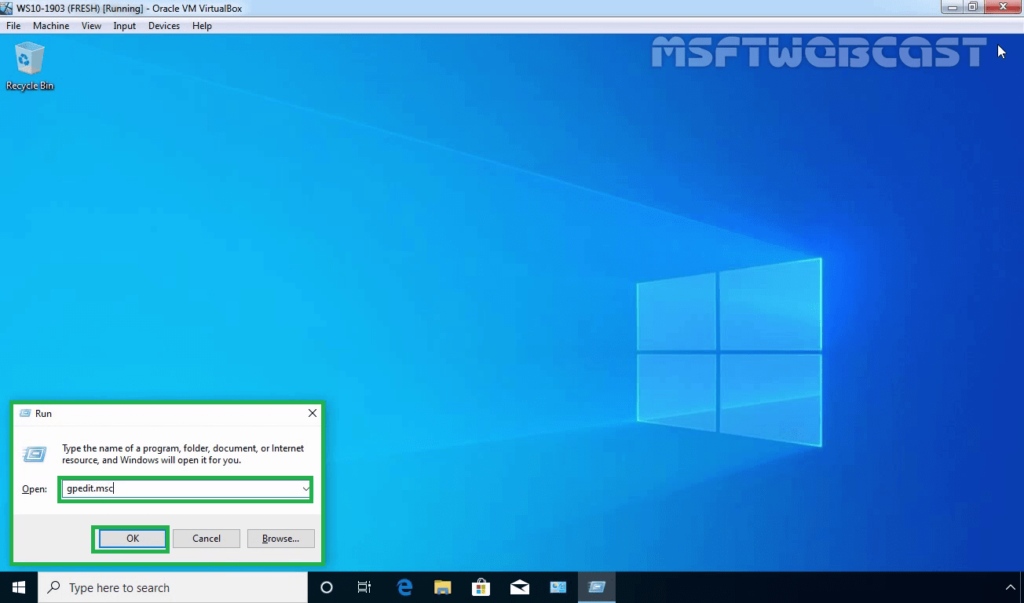
1. Press Windows Key and R together to open the run menu, type gpedit.msc, and press enter key.
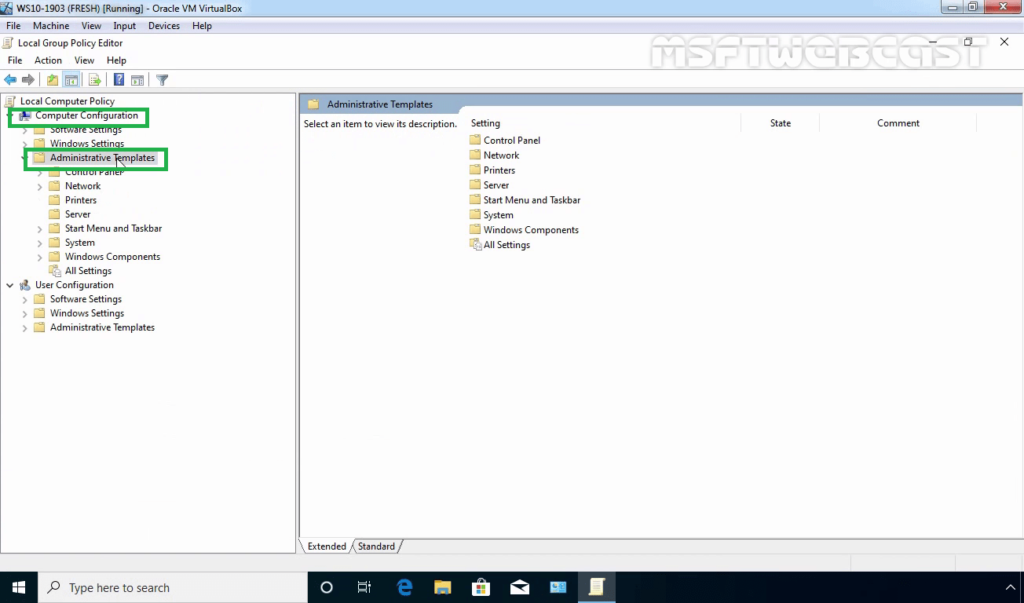
2. Under Computer Configuration, expand Administrative Templates.
3. Expand Windows Components.
4. Expand BitLocker Drive Encryption and Operating System Drives.
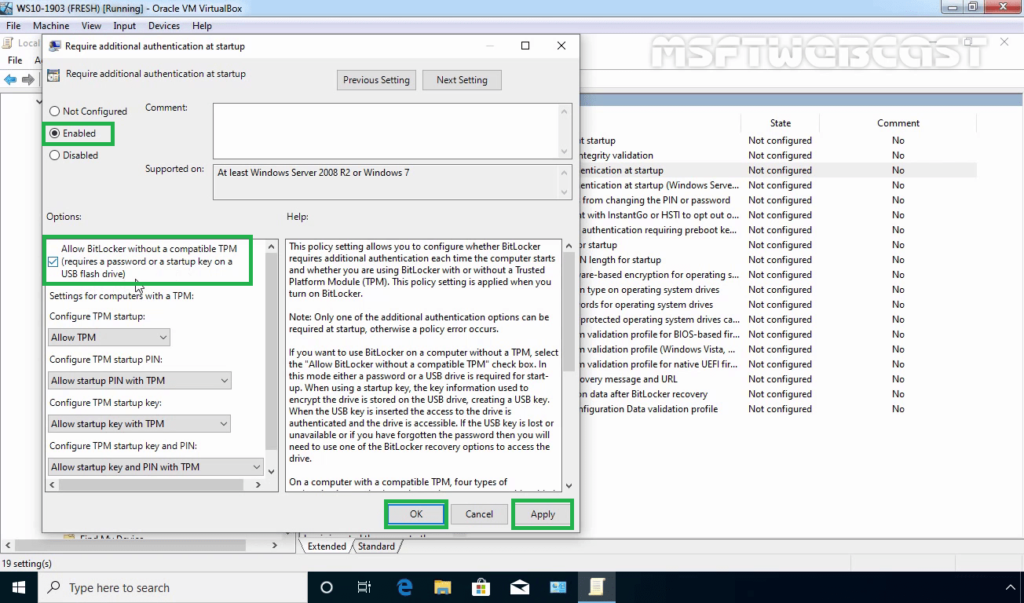
5. Under settings, double-click Require additional authentication at startup policy.

6. Select Enabled radio button.
Note: Make sure to check the “Allow BitLocker without a compatible TPM (requires a password or a startup key on a USB flash drive)” option.
7. Click OK to save the changes.
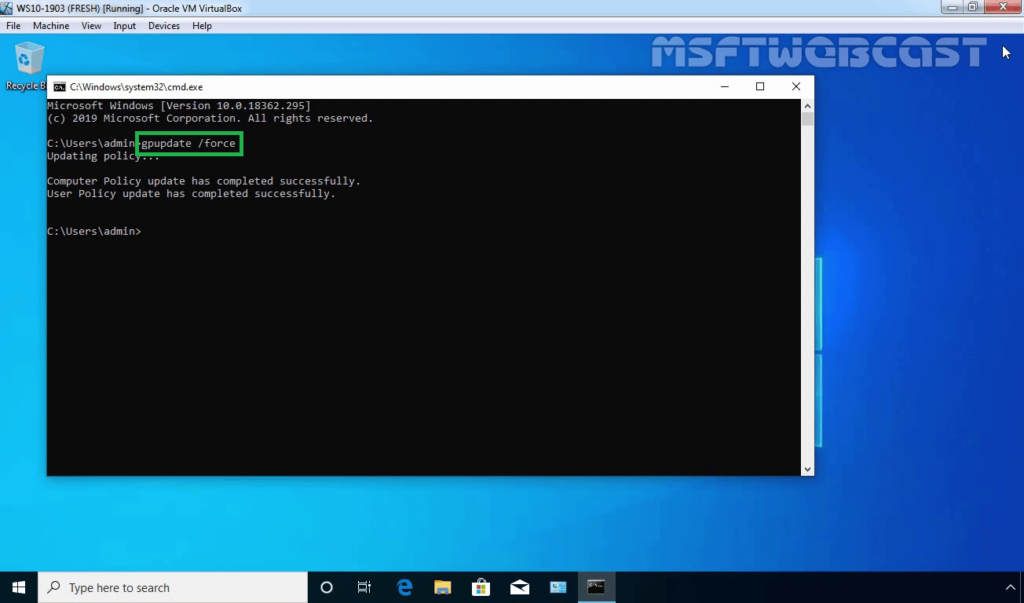
Update the Group Policy Settings:
8. We will manually update the group policy settings by running command gpupdate /force.
Enable BitLocker on the Windows 10 system drive:
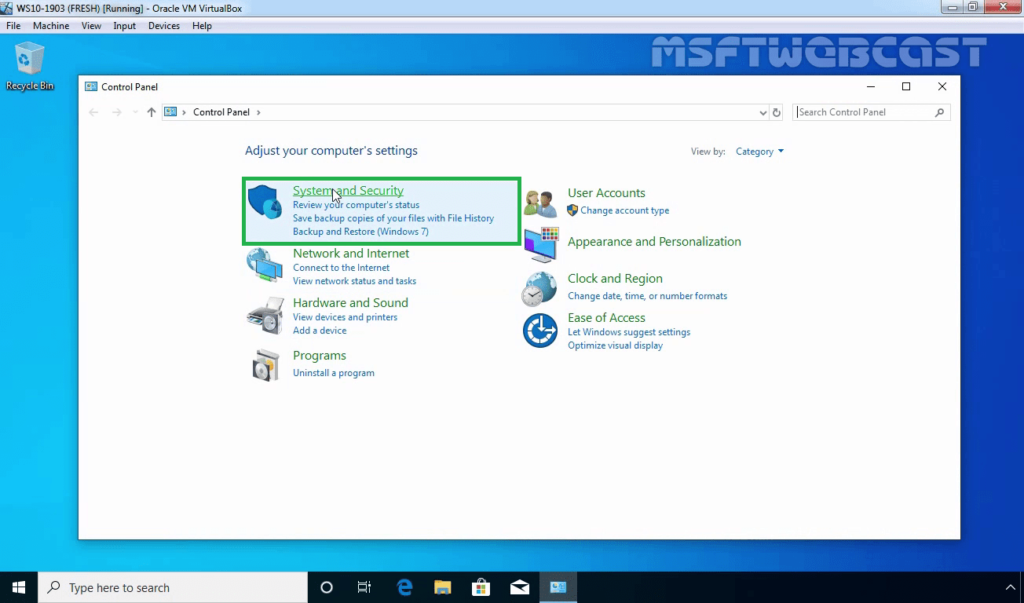
9. Press Windows Key and R together to open the run menu, type control, and press enter key.
10. On Control Panel, click System and Security.
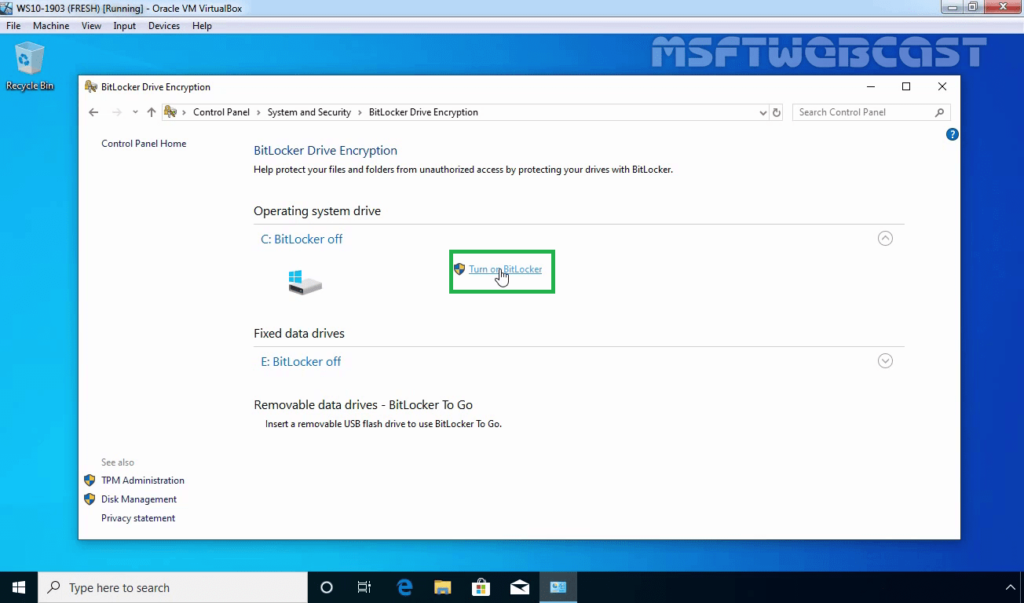
11. Click BitLocker Drive Encryption.
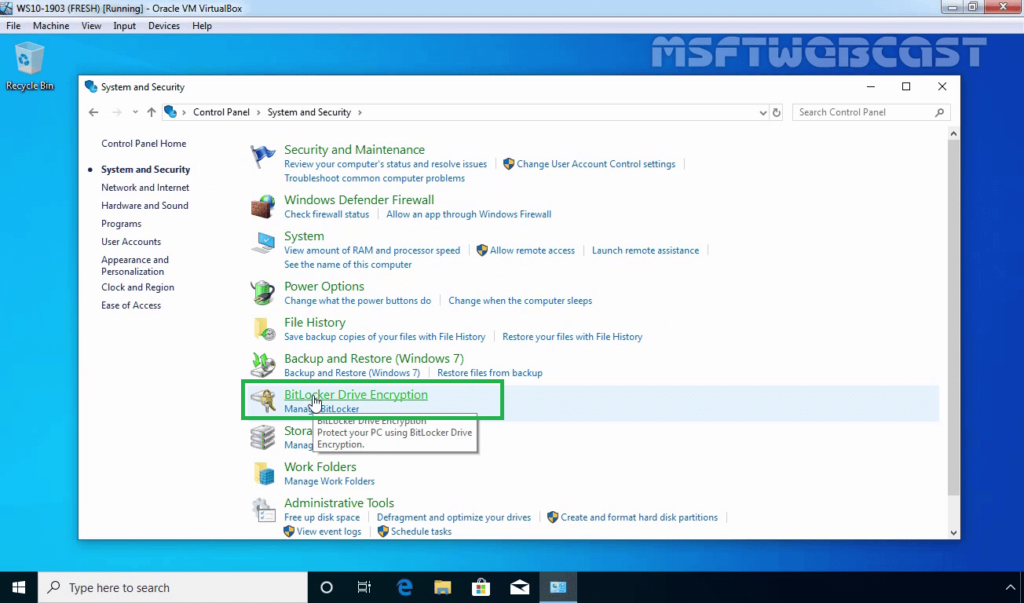
12. Under BitLocker Drive Encryption for operating system drive, click Turn on BitLocker.
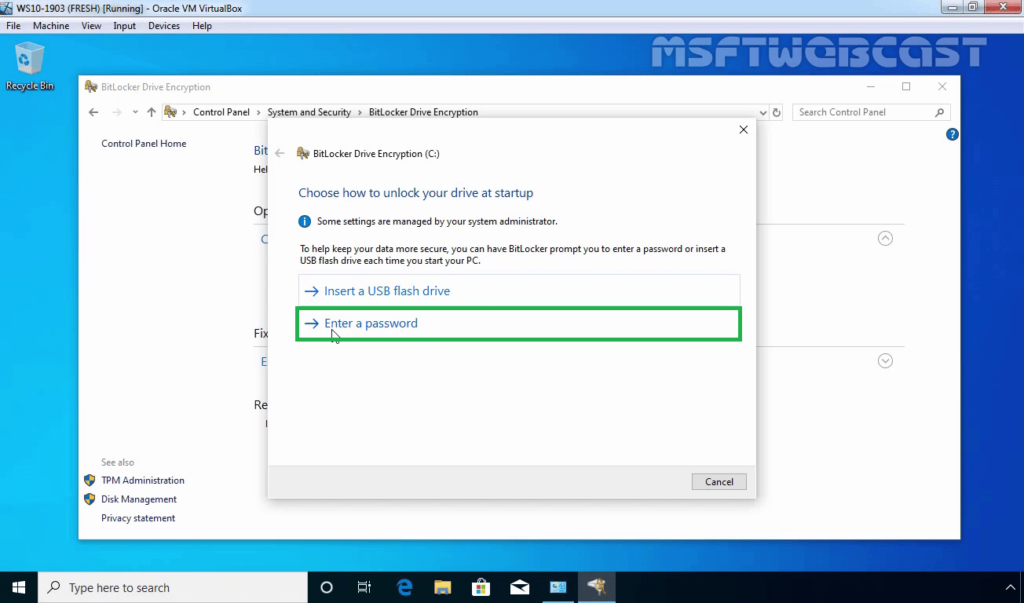
13. Choose how you want to unlock your drive during startup: Insert a USB flash drive or Enter a password. In this case, we will select Enter a password to continue.
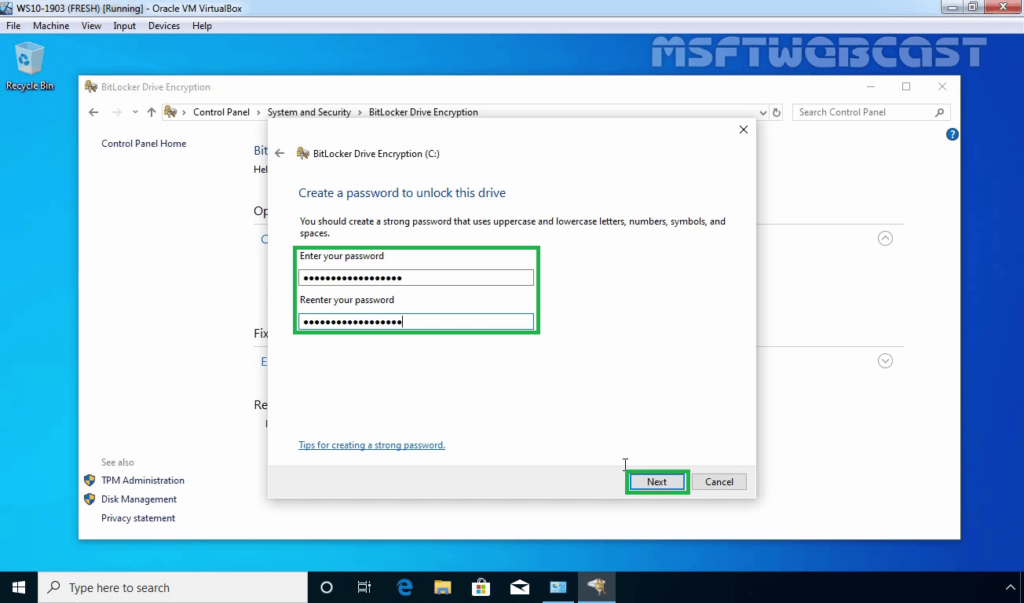
14. Enter a strong password that you’ll use to unlock the encrypted drive. Click Next.
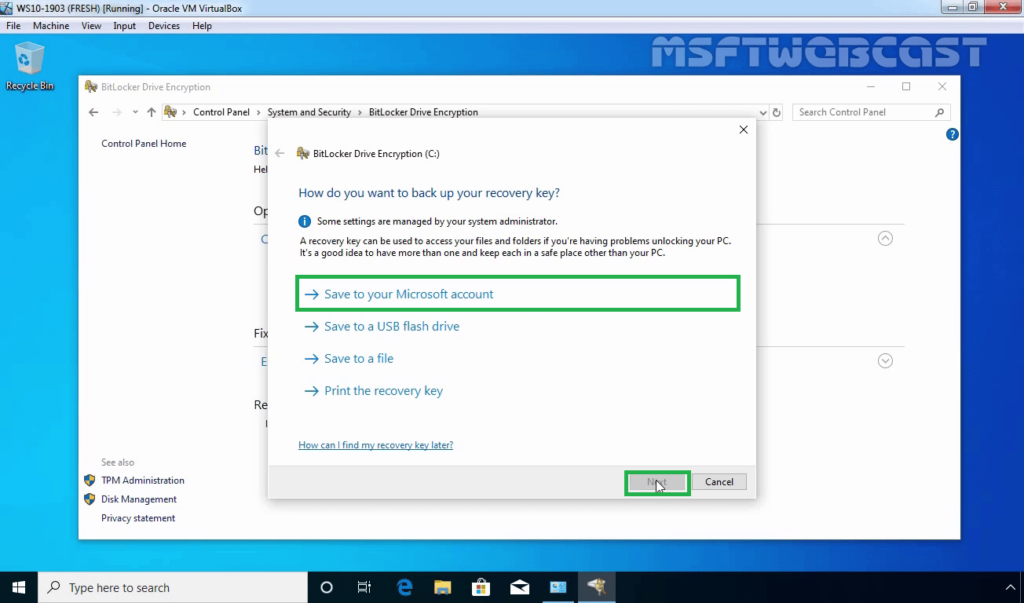
Backup BitLocker Recovery Key:
The Recovery Key is useful in case you forget your encryption password. Now you need to save your BitLocker Recovery Key somewhere safe by selecting one of the given options.
- Option:1 Save to your Microsoft account
- Option:2 Save to a USB flash drive
- Option:3 Save to a file
- Option:4 Print the recovery
15. Select the option that is most suitable for you, and save the recovery key in a safe place. After that, click the Next button.
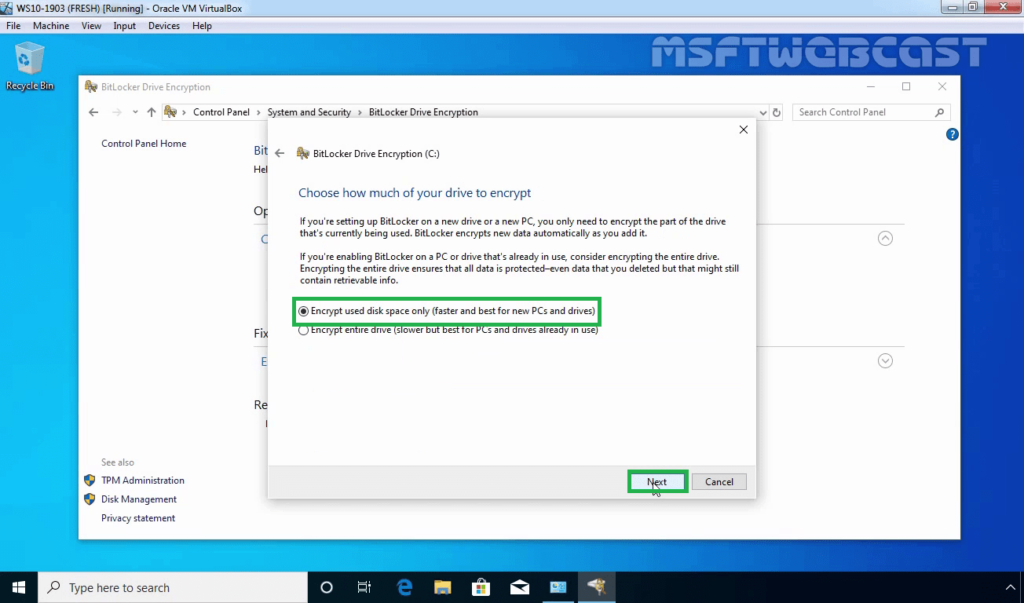
You now see the option to choose how much of your drive to encrypt.
- Encrypt used disk space only (faster and best for new PCs and drives)
- Encrypt entire drive (slower but best for PCs and drives already in use)
16. Select the option that is most convenient for you. I will go with encrypt used disk space as its much faster.
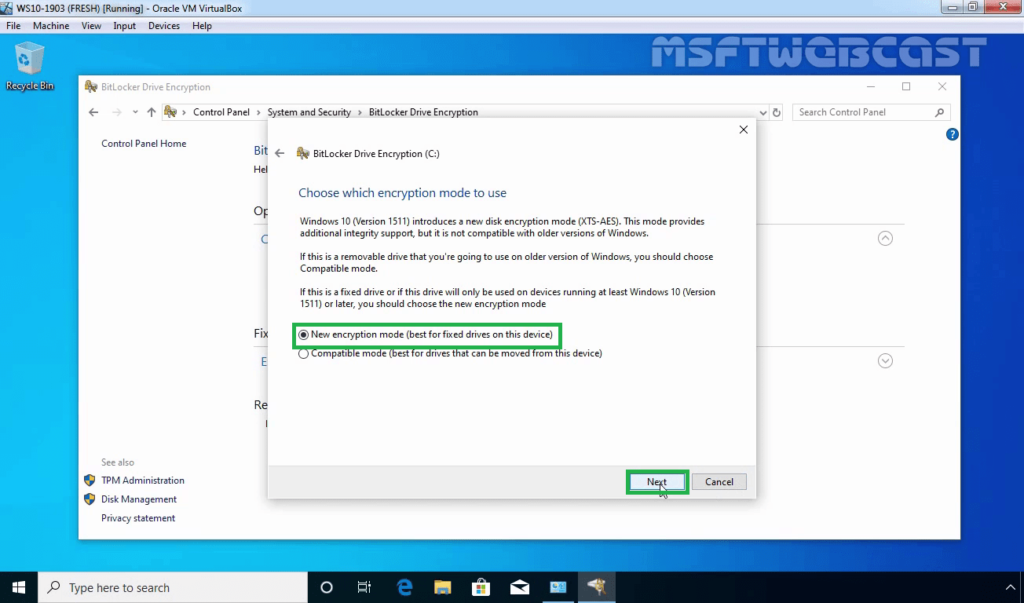
17. Now you have the option to choose which encryption mode you want to use. If you are running the latest version of Windows 10 then, select New encryption mode and click Next.
18. Make sure to select the Run BitLocker system check option.
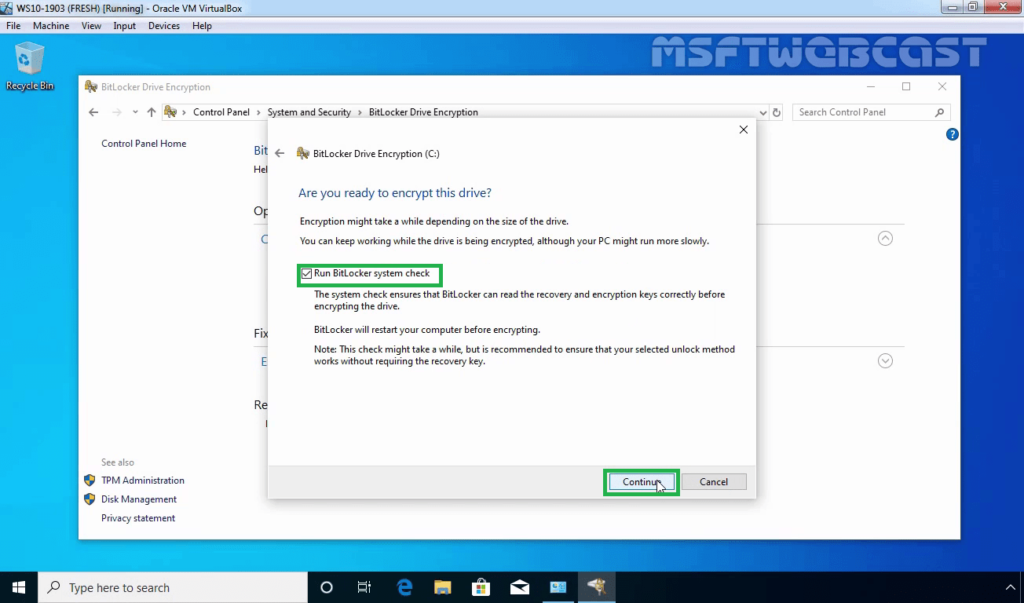
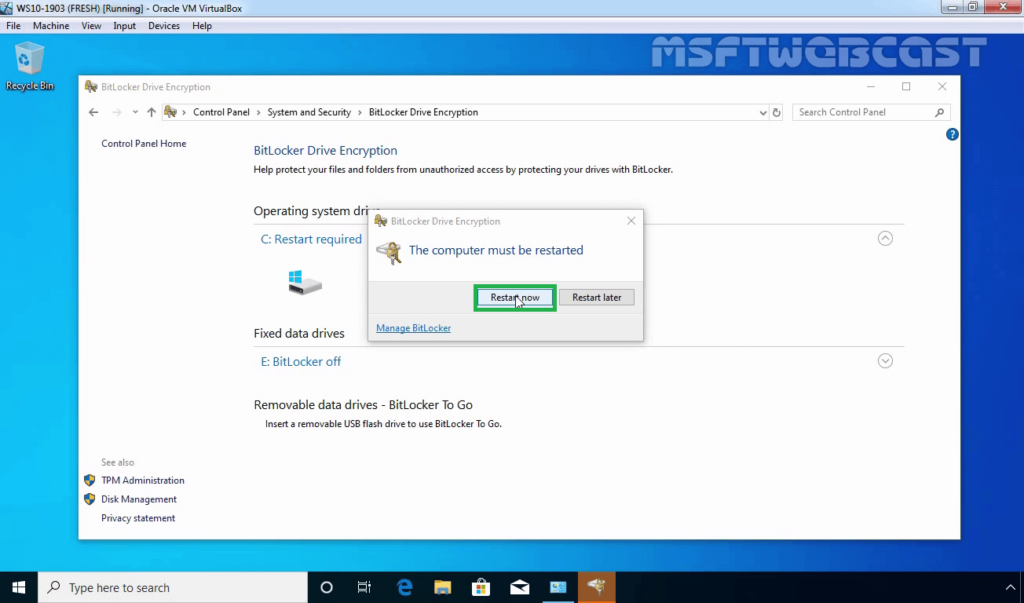
19. After you click Continue, you have to restart your computer.
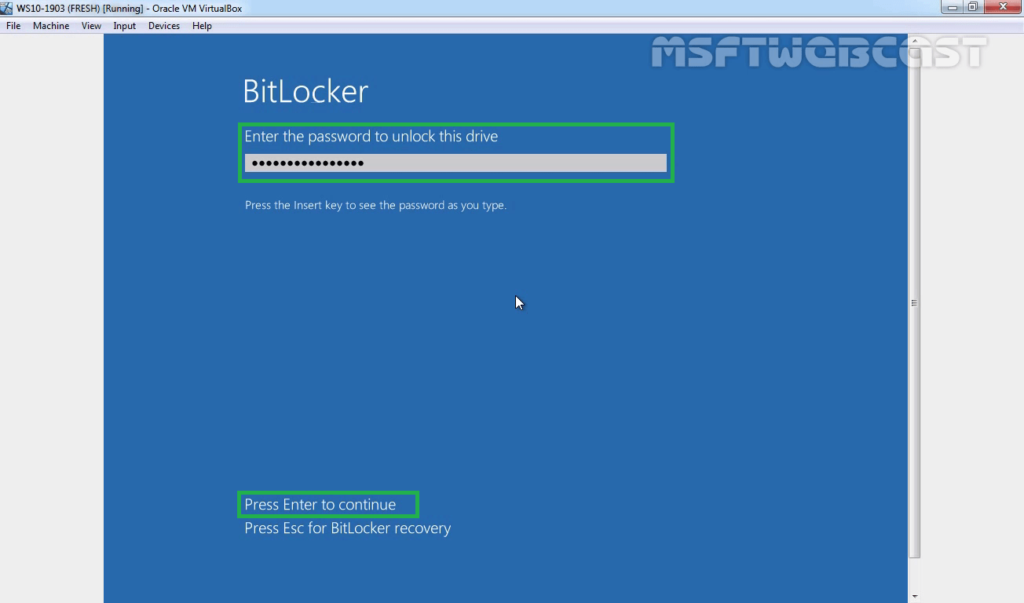
20. On reboot, BitLocker will now ask to enter the password to unlock the encrypted drive. Enter the encryption password and press Enter key to boot.
Verify the BitLocker Drive Encryption Process:
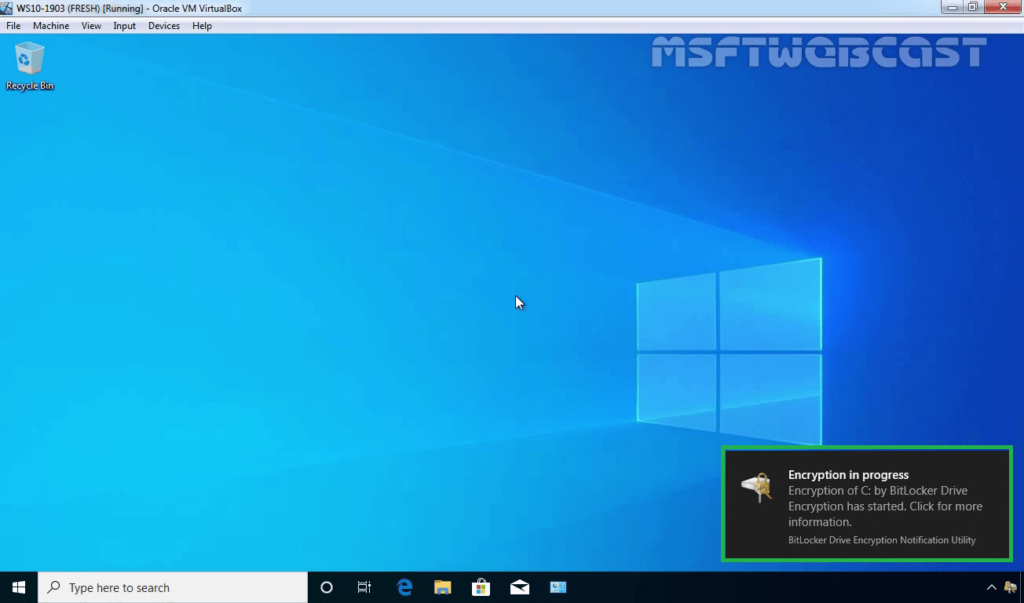
21. Windows 10 will normally boot up. Upon login, you will see notification about Encryption is going on.
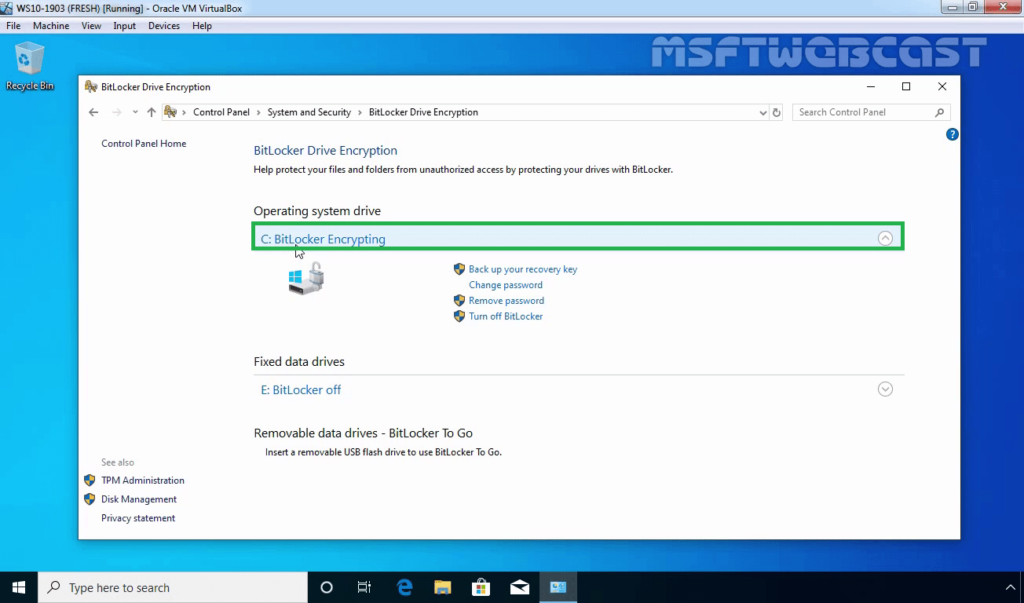
22. On Control Panel, click System and Security. Click BitLocker Drive Encryption. You will see BitLocker is encrypting your Operating System drive.
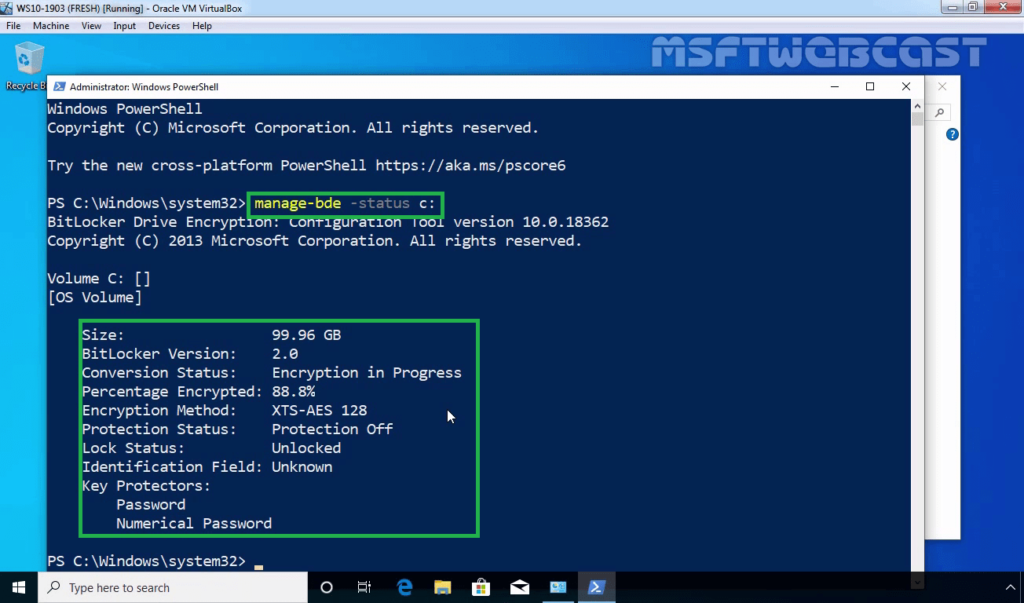
23. You can also monitor the BitLocker Drive Encryption process using PowerShell cmdlet. Cmdlet: manage-bde -status C:
24. Once the BitLocker drive encryption process is complete, you will see the BitLocker On.

If you open File Explorer, you can see that lock icon on C: drive.
Thank you for reading this. Have a Good Day.