In the last post we have completed installation process of Windows Server 2019. Once you have completed installation, you need to perform several post-installation configuration steps before you can deploy your windows server in a production environment.
These steps allow you to prepare the server for the role it will perform in your organization. By using server manager console, you can fully manage Windows servers.
- Configuring Windows Update settings
- Setting the Time Zone
- Assign Static IP Address
- Enabling Remote Desktop
- Renaming the Server
Video Tutorial on How to Perform Basic Configuration tasks in Windows Server 2019.
Step 1: Log on to the server using Administrator privileges.
Step 2: After Logging on as administrator Server Manager Console automatically opens, if it is not loaded automatically, press start button on your keyboard and select Server Manager.
Step 3: In Server Manager window click on the local server in the left sidebar.

Step 4: Click on the value of Windows Update. That will open Windows Update Settings console. Click on “Check for updates” to check for windows update.
If any update is available it will display there and you will have option to install the update as well. Now close the settings close.


In my case it is UTC+5:30 (Chennai, Kolkata, Mumbai, New Delhi). Once you select correct time zone for your server then click on OK button to close the console.

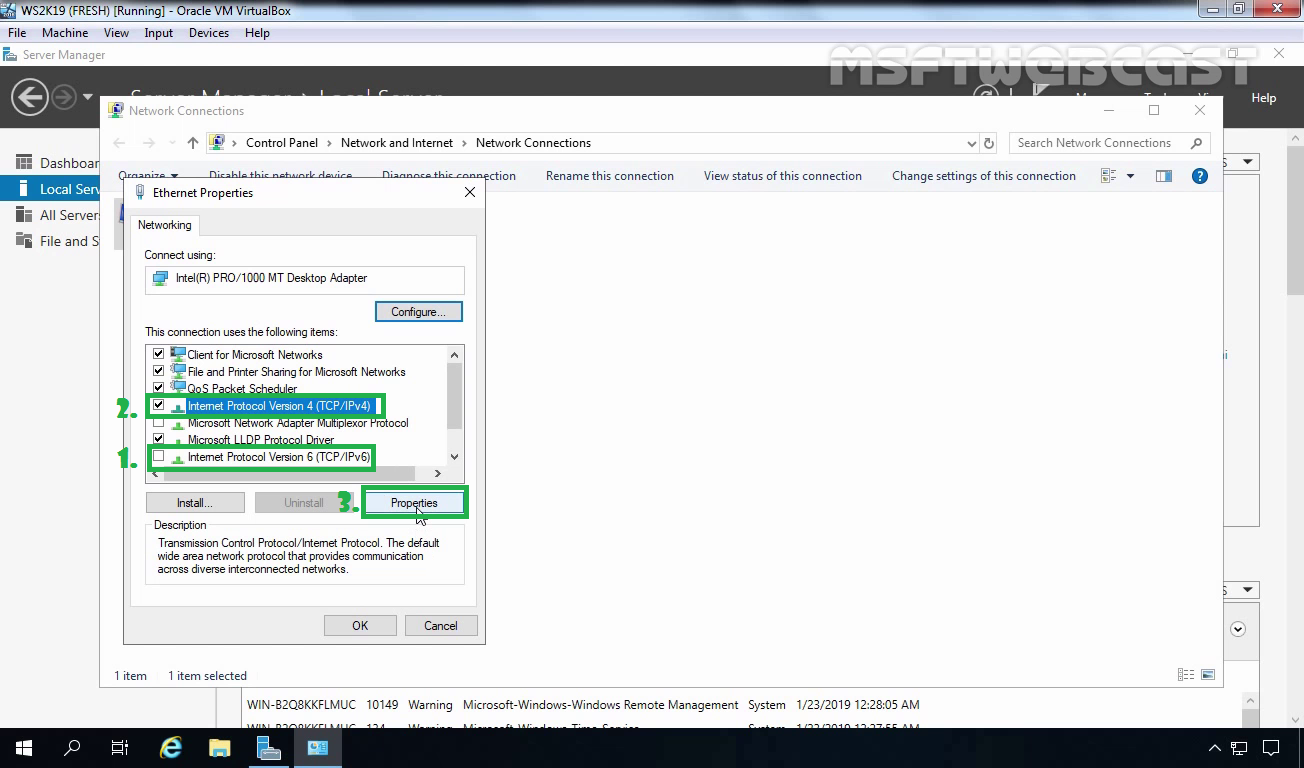
Step 6: Click on the Ethernet value, the network connection windows appears.

Right-click the Ethernet connection and, from the context menu, select Properties. The Ethernet Properties sheet appears.

Step 7: First of all unchecked Internet Protocol Version 6 (TCP/IPv6) checkbox as we are not going to use IPv6 address on our server.
- IP address: 172.18.72.5
- Subnet mask: 255.255.0.0
- Default gateway: 172.18.72.1
- Preferred DNS server: 172.18.72.5
- Alternate DNS server: 8.8.8.8


Step 9: Click on the value of Remote Desktop.

System Properties windows appears. Select Allow remote connection to this computer. (It will also add firewall exception for remote desktop port).

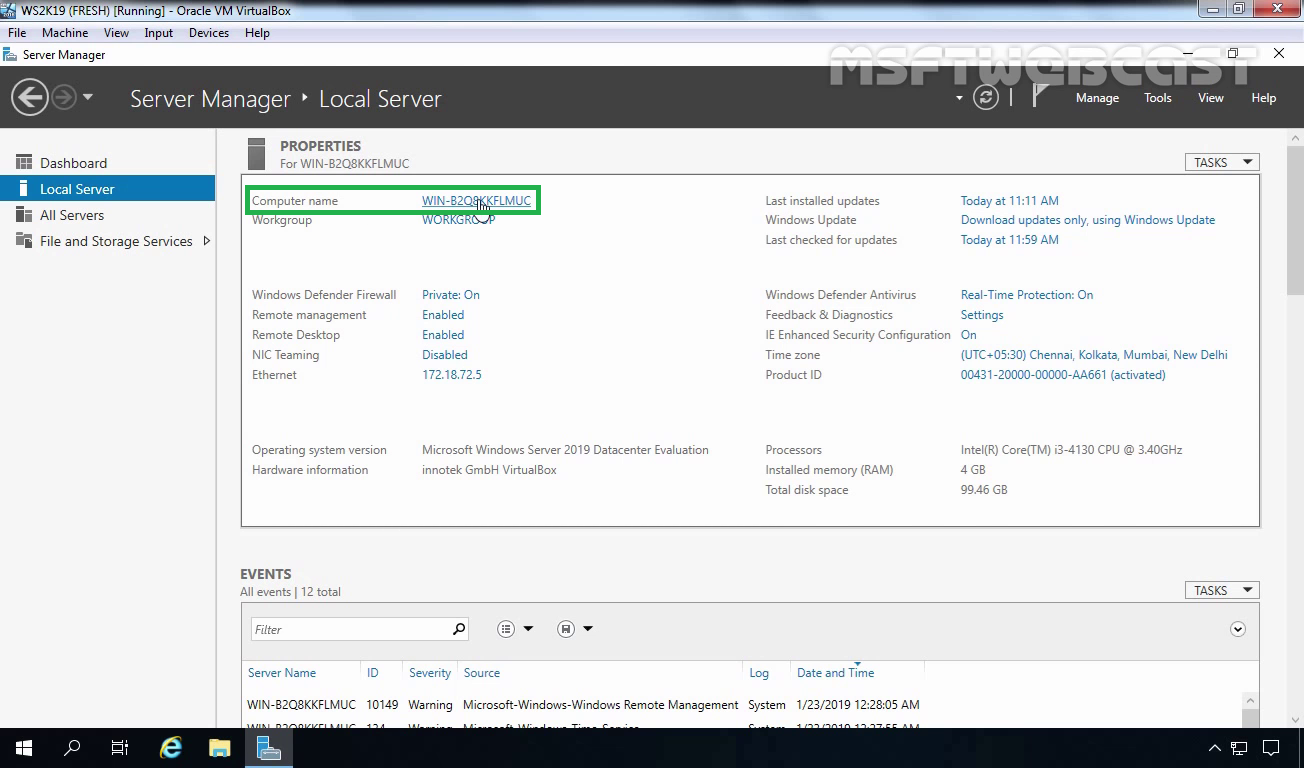
A System properties windows will open, click on the change button for specifying the server name.

Type the name which you want to set for this windows server 2019 computer. I am going to type WS2K19-DC01.

