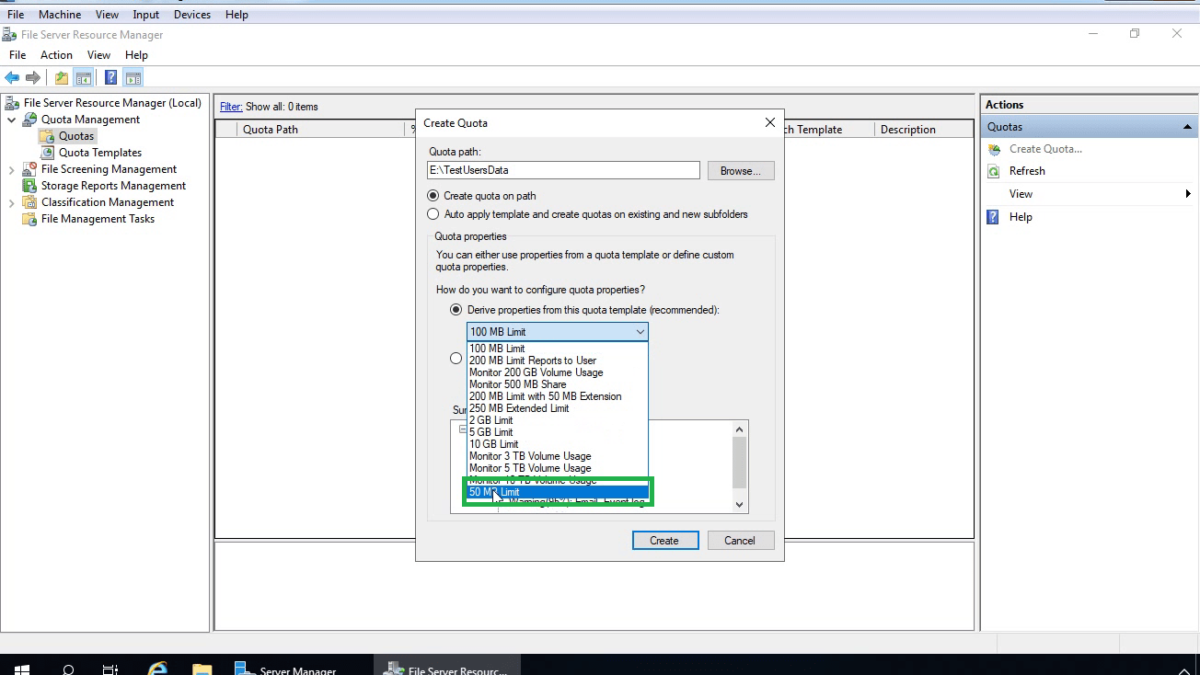
In this step by step tutorial, you will be learning about How to Configure Disk Quota using File Server Resource Manager (FSRM) on Windows Server 2019.
What is the File Server Resource Manager?
File Server Resource Manager (FSRM) is a role service in Windows Server that enables to control and manage the quantity and type of data stored on a file server. You can use FSRM to automatically classify files, perform tasks based on these classifications, set quotas on folders, and create reports monitoring storage usage.
File Server Resource Manager includes the following features:
- Quota management
- File Classification Infrastructure
- File screening management
- Storage reports
What is Quota Management?
By using Quota management, you can limit the amount of disk space allocated to a volume or folder. Quotas can be created from a template or with custom properties.
There are two kinds of quotas: soft quotas and hard quotas.
- Hard Quota: A hard quota prevents users from saving files after the space limit is reached and generates notifications when the volume of data reaches the configured threshold.
- Soft Quota: A soft quota does not enforce the quota limit but generates a notification when the configured threshold is met.
Test lab setup:
- WS2K19-DC01: Domain Controller and DNS.
- WS2K19-FS01: File Server.
- WS10-CLI01: Windows 10 Client Machine.
Install FSRM role on the file server:
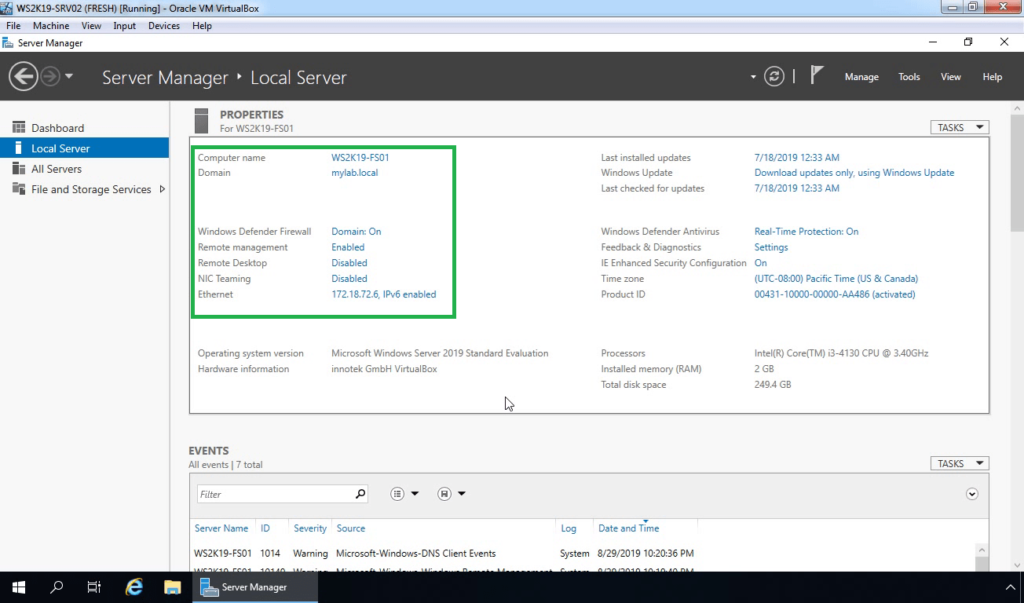
1. Open Server Manager Console.
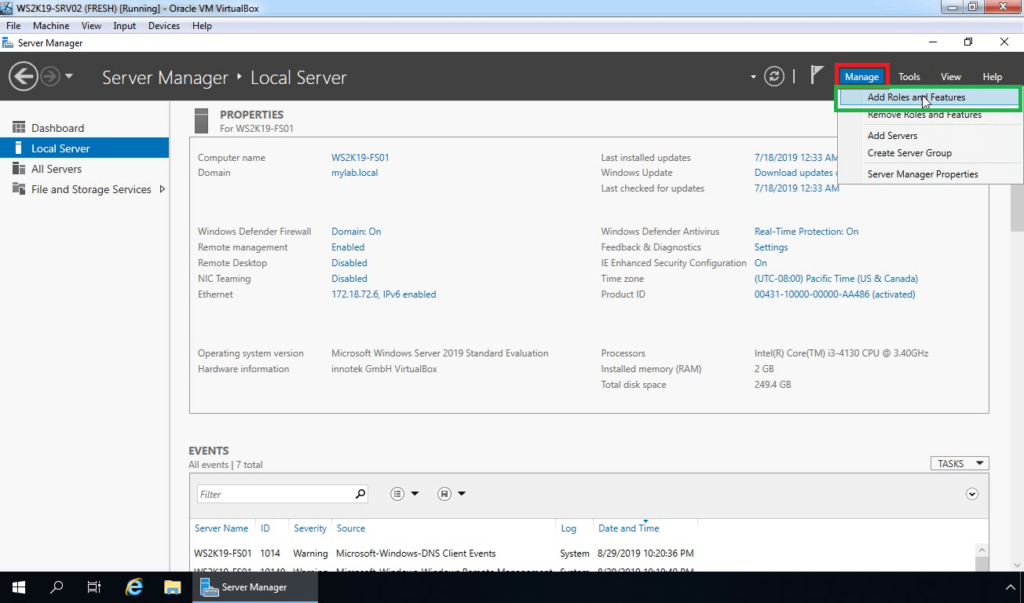
2. At the top of the Server Manager, click on Manage and select Add Roles and Features.
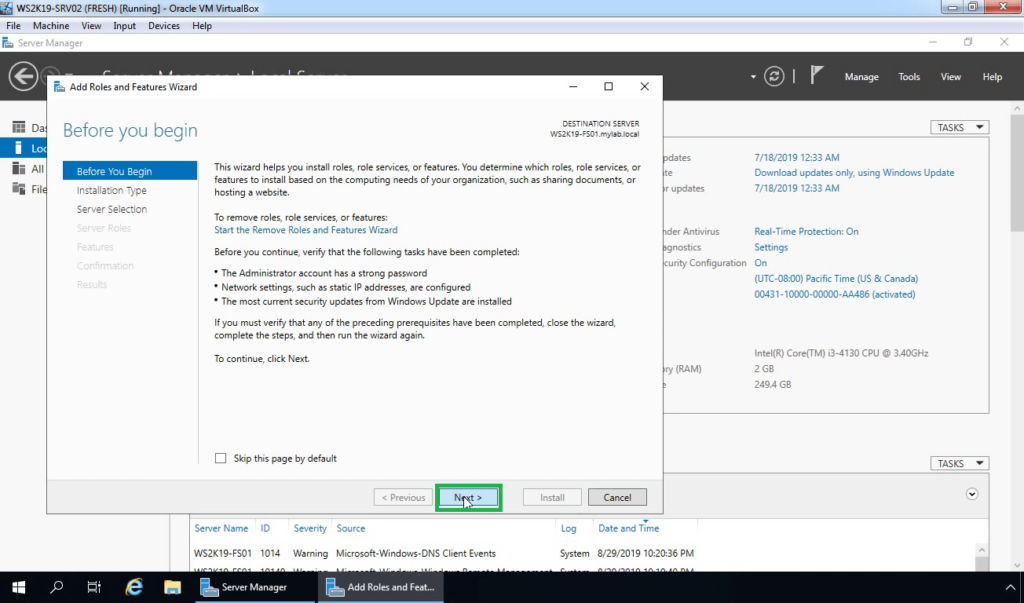
3. On the Before you begin page, click Next.
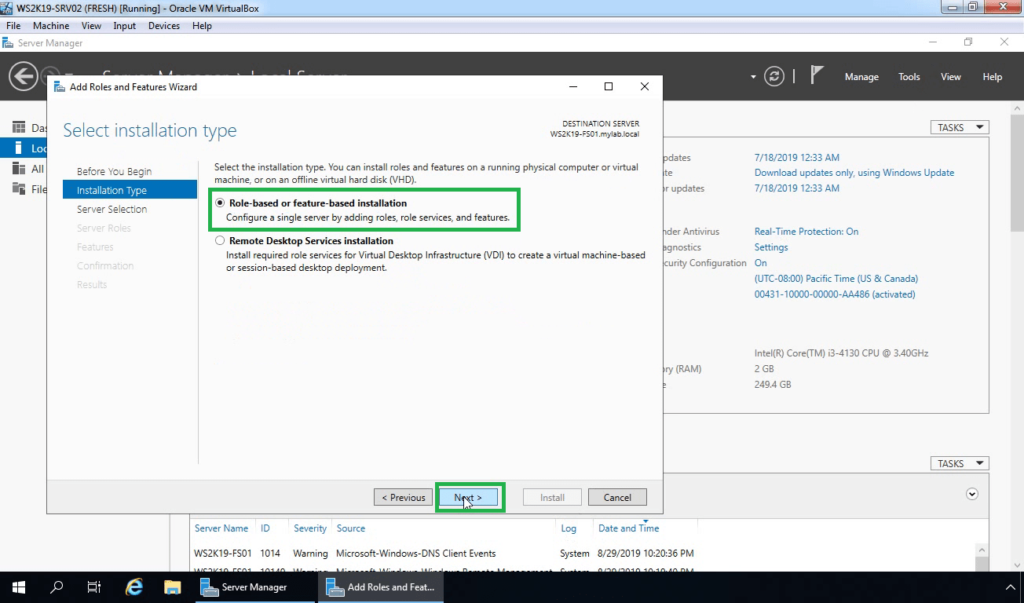
4. Select Role-based or feature-based installation and then click Next.
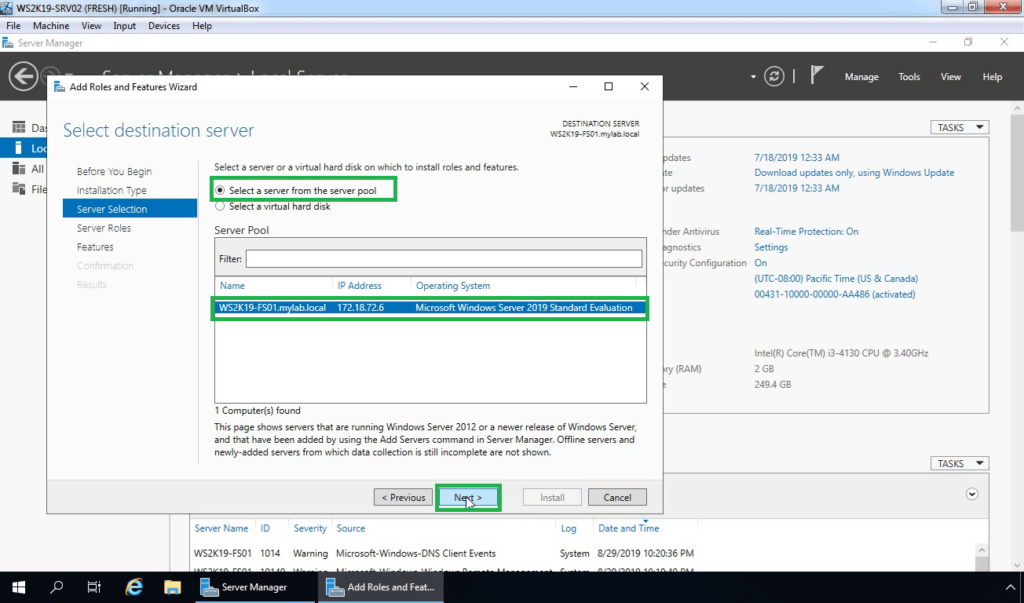
5. Click Select a server from the server pool, click the name of the server to install FSRM to, and then click Next.
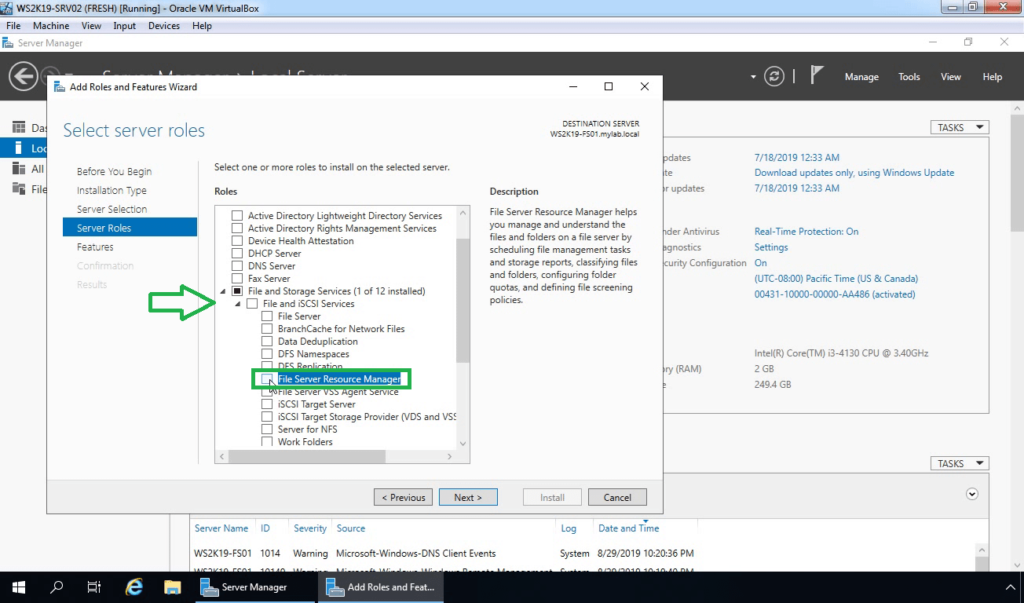
6. Expand File and Storage Services and expand the File and iSCSI Services. Select File Server Resource Manager.
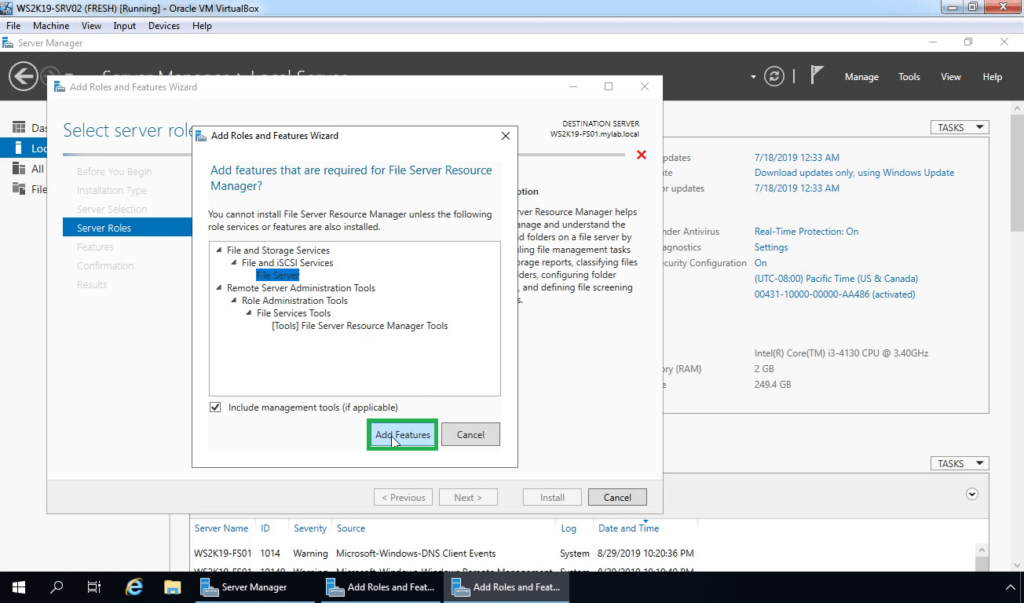
7. A new window will pop up, click on Add Features to include required features and management tools.
8. Click Next.
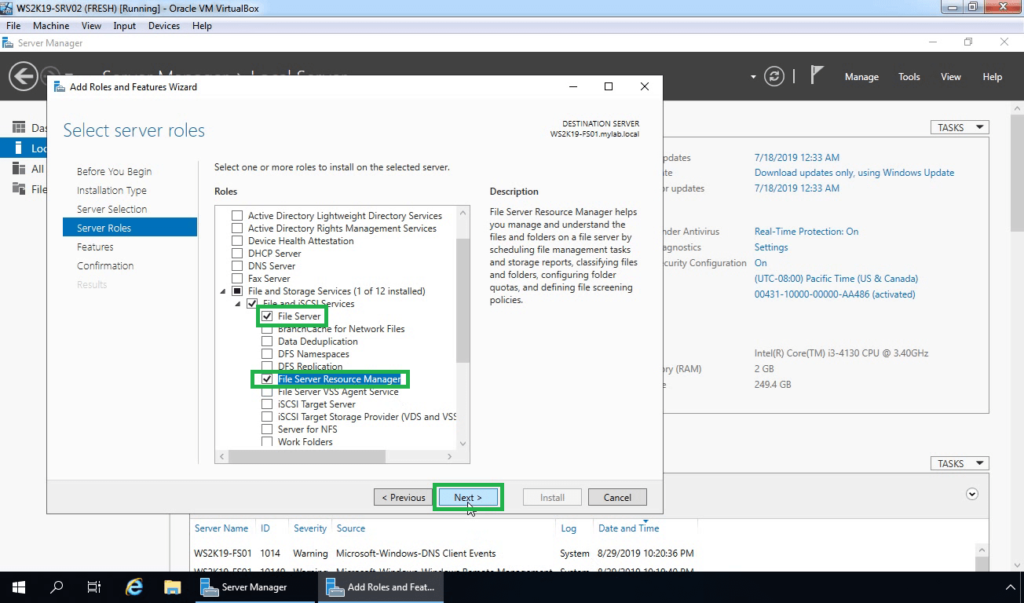
9. On select features page, click Next.
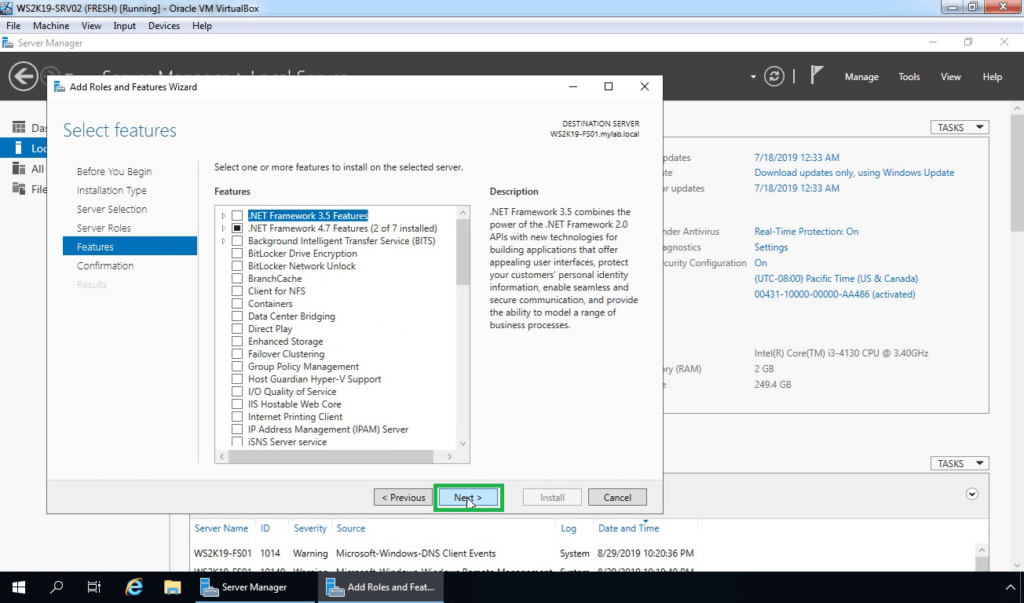
10. Click on Install to start the installation process.
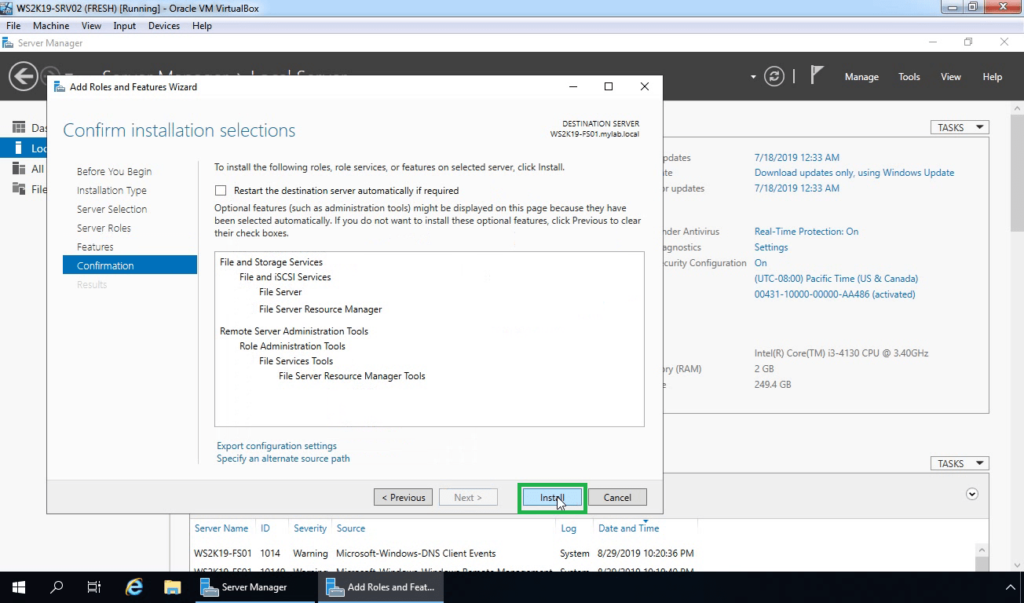
11. When the installation is complete, click the Close button.
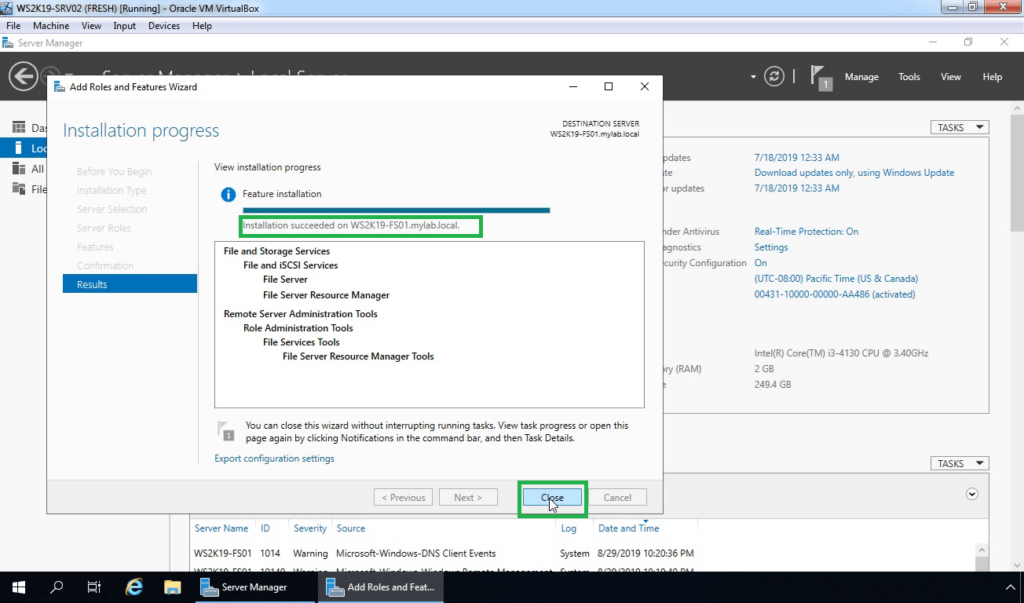
Note: Already I have created one shared folder on our file server for the testing purpose. We will apply disk quota on that shared folder.
Create a Quota Template:
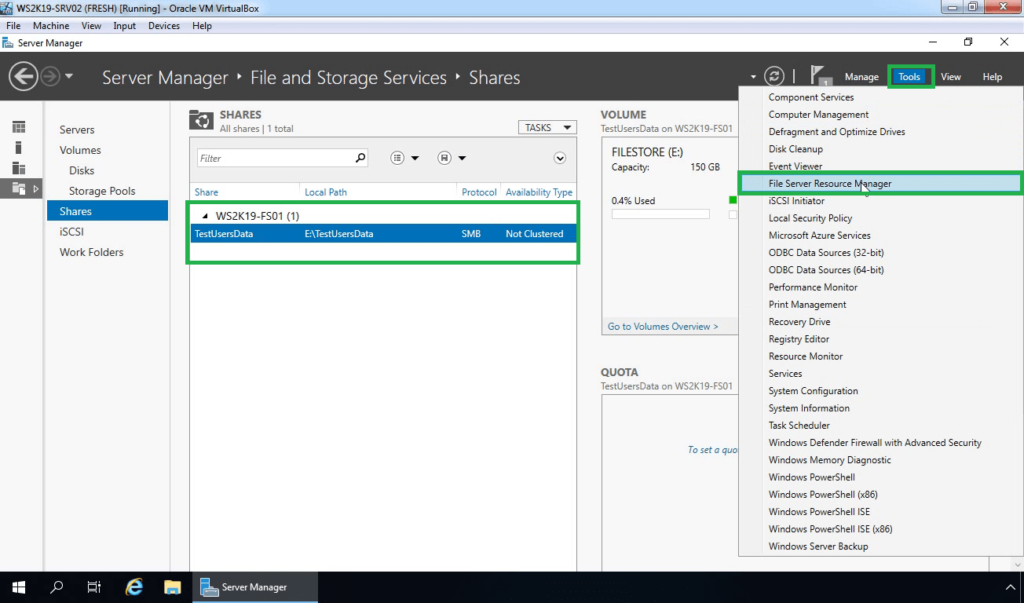
12. Click on Tools and select File Server Resource Manager.
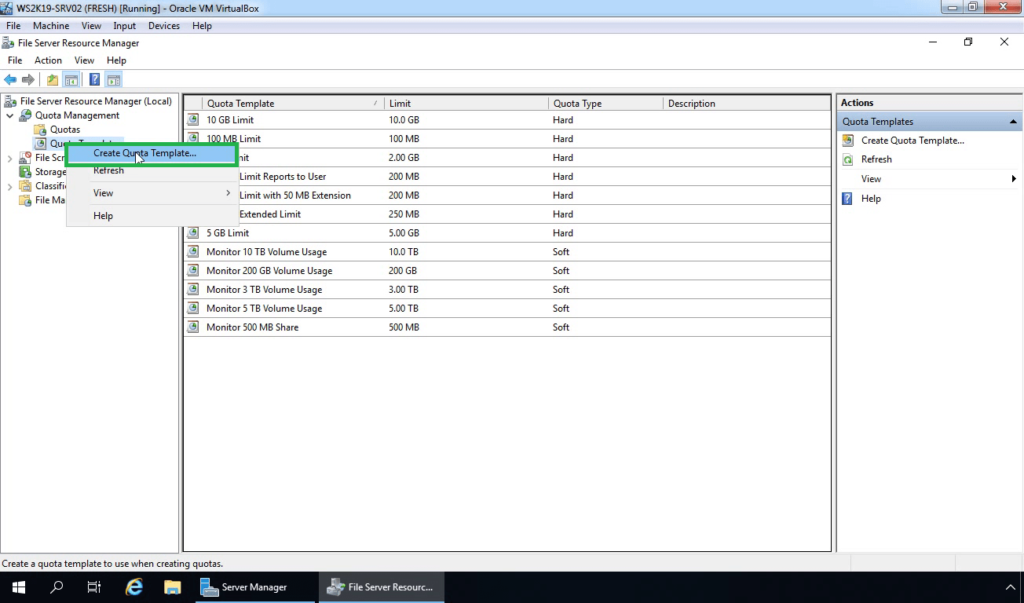
13. On File Server Resource Manager console, expand quota management. Right-click on Quota Templates and select Create Quota Template.
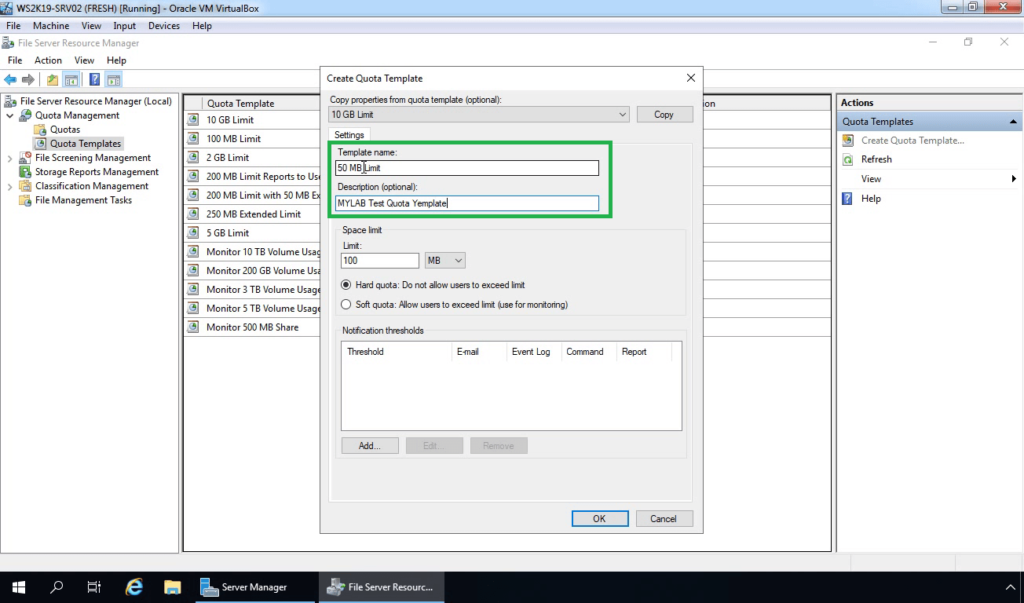
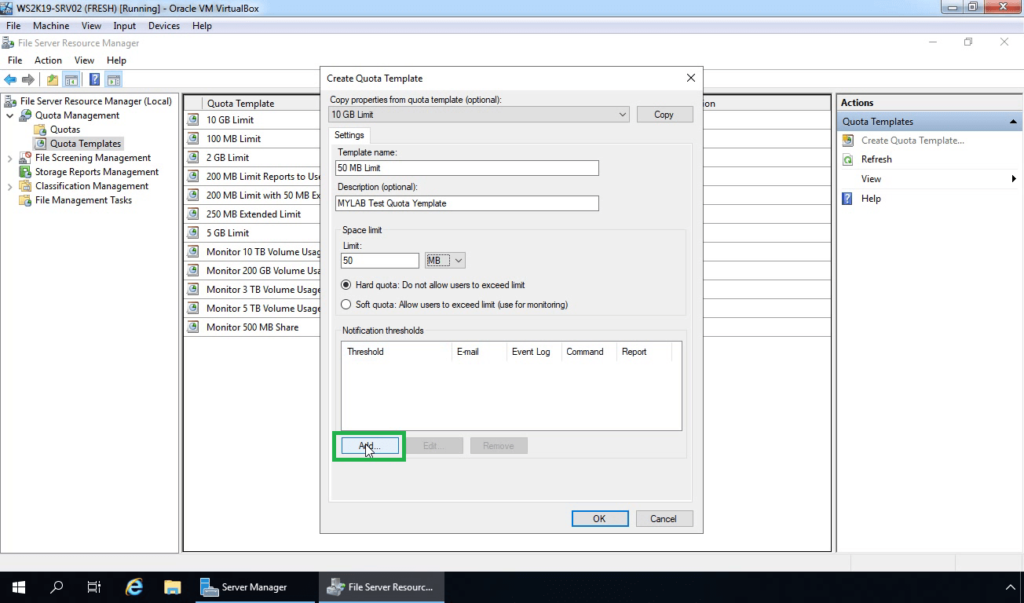
14. In the Template name text box, type a name for a new quota template. Add a description if you want.
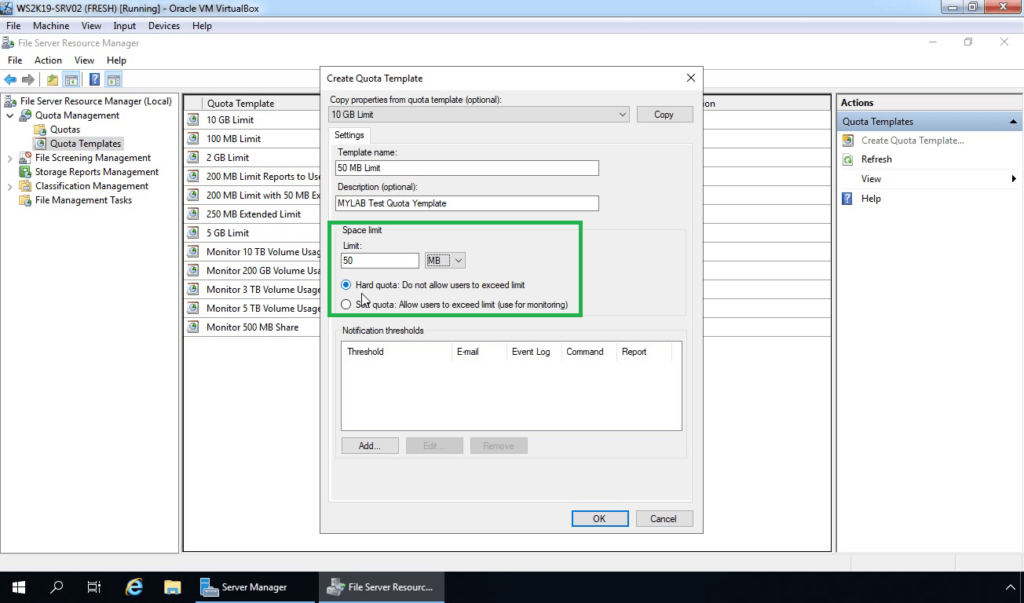
15. Under Space Limit:
- In the Limit text box, enter a number and choose a unit (KB, MB, GB, or TB) to specify the space limit for the quota.
- Choose the Hard quota or Soft quota option.
16. To set up a notification threshold, click the Add button.
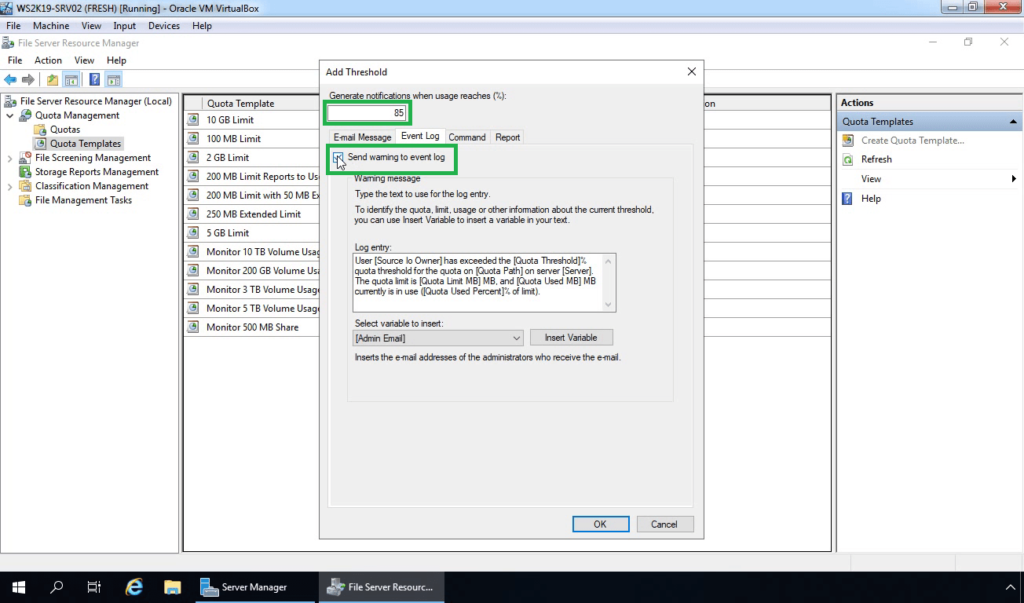
17. In the Generate notifications when usage reaches (%) text box, enter a percentage of the quota limit for the notification threshold.
18. On the Event Log tab, select the Send warning to the event log checkbox.
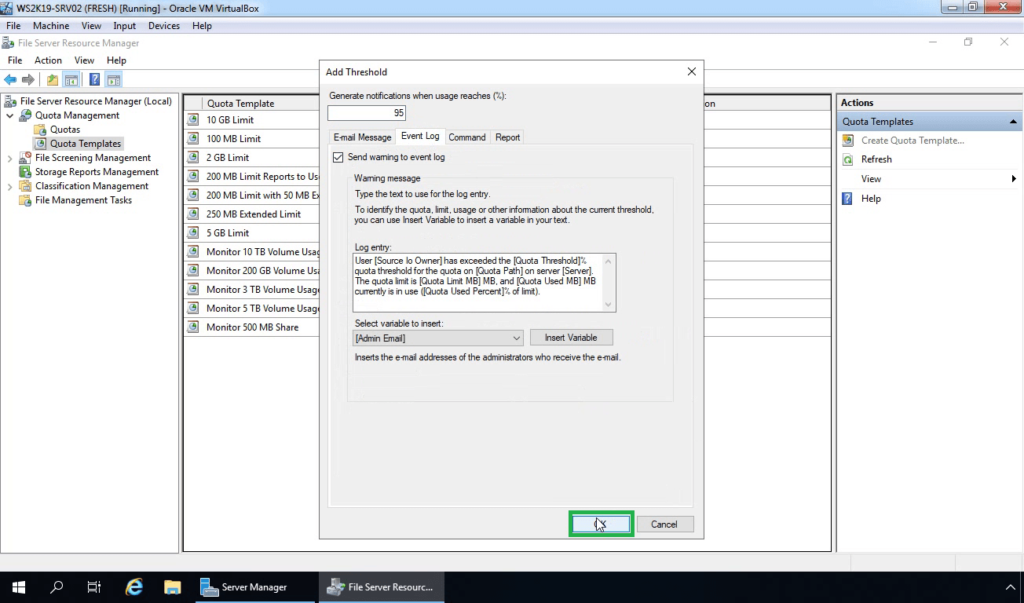
19. Click OK to save your notification threshold.
20. Click OK to close the Create Quota Template dialog box.
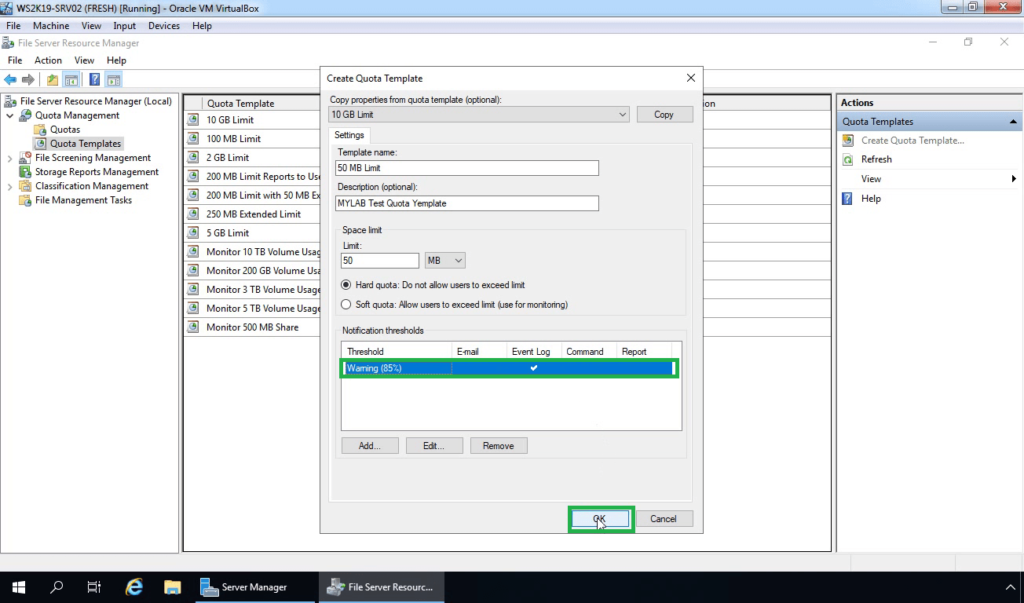
Note: Verify new quota template exists in File Server Resource Manager console
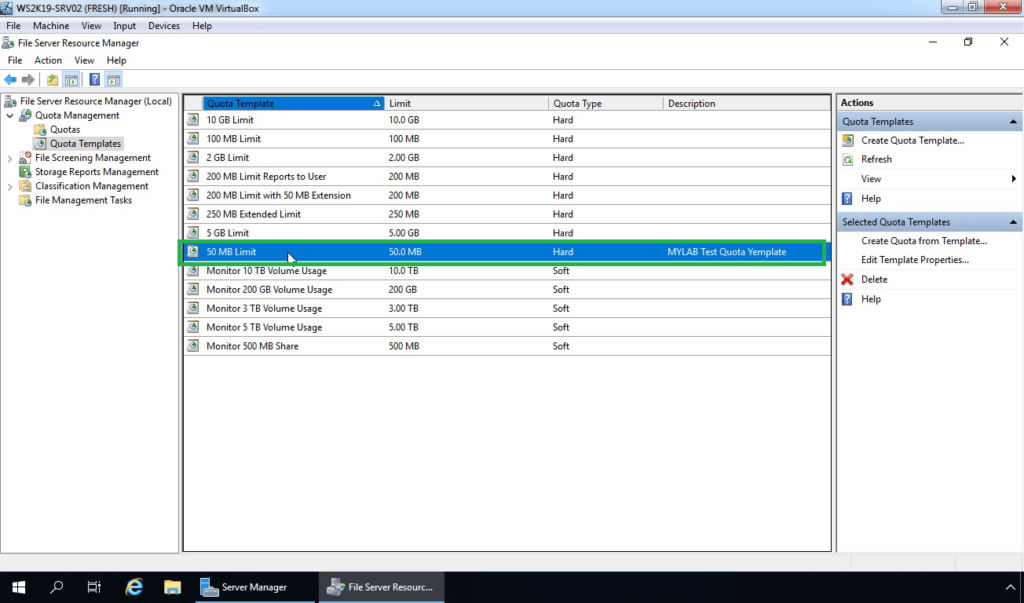
Create a Quota using an existing Quota Template:
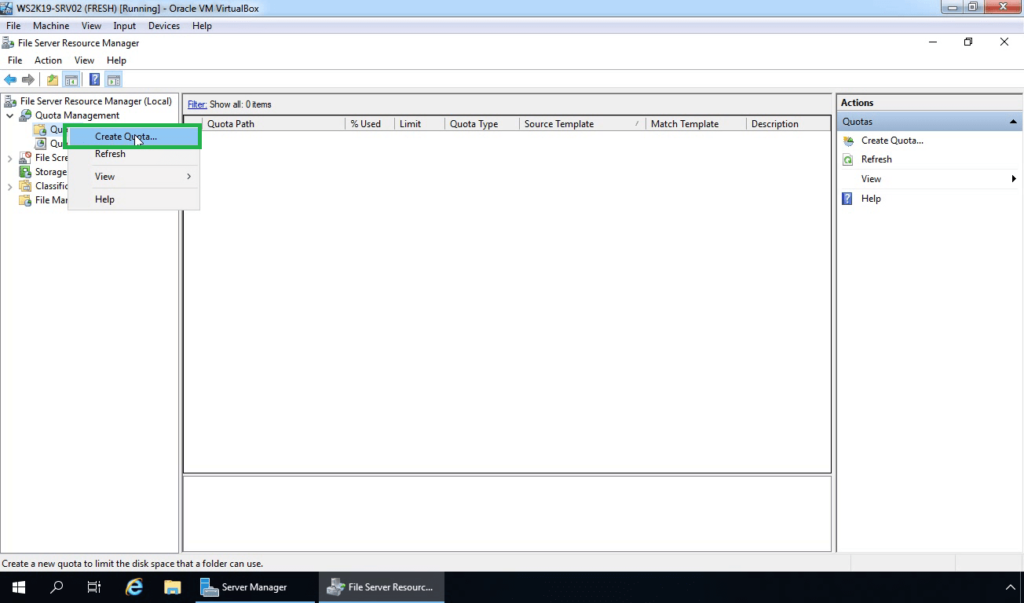
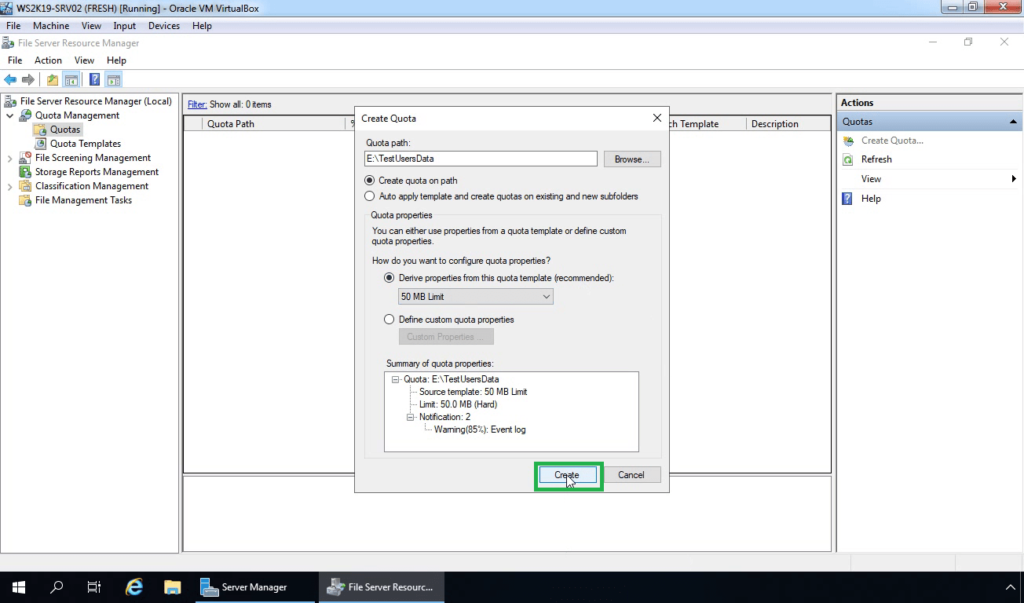
21. Right-click on Quota and select Create Quota.
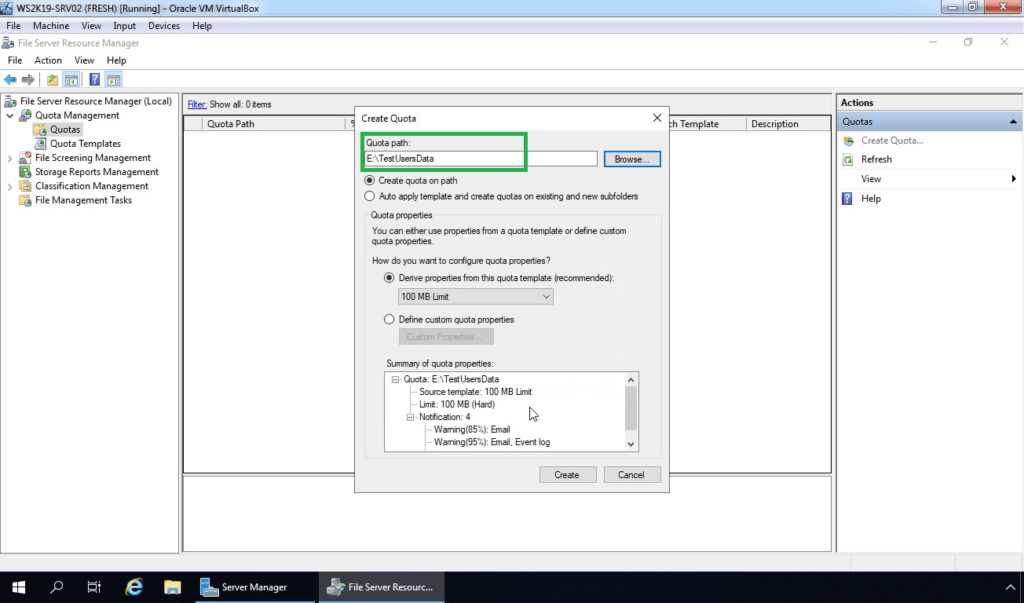
22. Browse the volume or folder that the quota applies to in the Quota path.
23. Under Derive properties from this quota template, select the template which we have created earlier.
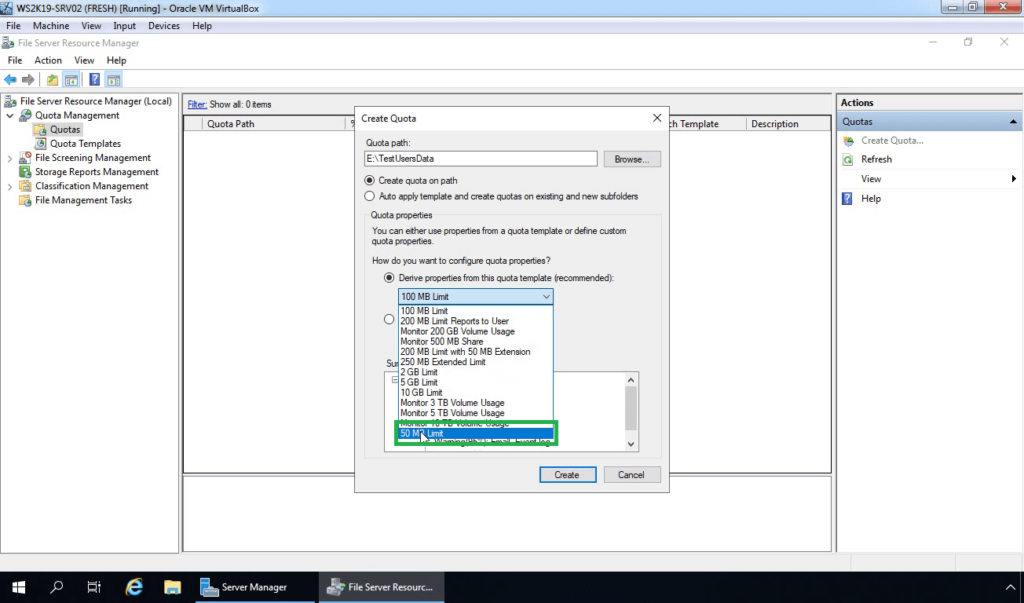
24. Click Create.
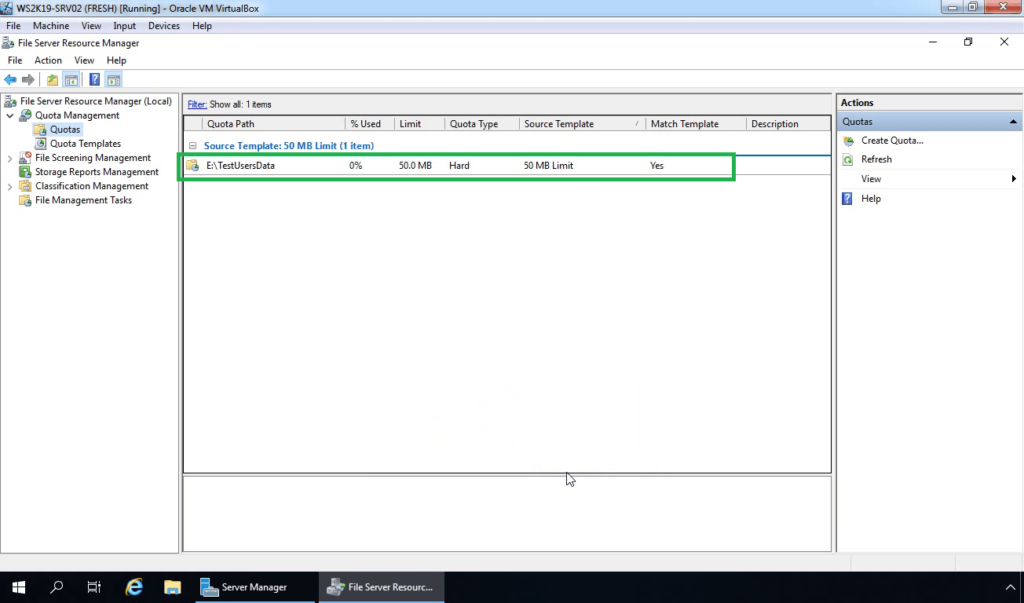
Verify quota entry in FSRM console.
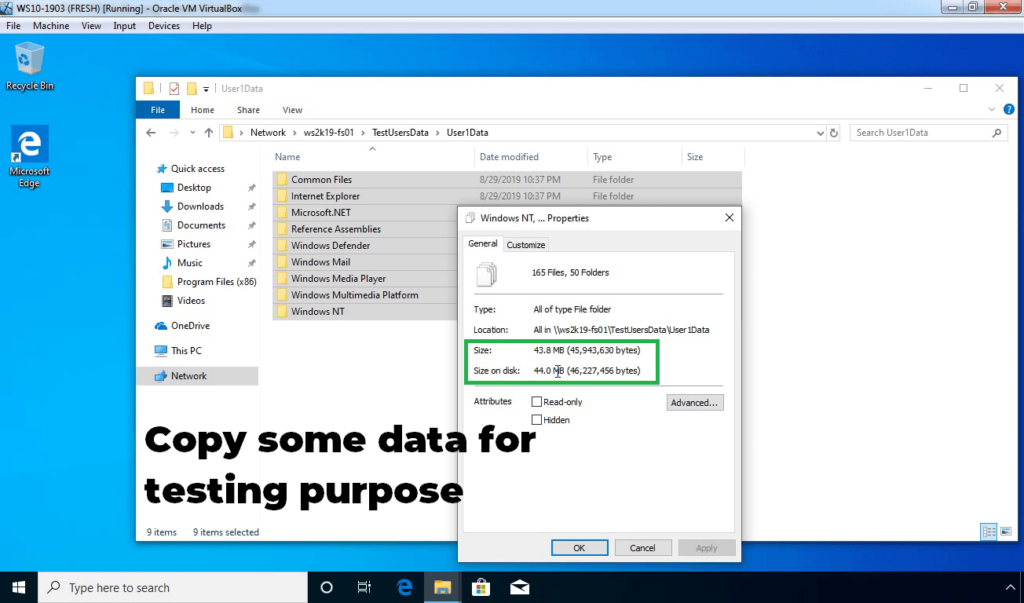
How to test Quota with FSRM?
25. On Windows 10 client machine, access the shared folder. Copy some data to the folder for testing purposes.
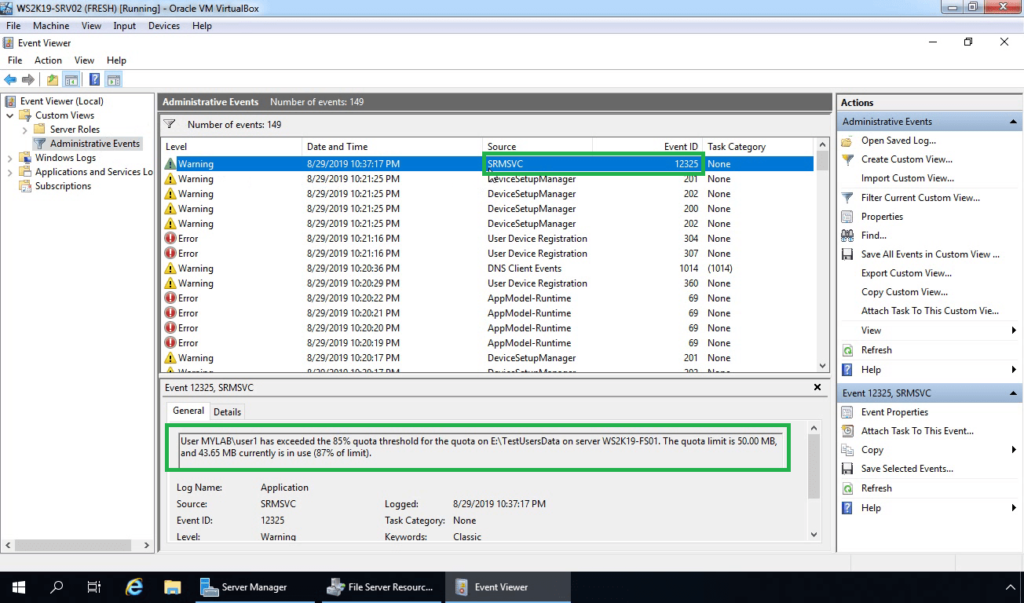
26. On a File server, open event viewer.
27. Look for the event ID 12325 (SRMSVC). Warning about user exceeded the disk quota threshold.
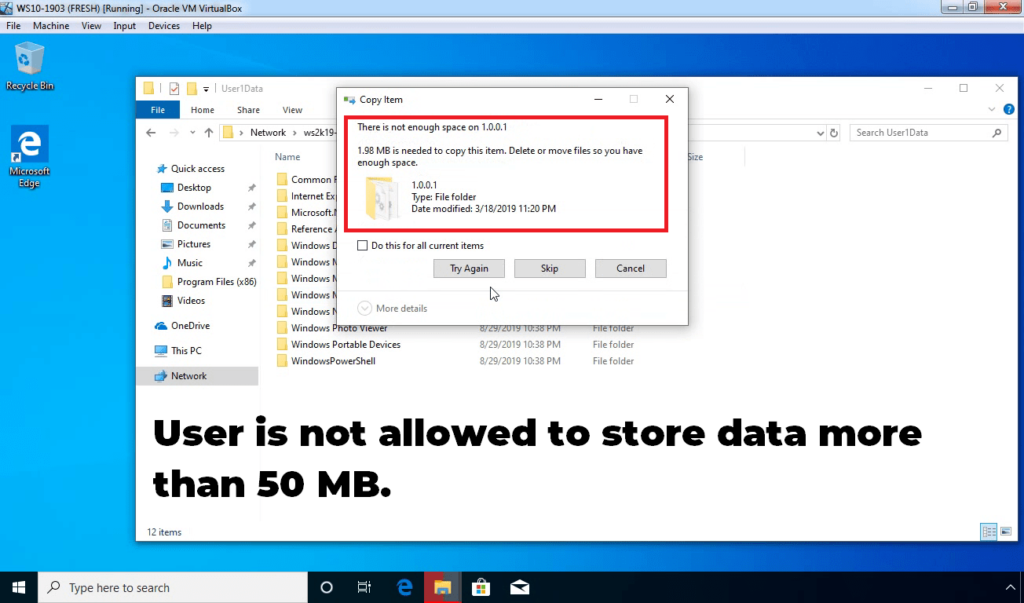
28. If a user tries to store more data then, he/she will receive the following error.
In this post, we have learned the steps to configure disk quota using file server resource manager in Windows Server 2019.
Hope this will be helpful. Thank you for reading.
Related Articles:
- Install and Configure DFS Namespace on Windows Server 2019.
- How to Configure DFS Replication in Windows Server 2019


