In this blog post, we will learn how to install newly released Fedora 30 in VirtualBox. Before installing on a physical machine it is the best practice to test Fedora in a virtual environment. VirtualBox is the best way to test the new features of Fedora 30. So let’s get started.
For this tutorial already I have VirtualBox install and ready on my windows machine. Before starting installation we also need the ISO image of Fedora 30 Workstation.
You can download the latest version of Fedora 30 ISO image from their official website. Generally, nowadays we have 64-bit of hardware on our computer. Hence, download the live image of the appropriate version 32-bit or 64-bit. For me, I will go with the 64-bit version.
Link to download the image:
Step:1 Create a Virtual machine for Fedora Installation:
1. Open Oracle VirtualBox VM Manager.
2. In VirtualBox, in the upper left corner find an Icon which says “New”. This will open up a Virtual Machine setup wizard which will walk us through the steps to create a VM.

3. Set the memory to at least 2GB (2048 MB) for a smooth experience. I am specifying 4GB (4096 MB). You can adjust the assign memory base on the available memory on your physical machine.
Click on “Create” to move on to the next to create a virtual hard disk for your VM.

4. Select the size for your virtual hard disk along with the format. Here, I am selecting 50GB of space and .vdi format which works the best with VirtualBox.
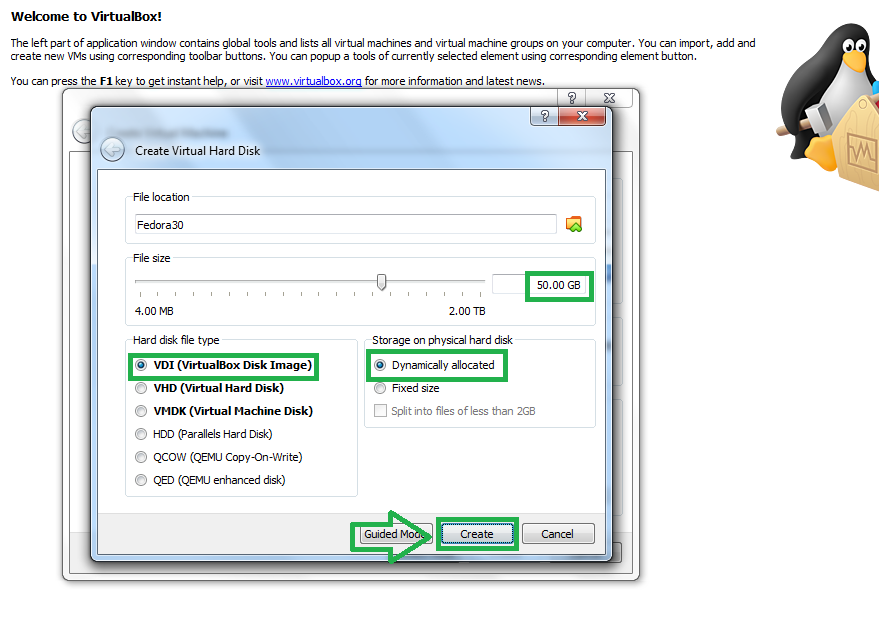
5. Click on “Create” and your Virtual Machine is ready.
Step:2 Modifying Virtual Machine settings:
We will be modifying some settings to improve our experience with the VM a bit better.
1. To begin with, right-click on your newly created Fedora VM and select settings

2. Go to Settings → System → Processor. And if you have a multicore processor dedicate 2 core to your VM.

3. Next, Click on “Display” and set Video Memory to 128 MB.
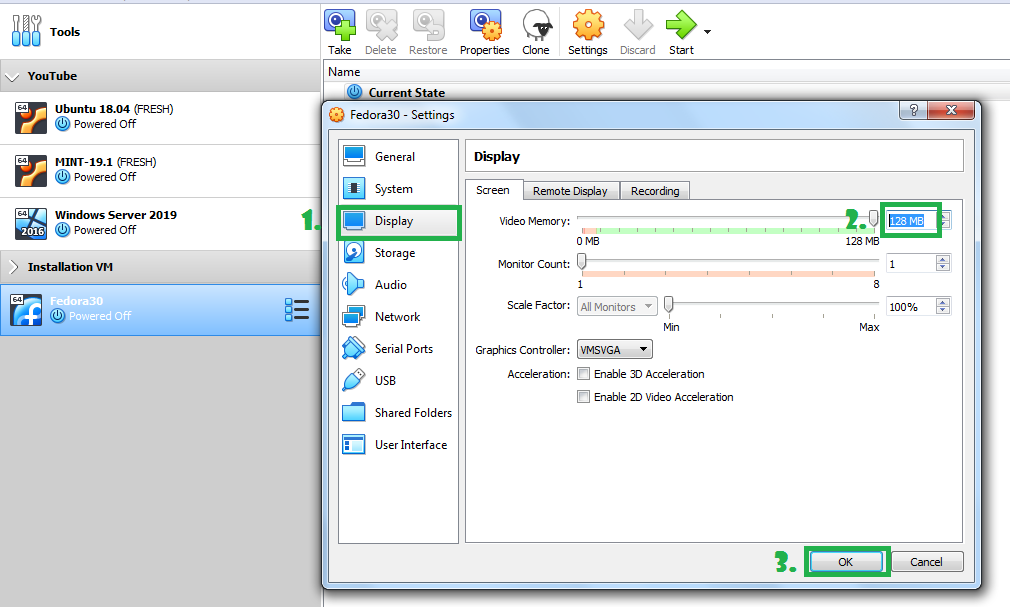
4. Click on the ok button to close this settings and now we are ready to start the VM.
Step: 3 Installing the Fedora 30 in VM:
To start the VM, simply double-click on it from your VirtualBox GUI. Since there’s no operating system installed, the virtual hard disk is not bootable.
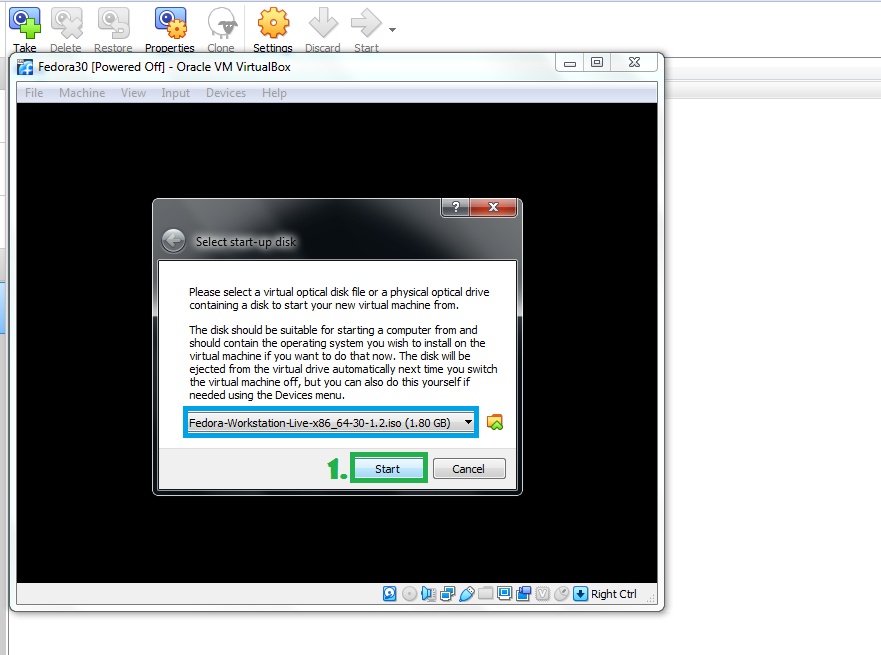
1. VirtualBox notices that this is the first time we are booting the system so it prompts us to select a start-up disk. Click on the file icon.
2. You need to specify the path of the Fedora .iso image, which you have downloaded earlier.

3. Click on “Start” button to boot VM using specified ISO image.
4. As we want to install the system we will select the top-most option which says “Start Fedora-Workstation-Live-30”. Use arrow keys to go toggle through the options and return key to select the required one.
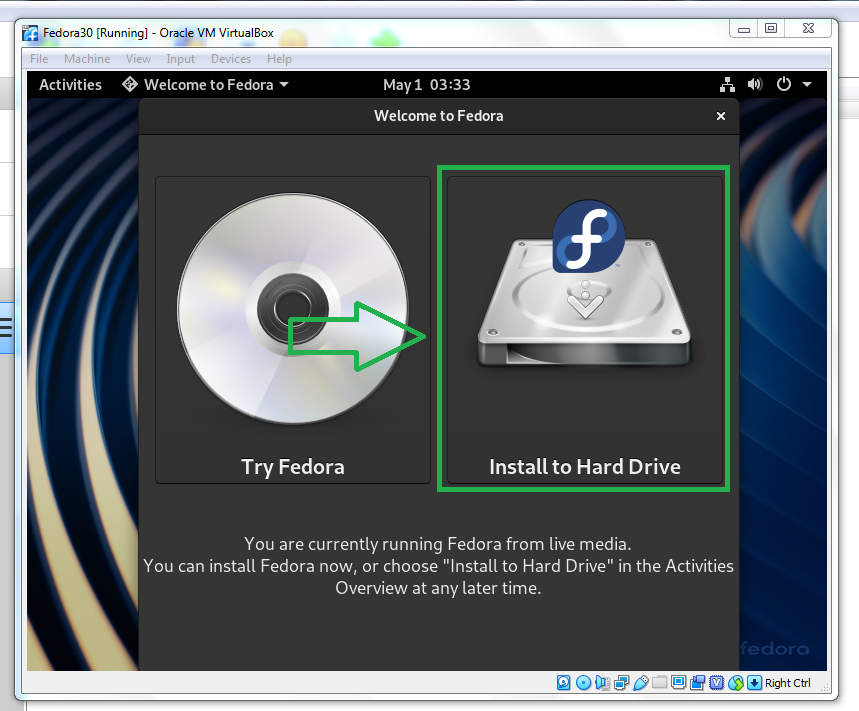
5. The welcome menu would automatically ask you what you want to do. Here we have two option: i) If you want to try Fedora without installing it, then select “Try Fedora” and ii) If you are sure about installation, then go with “Install to Hard Drive” option. I am selecting the second one as we are installing this in the virtual environment.
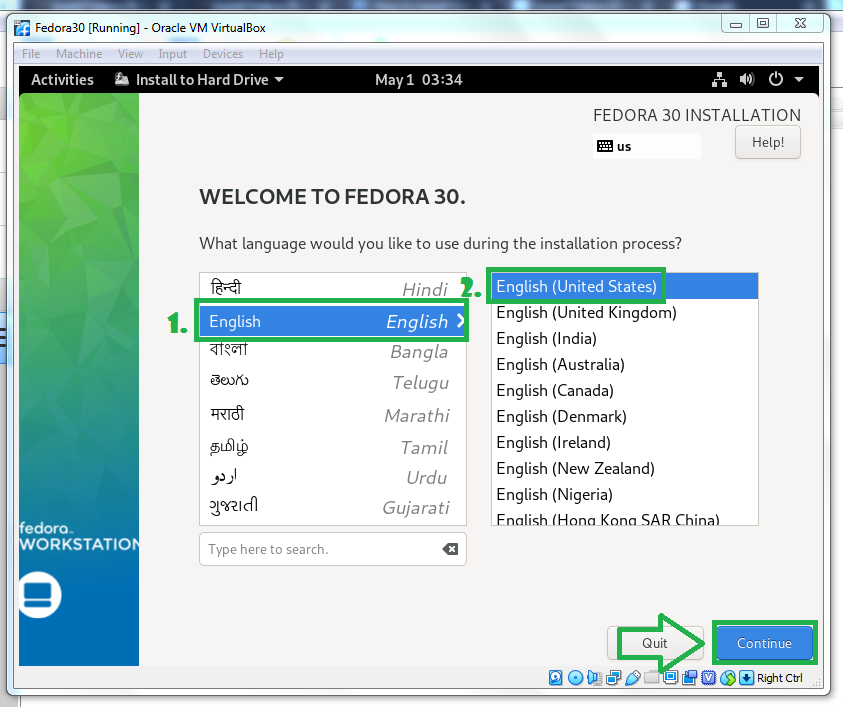
6. Select your language, I assume English (US) would be a good choice.
7. Time and Date would be automatically selected at this point as our VM is connected with Internet. If not, then click on “Time & Date” and select the appropriate option.
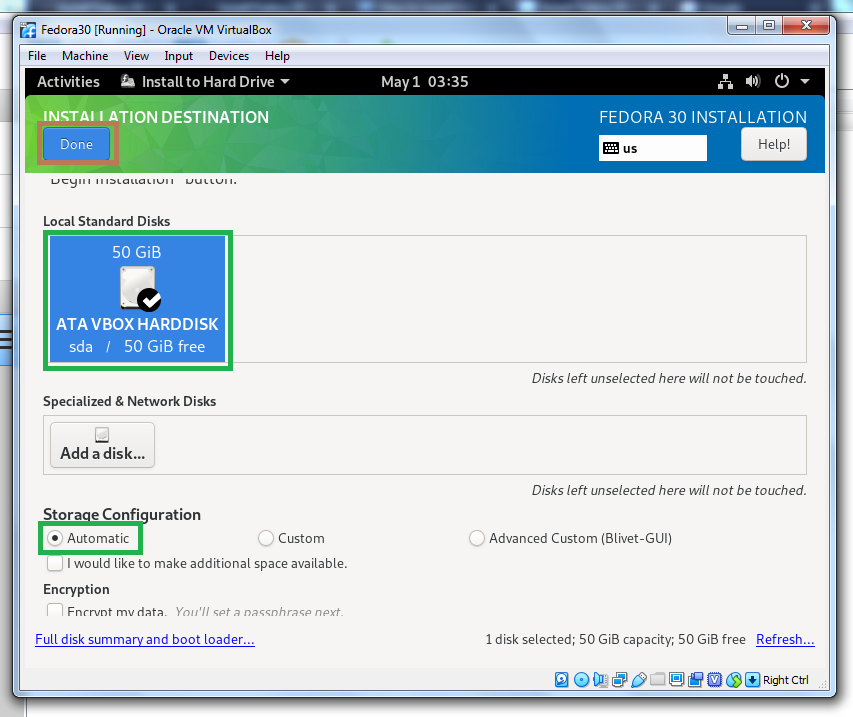
8. Click on the “Installation Destination” so we can select the hard disk we are going to install Fedora on.

9. To make it simple, I am selecting “automatic partitioning”. If you wish then feel free to experiment with other option like custom partitioning. Click “Done”, on the top-left, once you have verified the destination.
10. Now you will notice that the “Begin Installation” button, which was greyed out earlier, is now highlighted. Click on it and that will start the installation of Fedora OS.

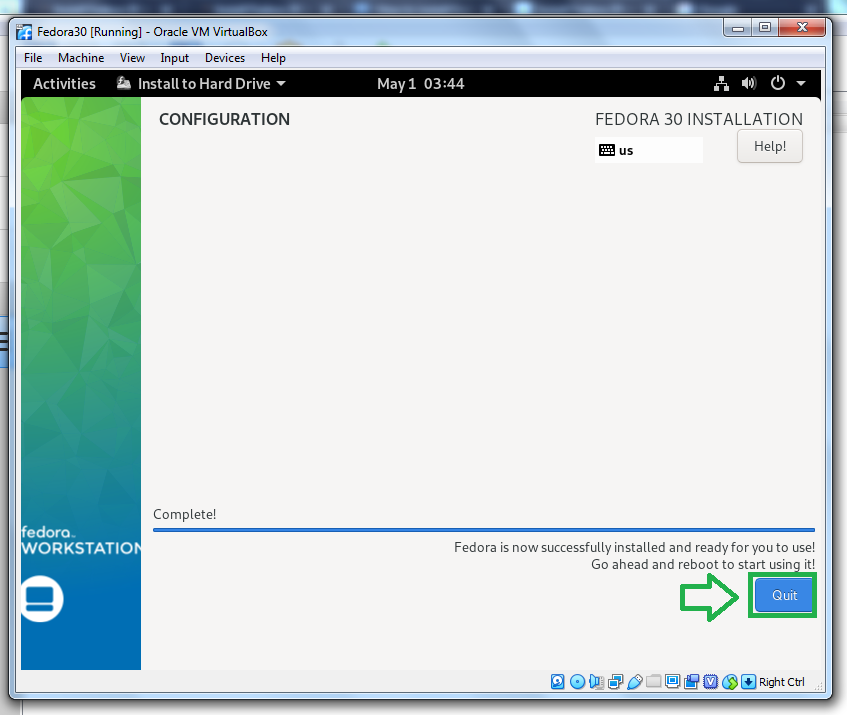
11. This will take a while to finish the installation process. Once the installation completes, Click on “Quit” button.
12. After successful installation of Fedora, Now we need to restart the virtual machine once. Click on “Restart” button to do it.

13. Let’s remove the ISO image as well otherwise, the virtual machine will again boot from the ISO image as we haven’t change the boot sequence order.

Step:4 Complete Post Installation task:
Note: At next boot up, the boot menu will pop up. Here select Fedora and not the rescue option.
1. On welcome screen, Click on “Next”

2. On privacy console, I am going with default selection. Click on “Next” to continue.

3. On online accounts console, click on “skip” button.

4. On about console, specify the username and users full name.

5. On the password tab, type the password of your choice and retype it to confirm the password again.

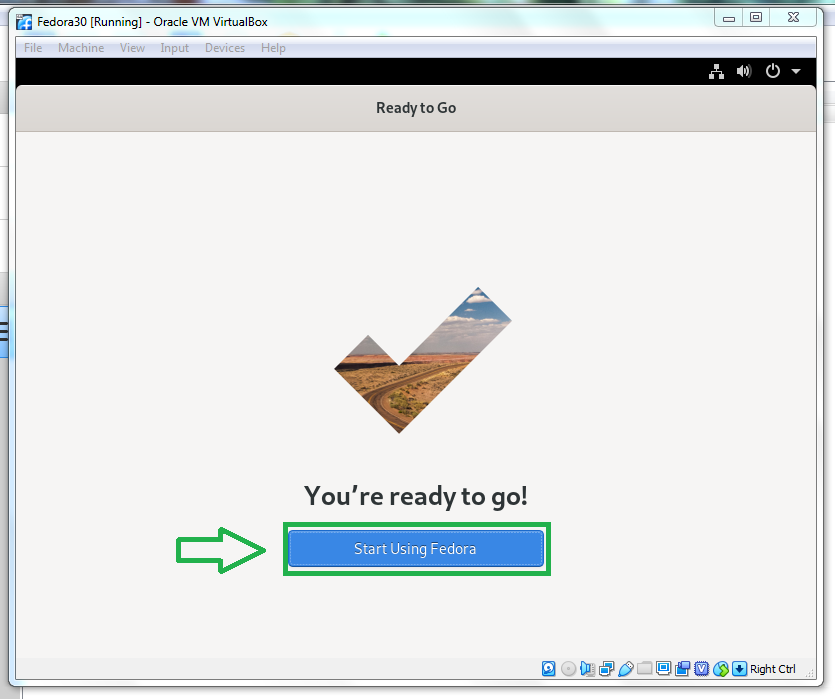
6. Click on “Start using Fedora” to complete the post-installation. Now your virtual machine is ready to use.

7. After completing the installation, our first steps is to check for system updates. Open terminal and type dnf check-update command. press enter to continue.

That’s it. We have successfully install Fedora 30 in VirtualBox. Take a snapshot of your virtual machine so you can restore it when “something goes south”.
I hope this guide on installing Fedora 30 on VirtualBox will be helpful. If you face any issue during installation, do let us know in the comments section.
Thank you readers!