In this blog post, I’ll walk you through the steps to install the Hyper-V role on Windows Server 2025 using both Server Manager and Windows PowerShell.
Hyper-V is Microsoft’s native hypervisor platform that enables you to run virtual machines (VMs) on Windows Server. With the release of Windows Server 2025, Hyper-V has received performance and security enhancements that make it an even more attractive choice for virtualization.
In this post, we’ll walk you through:
- Prerequisites for Installing Hyper-V on Windows Server 2025
- How to install the Hyper-V role via Server Manager
- How to install Hyper-V using PowerShell
Table of Contents
Prerequisites for Installing Hyper-V on Windows Server 2025
Before installing the Hyper-V role, make sure your hardware and system configuration meet the following minimum requirements:
- CPU: 64-bit processor with Second Level Address Translation (SLAT)
- Virtualization: Hardware-assisted virtualization (Intel VT-x or AMD-V) enabled in BIOS
- Memory (RAM): Minimum: 4 GB (Recommended: 8 GB or more for running multiple VMs)
- Storage: Sufficient disk space depending on VM needs; SSD recommended for performance
- Firmware: UEFI with Secure Boot support (recommended for enhanced security)
- Virtualization support turned on in the BIOS or UEFI
.
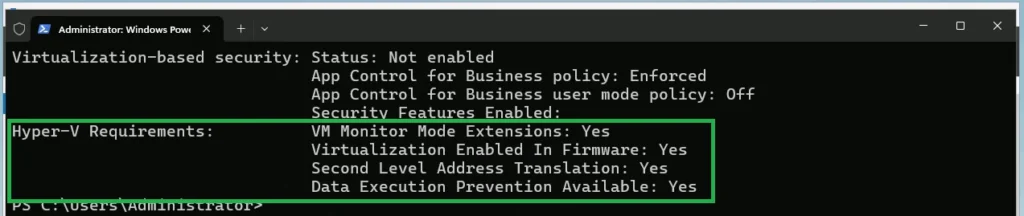
How to check for Hyper-V requirements:
Open Windows PowerShell or a command prompt and type:
Systeminfo.exeCheck the Hyper-V Requirements section in the output. If every listed requirement is marked “Yes”, your system meets the criteria to run the Hyper-V role.
Note: Hyper-V cannot be installed on a system where Device Guard or Credential Guard conflicts with virtualization-based security (VBS).
How to Install Hyper-V Role on Windows Server 2025:
Hyper-V can be easily installed on both Windows Server and Windows client operating systems. We have two options to add the role: we can either use Server Manager or enable the role through PowerShell. For beginners who haven’t worked with Windows Server before, the Hyper-V role can be easily installed using the Server Manager.
Method 1: Using Server Manager
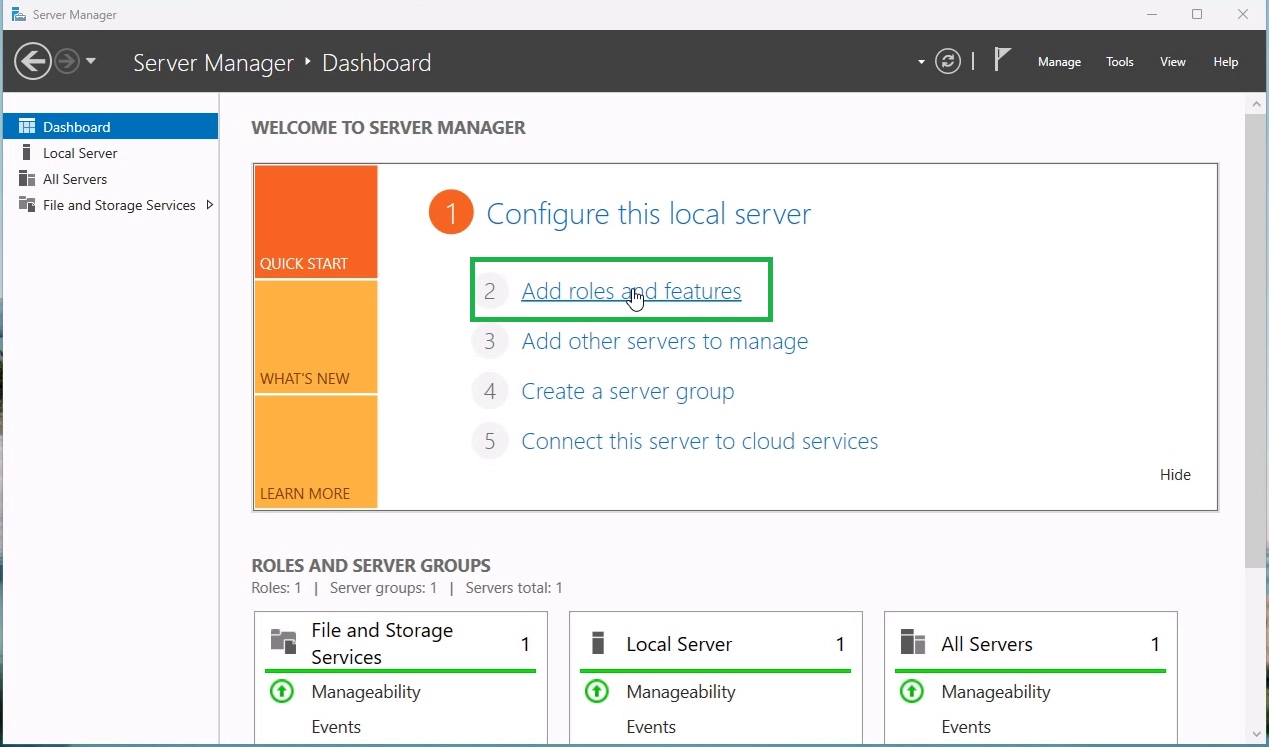
In Server Manager, on the Manage menu, select Add Roles and Features.
.
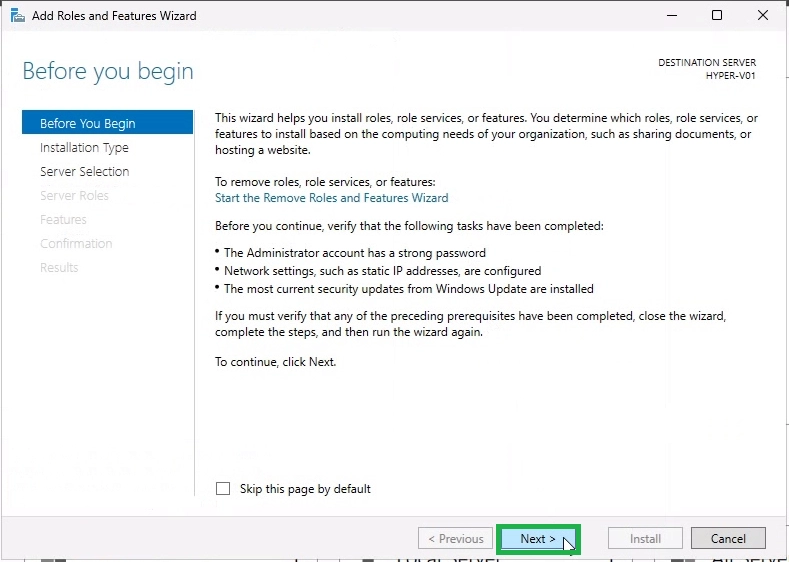
On the Before You Begin page, ensure that the destination server and network environment are properly configured for the role and features you plan to install. Then, click Next to continue.
.
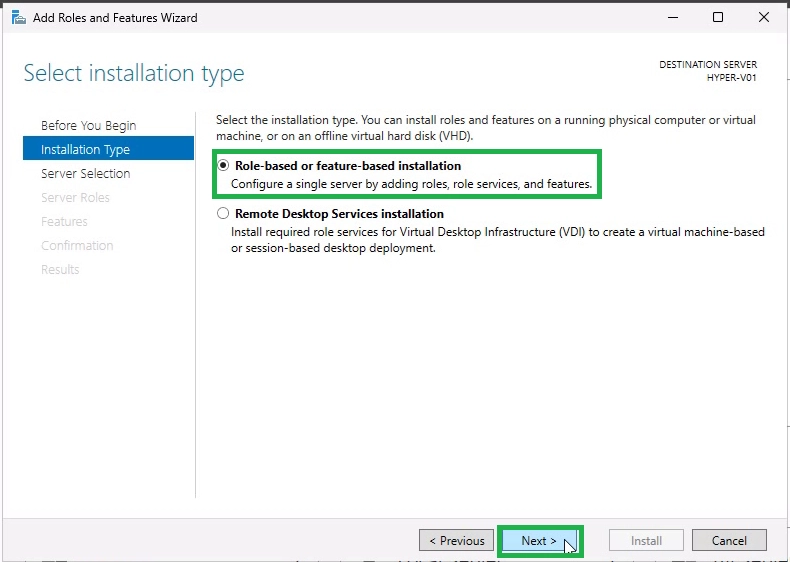
On the Select installation type page, select Role-based or feature-based installation, and then select Next.
.
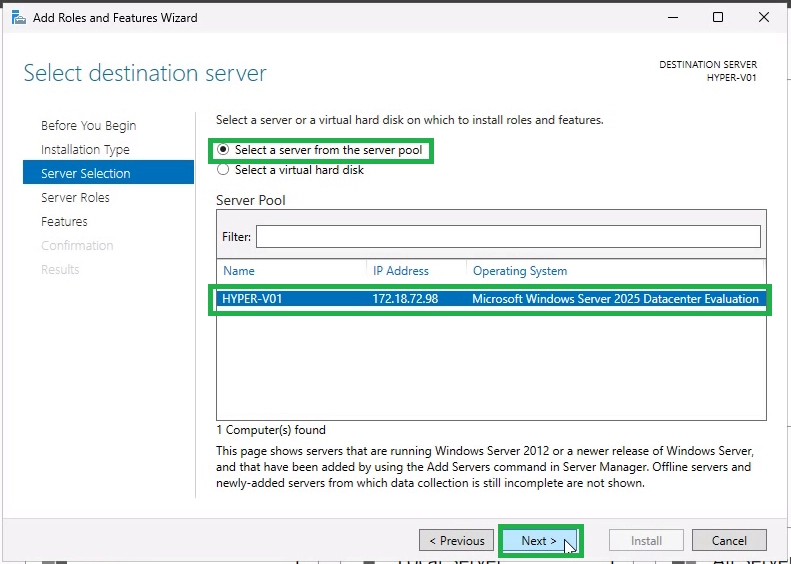
On the Select destination server page, select a server from the server pool, and then select Next.
.
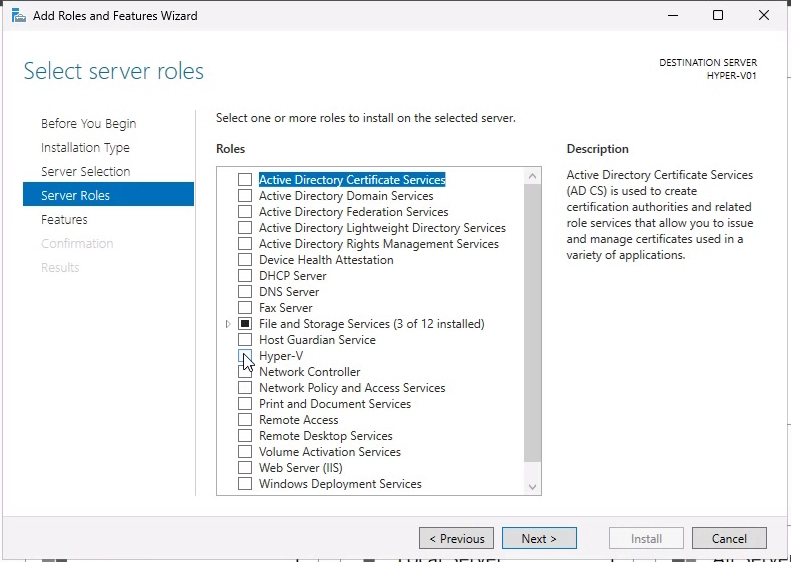
On the Select Server Roles page, check the Hyper-V box to add the role.
.
From the Add Roles and Features Wizard page, select Add Features.

.
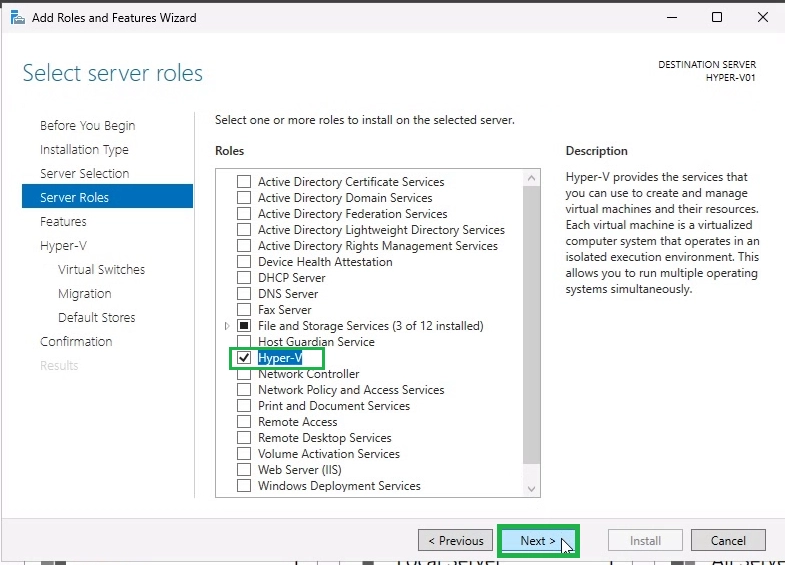
Ensure the Hyper-V role is selected, then click Next to proceed.
.
On the Select features page, select Next.

.
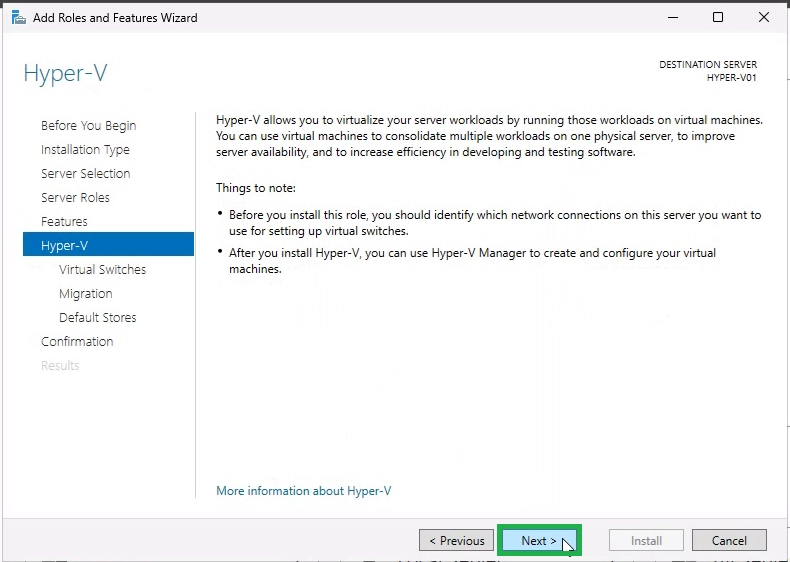
From here, we will begin the Hyper-V-specific configuration. The wizard will display an overview of the Hyper-V role. You can read a brief overview of the Hyper-V server role. Click Next to continue.
.
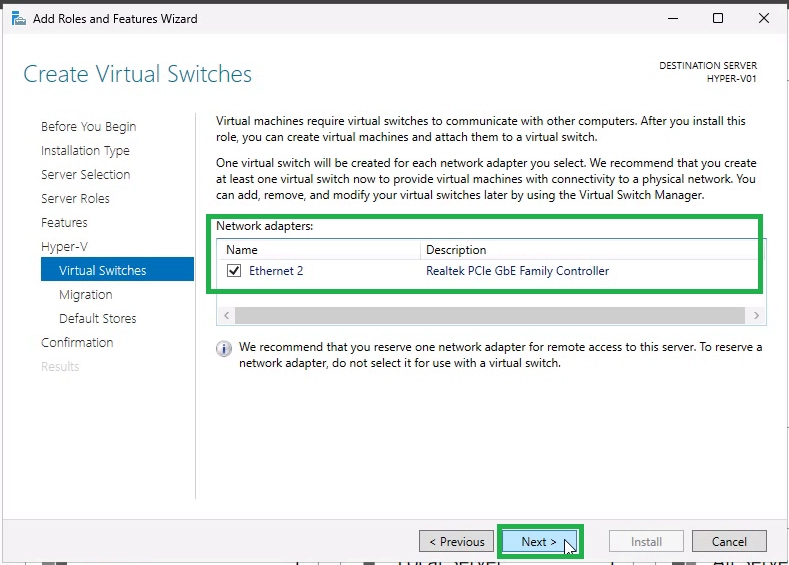
You will configure the first Hyper-V Virtual Switch on this configuration page. Virtual Switches make it possible for Virtual Machines to talk to each other. If you want to create a virtual switch and link it with a physical network, choose one or more of the available network adapter from your host server.
As a note, this step is not required during the installation of the Hyper-V role and can be done later using Hyper-V Manager. You can also use Windows PowerShell to create a virtual switch.
I’ve chosen the physical network adapter on the host to be used for creating the first virtual switch. Click Next to proceed.
.
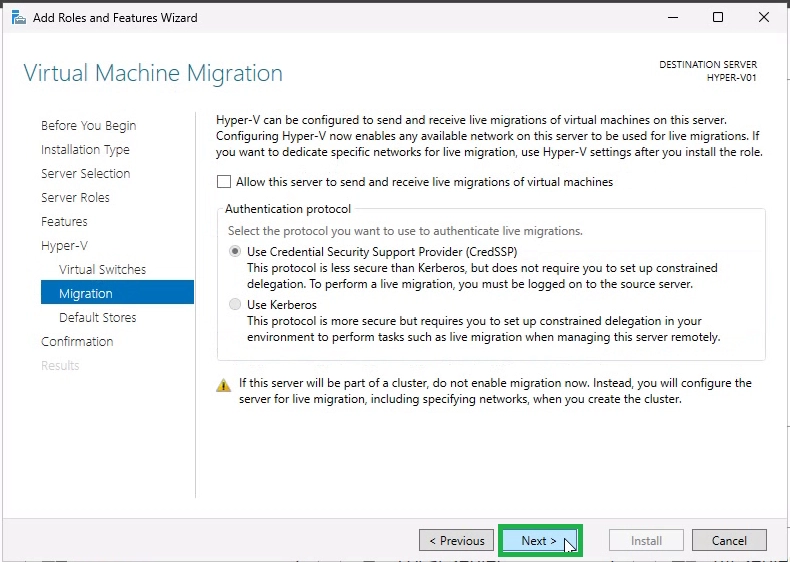
If you want to perform live migrations of VMs between Hyper-V hosts, enable the Virtual Machine Migrations option.
Otherwise, you can leave it off, as this configuration can also be specified later using Hyper-V Manager or PowerShell. Click Next to proceed.
.
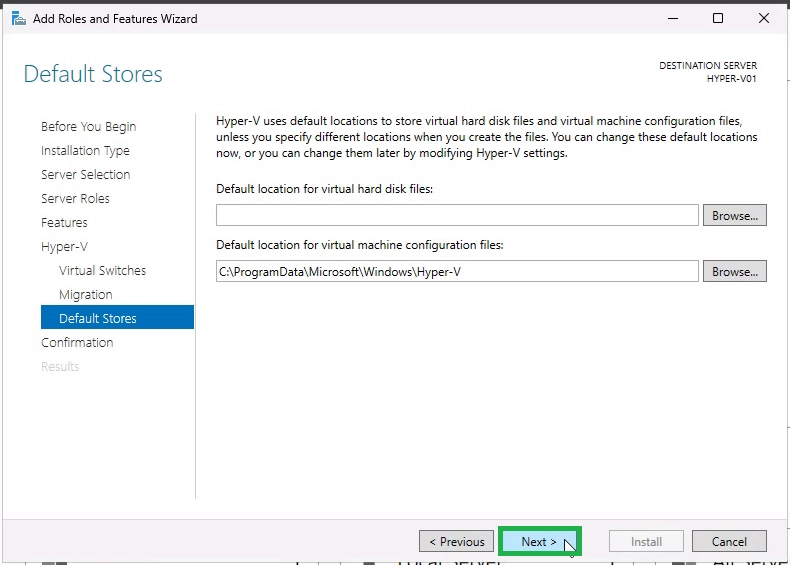
By default, Hyper-V stores virtual machine configuration files at this location. You can specify custom locations or partitions here to store the disk files and VM configuration files.
At this moment, we are going with the default locations. Once you are done, click Next.
.
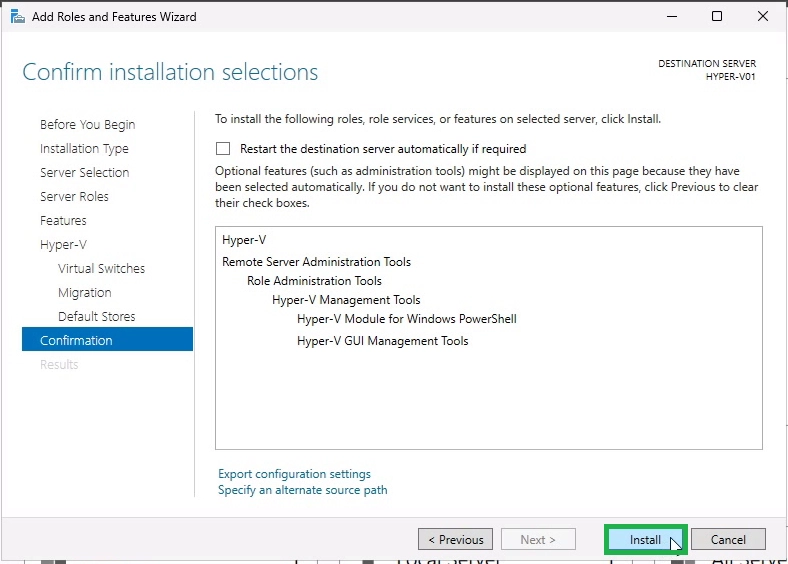
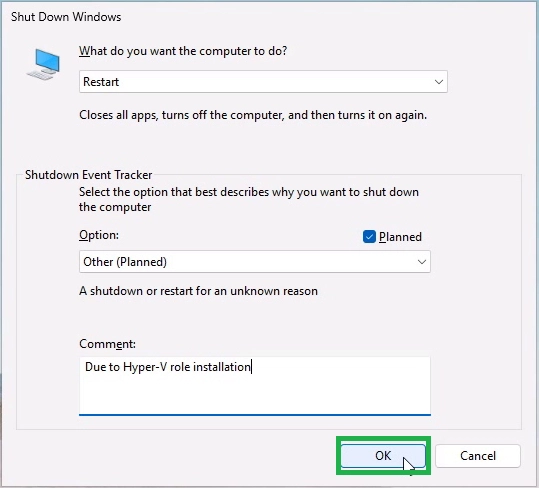
On the Confirm installation selections page, select Restart the destination server automatically if required, and then select Install.
.
When you click Install, the installation of the Hyper-V role begins. The Hyper-V installation on your server may take a few minutes to complete.
A restart is required as the final step to complete the installation.

.
Method 2: Using PowerShell
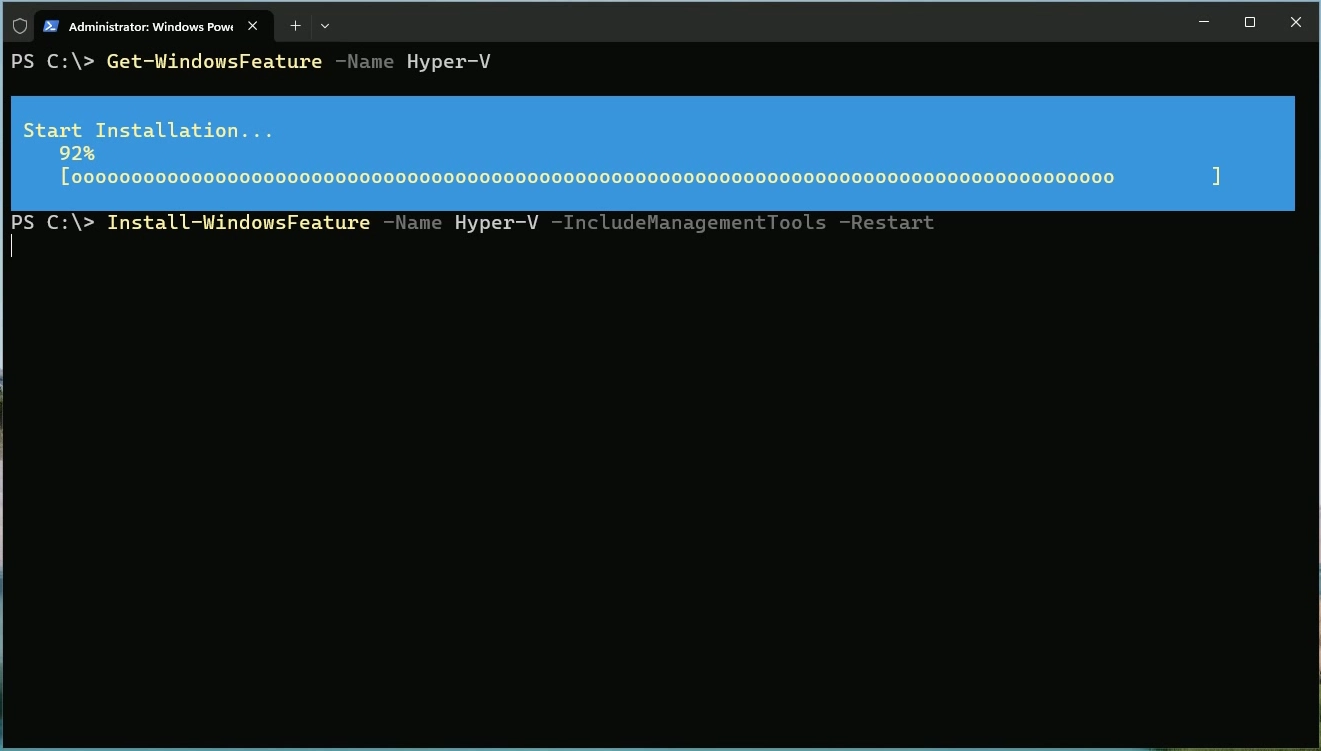
Open PowerShell as Administrator.
Run the following command
Install-WindowsFeature -Name Hyper-V -IncludeManagementTools -RestartThe -Restart switch will automatically reboot the server once installation is complete.
.
.
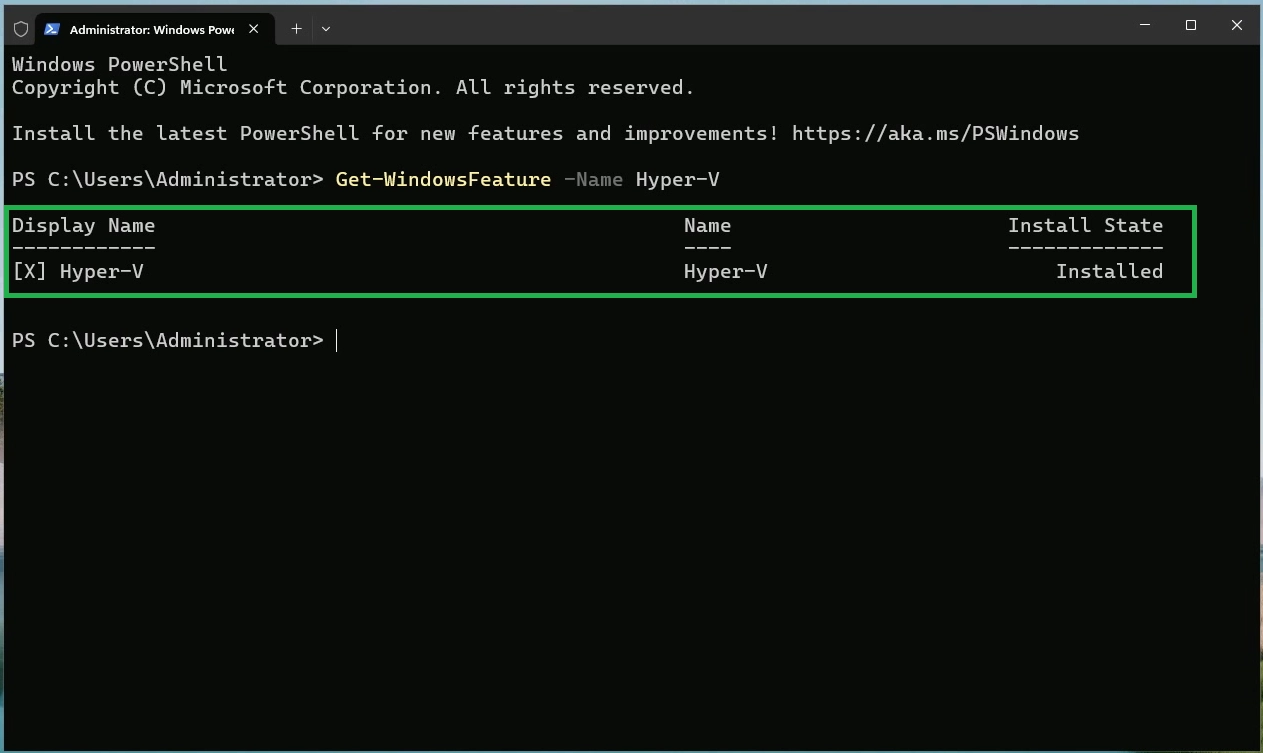
Verifying the Hyper-V Role Installation
Press CTRL + ALT + DEL key combination to unlock the Server. Type the administrator password and press enter to login to this Windows Server 2025.
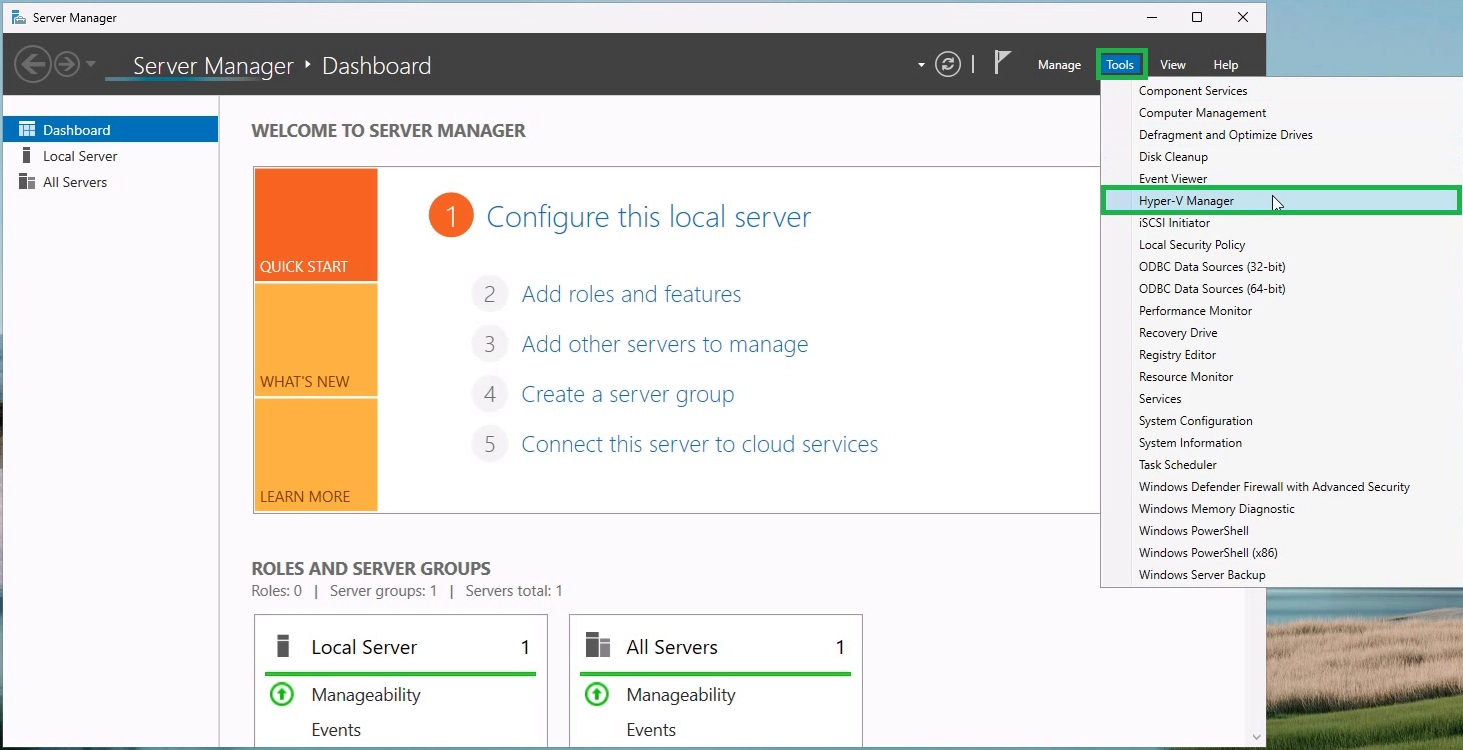
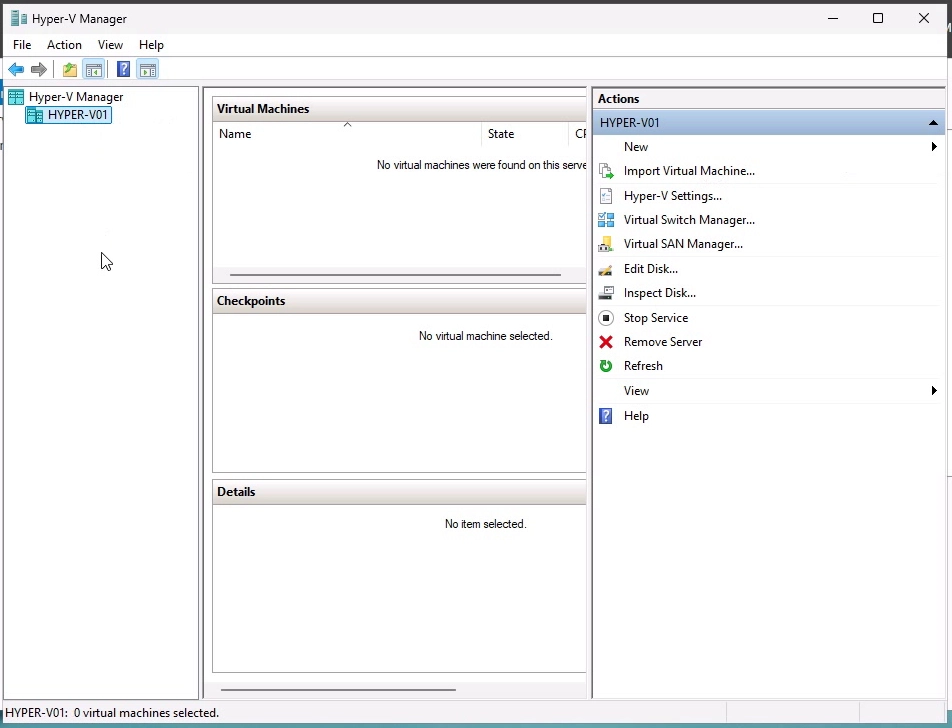
When installation is finished, verify that Hyper-V installed correctly. You can verify that Hyper-V and the Hyper-V management tools were successfully installed by launching the Hyper-V Manager.
Check the Roles and Features tile on the page for the selected server.
Click on Tools and select Hyper-V Manager to open the Hyper-V management console.
.
Hyper-V Manager should launch successfully, and you will see your local Windows Server listed by default.
.
It is the primary tool for managing and configuring Hyper-V, as well as creating and managing virtual machines. In an upcoming posts, we will dive deeper into the inner workings of Hyper-V Manager and creating and managing virtual machines.
Conclusion:
Hyper-V remains a powerful and flexible virtualization solution built into Windows Server 2025. Whether you manage a small lab environment or an enterprise data center, it offers the tools needed to build scalable, secure, and efficient virtual infrastructure. If you’re setting up a virtual environment on Windows Server 2025, Hyper-V is an excellent place to start.
6 Comments
Leave a Reply
You must be logged in to post a comment.
[…] guide for creating a new virtual machine using Hyper-V on a Windows Server 2025 host. Click here to read our previous blog post on installing and configuring the Hyper-V Server role on a Windows […]
[…] a look at our latest post on installing the Hyper-V Role on Windows Server 2025 using the Server Manager […]
[…] sure to check out our previous blog post for a step-by-step guide on installing the Hyper-V Server role on Windows Server […]
[…] Windows Host: Windows Server 2025 with the Hyper-V feature enabled. […]
[…] sure to read our previous blog post on how to install and configure the Hyper-V Role on Windows Server […]
[…] A machine running Windows Server 2025 with the Hyper-V roleenabled. […]