Hyper-V is widely used to create and manage virtual machines (VMs) on Windows servers. While Hyper-V offers a graphical management tool in the form of Hyper-V Manager, many tasks are more efficiently performed using PowerShell.
PowerShell is a powerful scripting language that can automate and streamline the creation and management of Hyper-V VMs. In this blog post, we’ll explore how to create and manage a Hyper-V VM using PowerShell.
Take a look at our latest post on installing the Hyper-V Role on Windows Server 2025 using the Server Manager Dashboard.
Table of Contents
Prerequisites
Before we dive into creating and managing Hyper-V VMs using PowerShell, make sure you have the following prerequisites:
- Windows Server with Hyper-V Role Installed: Hyper-V is available on Windows Server and some versions of Windows 10/11 (Pro and Enterprise). Ensure that Hyper-V is enabled on your machine.
- PowerShell Module: The Hyper-V PowerShell module must be installed. It is typically installed by default when the Hyper-V role is enabled.
- Administrative Privileges: You need administrative privileges to create and manage VMs.
Step 1: Install the Hyper-V PowerShell Module
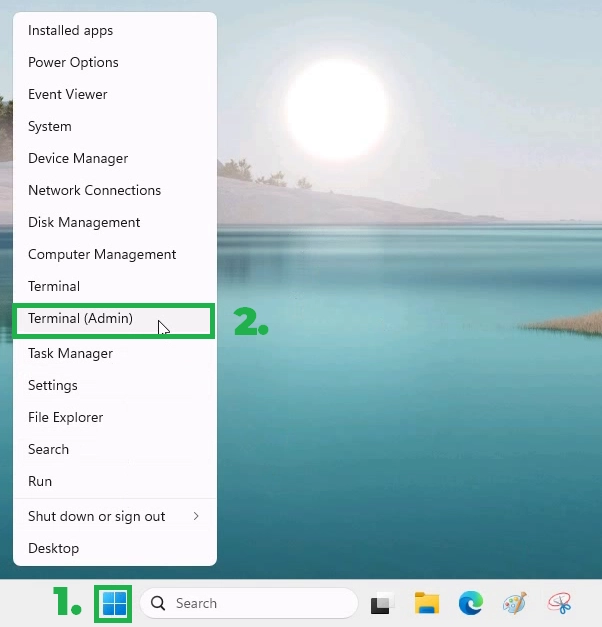
On the Windows Server 2025 desktop, right-click the Start button and select Terminal (Admin) to launch Windows PowerShell with administrative privileges.
.
If the Hyper-V PowerShell module is not already installed, you can install it by running the following command:
Install-WindowsFeature -Name Hyper-V-PowerShell
.
Once Hyper-V is installed and the PowerShell module is available, you can start creating and managing virtual machines directly from the command line.
.
Step 2: How to Create a Hyper-V VM with PowerShell
Creating a new Hyper-V virtual machine with PowerShell is straightforward using the New-VM cmdlet. Let’s walk through the steps to create a basic virtual machine.
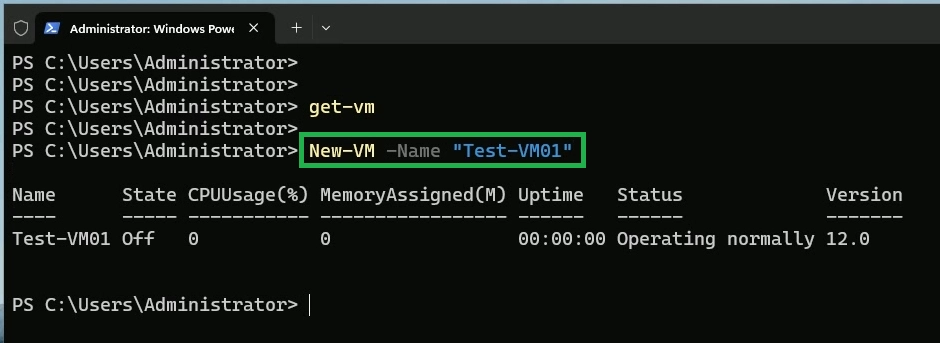
New-VM -Name "Test-VM01"This cmdlet creates a new Generation 1 virtual machine named Test-VM01, configured with one virtual CPU and a virtual CD/DVD drive attached.

.
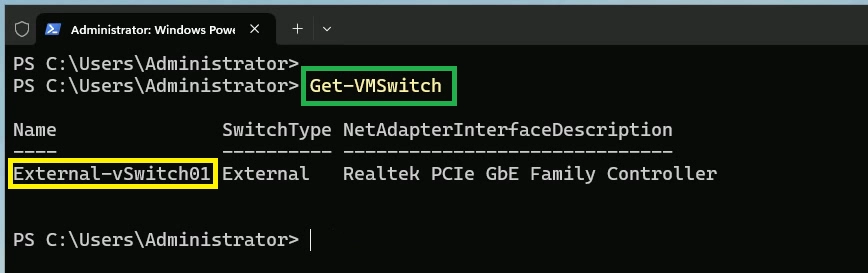
Get the name of the virtual switch that you want the virtual machine to use by using the Get-VMSwitch cmdlet:
Get-VMSwitch Make a note of the virtual switch name, as we’ll use it when creating the VM and attaching the switch to it.
.
Let’s add a few additional switches to the previous cmdlet in order to create a new virtual machine with advanced property settings.
New-VM -Name "Test-VM02" -MemoryStartupBytes 2GB -Generation 2 -SwitchName "External-vSwitch01"Here’s what the parameters mean:
- -Name “Test-VM02”: This parameter specifies the name of your virtual machine.
- -MemoryStartupBytes 2GB: This parameter defines the amount of RAM allocated to the VM at startup.
- -Generation 2: This parameter specifies the generation of the virtual machine.
- -SwitchName “External-vSwitch01”: This parameter specifies the friendly name of the virtual switch to connect the VM to the network.
This will create a Generation 2 virtual machine named Test-VM02, allocate 2 GB of memory, and connect the new virtual machine to an existing virtual switch for network connectivity.

.
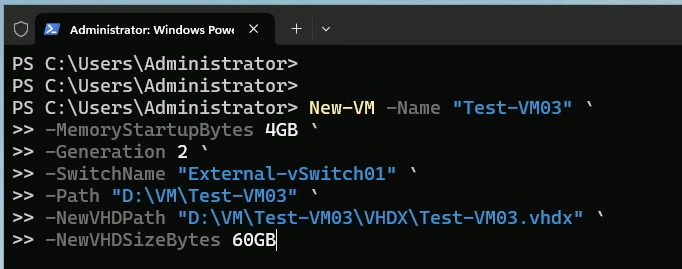
Let’s create a new virtual machine with a new virtual hard disk, storing both the VM configuration and the VHD file in a non-default path.
New-VM -Name "Test-VM03" -MemoryStartupBytes 4GB -Generation 2 -SwitchName "External-vSwitch01" -Path "D:\VM\Test-VM03\" -NewVHDPath "D:\VM\Test-VM03\VHDX\Test-VM03.vhdx" -NewVHDSizeBytes 60GB Here’s what the parameters mean:
- -Path “D:\VM\Test-VM03: This parameter specifies the directory path where the VM configuration files will be stored.
- -VHDPath “D:\VHDX\Test-VM02.vhdx”: The directory path where the new virtual hard disk (VHD) file will be stored.
- -NewVHDSizeBytes 60GB: This parameter specifies the size of the VHDX file to be created.

.
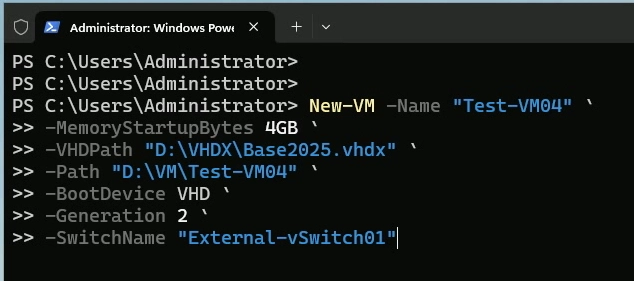
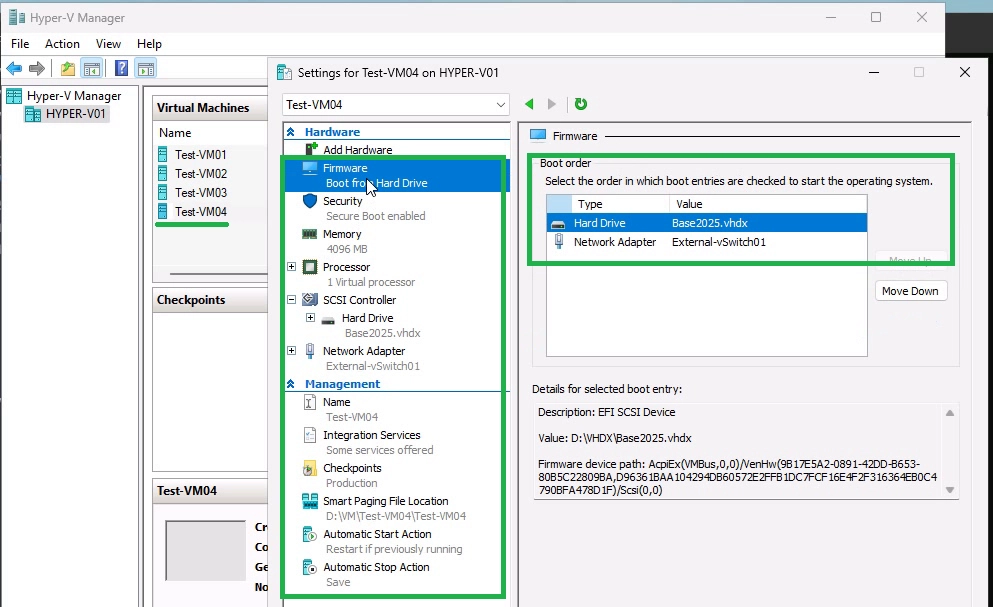
Create a new virtual machine using an existing VHDX file and configure the boot order.
New-VM -Name “Test-VM04” -MemoryStartupBytes 4GB -BootDevice VHD -VHDPath "D:\VHDX\Base2025.vhdx" -Path "D:\VM\" -Generation 2 -Switch "External-vSwitch01"This creates a Generation 2 virtual machine named Test-VM04 with 4 GB of memory. It boots from the VHDX file located at D:\VHDX\Base2025.vhdx and uses the virtual switch External-vSwitch01. The virtual machine’s configuration files are stored in the VM folder on the D: drive.
.
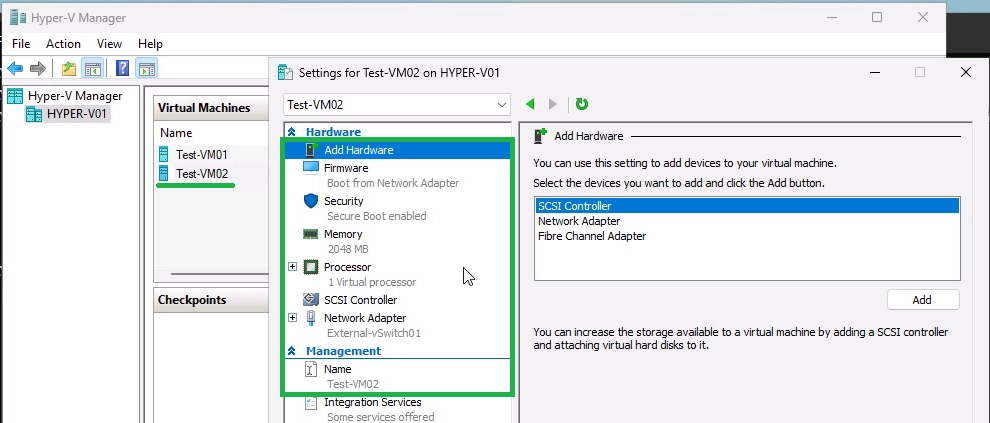
Step 3: Modify the New Virtual Machine
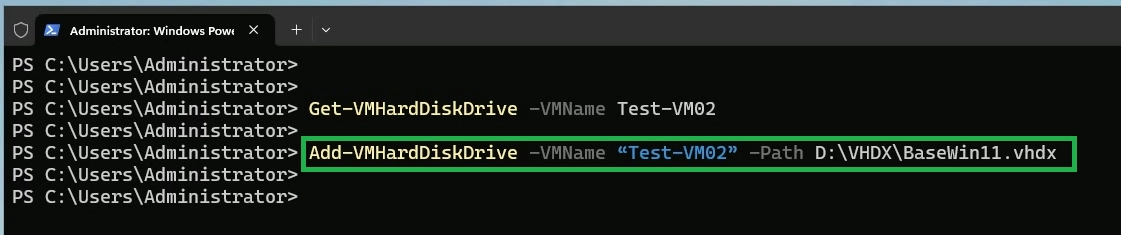
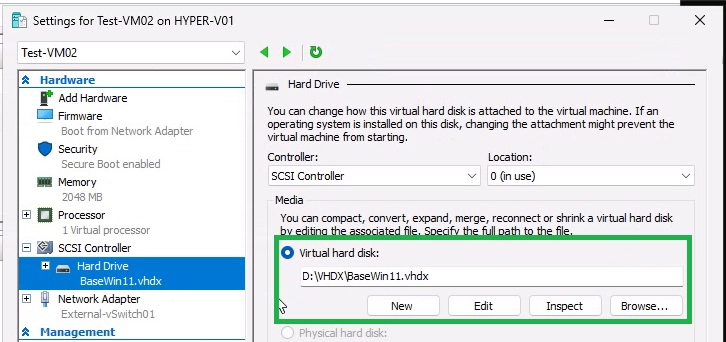
Earlier, we created a new virtual machine named “Test-VM02” without a virtual hard disk. Now, let’s see how we can attach an existing virtual hard disk to the VM.
To attach the VHD(X) to the VM, simply run the Add-VMHardDiskDrive PowerShell command:
Add-VMHardDiskDrive -VMName "Test-VM02" -Path "D:\VHDX\BaseWin11.VHDX"Here’s what the parameters mean:
- -Path: This parameter specifies the path to the existing VHDX file.
.
Run the following cmdlet to retrieve the controller number and controller location of the attached virtual hard disk.
Get-VMHardDiskDrive -VMName "Test-VM02"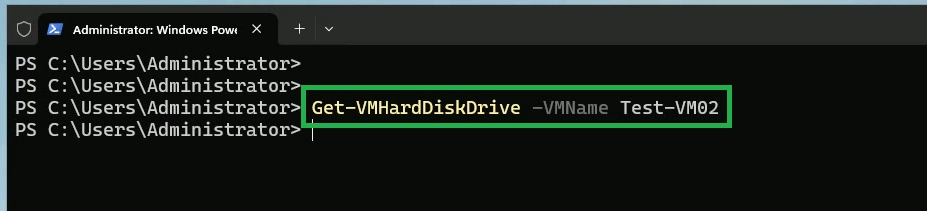
.
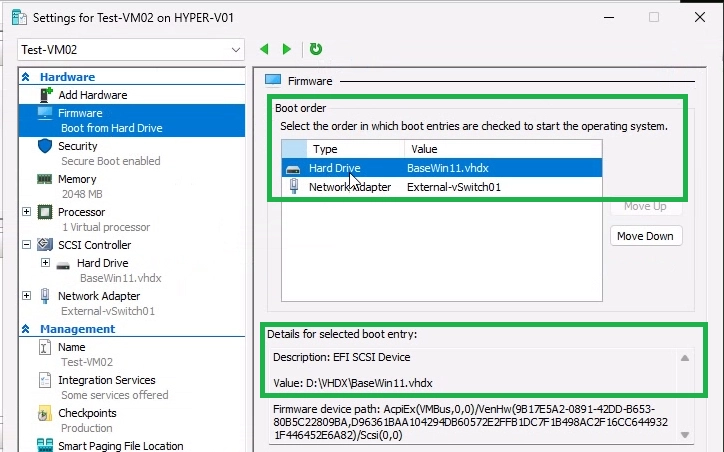
Let’s modify the boot order and set the newly attached VHDX file as the primary boot device for the VM Test-VM02.
We cannot directly modify the boot order. Instead, we need to create a variable for the VHDX file to be used as the primary boot device, and then use the Set-VMFirmware command to update the VM’s boot order.
Run the following cmdlet to create a variable, $VMVHD, that contains the VM hard disk object.
$VMVHD = Get-VMHardDiskDrive -VMName "Test-VM02" -ControllerNumber 0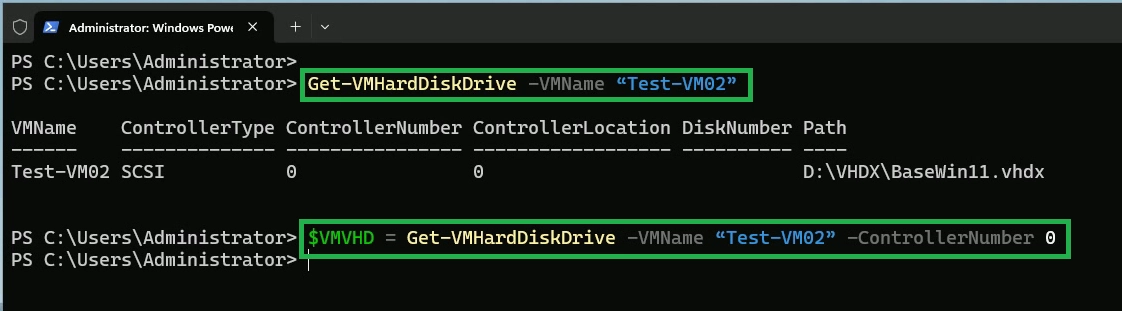
.
Run the following cmdlet to set this disk as the primary boot device using the Set-VMFirmware PowerShell cmdlet:
Set-VMFirmware -VMName “Test-VM02” -FirstBootDevice $VMVHD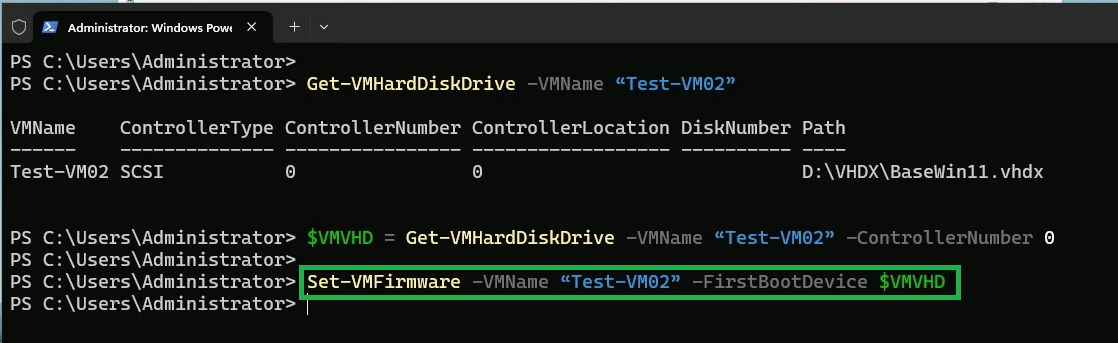
.
.
By default, a VM created using the New-VM command comes with a single virtual processor. You can modify the number of virtual processors as needed using the Set-VM PowerShell cmdlet.
Run the following cmdlet to change the number of virtual processors to 3 for the virtual machine Test-VM02.
Set-VM -VMName "Test-VM02" -ProcessorCount 3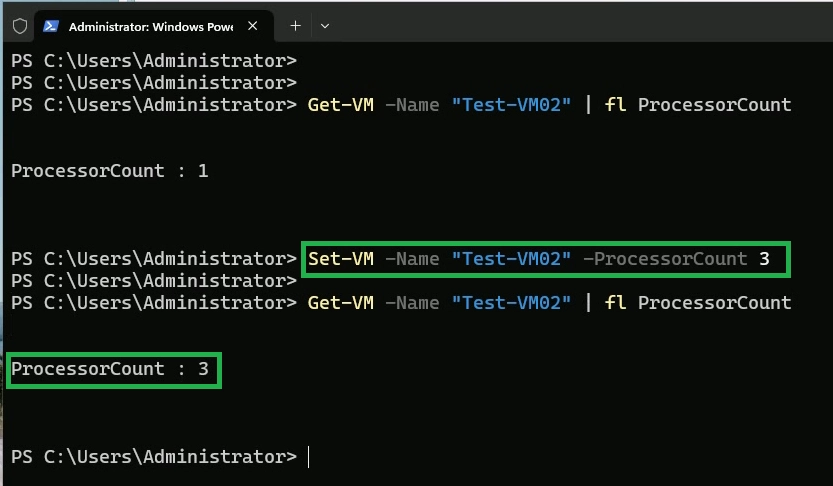
.
The Start-VM cmdlet starts a virtual machine.
The command below starts the virtual machine TestVM02.
Start-VM -Name "Test-VM02"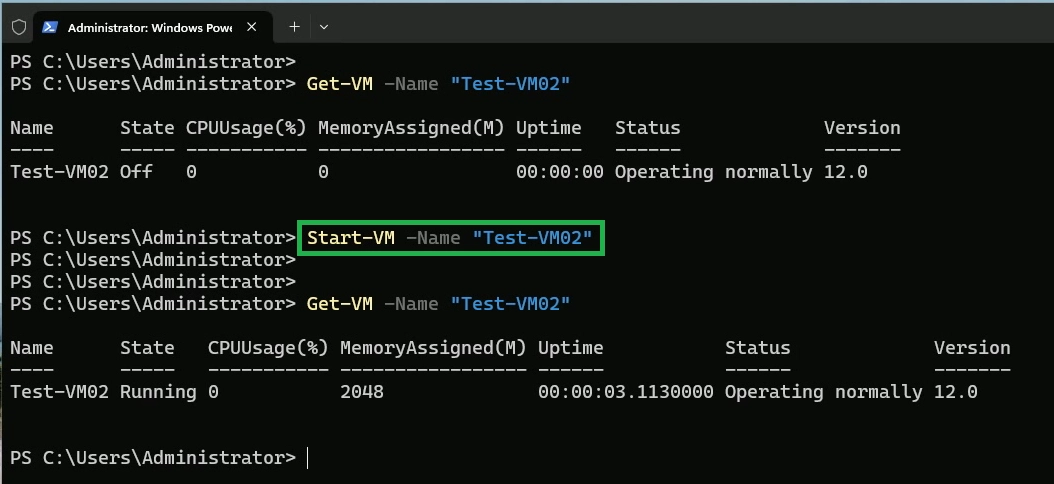
.
To shut down the virtual machine Test-VM02 through PowerShell, run the following command:
Stop-VM -Name "Test-VM02"
.
Let’s manage automatic start and stop actions using the Set-VM PowerShell cmdlet.
Run the following cmdlet to configure the virtual machine “Test-VM02” to shut down when the Hyper-V host shuts down.
Set-VM -Name "Test-VM02" -AutomaticStopAction Shutdown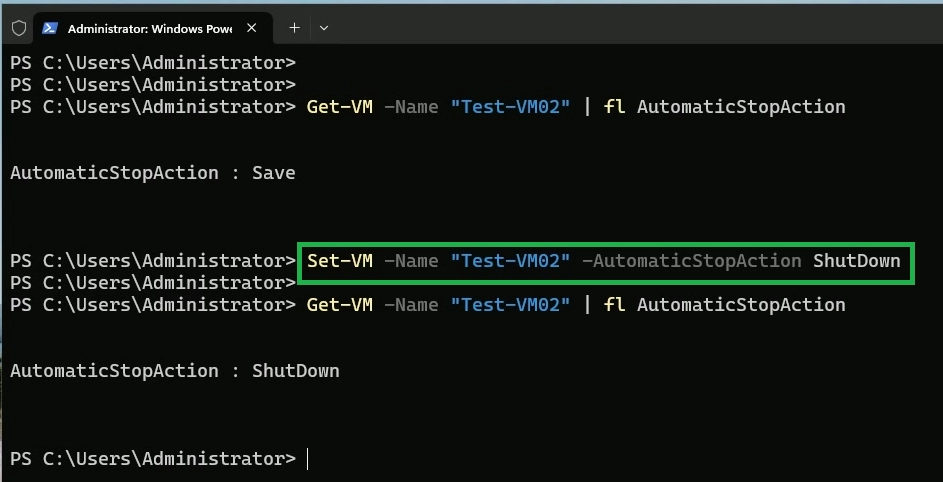
.
Run the following cmdlet to configure the virtual machine “Test-VM01” to start with a 40-second delay when the Hyper-V host starts.
Set-VM -VMName "Test-VM02" -AutomaticStartAction Start -AutomaticStartDelay 40 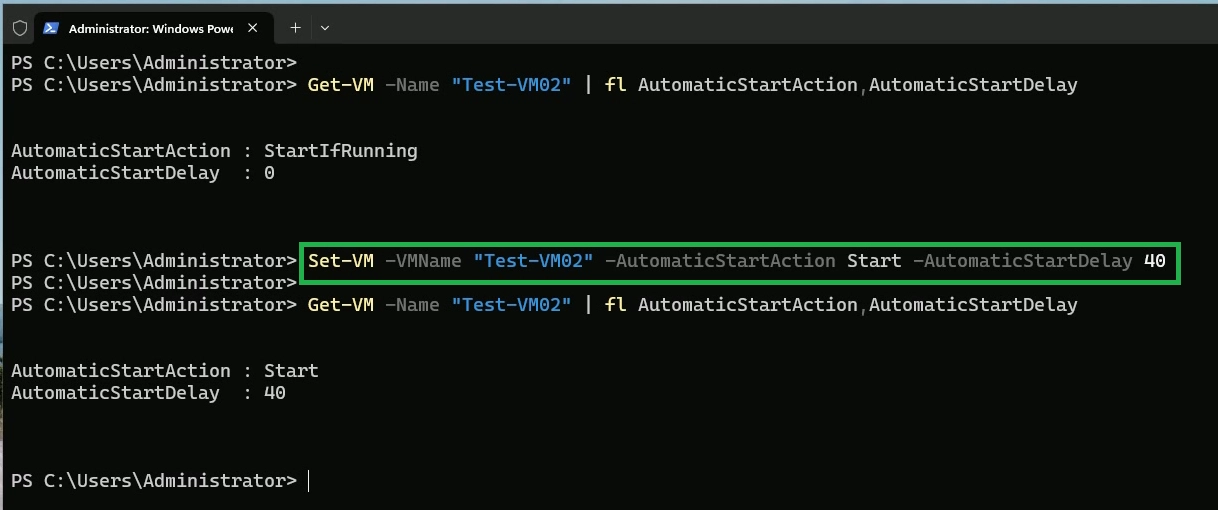
.
Conclusion:
Using PowerShell to create and manage Hyper-V virtual machines can greatly enhance efficiency and automation for administrators. Whether you’re setting up a new VM, adjusting resources, or managing virtual disks, PowerShell provides a powerful and flexible approach to controlling your Hyper-V environment.
By mastering a few basic cmdlets, you can simplify your virtualization tasks and ensure consistent, repeatable outcomes throughout your infrastructure.