This blog post provides a step-by-step guide for creating a new virtual machine using Hyper-V on a Windows Server 2025 host. Click here to read our previous blog post on installing and configuring the Hyper-V Server role on a Windows Server 2025 machine.
If you’re running a virtualized environment, Hyper-V remains a powerful and built-in virtualization platform in Windows Server 2025. Whether you’re testing software, hosting services, or setting up a lab environment, creating a virtual machine (VM) in Hyper-V is a fundamental step. In this post, you will learn how to create a virtual machine by using Hyper-V Manager and what options you have when you create a virtual machine in Hyper-V Manager.
Table of Contents
Prerequisites:
Before creating a VM, make sure:
- Hyper-V is installed and enabled on your Windows Server 2025 machine
- Administrative rights
- An ISO file or other bootable media is ready for your guest OS
How to Create a New Virtual Machine in Hyper-V via Hyper-V Manager
Open the Start Menu and search for Hyper-V Manager
Select ‘Run as Administrator’ to launch Hyper-V Manager with administrative privileges.

.
Hyper-V Manager will open.
In the Hyper-V Manager, select the local server node. Right-click the local server node, hover over “New,” and select “Virtual Machine…”

.
The New Virtual Machine Wizard will launch, guiding you through the configuration options for your new VM. Click Next on the Before You Begin screen.

.
Enter a name for your virtual machine. For example, TestVM01.
Optionally, check Store the virtual machine in a different location to change the VM’s storage path. Click Next to continue.

.
Choose the virtual machine generation:
- Generation 1: Legacy BIOS-based (for older OSes).
- Generation 2: UEFI-based, more secure and modern (recommended for newer OS versions).
Note: Keep in mind that the VM generation cannot be changed after the virtual machine has been created.
Click Next to proceed.

.
Specify the Startup Memory for the Virtual Machine. (e.g., 4096 MB for 4 GB).
Optionally check Use Dynamic Memory if you want Hyper-V to manage memory dynamically.
This feature enables the virtual machine to dynamically allocate memory, up to the host’s maximum available memory or 1 terabyte, whichever is lower. Click Next.

.
Choose a Virtual Switch from the drop-down. If none exist, create one via Virtual Switch Manager in the Actions pane.
In this example, we will use the existing external virtual switch that was created during the Hyper-V role setup. Click Next.

.
Select “Create a virtual hard disk” as we want to create a new, blank VHD for the VM.
Enter the virtual disk’s name, location, and size (e.g., 127 GB).
Alternatively, you can choose to use an existing virtual hard disk or attach one later. Click Next.

.
Choose how you’ll install the operating system:
- Install an operating system later
- Install from a network-based installation server
- Install an OS from the bootable floppy disk
- Install from a bootable image file (ISO):
- Selecting this option provides two sub-options: the first allows you to use physical media, while the second lets you choose a bootable .ISO image.
Browse and select your ISO file.

.

.
Click Next to continue.

.
Review your selections. Review everything one more time to ensure all settings are correct.
Click Finish to create the VM.

.

.
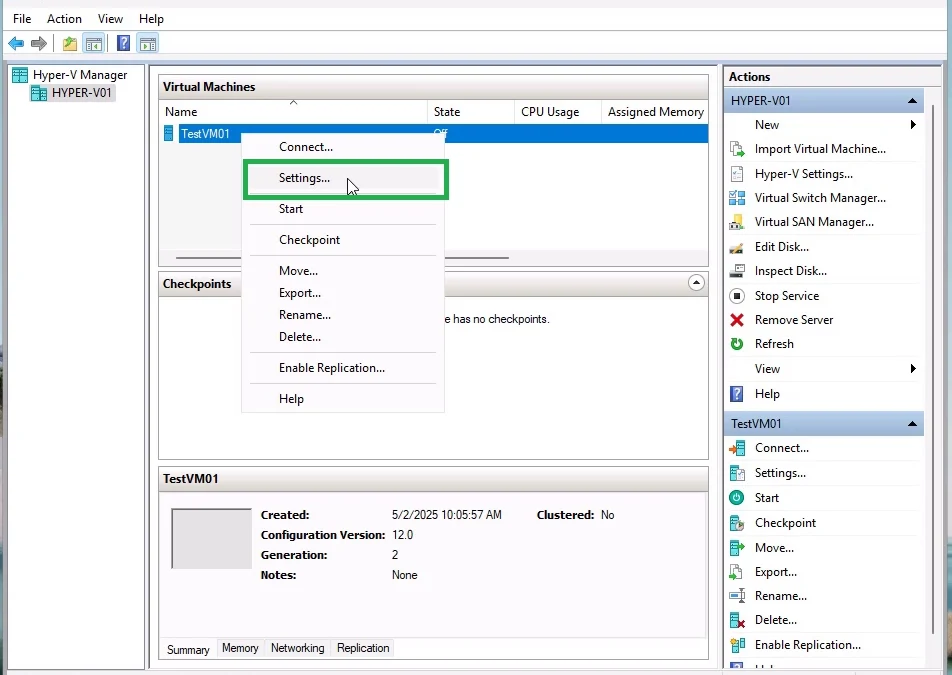
Modify the Virtual Machine Settings:
In Hyper-V Manager, right-click on your new VM and select Settings.
.
Go to the Firmware section and check the boot order. Ensure that the DVD/ISO image option is set as the first boot device.

.
To install Windows 11 on a Hyper-V VM, you must enable TPM in the VM settings. Without it, you won’t be able to install Windows 11. Note that Secure Boot is already enabled for this VM.

.
Click Apply and then OK to save the changes to the VM.

.
In Hyper-V Manager, right-click on your new VM and select Connect to launch the console.

.
Click Start to boot the VM from the attached ISO image.

.
Press any key on your keyboard to start the operating system installation.

.
Follow the on-screen prompts to complete the Windows 11 installation in the Hyper-V virtual machine.

.
Conclusion:
You’ve successfully created a new virtual machine in Hyper-V on Windows Server 2025! From here, you can proceed to install your guest OS and begin configuring the VM for its intended role. Creating a virtual machine in Hyper-V on Windows Server 2025 is a straightforward process. By following the steps outlined in this guide, you can easily set up and configure a new VM to suit your needs.