In this post, we will cover the steps on how to configure Network Policy Server to allow VPN users to connect to the VPN server running on Windows Server 2019.
This is the third part of a four-part series on Install and Configure VPN with Remote Access Service in the Windows Server 2019. We will create an NPS policy to allow only specific users to connect to the VPN server based on some specific conditions.
- PART-1 How to Install Remote Access Service on Windows Server 2019
- PART-2 How to Install and Configure VPN in Windows Server 2019
- PART-3 Configure Network Policy Server (NPS) for VPN in Windows Server 2019
- PART-4 Configure Port Forwarding and Test VPN Connection on Windows 10
Understanding VPN Test Lab:
- WS2K19-DC01: Domain Controller and DNS server.
- WS2K19-VPN01: Remote Access Server with NPS role.
- WS10-CLI01: Windows 10 Client Machine.
Create Active Directory Users and Groups:
1. On Domain Controller, Open Active Directory Users and Computers snap-ins.

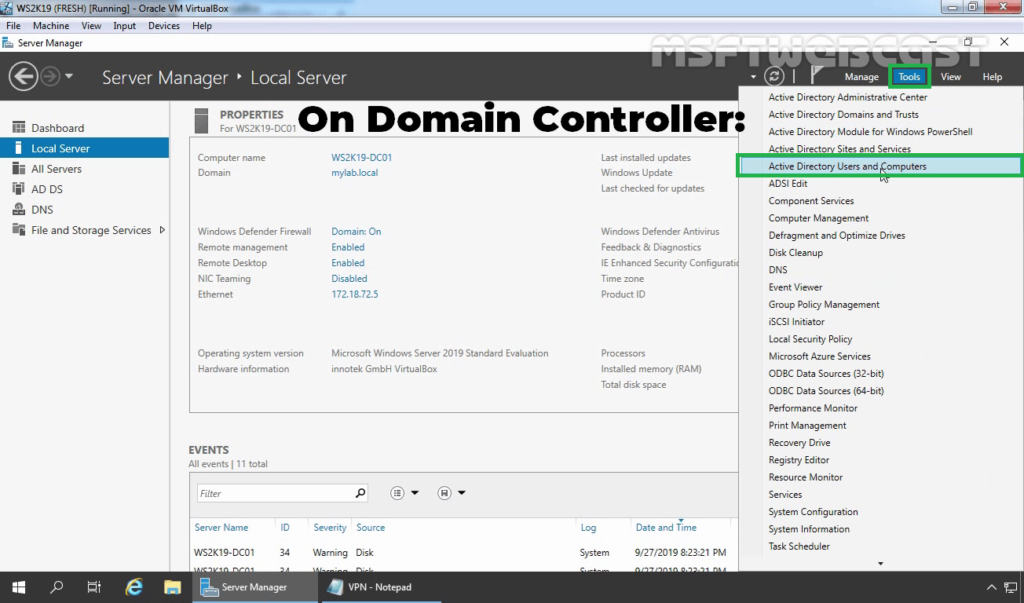
2. Do as instructed below:
- Create two AD users name Test User1 and Test User2.
- Create a security group name: TestUsers.

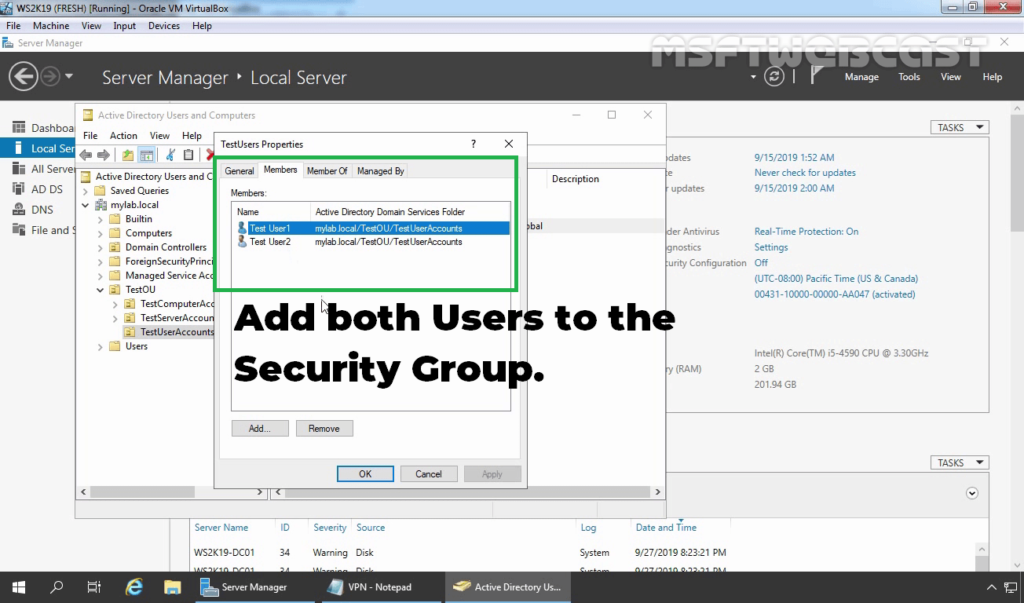
3. Add both users to the security group.
4. Check both users dial-in permission. Make sure Control access through NPS Network Policy is selected.

Configure Network Policy Server:
We need to create an NPS policy to allow only specific users to connect to the VPN server based on specific conditions which we can define in the policy. We can configure NPS server from Network Policy Server management console.
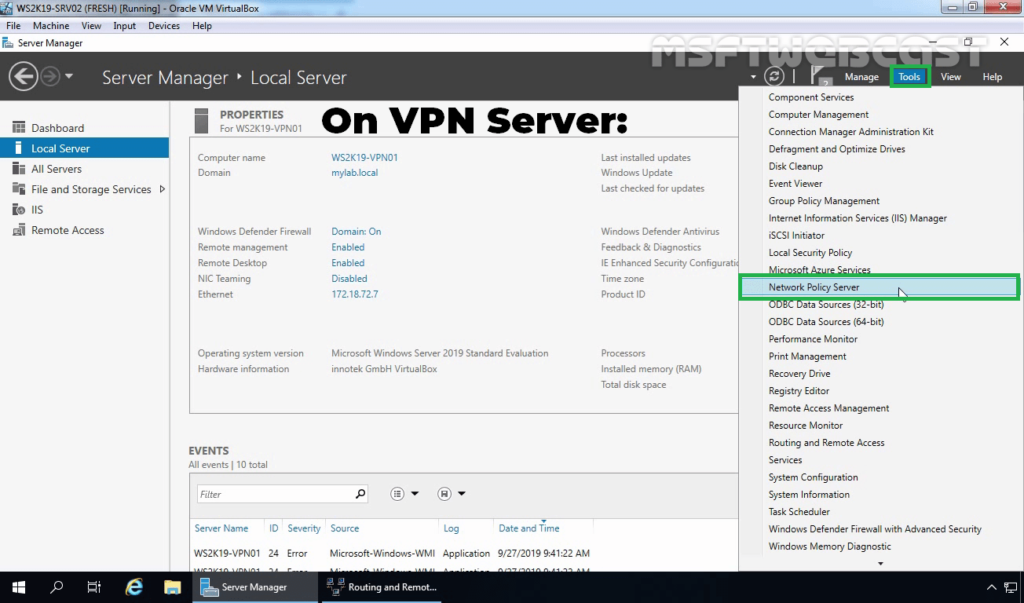
5. On the VPN server, open server manager console.
6. Click on Tools and select Network Policy Server.
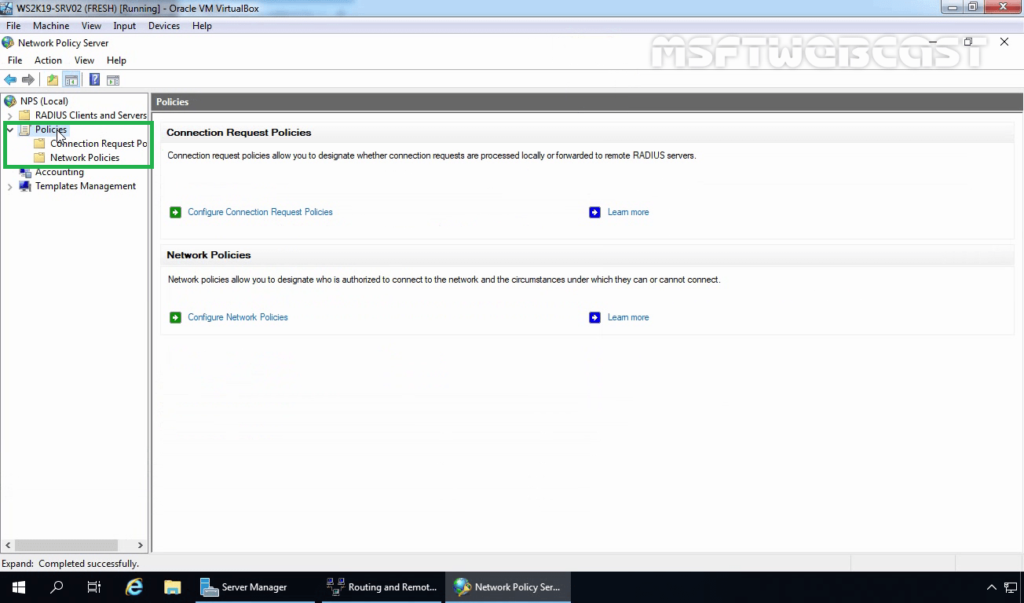
7. On NPS management console, expand Policies.
8. Expand and right-click on Network Policies and select New.

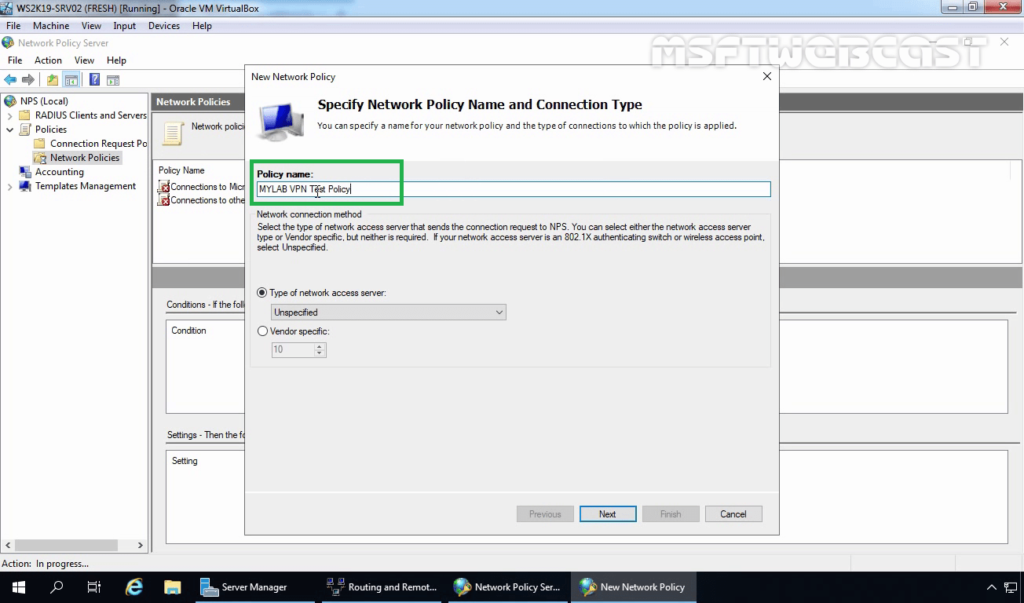
9. Specify a meaningful name to the policy.
10. Select Remote Access Server from the drop-down list as a type of Network Access Server. Click Next.

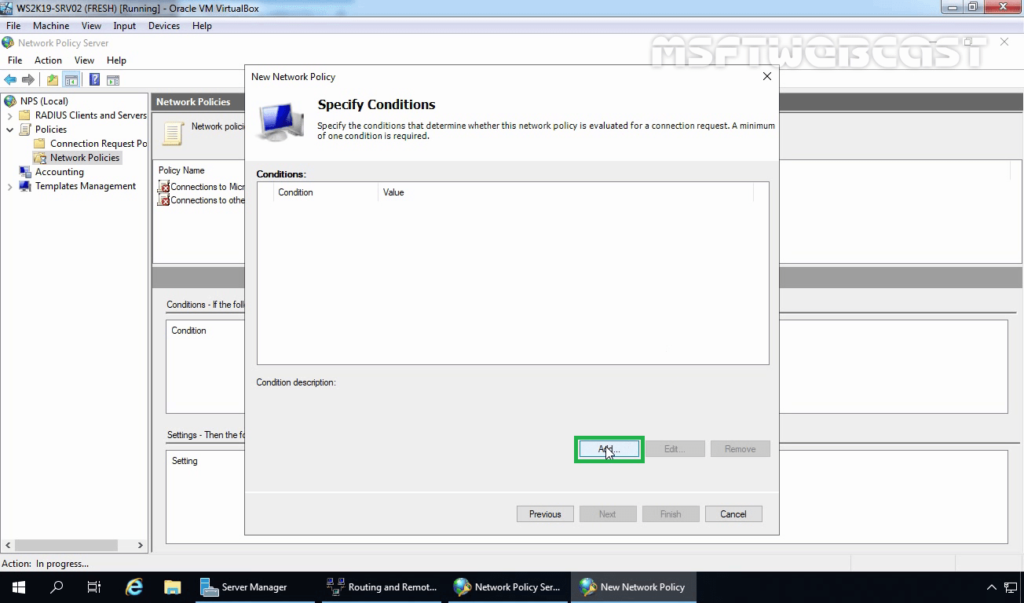
11. Click on Add to add the condition.
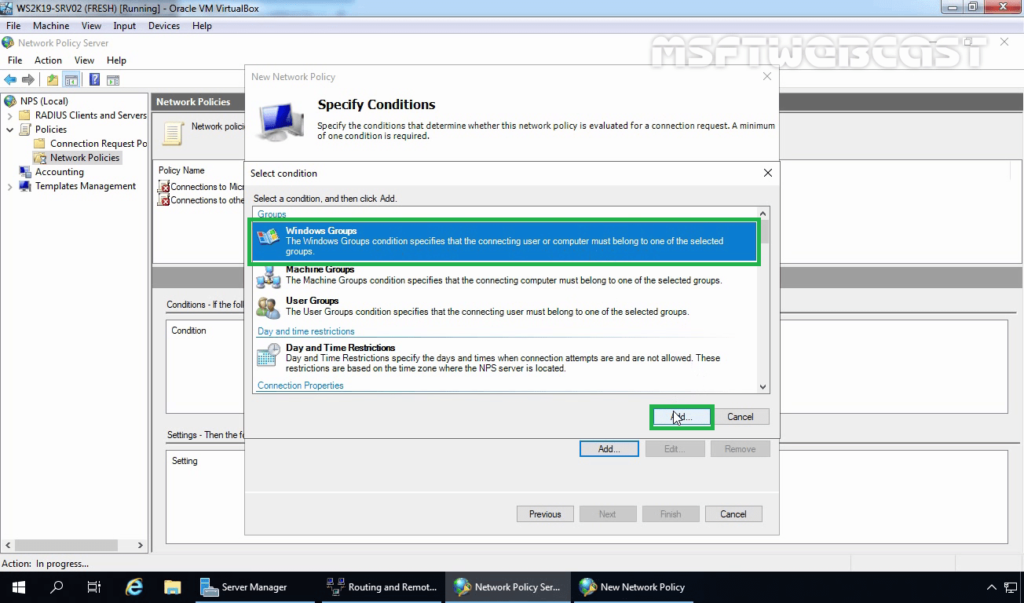
12. Select Windows Groups and click on Add.
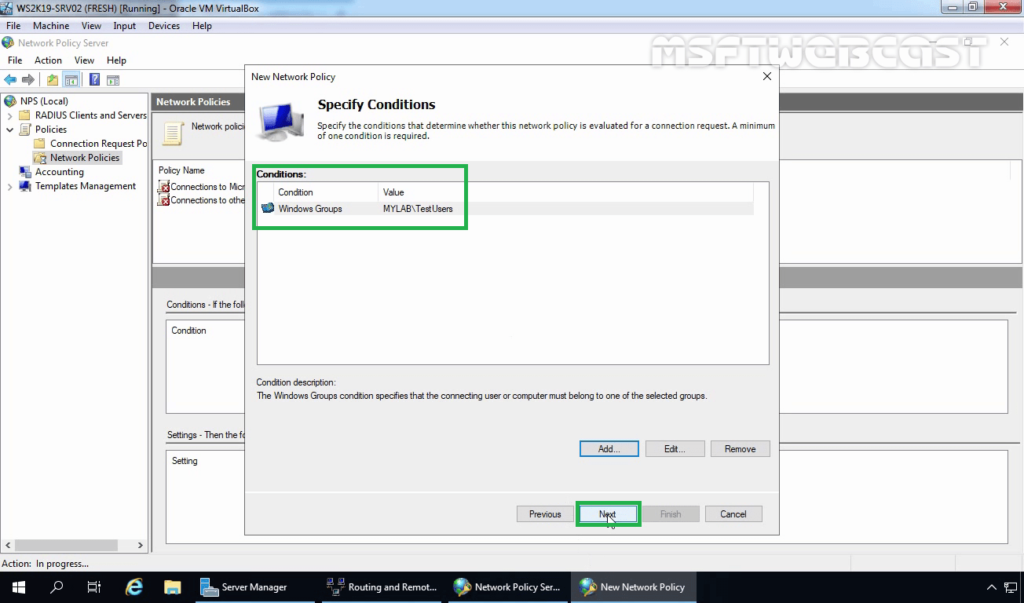
13. Add the security group TestUsers as a condition. Click on Next.
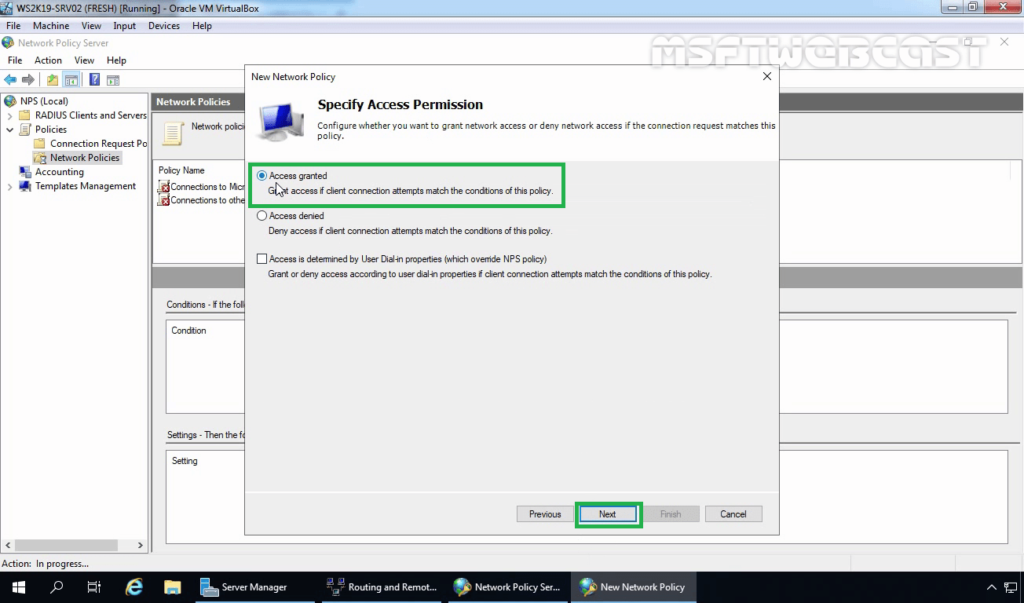
14. Make sure the Access granted radio button is selected. Click Next.
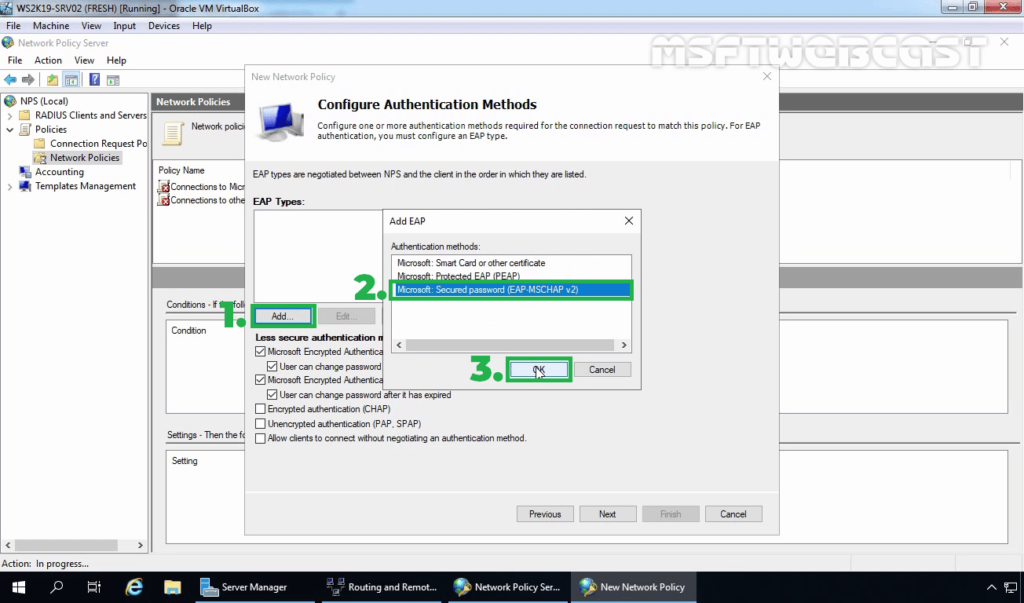
15. On the configure authentication methods page, click on Add.
16. Select Microsoft: Secure password (EAP-MS-CHAP v2) and click OK.
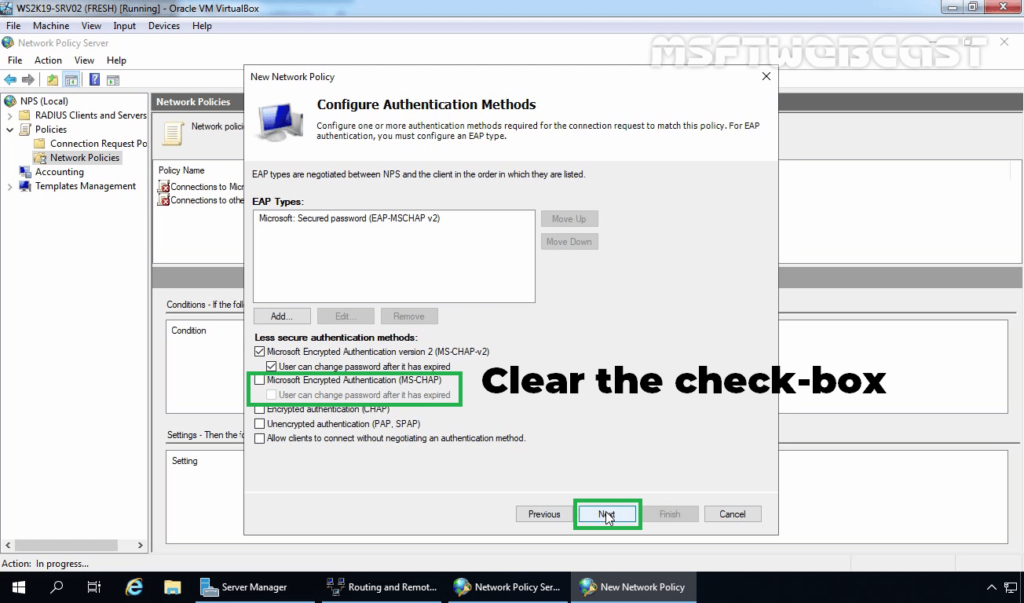
17. Clear the check-box for MS-CHAP and click Next.
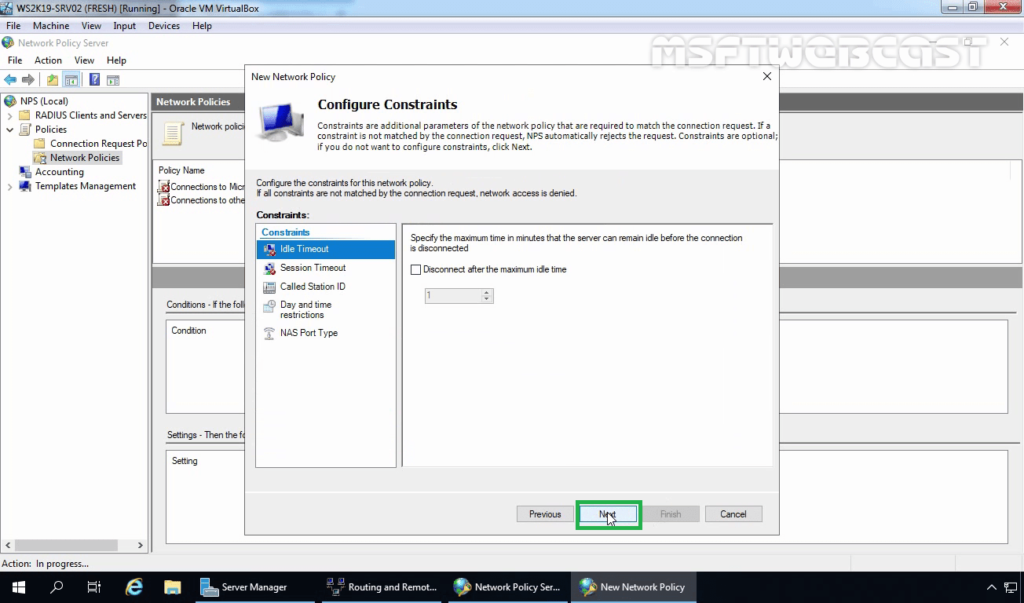
18. Click Next.
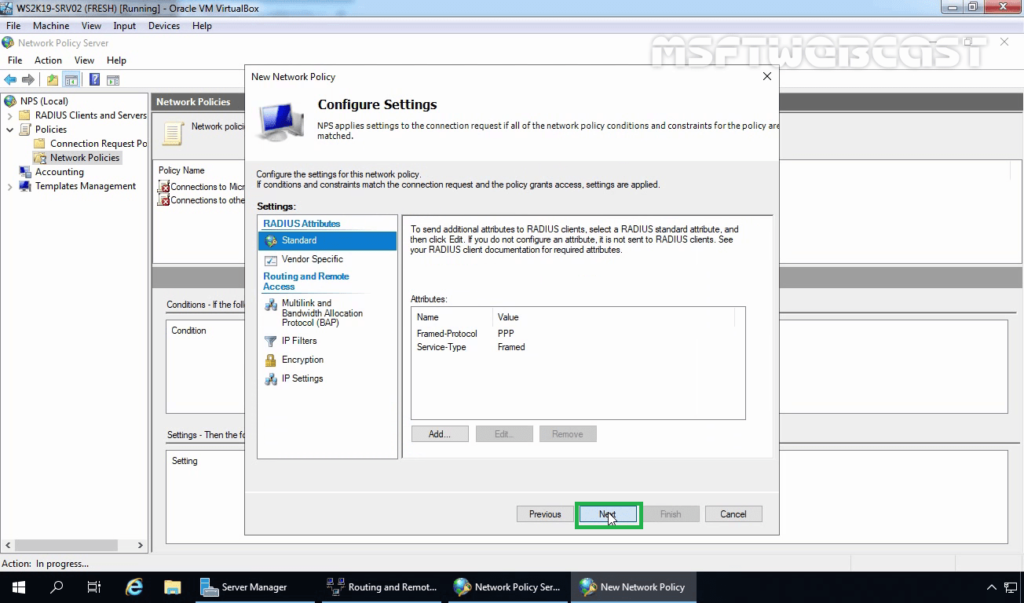
19. Click Next on configure settings page.
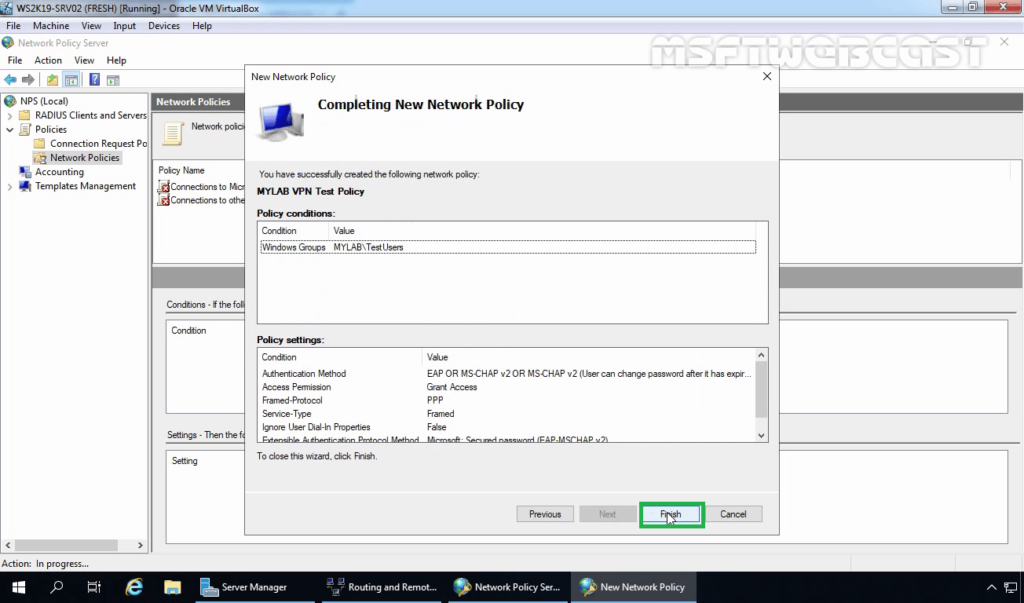
20. Click on Finish to create NPS policy and close the console.
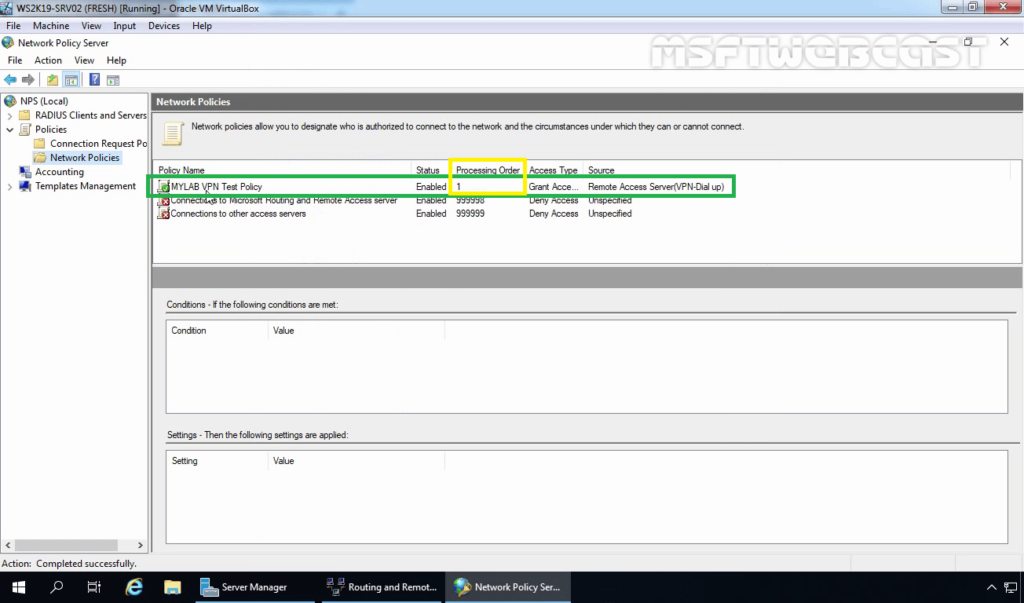
21. Verify that the policy is at the top of the list in the NPS management console.
That’s it. We have successfully Configure Network Policy Server (NPS) for VPN in Windows Server 2019
In the next post, we will configure port forwarding on the router to allow required ports for VPN service. We will also set up a VPN connection on Windows 10 to test VPN connectivity.