In this post, we will learn the steps to move and rename the default mailbox database path in Exchange Server 2019.
The default location of the Mailbox database:
With the Fresh installation of Exchange Server 2019, a default mailbox database is created automatically in default Exchange installation location, which is C:\Program Files\Microsoft\Exchange Server\V15\Mailbox.
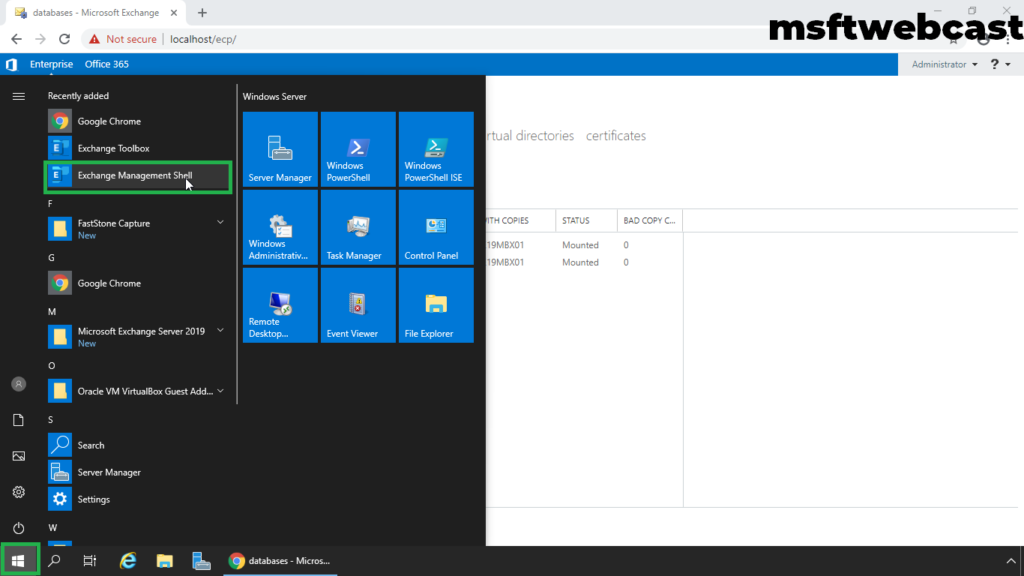
From the Start Menu, open Exchange Management Shell.

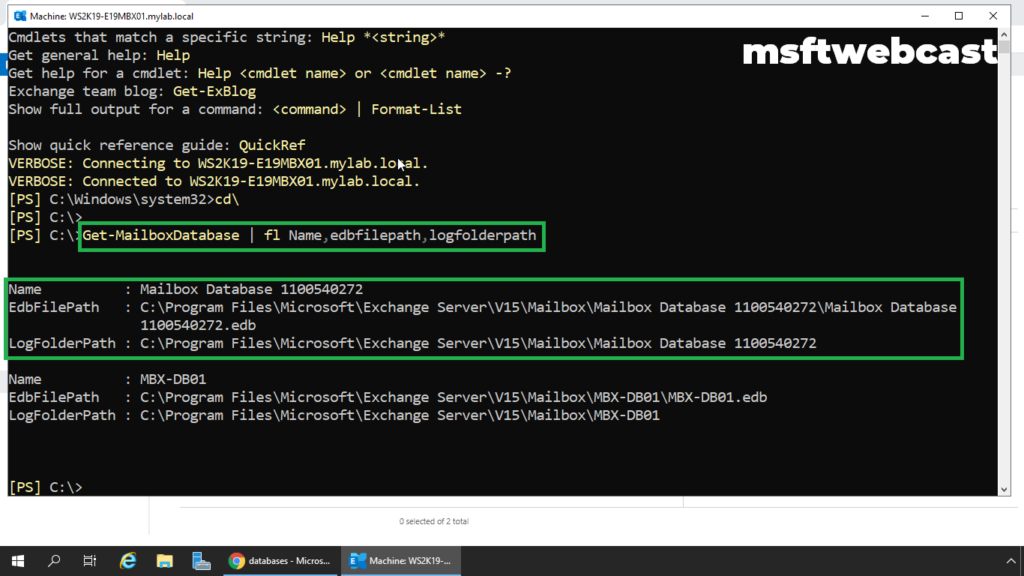
By running below cmdlet, we can see where that database and log files are currently stored.
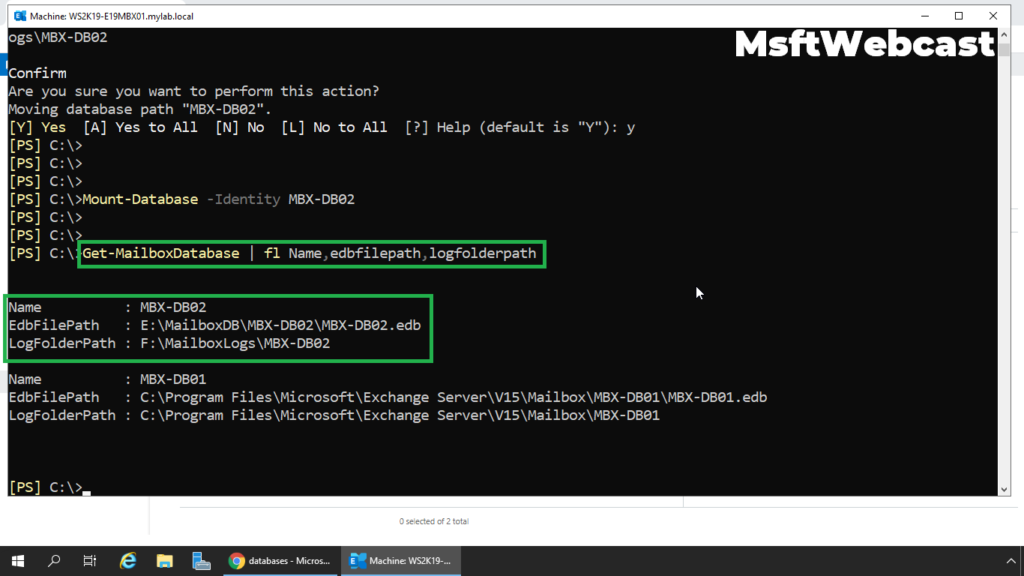
Get-MailboxDatabase | FL Name, EdbFilePath, LogFolderPath
It is best practice to store Mailbox Database and Log Files on a different partition than system partition with Exchange binaries.
If we want to move the mailbox database files to another location, we must use the Exchange Management Shell. There is no graphical user interface to move a mailbox database location.
We need to use the Move-DatabasePath cmdlet in Exchange Management Shell (EMS).
Before we move the default mailbox database location, we will rename the default mailbox database. The uniquely generated name of “Mailbox Database 1100540272” is not desirable.
Rename Default Mailbox Database:
Go back to Exchange Management Shell.
First, let’s get the name of all mailbox databases on the local mailbox server.
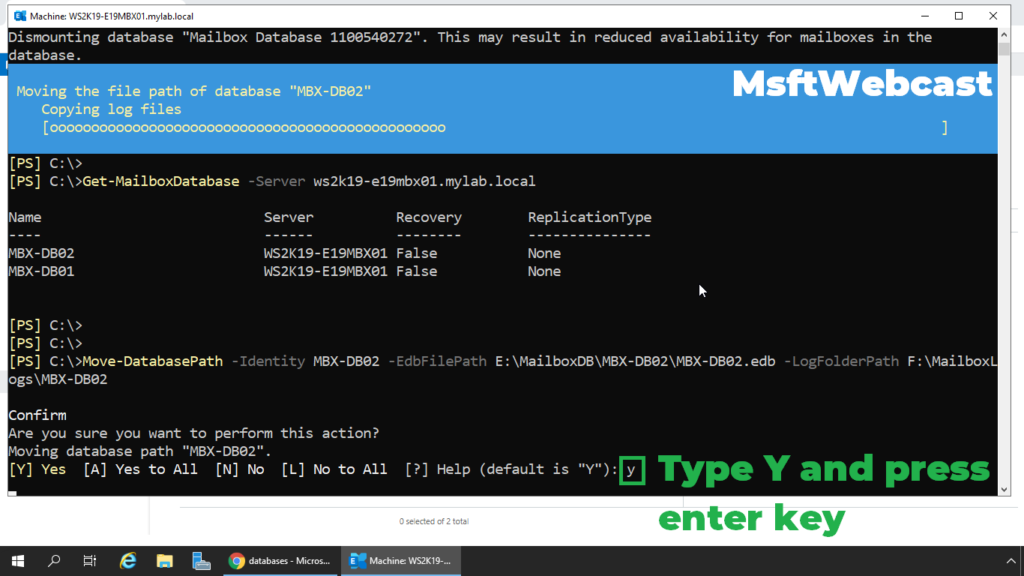
Get-MailboxDatabase -server ws2k19-e19mbx01.mylab.local
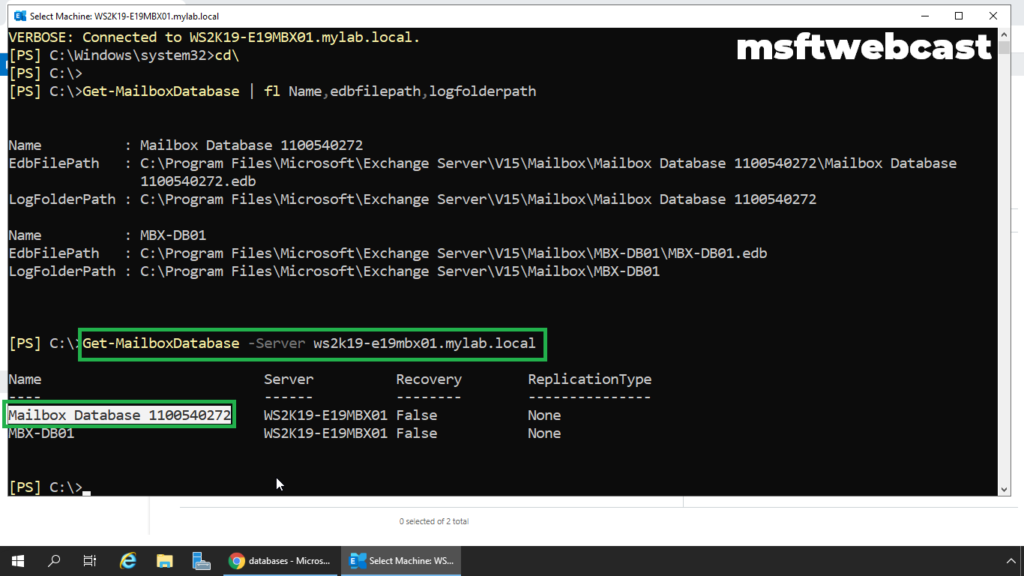
Note down the default mailbox database name. In our case, it is “Mailbox Database 1100540272“.
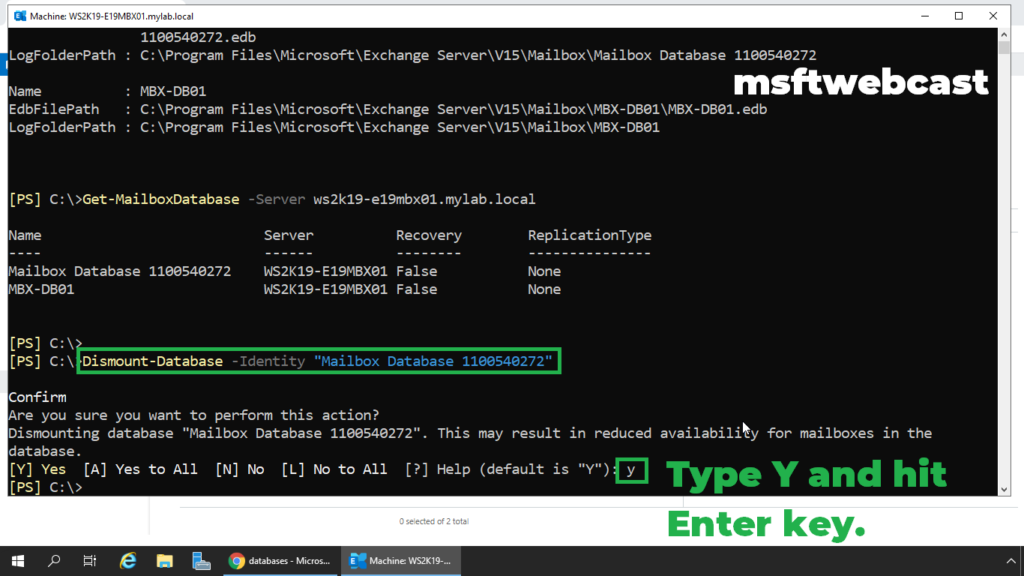
Before we rename the default mailbox database, we want to dismount the mailbox database.
Dismount-Database -Identity “Mailbox Database 1100540272“
Next, we will rename the mailbox database using a set-mailboxdatabase cmdlet.
Set-MailboxDatabase “Mailbox Database 1100540272” -Name MBX-DB02
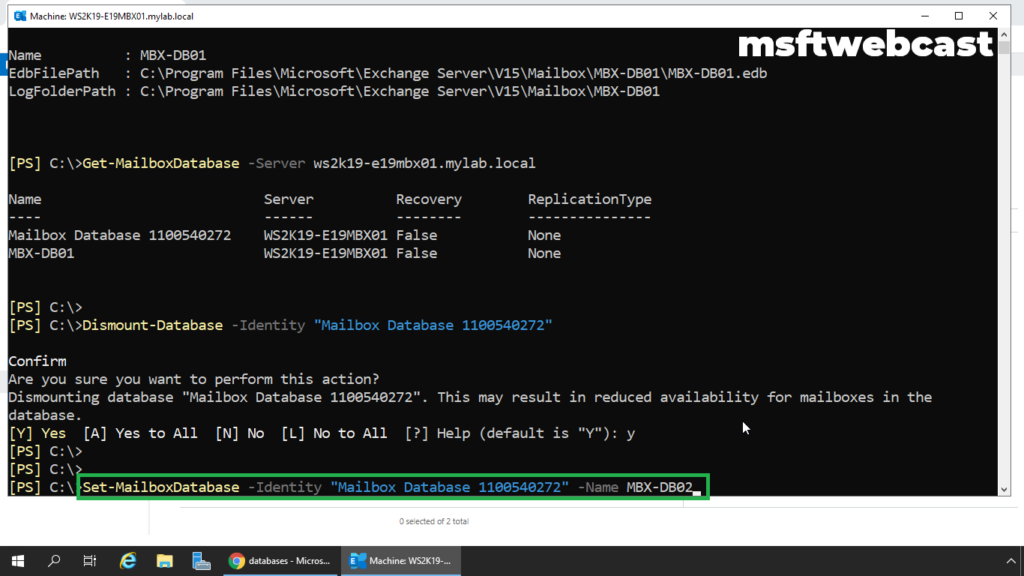
The above cmdlet will rename the default mailbox database name to MBDB02.
Move Mailbox Database Location:
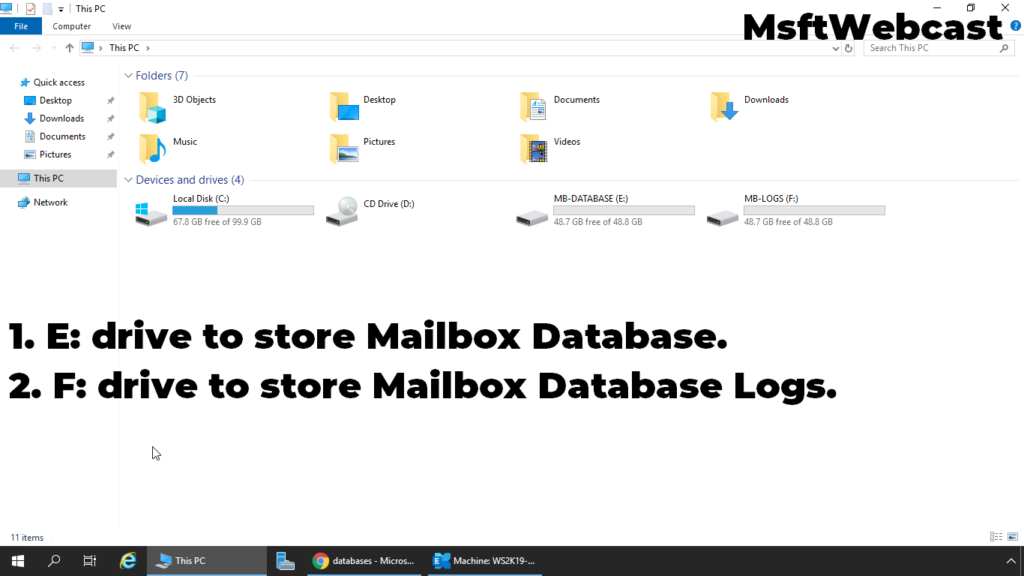
In our test lab setup, I have created two drives and assigned the drive letter E: (Mailbox Database File) and F: (Mailbox Logs Files).
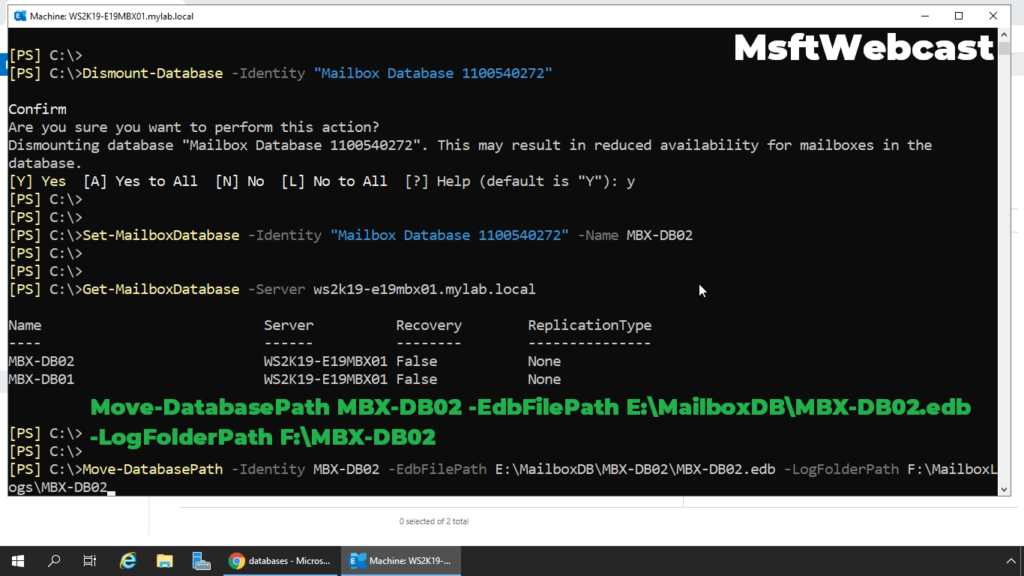
Move-DatabasePath MBX-DB02 -EdbFilePath E:\MailboxDB\MBX-DB02.edb -LogFolderPath F:\MBX-DB02
Type Y key for confirmation and press enter key to continue.
The above cmdlet will move the mailbox database .edb file path to D: drive and Log files to E: drive.
Mount Mailbox Database:
After renaming and changing the mailbox database location, we need to mount the mailbox database to bring the database online.
Mount-Database -Identity MBDB02

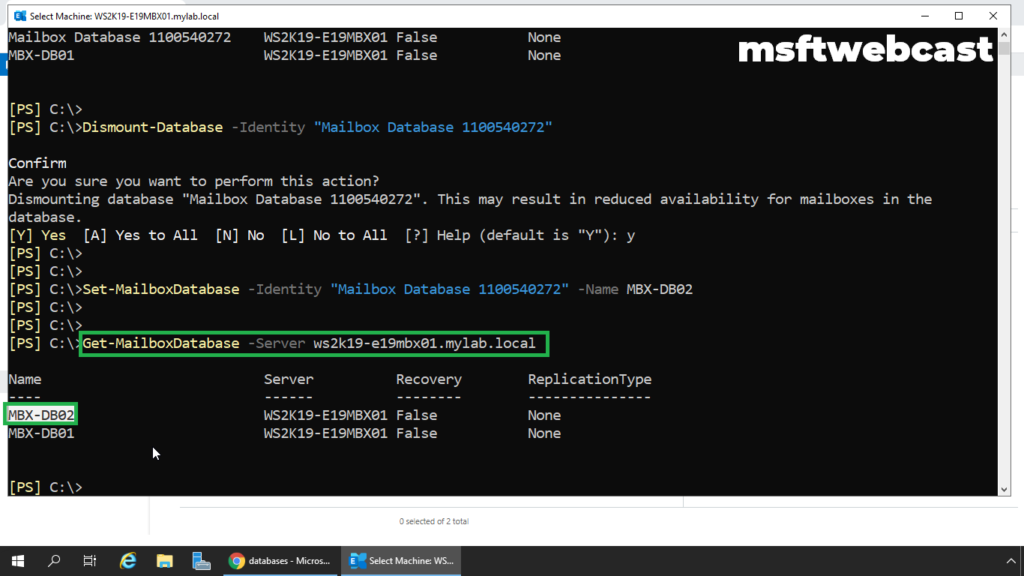
Again check mailbox database and log files path using Exchange Management Shell (EMS).
Check mailbox database and log files path in file explorer.

In this post, we have successfully renamed the default mailbox database and changed the location of the mailbox database.