
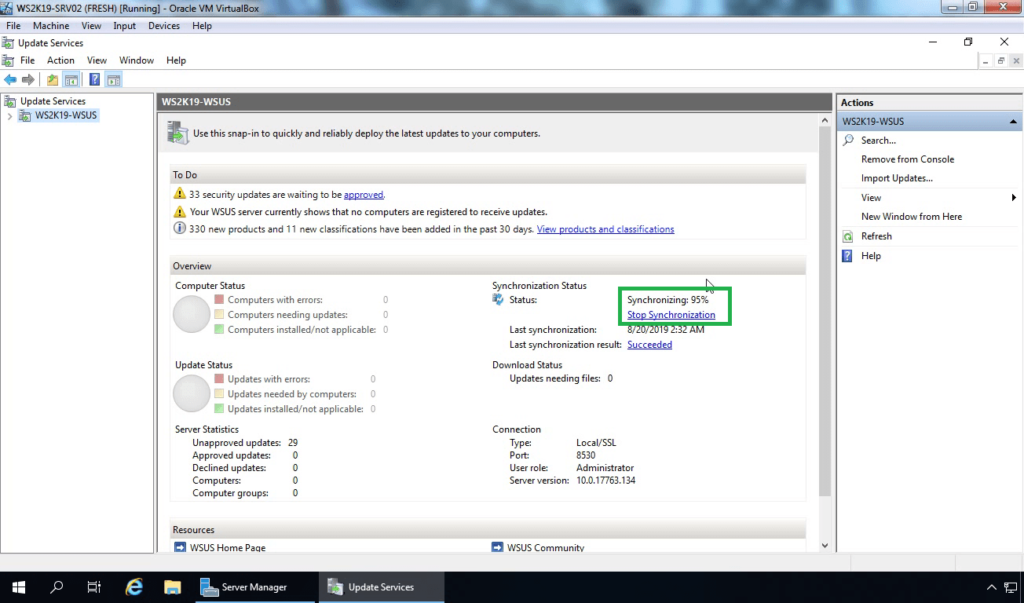
In the previous posts, we have seen the Installation and Configuration of the WSUS on Windows Server 2019. In this article, we will see how to configure client-side targeting in the WSUS server 2019.
Overview:
WSUS allows you to direct updates to groups of client computers. This capability can help you ensure that specific computers get the correct updates at the most convenient times continuously.
By default, each computer is already assigned to the All Computers group. Computers will also be assigned to the group of unassigned computers until you assign them to another group. Regardless of the group to which you assign a computer, it will also remain in the All Computers group.
Note: A computer can be in only one other group in addition to the All Computers group.
You can assign computers to computer groups by using one of two methods, server-side or client-side targeting, depending on whether or not you want to automate the process.
Server-side targeting:
With server-side targeting, you use the WSUS console to both create groups and then assign computers to the groups.
Client-side targeting:
With client-side targeting, you enable client-computers to add themselves to the computer groups you have created in the WSUS console using group policy.
Test lab setup:
- WS2K19-DC01.mylab.local: Active Directory Domain Services with DNS
- WS2K19-WSUS.mylab.local: WSUS server
- WS2K19-SRV01.mylab.local: Member server
Create a computer group in the WSUS console:
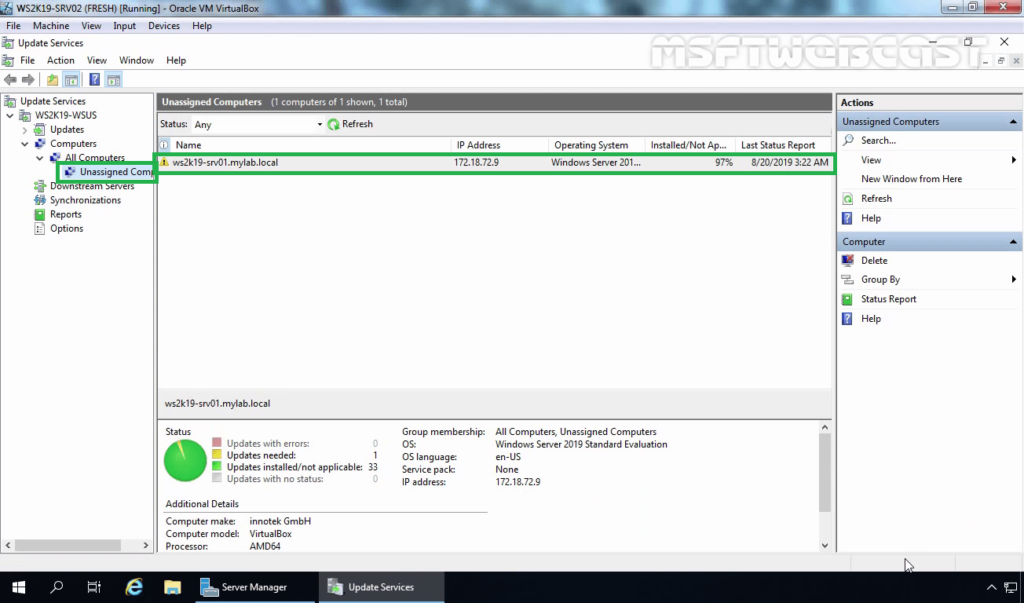
Open the WSUS console and look under Computer > All Computers, you will see one default computer group called Unassigned Computers.
By default, there are two computer groups, All Computers, and Unassigned Computers. Besides the default groups, you can create as many computer groups as you want.
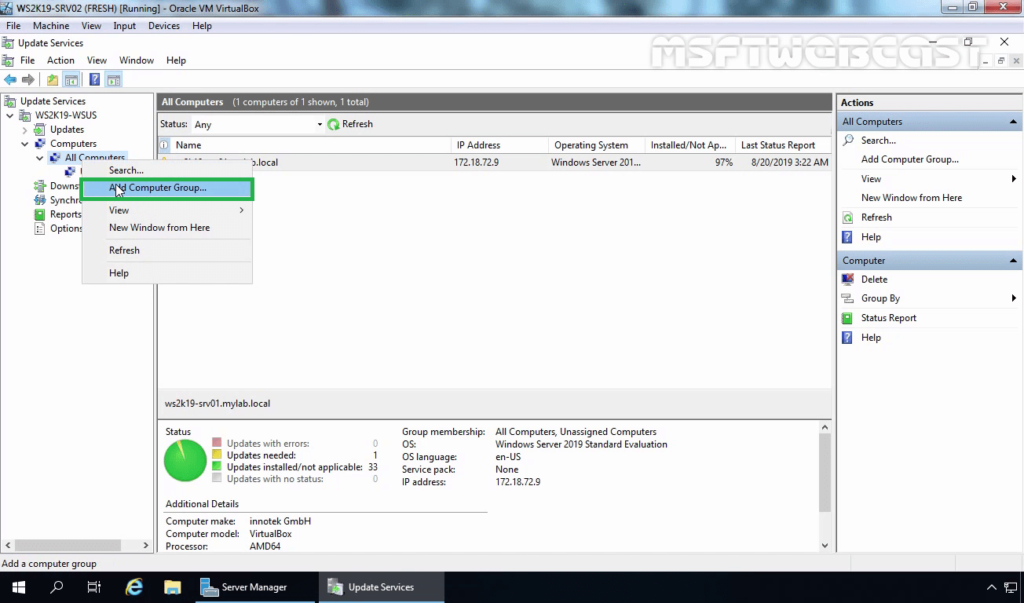
Right-click All Computers, and then click on Add Computer Group.
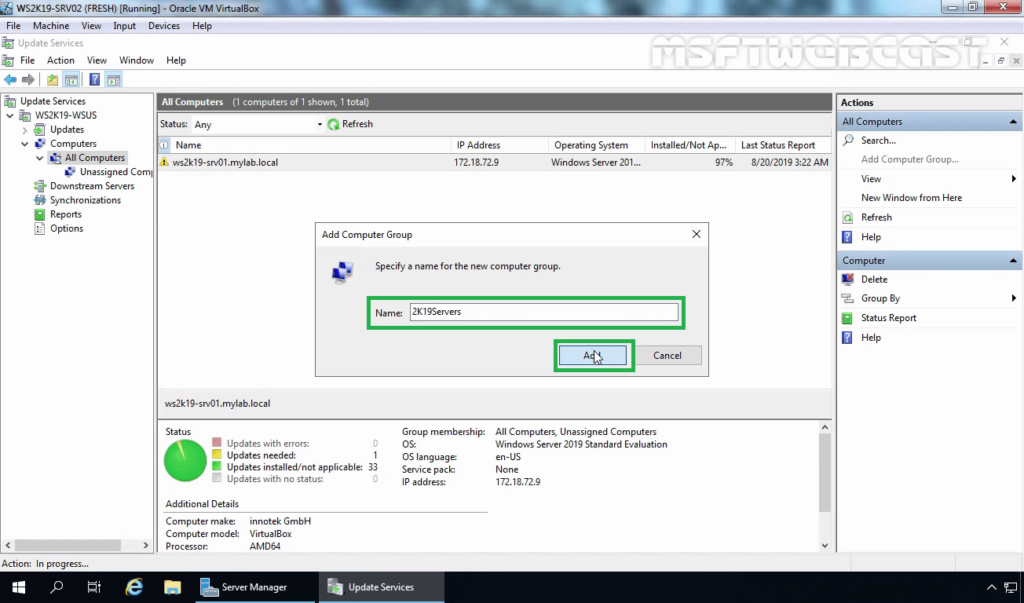
In Group Name, type a name for your new computer group, and then click Add. For example: “2K19Servers”.
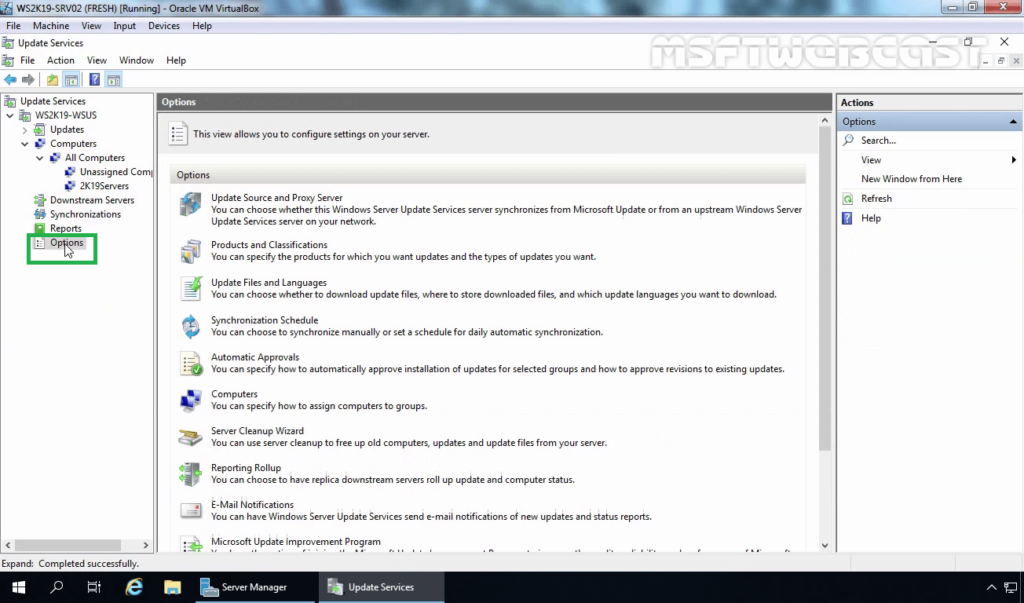
To use either client-side targeting or server-side targeting, you must set the options in the WSUS console.
Click on Options.
Click on Computers. A new window pops up.
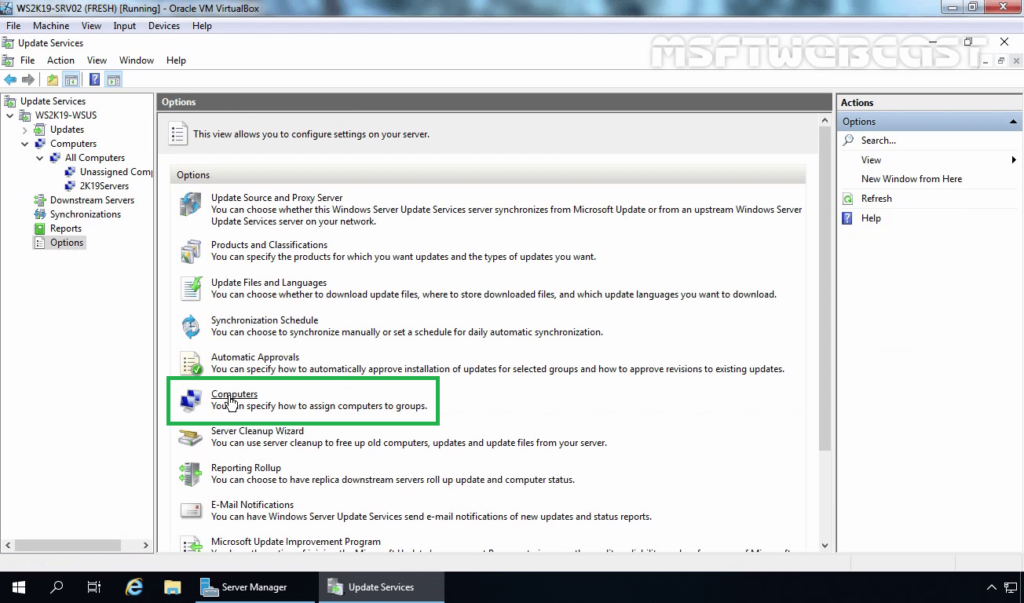
On General tab, choose Use Group Policy or registry settings on computers.

Click Apply and OK.
Now we will enable the client-side targeting through the group policy.
Create a Client-side targeting GPO:
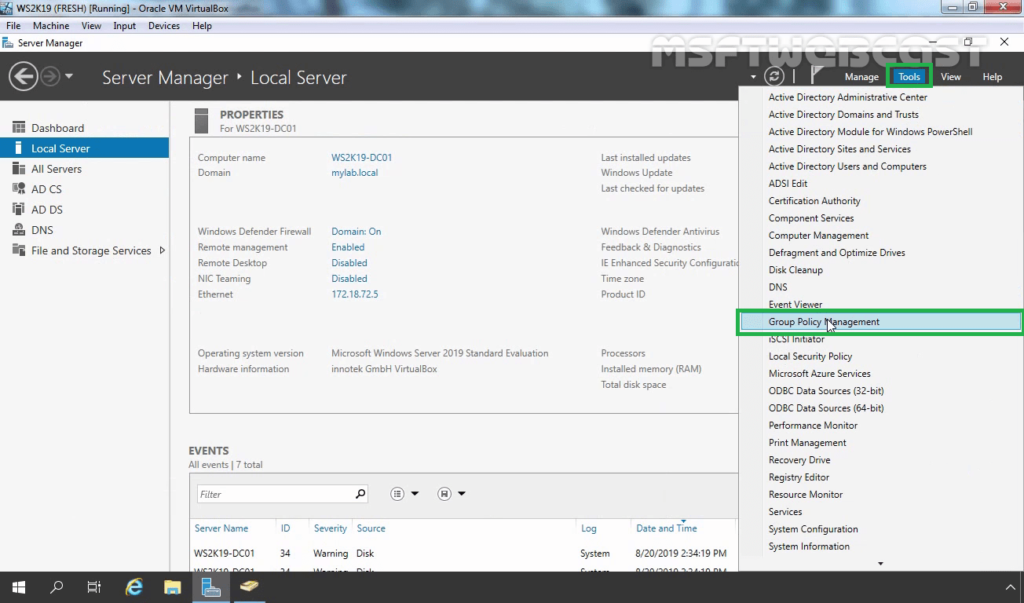
On Domain Controller, open Server manager console.
Click on Tools, and select Group Policy Management.
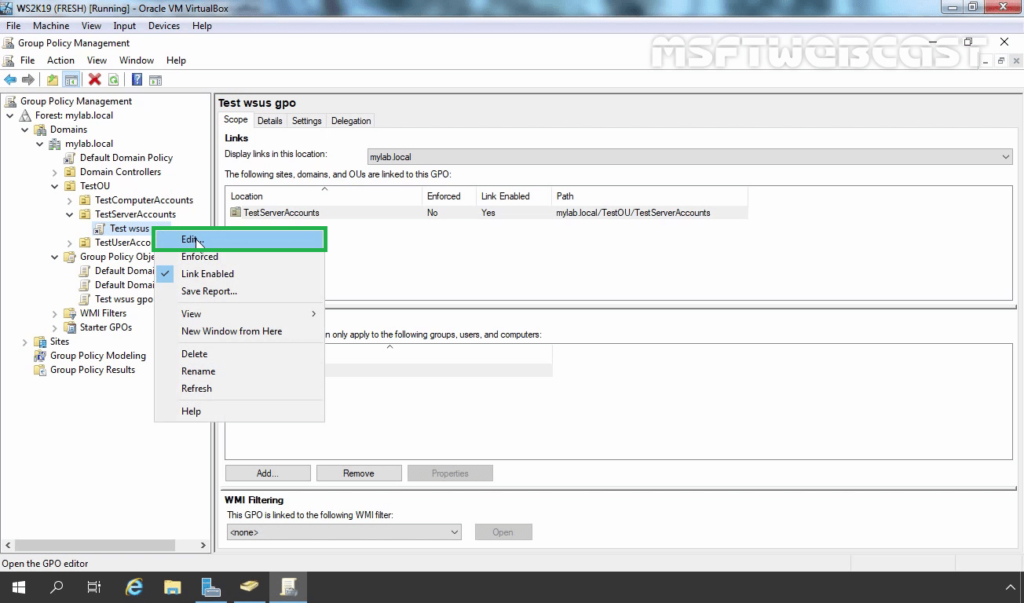
In the previous post, we have created one GPO named “Test WSUS GPO” to apply the WSUS related settings. We will use the existing GPO to setup the client-side targeting settings.
Right-click the WSUS Update Policy, click Edit.
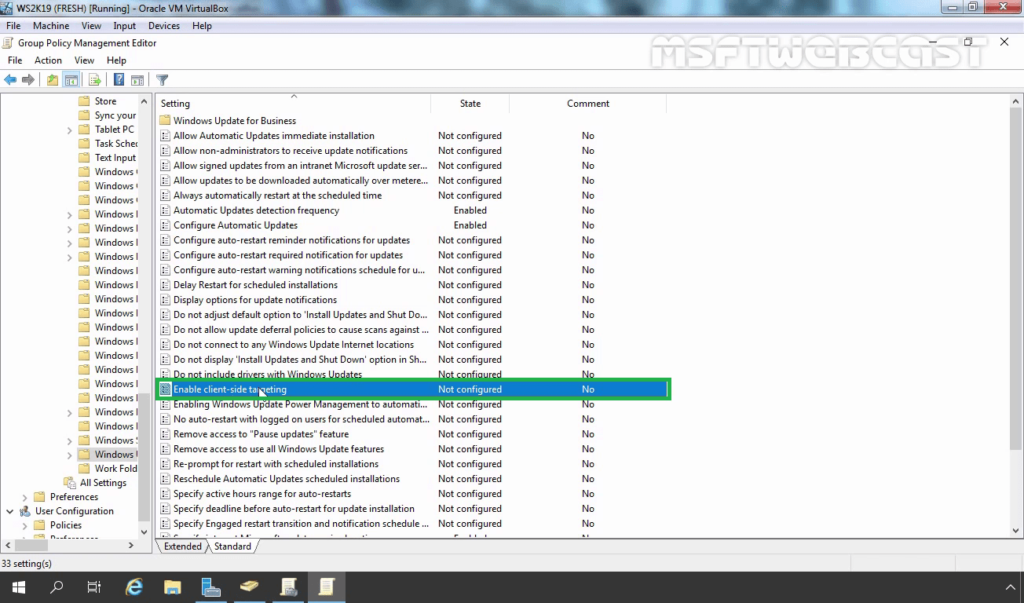
Navigate to Computer Configuration > Policies > Administrative templates > Windows Component > Windows Update.
Double-click on Enable Client-side targeting policy.
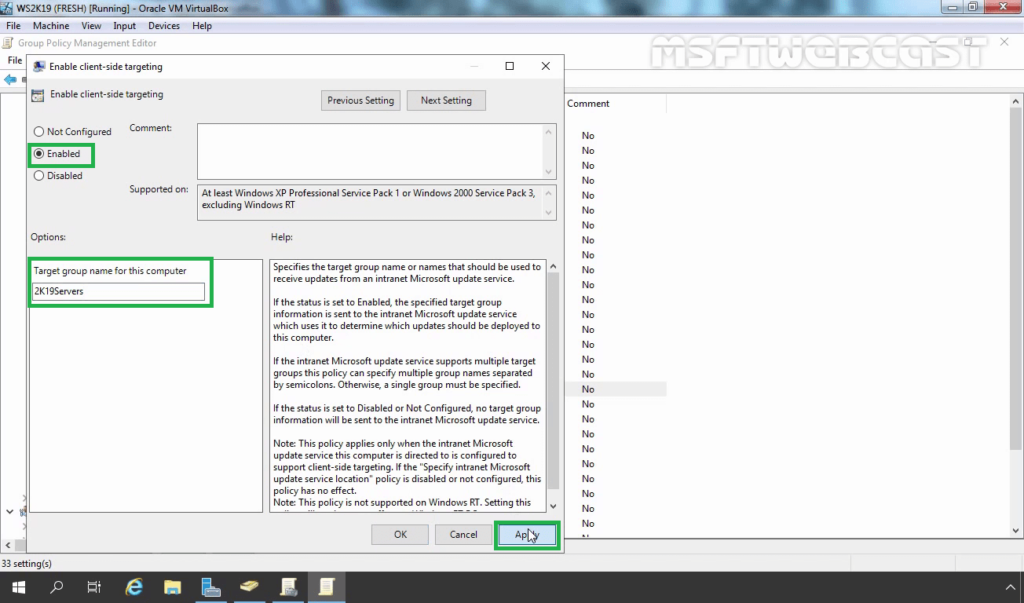
Click on Enabled and in the Target group name for this computer field, type the name of the group which we have created earlier.
Click Apply and OK.
Close the group policy editor console.
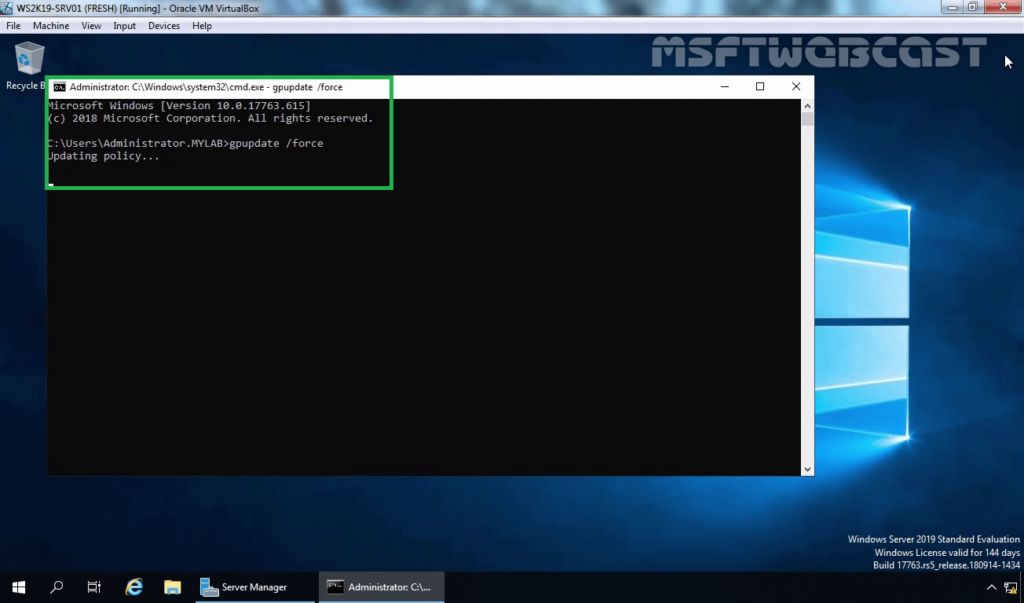
By default, Group Policy refreshes in the background every 90 minutes, with a random offset of 0 to 30 minutes. If you want to update Group Policy sooner, you can go to a command prompt on the client computer and type: gpupdate /force.
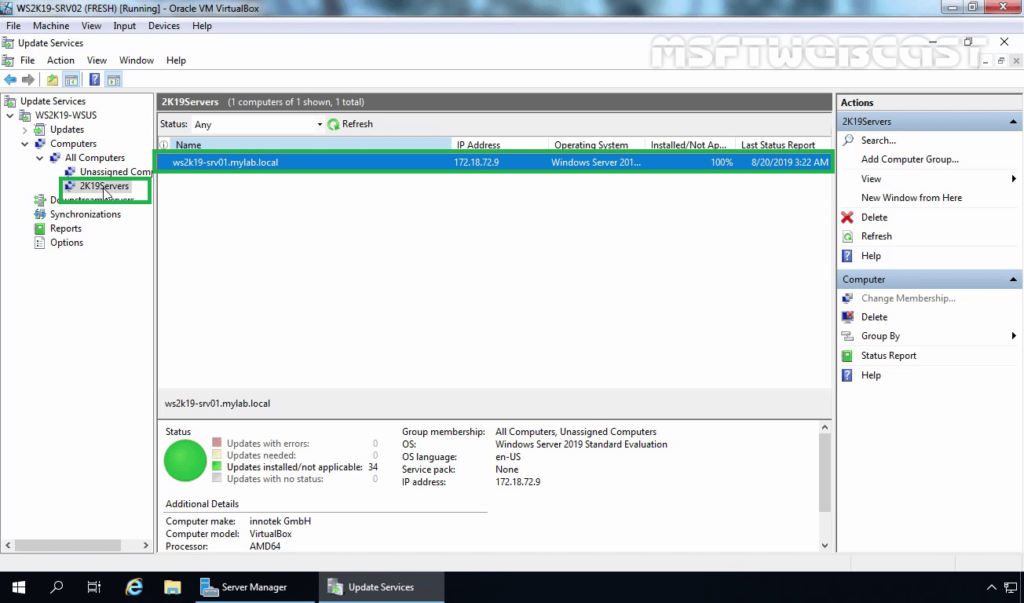
If everything works properly, the computer account of our member server will appear under the computer group name 2K19Servers in the WSUS console.
I hope this article will be helpful. Thank you for reading.