
Microsoft Hyper-V enables the deployment of virtual infrastructure by allowing the creation of virtual machines (VMs). In environments with multiple VMs, administrators use Hyper-V virtual switches to facilitate communication between the VMs, the host system, and external networks. This guide walks you through creating and configuring a virtual switch to connect your VMs to external, internal, or private networks.
Table of Contents
Be sure to check out our previous blog post for a step-by-step guide on installing the Hyper-V Server role on Windows Server 2025.
What is a Virtual Switch in Hyper-V?
A Virtual Switch in Hyper-V acts like a traditional network switch but operates in a virtualized environment. It allows virtual machines to communicate with each other and with external networks based on how the switch is configured.
Hyper-V provides three types of virtual switches: External, which connects VMs to the physical network; Internal, which allows communication between VMs and the host only; and Private, which restricts communication to just the VMs on the same host.
Prerequisites
Before creating and configuring a virtual switch, ensure your computer meets the following requirements:
- Hyper-V must be enabled
- Identify the type of virtual switch that best suits your networking requirements
- Ensure you have administrative privileges on the system
How to Create and Configure a Virtual Switch with Hyper-V
Creating an External Virtual Switch with Hyper-V Manager
After meeting all the prerequisites, you can proceed with creating your virtual switch. You can create Hyper-V standard virtual switches using either the Hyper-V Manager GUI or PowerShell commands.
To create a virtual switch in Hyper-V, launch Hyper-V Manager and follow these steps:
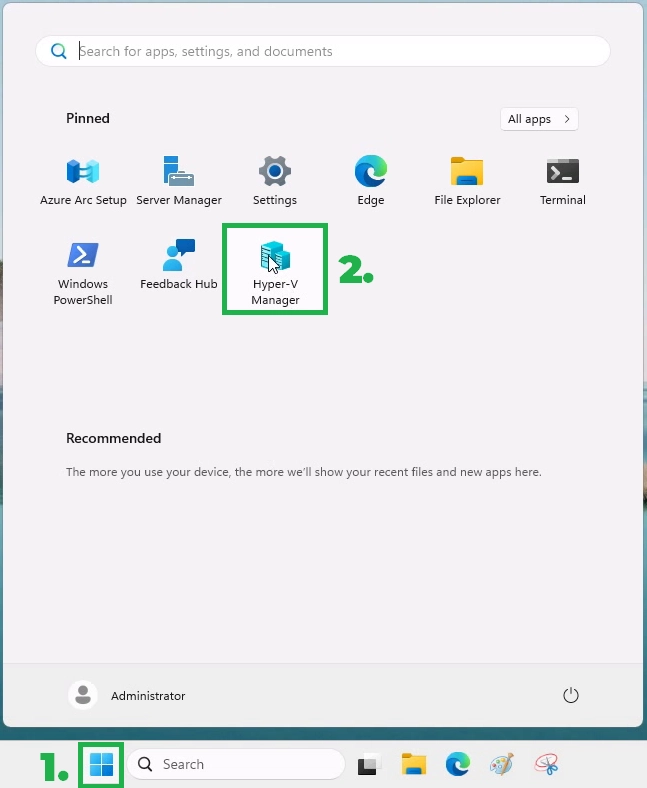
Open Hyper-V Manager.

.
From the Actions pane, select Virtual Switch Manager.


Select the type of virtual switch you want to create.
- External: Use this if you want your VMs to access the internet or physical network.
- Internal: Suitable for test environments needing host-VM communication.
- Private: Best for fully isolated VM-to-VM networks.


.
In this example, select External Virtual Switch as the switch type, then click Create Virtual Switch.

.
- Give your virtual switch a meaningful name and description.


.
- Choose the physical network adapter that will be used for connectivity.


.
- You can also choose to allow the management operating system to share the same selected network adapter by checking the appropriate box.


.
- Deselect the box if you have a separate management network adapter or if you plan to create one manually later. If you deselect it, a warning message will appear, alerting you that you may lose access to the host unless another network adapter is configured for management communication.
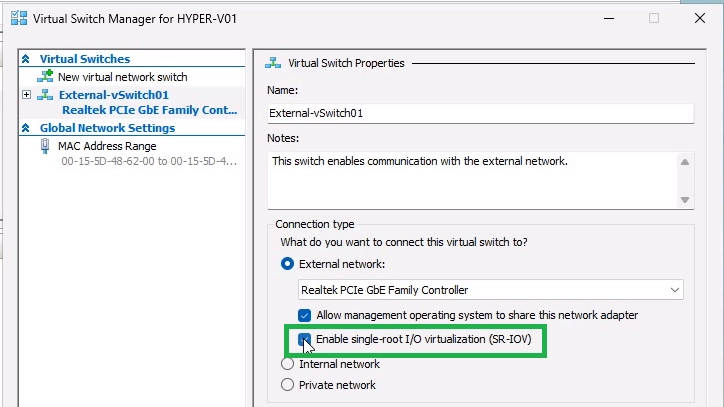
- Single Root I/O Virtualization (SR-IOV) allows you to configure a setup where network traffic bypasses the virtual switch and is directly routed to the virtual machine, increasing network throughput.
Note: SR-IOV cannot be enabled on an existing virtual switch. It must be configured when the virtual switch is created.

.
- You can configure a VLAN identification (ID) for virtual machine network adapters and virtual switches. For virtual switches connected to external or internal networks, a VLAN ID can be specified to segment traffic. This VLAN ID is used by both the management operating system and virtual machines communicating through the specified virtual switch.


.
Click on Apply.


.
A warning will appear, notifying you that the change may disrupt your network connectivity. If you’re okay with this, select Yes to proceed.


.
Check that the external virtual switch named External-vSwitch01 has been created successfully. Click Ok to close the Virtual Switch Manager. You now have an external virtual switch that can be used to enable network communication for virtual machines, allowing them to connect to external networks.


.
The process of creating internal and private virtual switches is similar to that of an external switch. However, certain settings, such as network sharing and SR-IOV, will be unavailable (grayed out) due to the specific characteristics of these switches.
Creating an Internal Virtual Switch with Hyper-V Manager
Click on Virtual Switch Manager.


.
Select the Internal virtual switch type, then click Create Virtual Switch.


.
Enter a meaningful name for the virtual switch.


.
Select the Internal Network type, as you are creating an Internal Virtual Switch.


.
Click Apply and then OK to save and create the Internal Virtual Switch on Hyper-V.


.
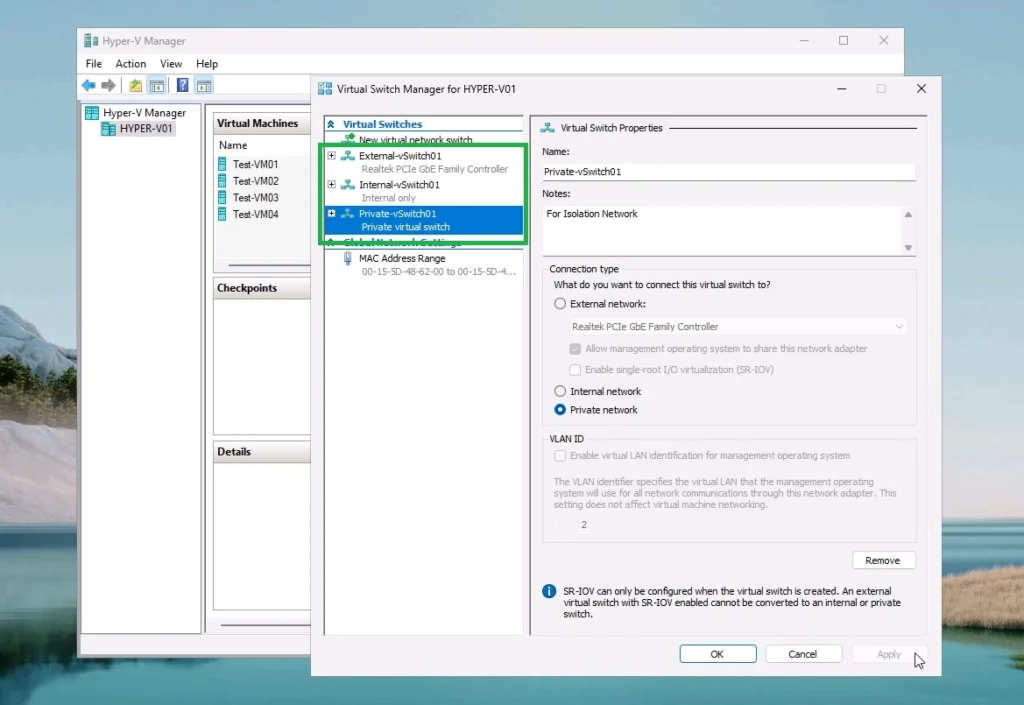
Create a Private Virtual Switch using Hyper-V Manager
Click on New Virtual Network Switch.


.
Select the Private virtual switch type, then click Create Virtual Switch.


.
- Enter a meaningful name for the virtual switch.
- Select the Private connection type, as you are creating a Private Virtual Switch.
- Click Apply and then OK to save and create the Private Virtual Switch on Hyper-V.


.
Connect VM to External Network using the Hyper-V Virtual Switch
In Hyper-V Manager, right-click your virtual machine and choose Settings… from the context menu.


.
- In the Settings window, select Network Adapter.
- On the right pane, under Virtual switch, choose the desired virtual switch from the dropdown menu.
- In this example, select the External Virtual Switch that you recently created.


.
Optionally, configure VLAN ID if your network uses VLAN tagging. Click Apply, then OK to save the changes.


.
Conclusion
Creating and configuring a virtual switch in Hyper-V is a simple yet effective way to manage network connectivity for virtual machines. Whether you’re setting up isolated test environments or production VMs with external access, the flexibility of Hyper-V’s virtual switch options makes it an essential tool for any system administrator.