
In this blog post, you will learn the steps to create and manage a Microsoft 365 group in Exchange Online using Exchange Admin Center. Generally, you use groups in exchange to distribute messages to multiple recipients.
There are many ways to create Microsoft 365 Groups. For example, you can use Microsoft 365 admin center, SharePoint admin center, Microsoft Team admin center, Azure Active Directory Admin Center, etc.
You can use the Exchange admin center (EAC) to create, manage or remove groups in your Exchange Online organization.
Four types of groups can be used to distribute messages:
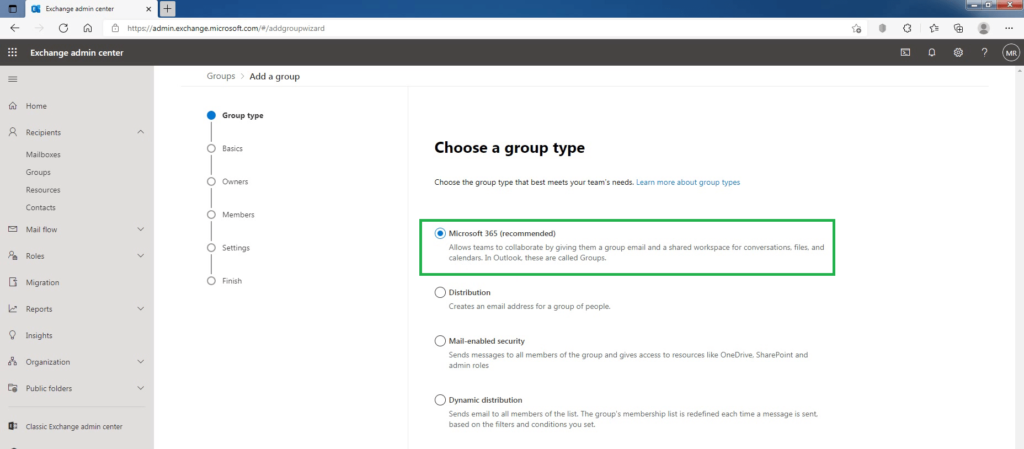
- Microsoft 365 group, is used for collaboration between teams, both inside and outside your company; by giving them a group email and a shared workspace for conversations, files, and calendars.
- Distribution list group is used for sending emails/notifications to a group of people.
- Dynamic distribution list group is used to expedite the mass sending of email messages and other information within a Microsoft Exchange organization.
- Mail-enabled security group is used for granting access to resources such as OneDrive, SharePoint, and emailing notifications to those users.
Microsoft 365 group is the recommended group as it provides the teams with a shared workspace to communicate and share files, appointments, emails, contacts, and other mailbox items.
Create a Microsoft 365 Group using Exchange Admin Center:
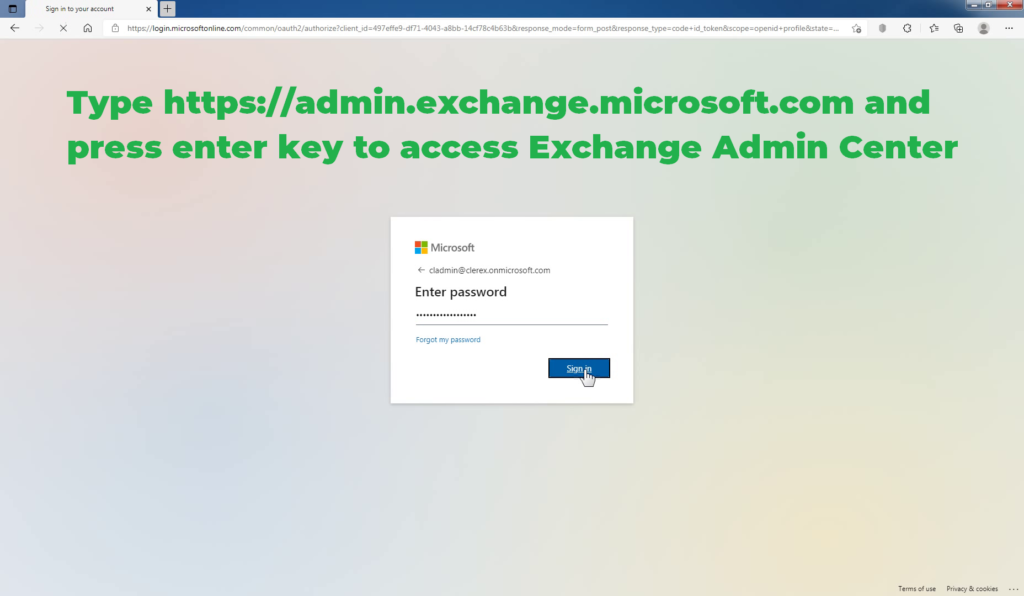
Open your favorite web browser and go to https://admin.exchange.microsoft.com and sign in to the Exchange admin center using the Exchange Administrator account.

In the left part of the window, expand the Recipients drop-down menu and click the Groups button.
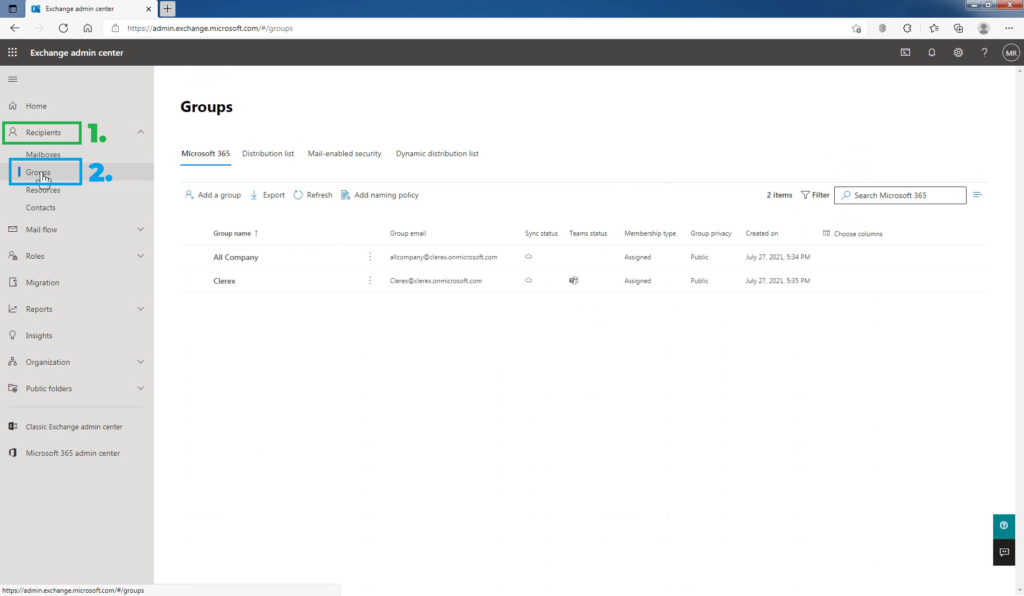
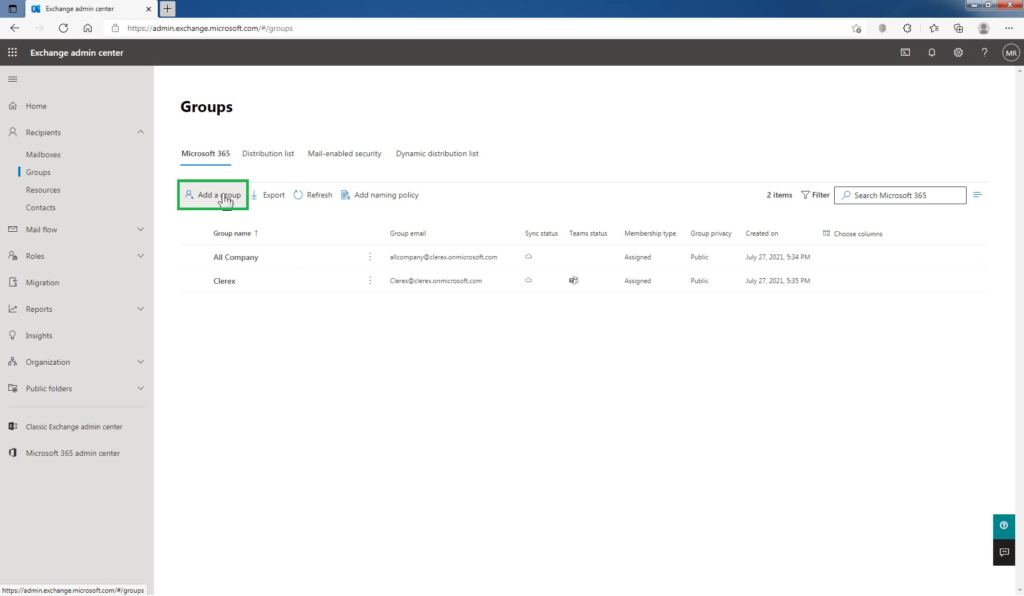
The Groups page is displayed. Select Add a Group.
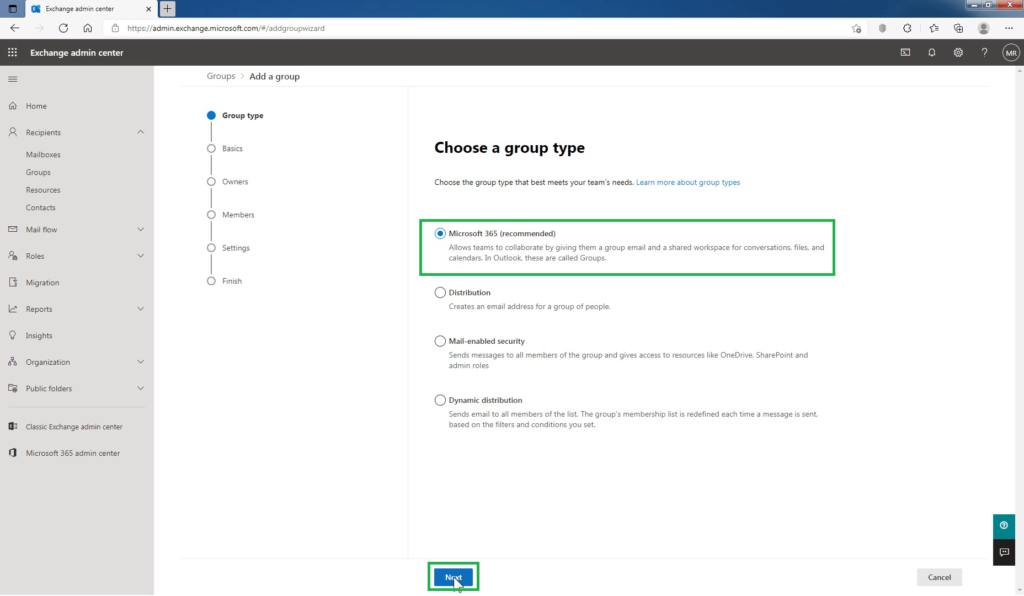
On the Choose a Group type page, select Microsoft 365, and select Next.
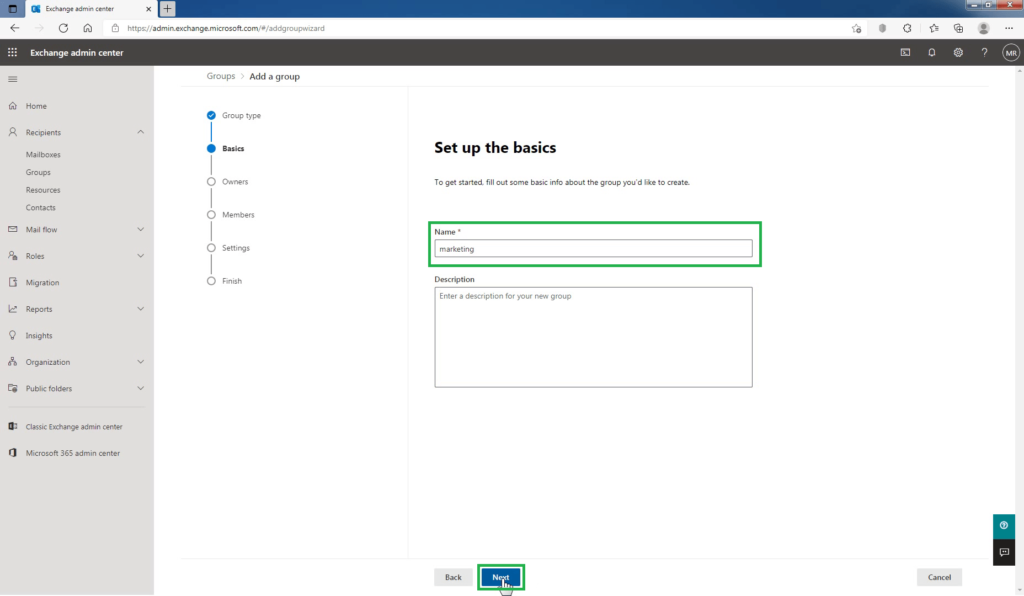
On the Set up the Basics page, type a name for the group, and, optionally, a description. Select Next.
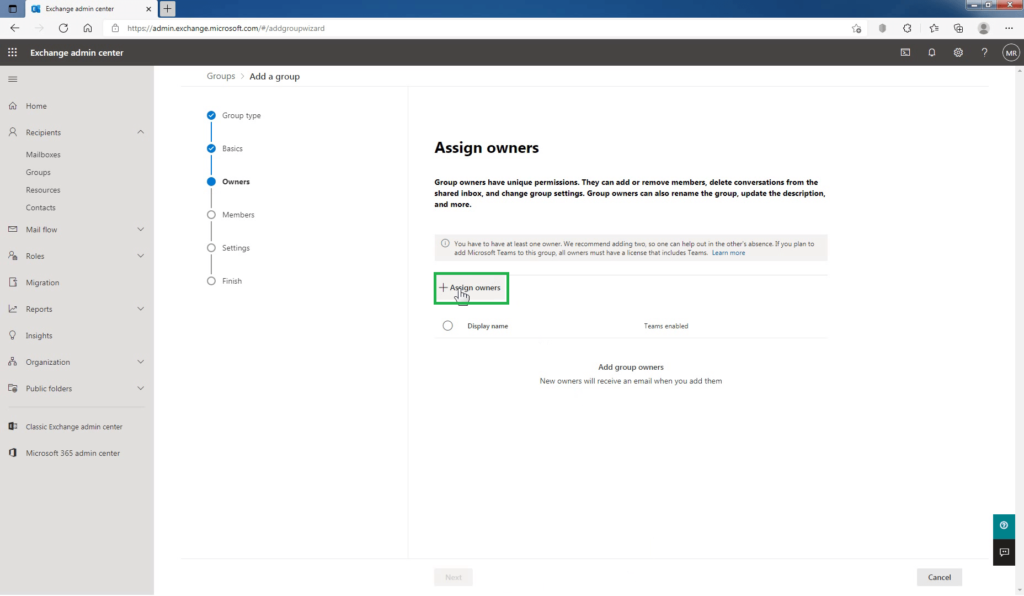
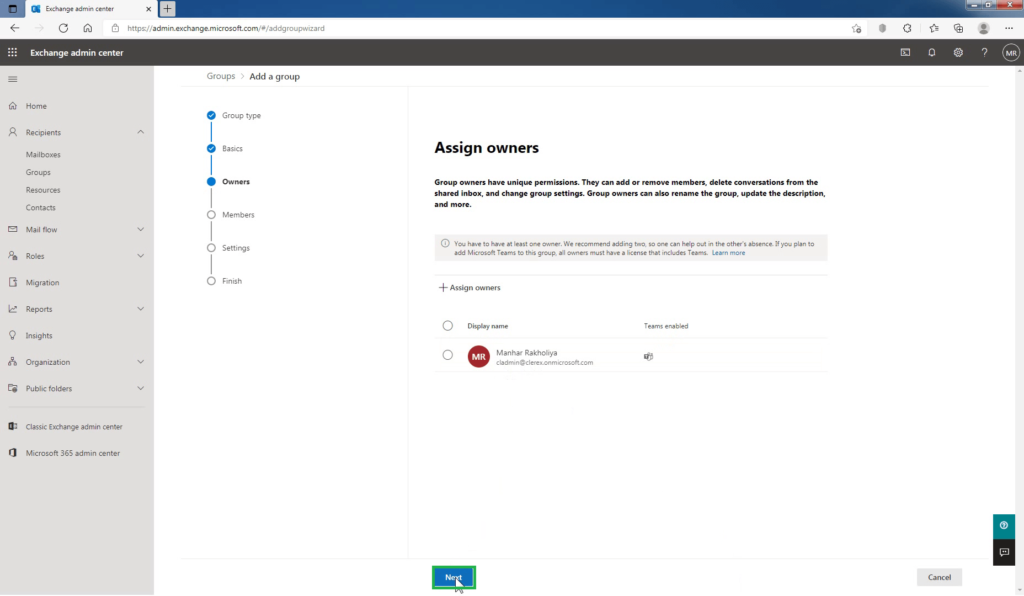
On the Assign Owners page, choose the name of one or more people who will be designated to manage the group. Owners have permission to add/remove members to the group and can also rename the group. Anyone who is a group owner will be able to delete emails from the Group inbox. Other members won’t be able to delete emails from the Group inbox.
To assign a group owner, click on Assign owners.
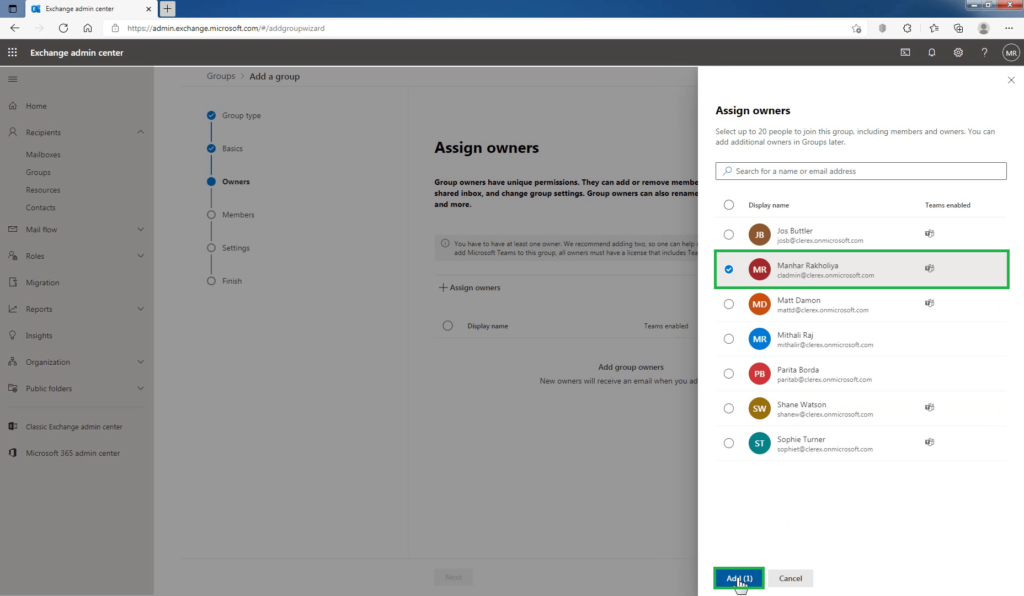
Search for the name of the owner(s) you want to add to the group, then click the box to the left of the name. Once you have all owners you want to add selected, click on Add at the bottom.
In this example, I’m going to add “Manhar Rakholiya” as the owner.
Select Next.
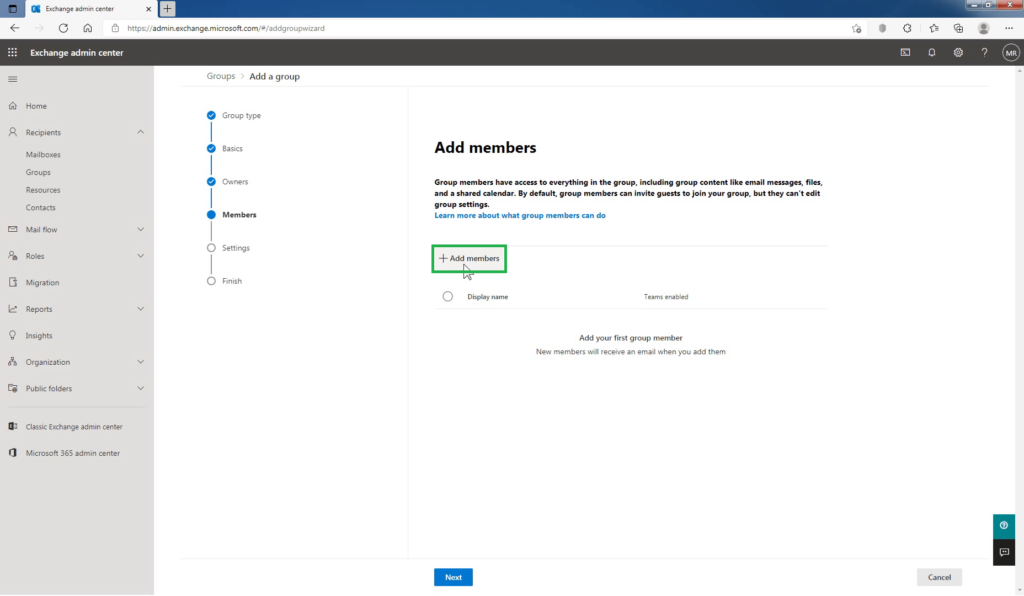
Now you can add members to the Microsoft 365 group. Each member of the group has the same permissions. The owner is the only member with elevated permissions.
On the Add Members page, choose the name of one or more people who will be designated as members of the group.
Click on Add Members.
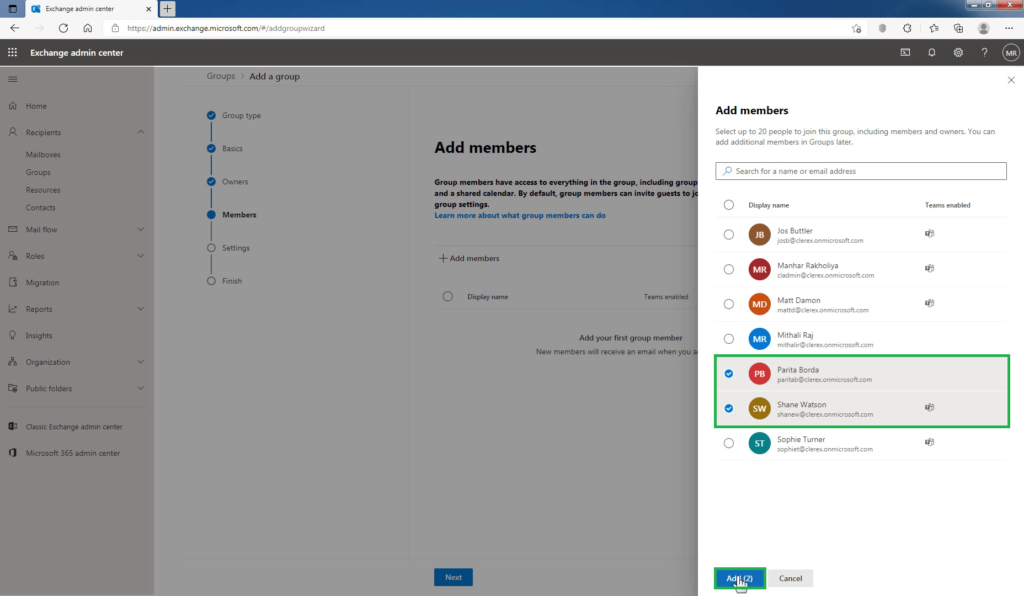
Search for the name of the member(s) you want to add to the group, then click the box to the left of the name. Once you have all the members you want to add selected, click on Add at the bottom.
In this example, I’m going to add members “Parita Borda”, and “Shane Watson”.
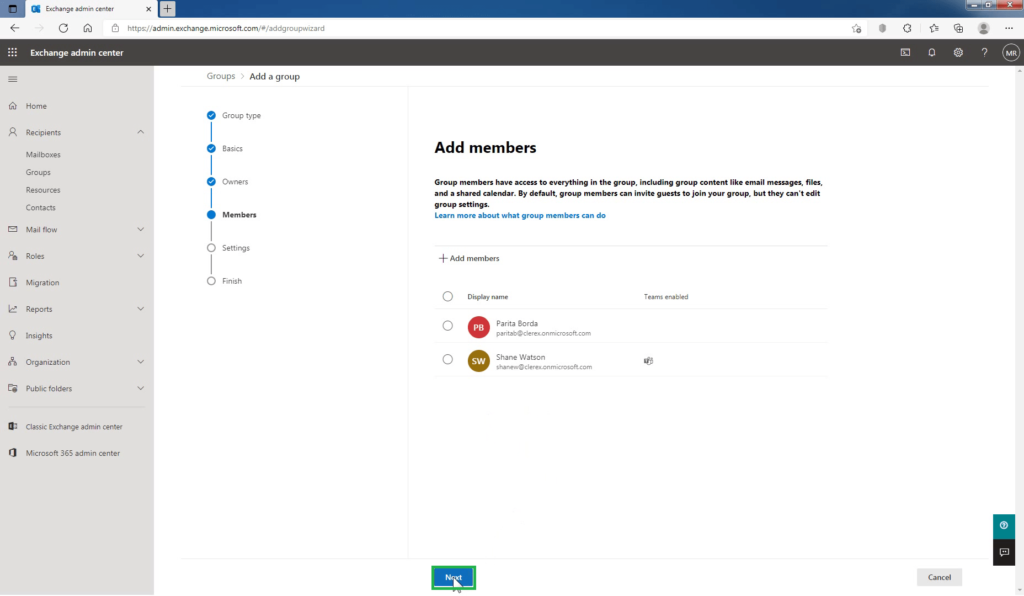
Select Next.
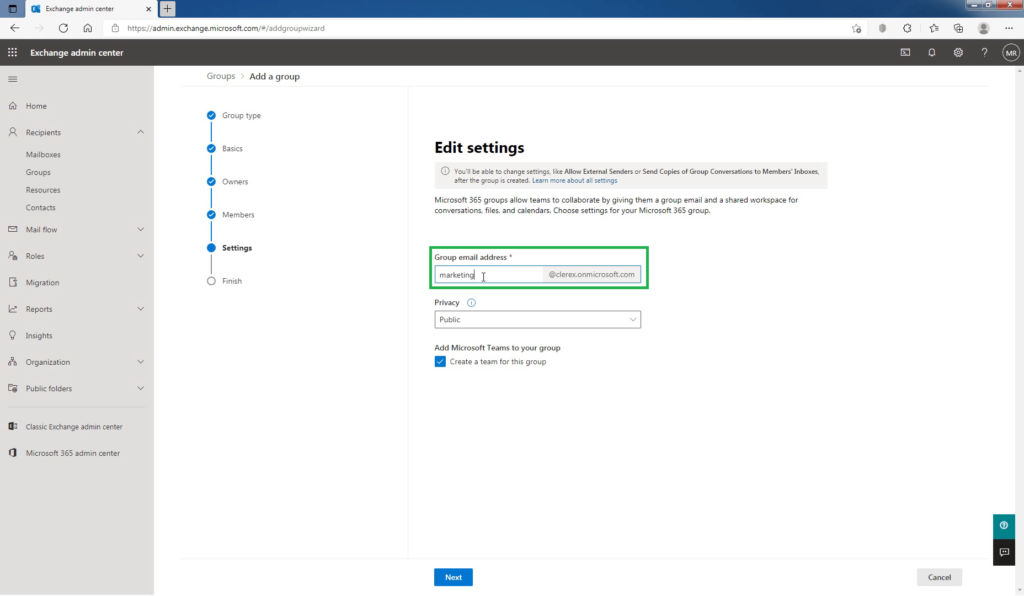
On the Settings page, type a unique email address for the group which will be used by anyone emailing this group, including people outside the organization.
In this example, I am going to give my group name the email address of Marketing (the email address will be marketing@clerex.onmicrosoft.com).
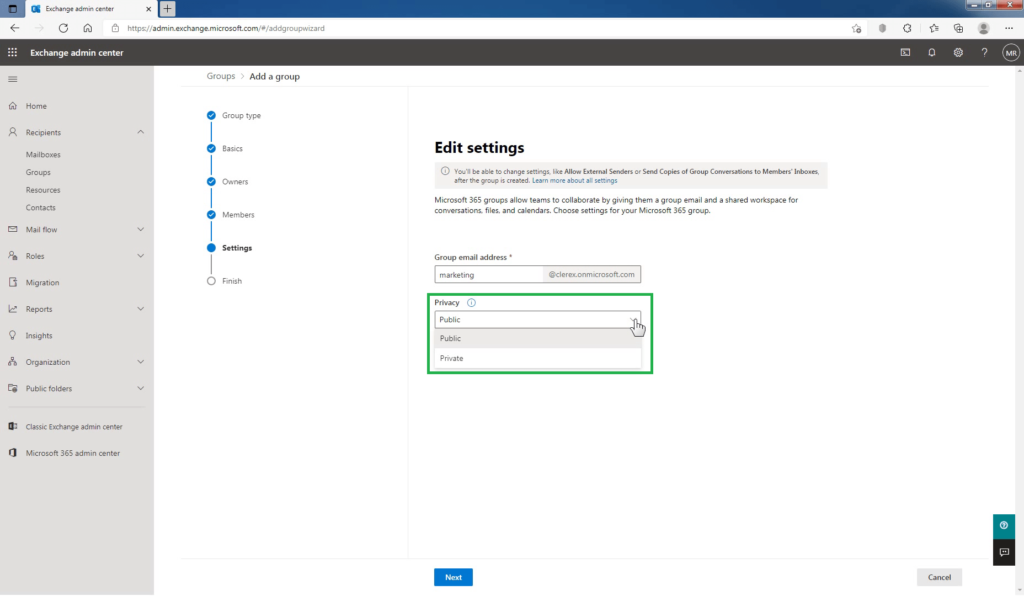
Choose a privacy option for this Microsoft 365 group. If you choose Public, anyone can join the group without getting approval from the owner of the group. If you choose Private, then only an owner can add members to the group.
In this example, I am going to choose the public.
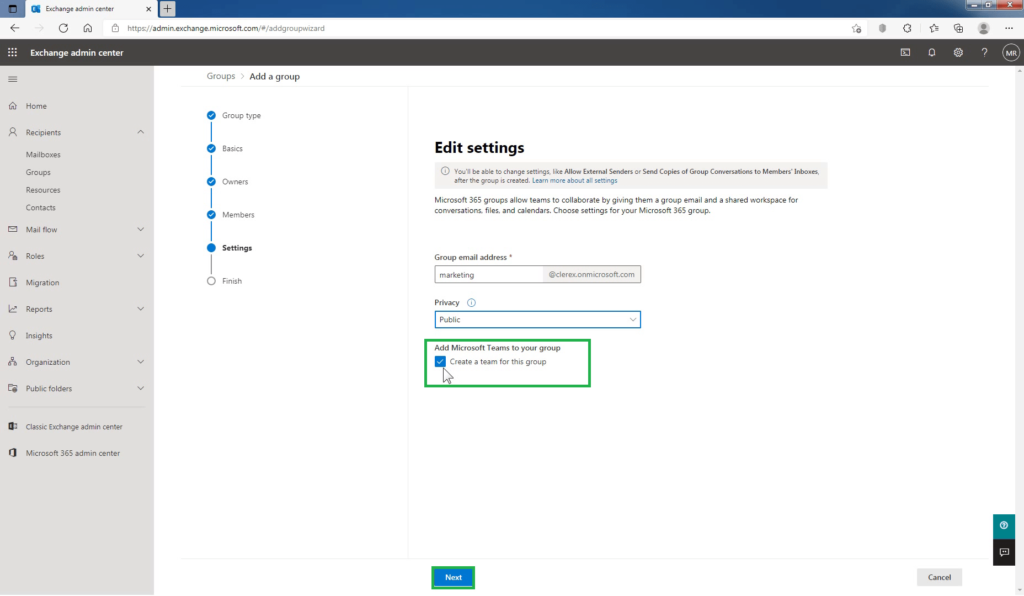
Choose whether you want to add Microsoft Teams. You can create a Microsoft Teams Team from this group as well. It is checked by default. Select Next.
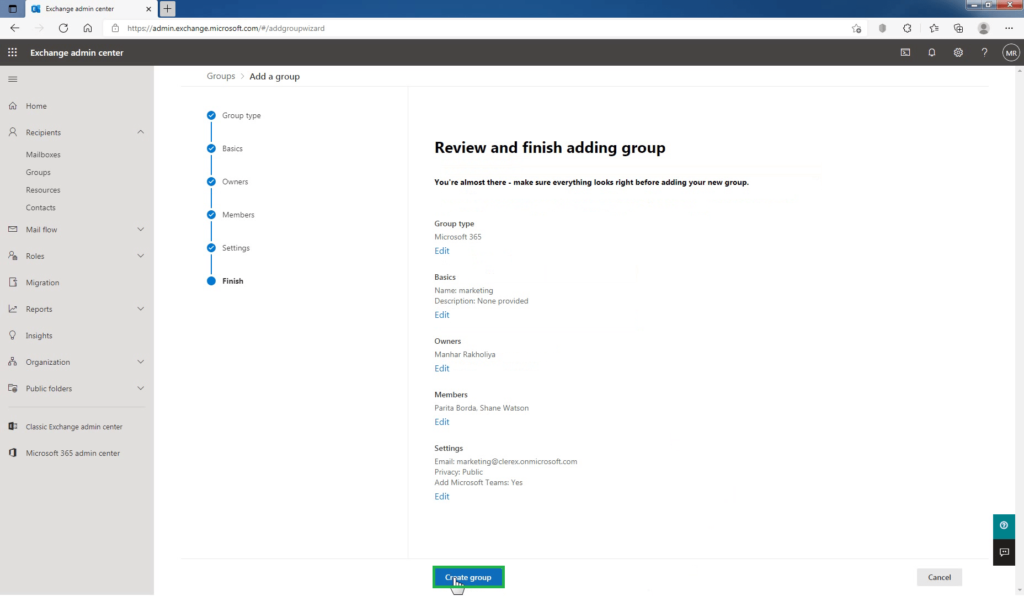
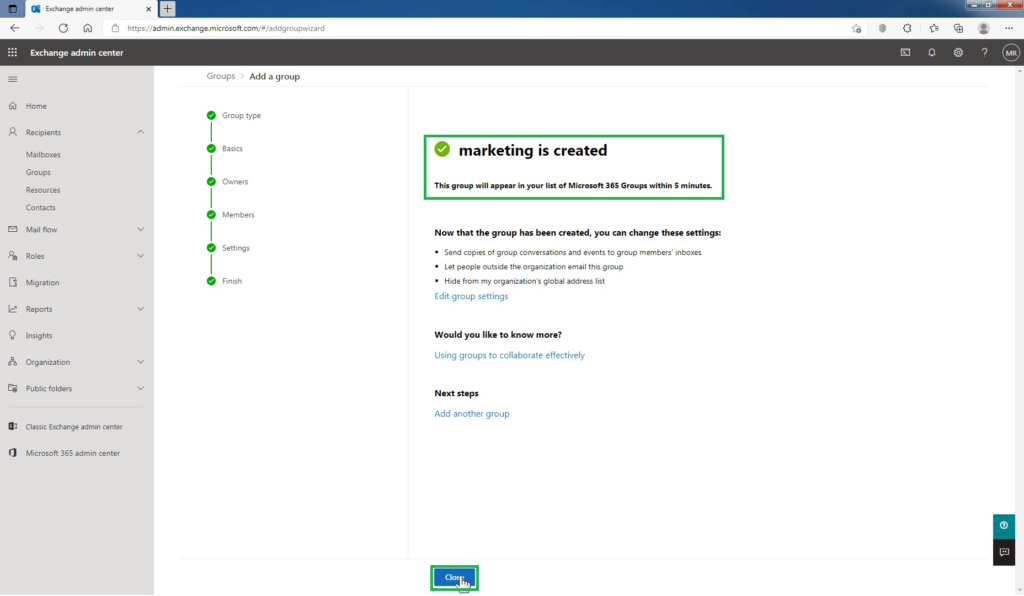
Review your settings. You can edit any settings you need on this page. If everything is how you want it, click Create Group.
You will get the confirmation page. The Microsoft 365 group with the name “Marketing” is created successfully. Click Close at the bottom of the screen.
How to Manage a Microsoft 365 Group:
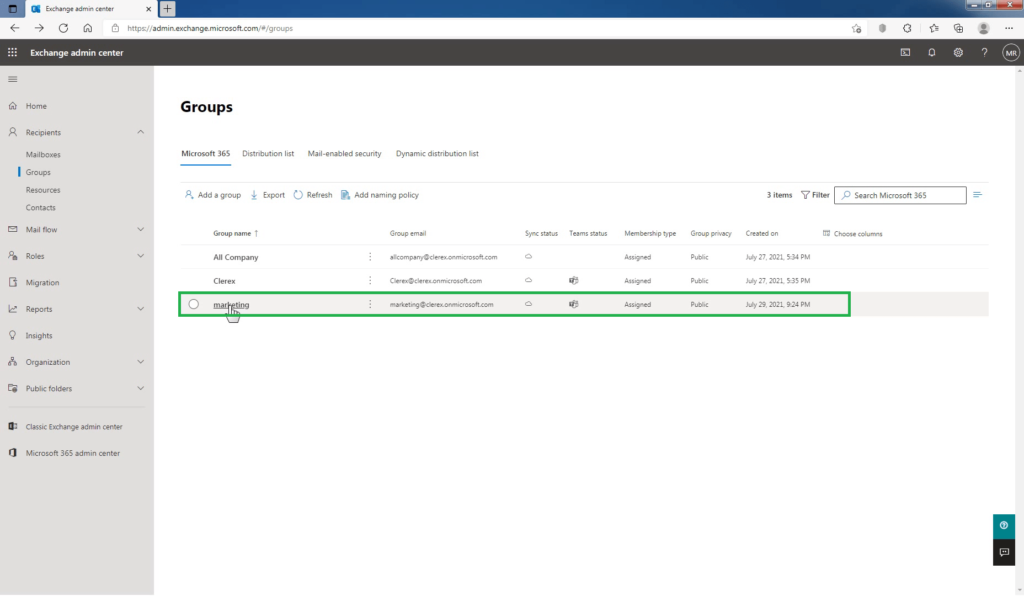
From the list view, select the group that you want to manage, and click the selected group name.
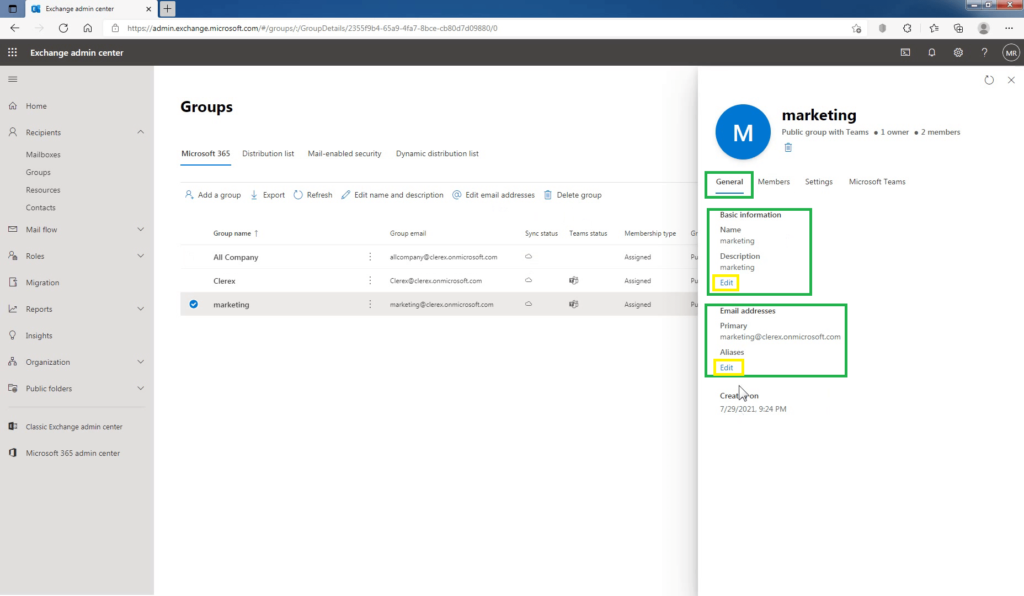
To edit the Microsoft 365 group information:
On the General tab, you can edit Basic Microsoft 365 group information like group name, and group description.
Under the Email address section, click on Edit email address to edit the Primary and Aliases email addresses of this Microsoft 365 group.
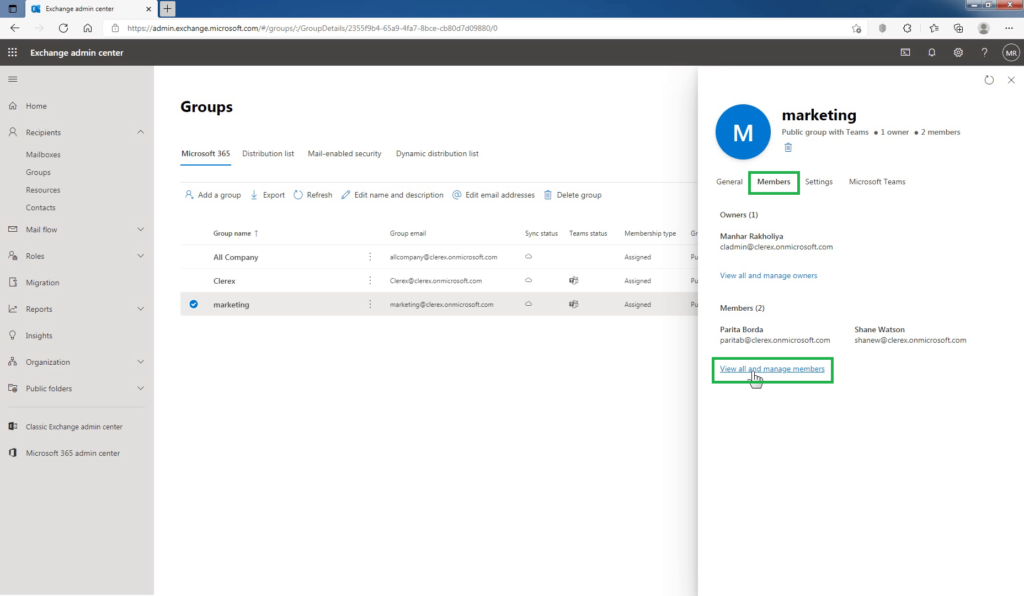
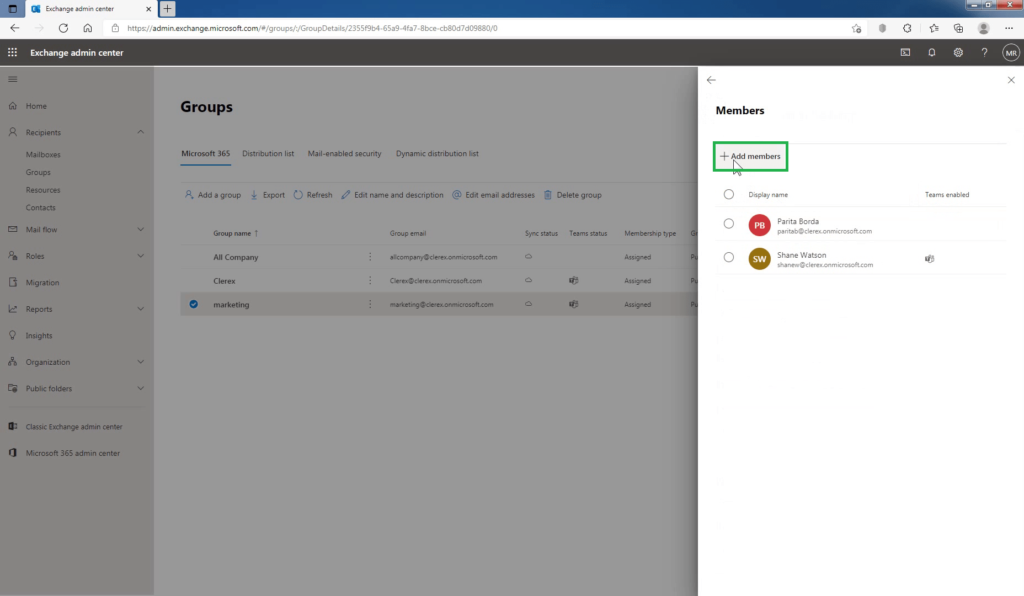
To add a member to the Microsoft 365 group:
On the Members tab, click on the view all and manage members link.
Click on Add Members to add or remove group members.
To add owners to the Microsoft 365 group:
On the Members tab, click on the view all and manage owners link.
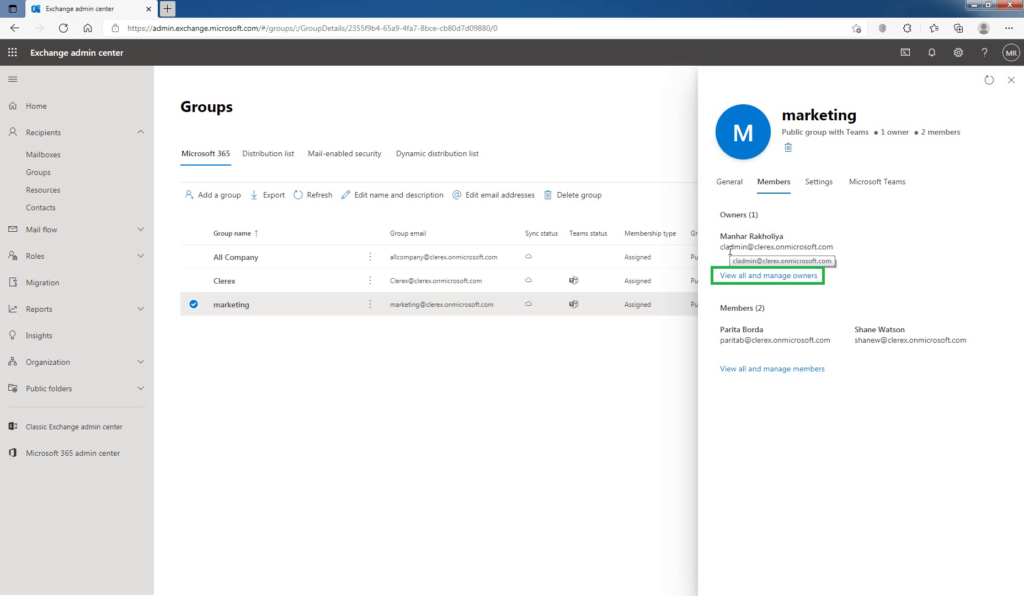
Click on Add Owner to add or remove group owners.
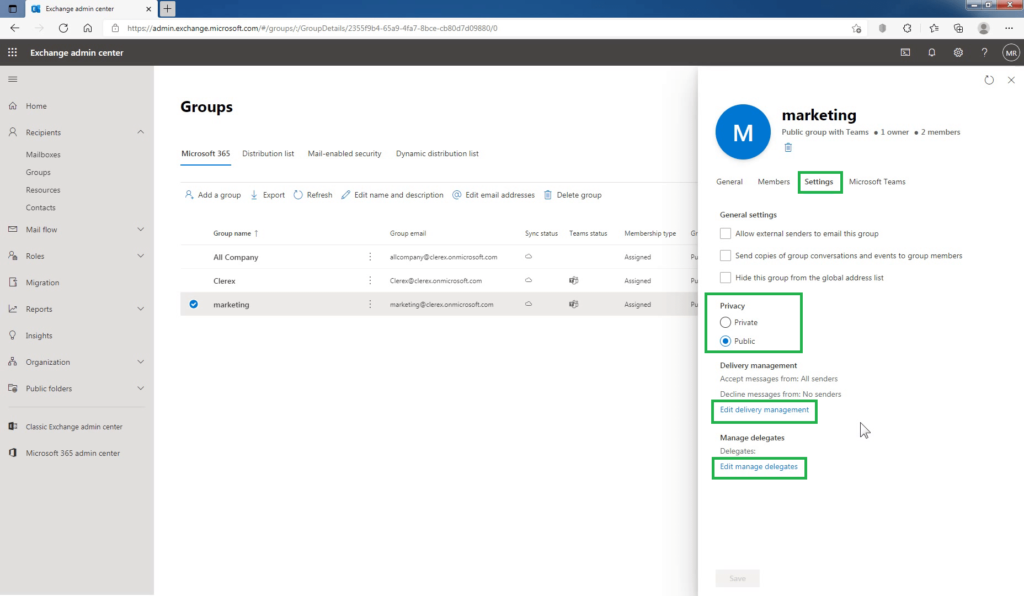
To edit Microsoft 365 group settings:
Click on the Settings tab.
Edit the settings as per your requirements.
Conclusion:
That’s it for this guide. In this post, you have learned the steps to create and manage a Microsoft 365 group in exchange online using Exchange Admin Center (EAC). The process is quite easy to follow.
Let me know if this guide has helped you by leaving a comment about your experience. Please like and share this guide to help others.
Video Tutorial on how to create and manage a Microsoft 365 Group in Exchange Online:
