
In this blog post, you will learn the steps on how to create Email Aliases for Microsoft 365 User using Microsoft 365 Admin Center.
What is Email Alias Address?
A primary email address in Microsoft 365 is usually the email address a user was assigned when their account was created. They can also have more than one email address associated with their Microsoft 365 business account. These additional addresses are called aliases.
An email alias is a secondary email address that connects with a user’s existing account. Any email message delivered to an email alias is sent to the same mailbox as the primary account. You can create up to 400 aliases for a user. No additional fees or licenses are required.
As a Microsoft 365 admin, you can add additional email addresses to your user’s accounts by creating an email alias. For example, if customers have questions, they can email info@msftwebcast.in instead of manhar@msftwebcast.in, which looks much more professional.
The user who is using this email address as their alias will get the email directly in their inbox. When they reply to the mail; however, they will reply with their primary email address.
If you want your people to reply with the email address info@msftwebcast.in instead of manhar@msftwebcast.in, we recommend that you create a shared mailbox. (Put a link to Shared Mailbox Article).
Steps to create Email Alias Address for Microsoft 365 User using Microsoft 365 Admin Center
Creating a new email alias for Microsoft 365 user in your tenant takes a few quick steps, as mentioned in the steps below:
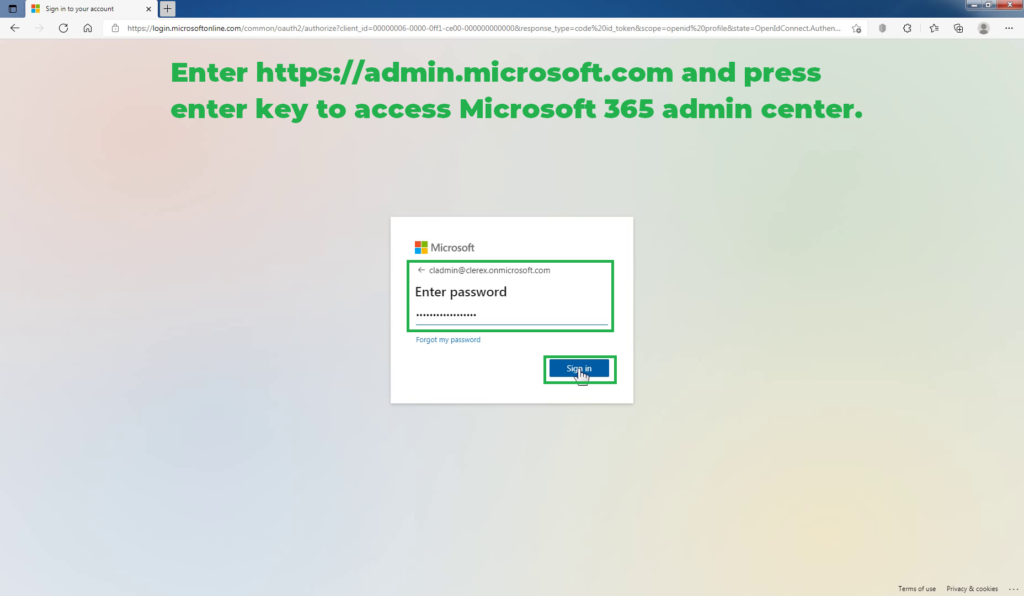
Open your favorite web browser and go to https://admin.microsoft.com and sign in to the Microsoft 365 admin center using your global administrator account.

In the left part of the window, expand the Users drop-down menu and click the Active users button.

The Active users operation pane will be displayed on the right side of the window.
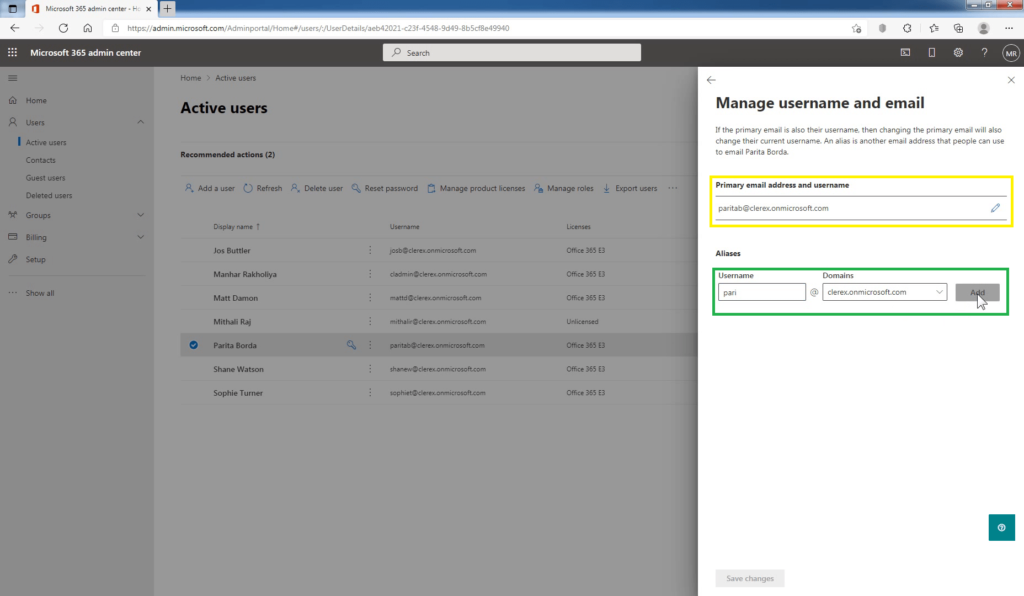
Select the user you want to add the new email alias and click Manage Username and email.
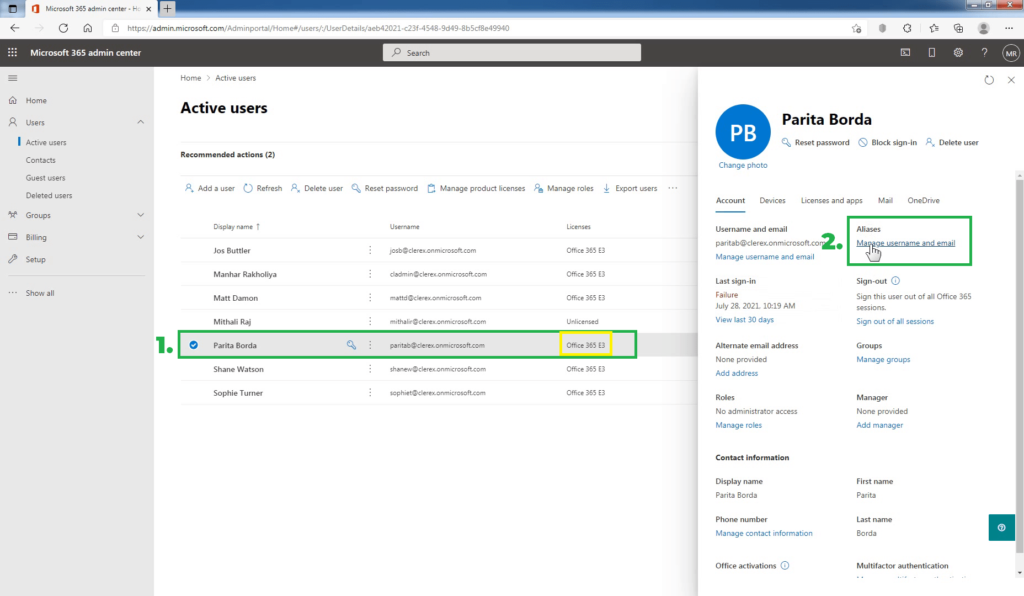
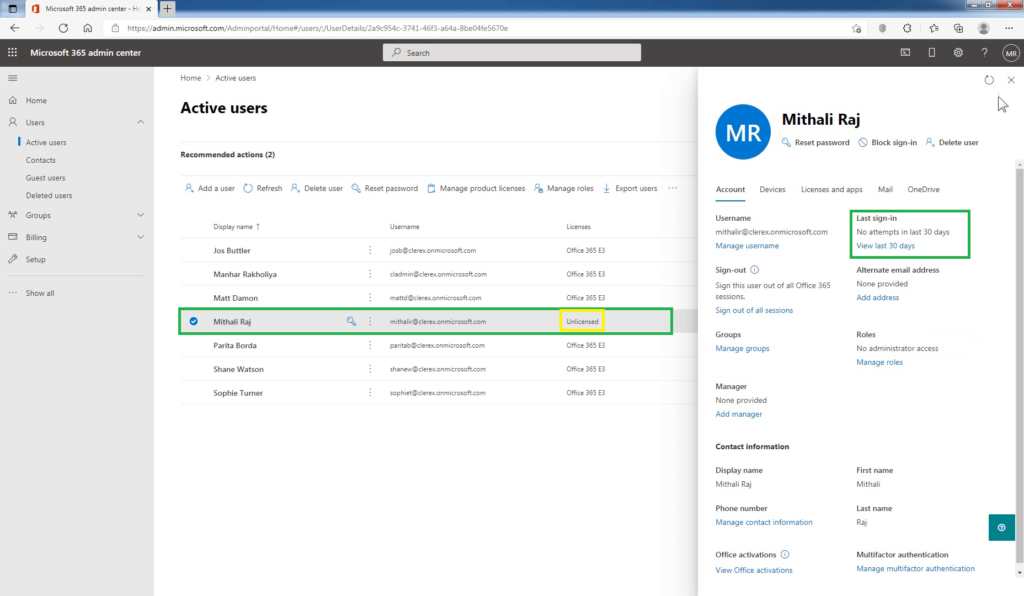
You won’t see this option if the person doesn’t have a license assigned to them.
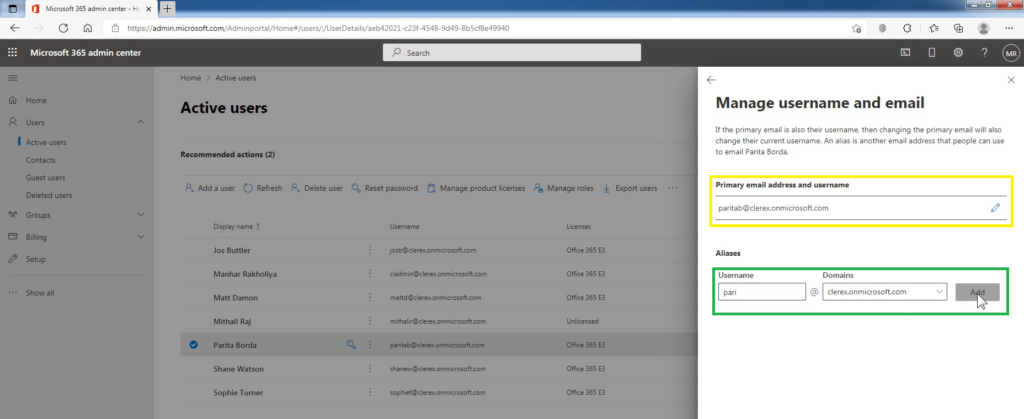
Under Aliases, enter the new alias address you want to add and select what domain the email address will use using the drop-down.
Click Add.
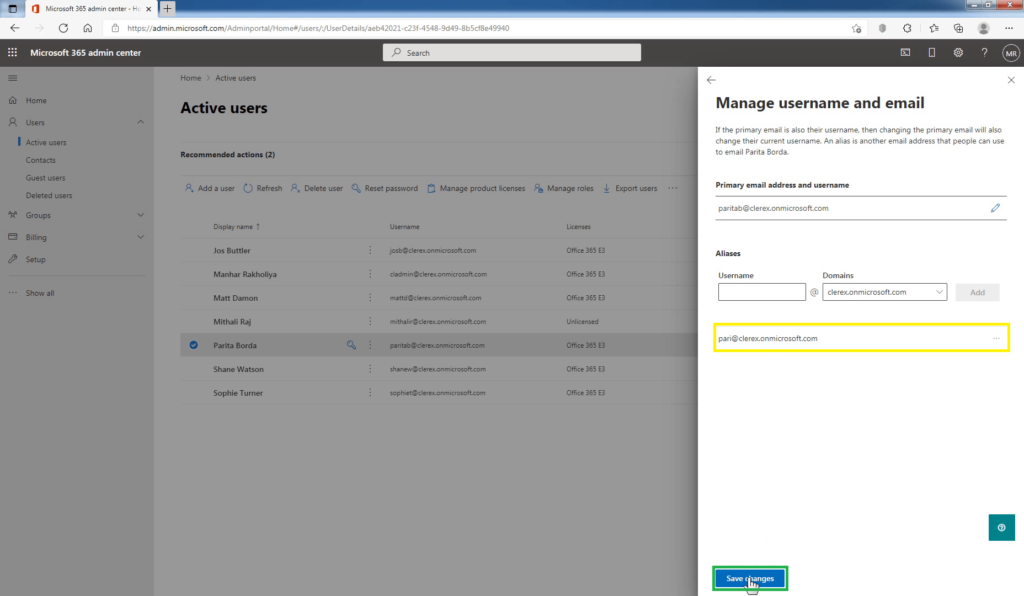
Click Save Changes.
Changes saved successfully.
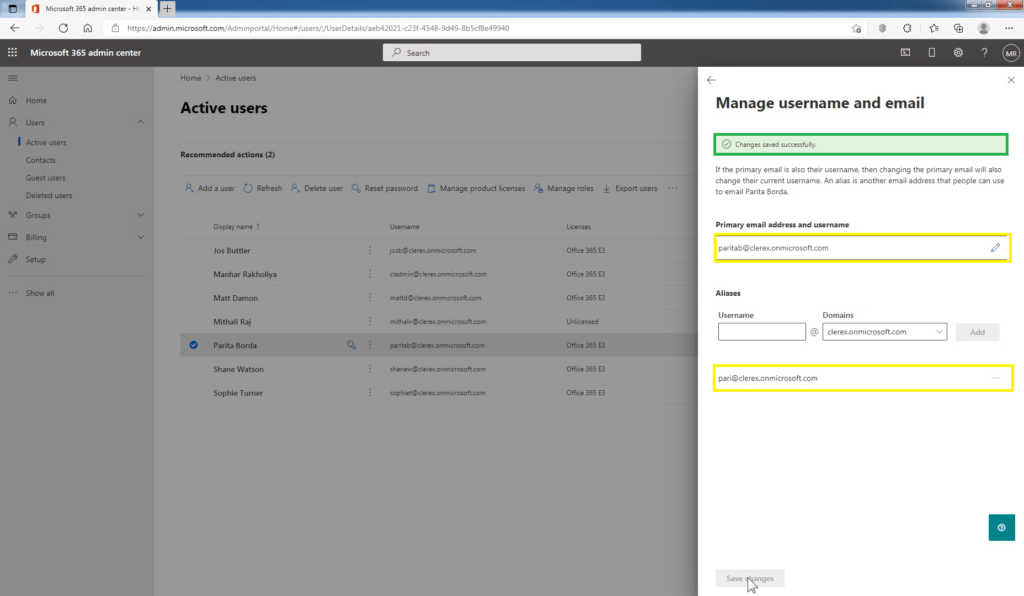
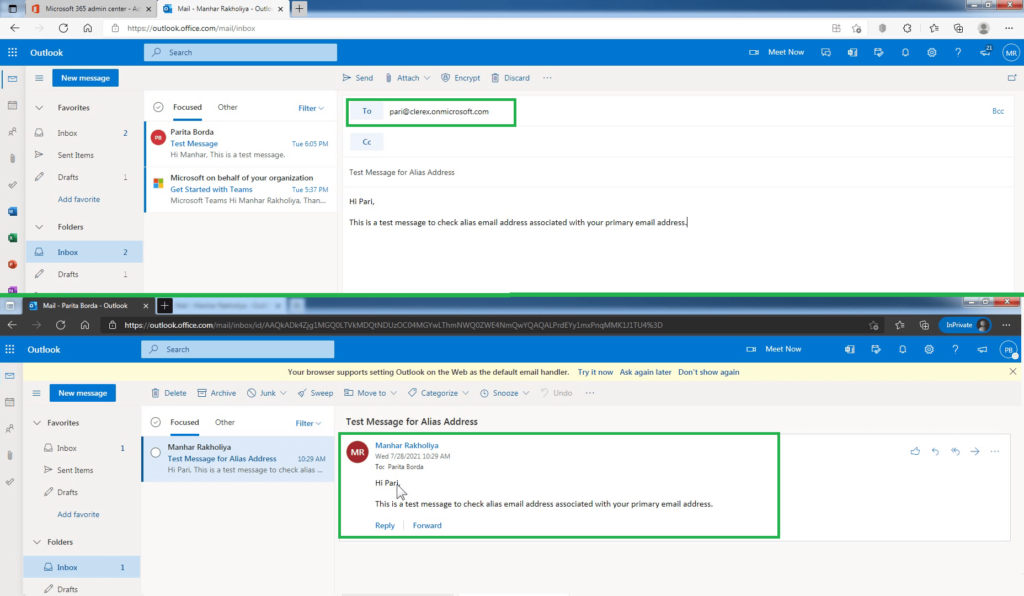
People can now email the alias address and it will arrive in your Microsoft email accounts inbox.
The user will now have a primary address and an alias. For example, all mail sent to Manhar’s primary address, manhar@msftwebcast.in, and his alias, info@msftwebcast.in, will go to Manhar’s Inbox. Sometimes you have to wait up to 24 hours for the new aliases to populate throughout Microsoft 365.
You can also use Exchange Admin Center (EAC) and Exchange Management Shell (EMS) to add a new email alias Address in Exchange Online.
Use Exchange Admin Center to add a New Email Alias Address
- Access the Exchange admin center using the URL https://admin.exchange.microsoft.com and sign in using your credentials.
- In the Exchange admin center dashboard, select recipients -> mailboxes.
- Double-click on the user you want to add the new email alias and then select the email address.
- Click Add + to add the new alias email address.
- Leave the SMTP selected, and type the new email address for the user.
- When done, click OK and then Save.
Wait for up to 24 hours for the new aliases to populate throughout Microsoft 365.
Conclusion:
That’s it! In this post, you have learned the steps to add a new email alias address for Microsoft 365 Users using Microsoft 365 Admin Center and Exchange Admin Center.
Let me know if this guide has helped you by leaving a comment about your experience. Please like and share this guide to help others.
Video Tutorial on How to Create Email Aliases for Microsoft 365 User
