In this post, we will learn the steps to on How to Grant Send on Behalf Permissions for the User Mailbox in Exchange 2019.
Why Send on Behalf Permission?
Send on Behalf permission allows the delegate to send messages from the mailbox to other users or groups on your behalf.
However, email recipients will see both your address and your delegate’s address in the email message with send on behalf message.
Send on Behalf permission can set from server end and as well as from outlook (means even end-user can also set up this permission). In this example, we will set up Send on Behalf permission on Exchange Server.
Note: Replies to send on behalf messages are sent to the mailbox or group, not to the delegate.
Grant Send on Behalf Permission for a Mailbox:
On Exchange 2019 Mailbox Server.
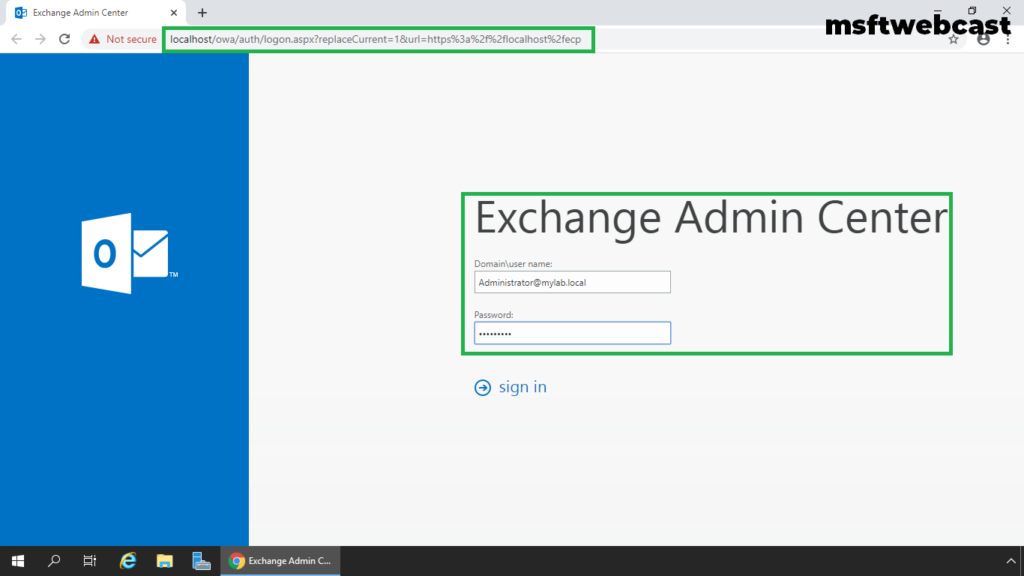
1. Open Internet Explorer and type https://localhost/ecp, and then press Enter. Sign in as an Administrator with the password.

2. In the Exchange Admin Center web interface, navigate to Recipients.
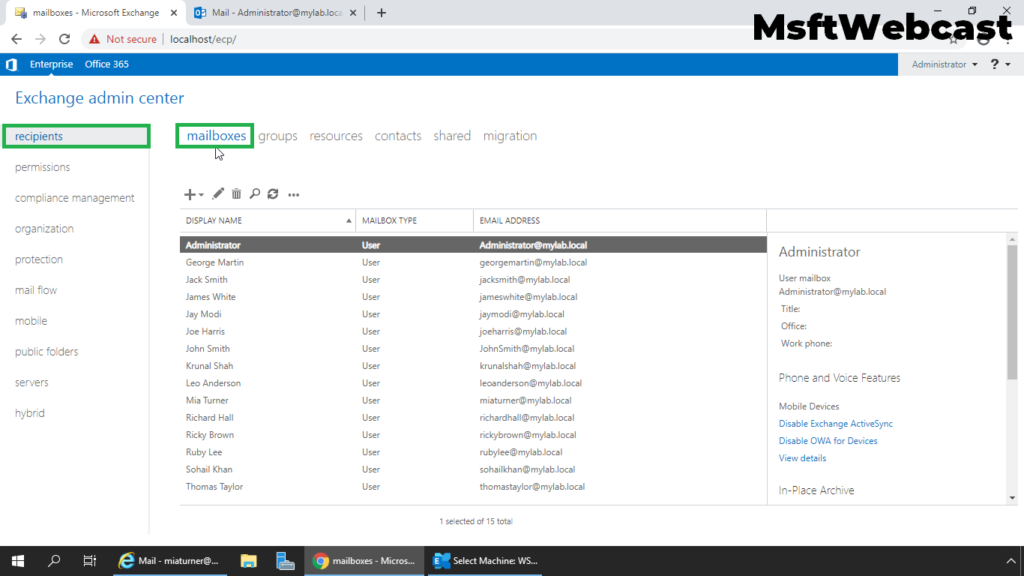
3. On the Mailbox tab, select the mailbox for which you want to grant send on behalf permission to other users and then click Edit.
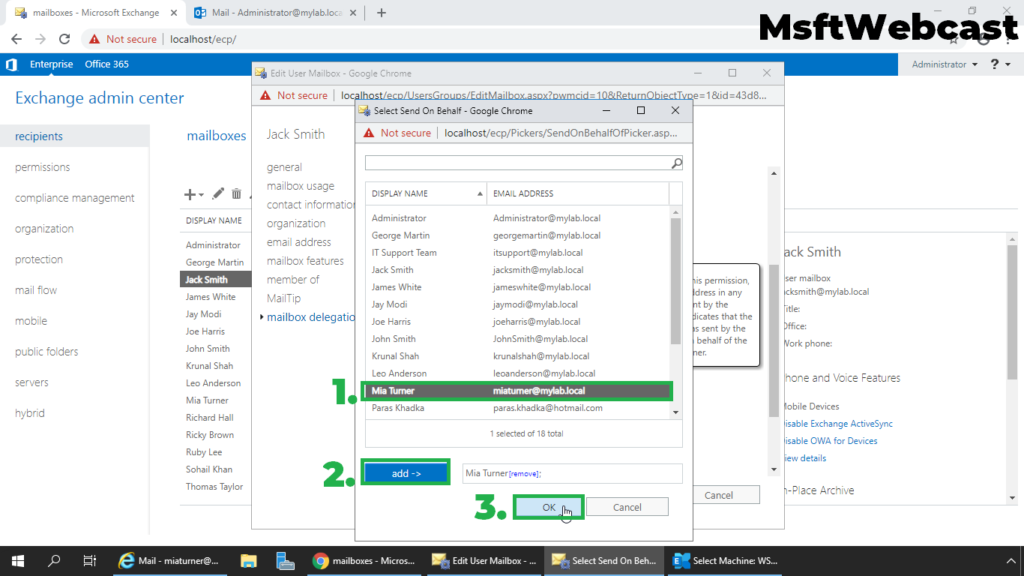
4. On the mailbox properties page, click the Mailbox delegation.
5. Under Send on Behalf section, click on the + (plus) sign.
6. Select the User and click on Add. Click OK.
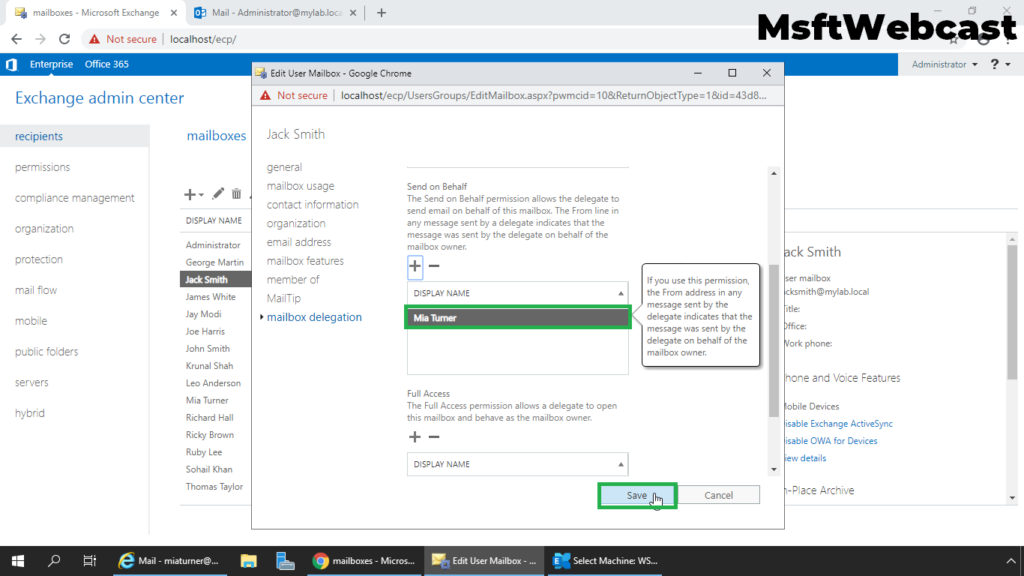
7. Verify that the user name appears under Send on Behalf permission list. Click on Save to save the changes.
At this point, we have successfully configured send on behalf permission for a mailbox in Exchange 2019. Now, it’s time to test the configuration.
Verify Send on Behalf permission for a Mailbox:
8. Login to outlook on the web using a user account who has the Send on Behalf permission.
9. Click on New mail + (plus) sign to compose a new email.
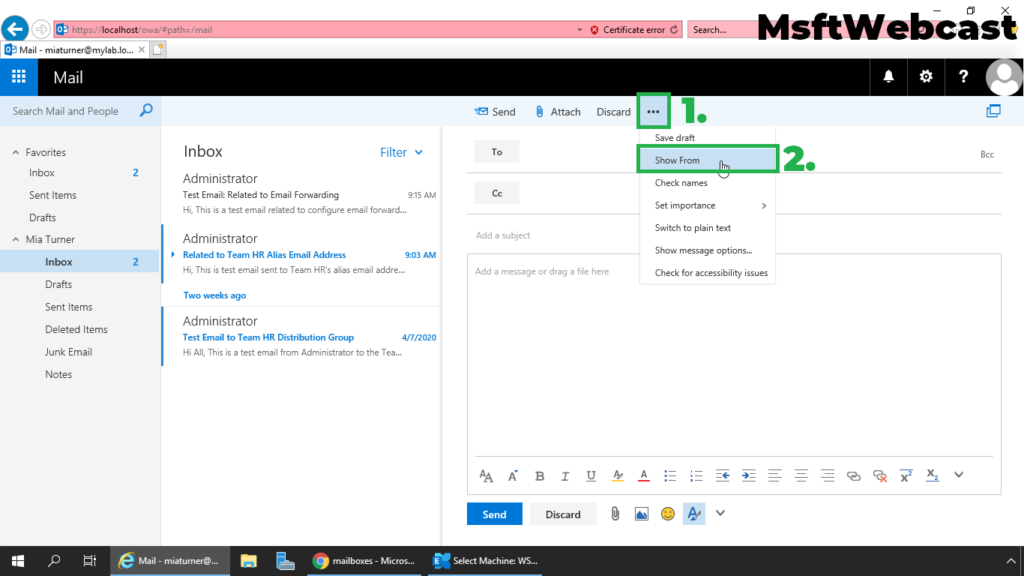
10. Click on Three dots and select show from (option).
11. In from the menu, select the mailbox on behalf you are sending the email.
12. Type the other details like recipient name, subject, and message content.
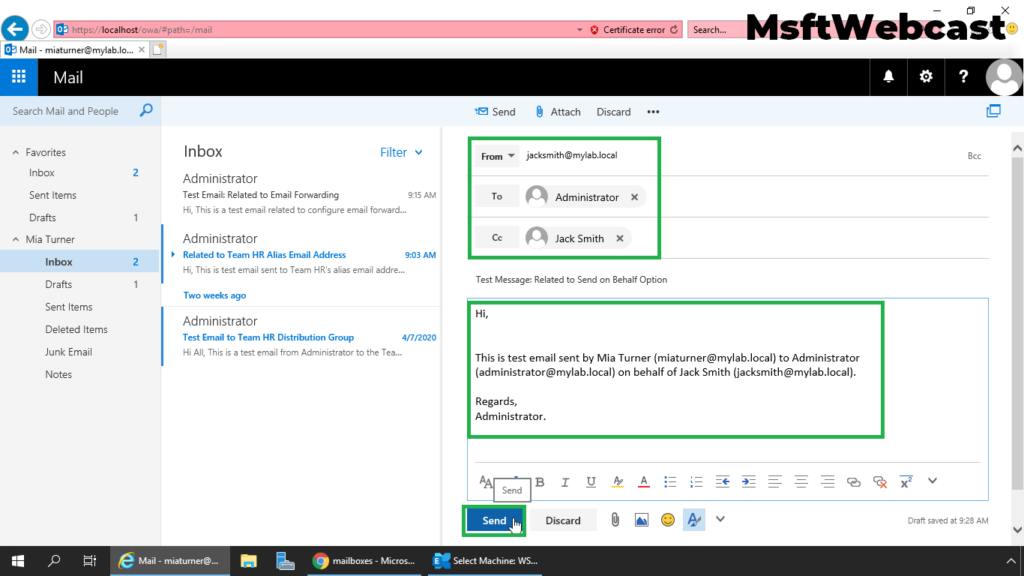
13. Click on the Send button to send the message.
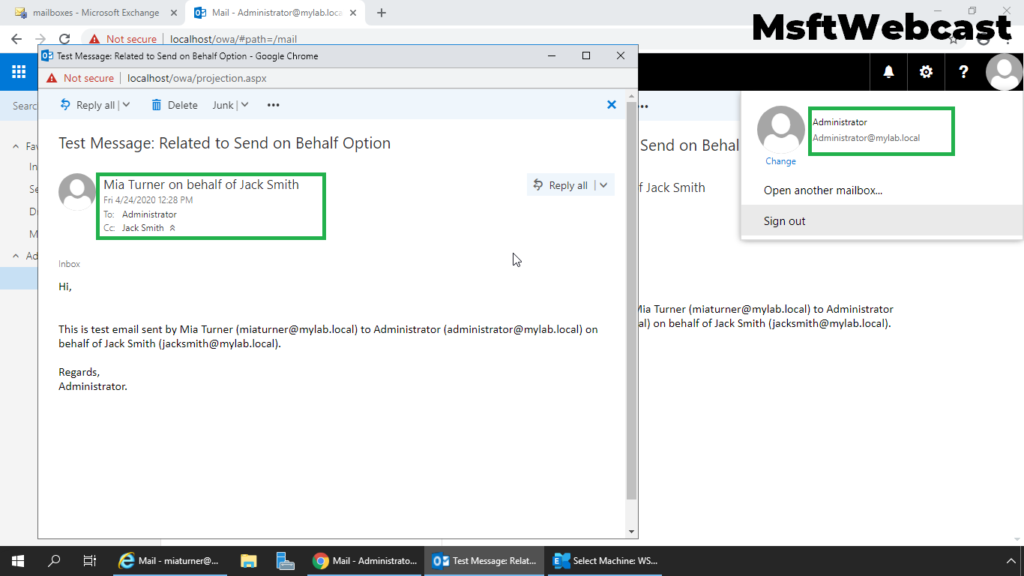
14. Verify on the Send on Behalf message.
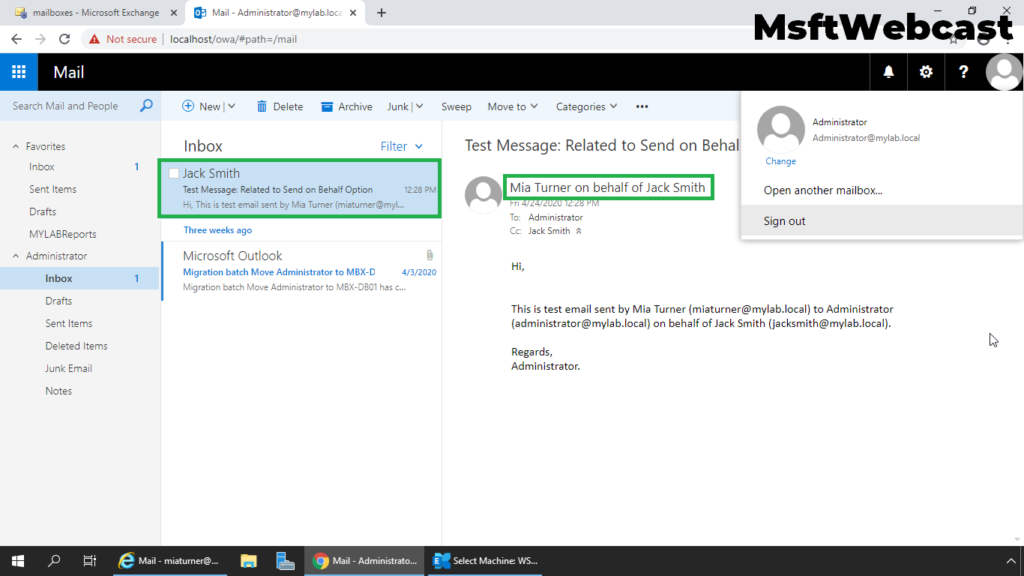
15. We can verify the “Mia Turner on Behalf of Jack Smith” message.
That’s all. In this article, we have learned the steps to configure the email message size limit for a Mailbox in Exchange Server 2019.